3 Menu Functions
3.1 User
3.1.1 Account
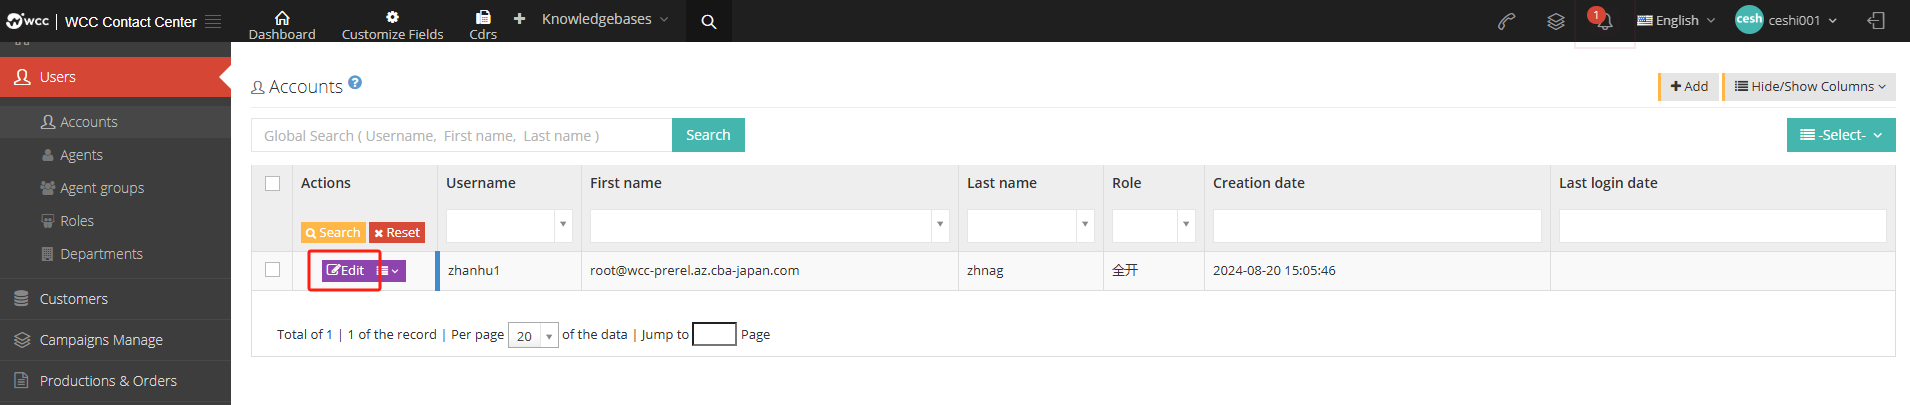
1 Account page introduction
Account is used to manage users of the system, such as adding agents, querying reports, updating configurations, etc.
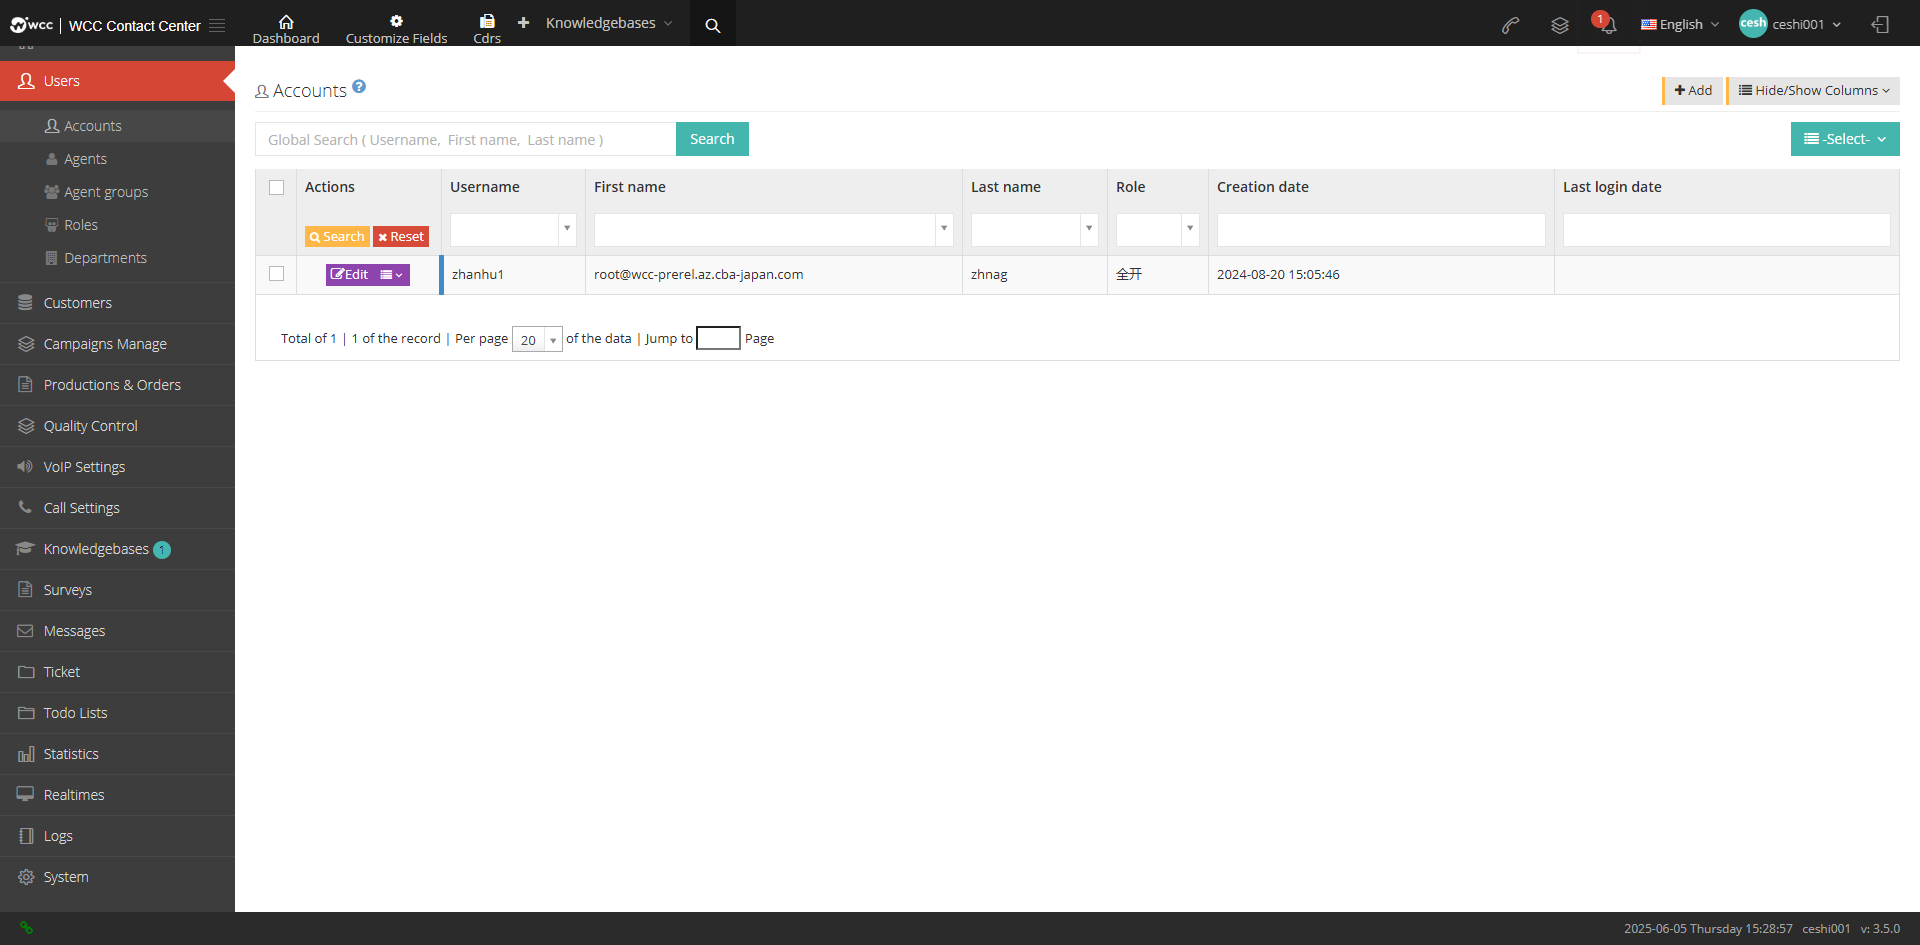
[Search] Supports user names, names and surnames to search globally for account.
【Add】Add a new account.
【Show/Hide Field】Show or hide the fields of this page.
[Please select] Delete according to the conditions.
[Edit] Edit the information of this account.
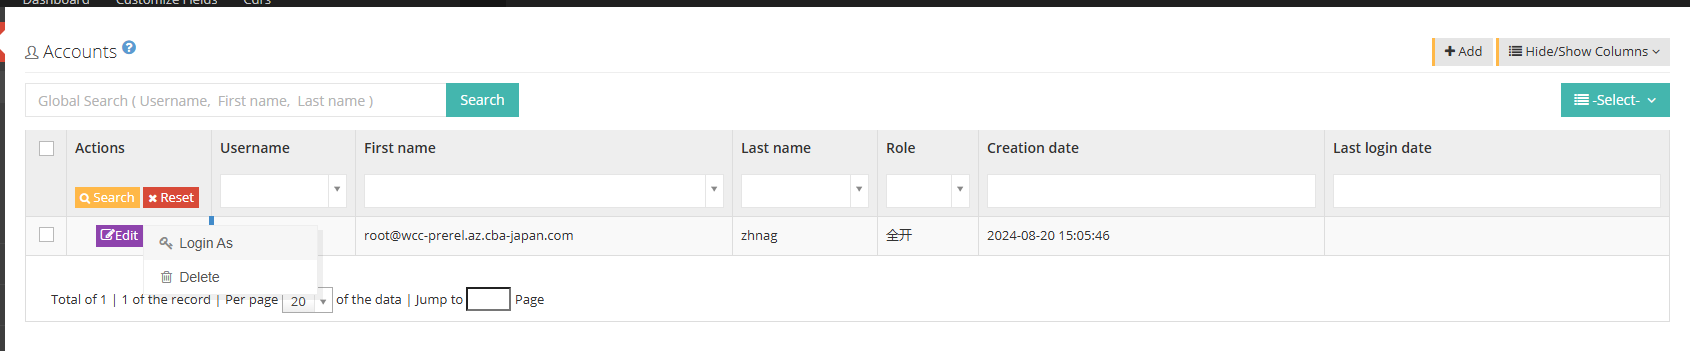
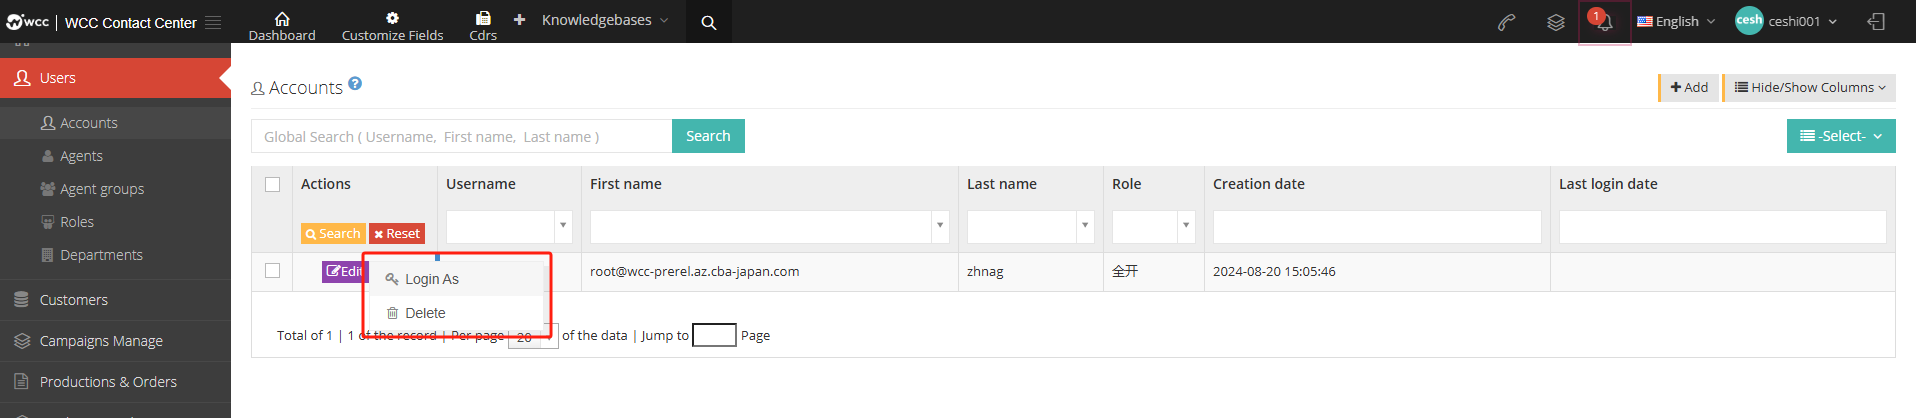
[Drop-down menu] Log in with this account or delete the account.
2 Show/Hide fields
Username: This account name.
Last name: The last name of this account.
Name: The name of the account.
Role: The role of the account.
Created date: The date of creation of the account.
Last Update: The last updated date for this account.
Last login date: The last login date for this account.
3 Add an account
① Click [Add] to enter the general settings page for adding an account:
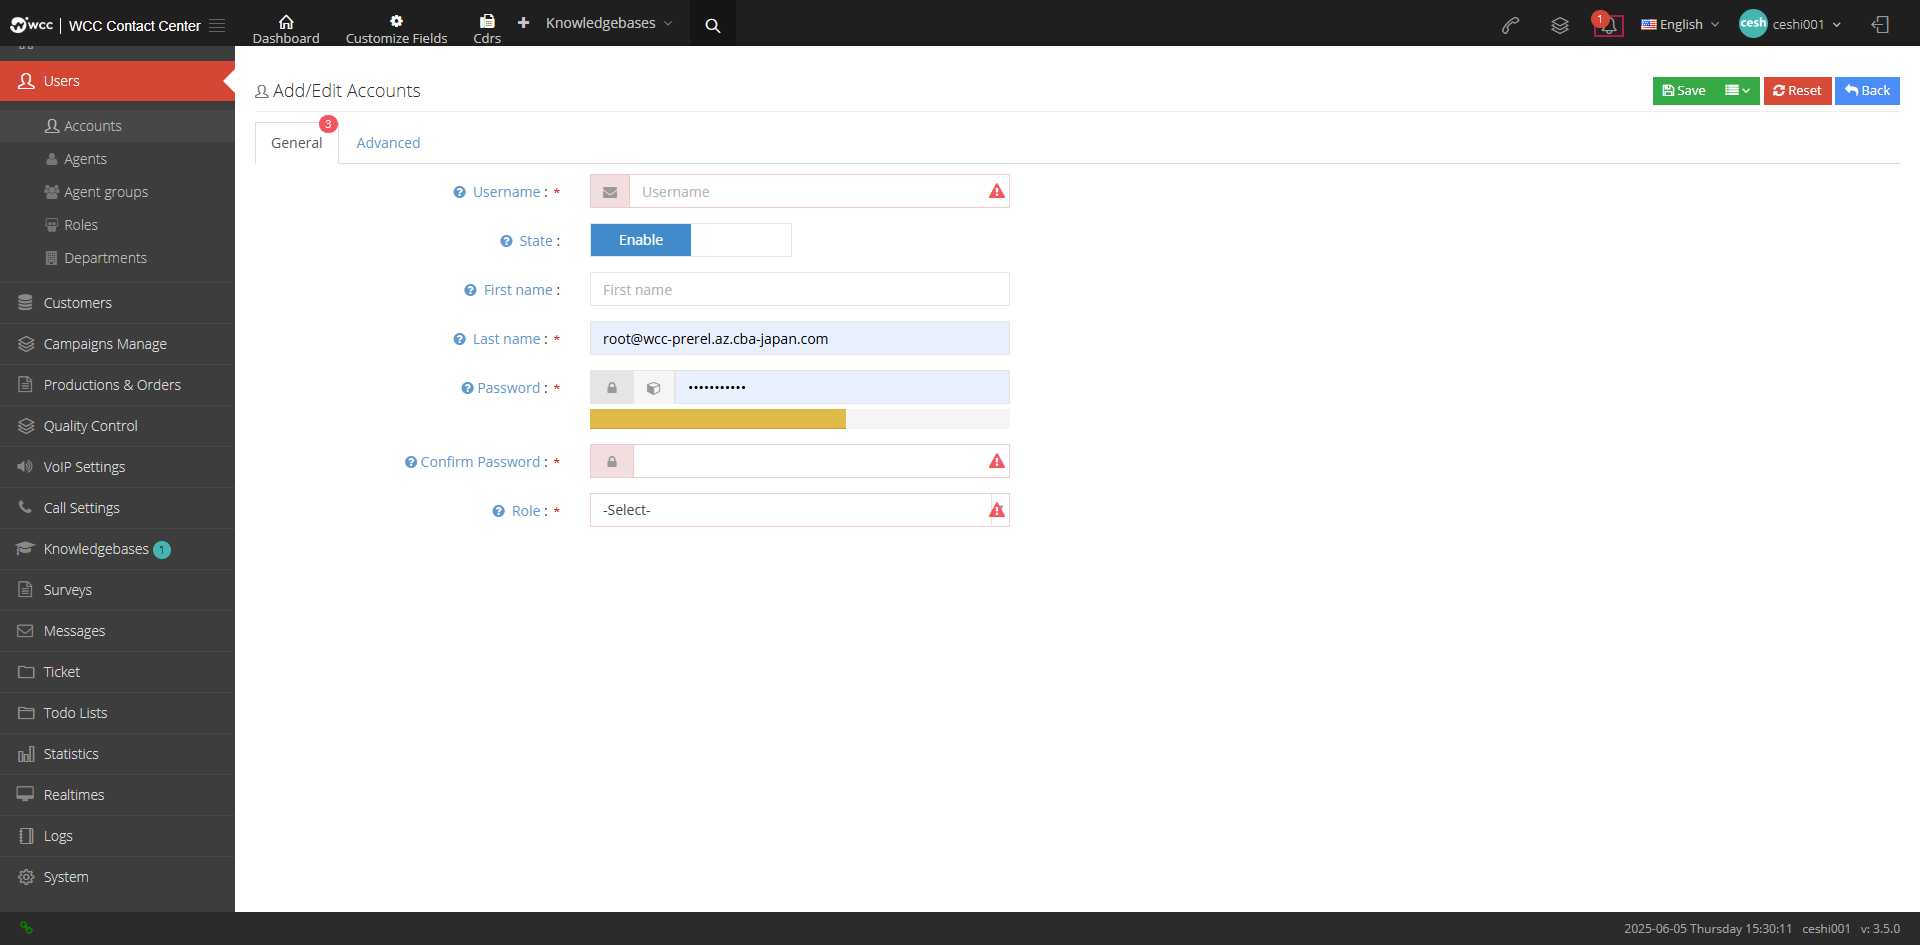
Username: The user will use this username to log in to the system.
Status: You can select this account to be disabled. After disabling, you cannot log in with the name and password of the account. The page prompts “This account does not exist or the password is incorrect.”
Short Name: Please enter the user’s last name.
Name: Please enter the user name.
Password: Enter a password or, automatically generate a password.

Confirm password: Please enter your password again to ensure that your passwords are the same twice.
Role: The role is used to set the page that this account can access and the permissions this account has on this page.
②Click [Advanced] to set up the notes for this account:

③After saving, the account is created successfully.
④After the creation of successful system account, the account page displays the successfully created system account. Click Edit to re-edit and modify its account information.
⑤Click the drop-down menu to log in or delete the user
3.1.2 Agents
1 Introduction to the agents page
Agent is the basic work unit in the system. When creating an agent, the system will automatically create a SIP account. You can register a SIP device or bind your phone number to the agent, and then the agent can initiate and receive calls through the system.
The seat can be checked into different seat groups for different work, and the system can provide a variety of reports to express the work content of the seat.
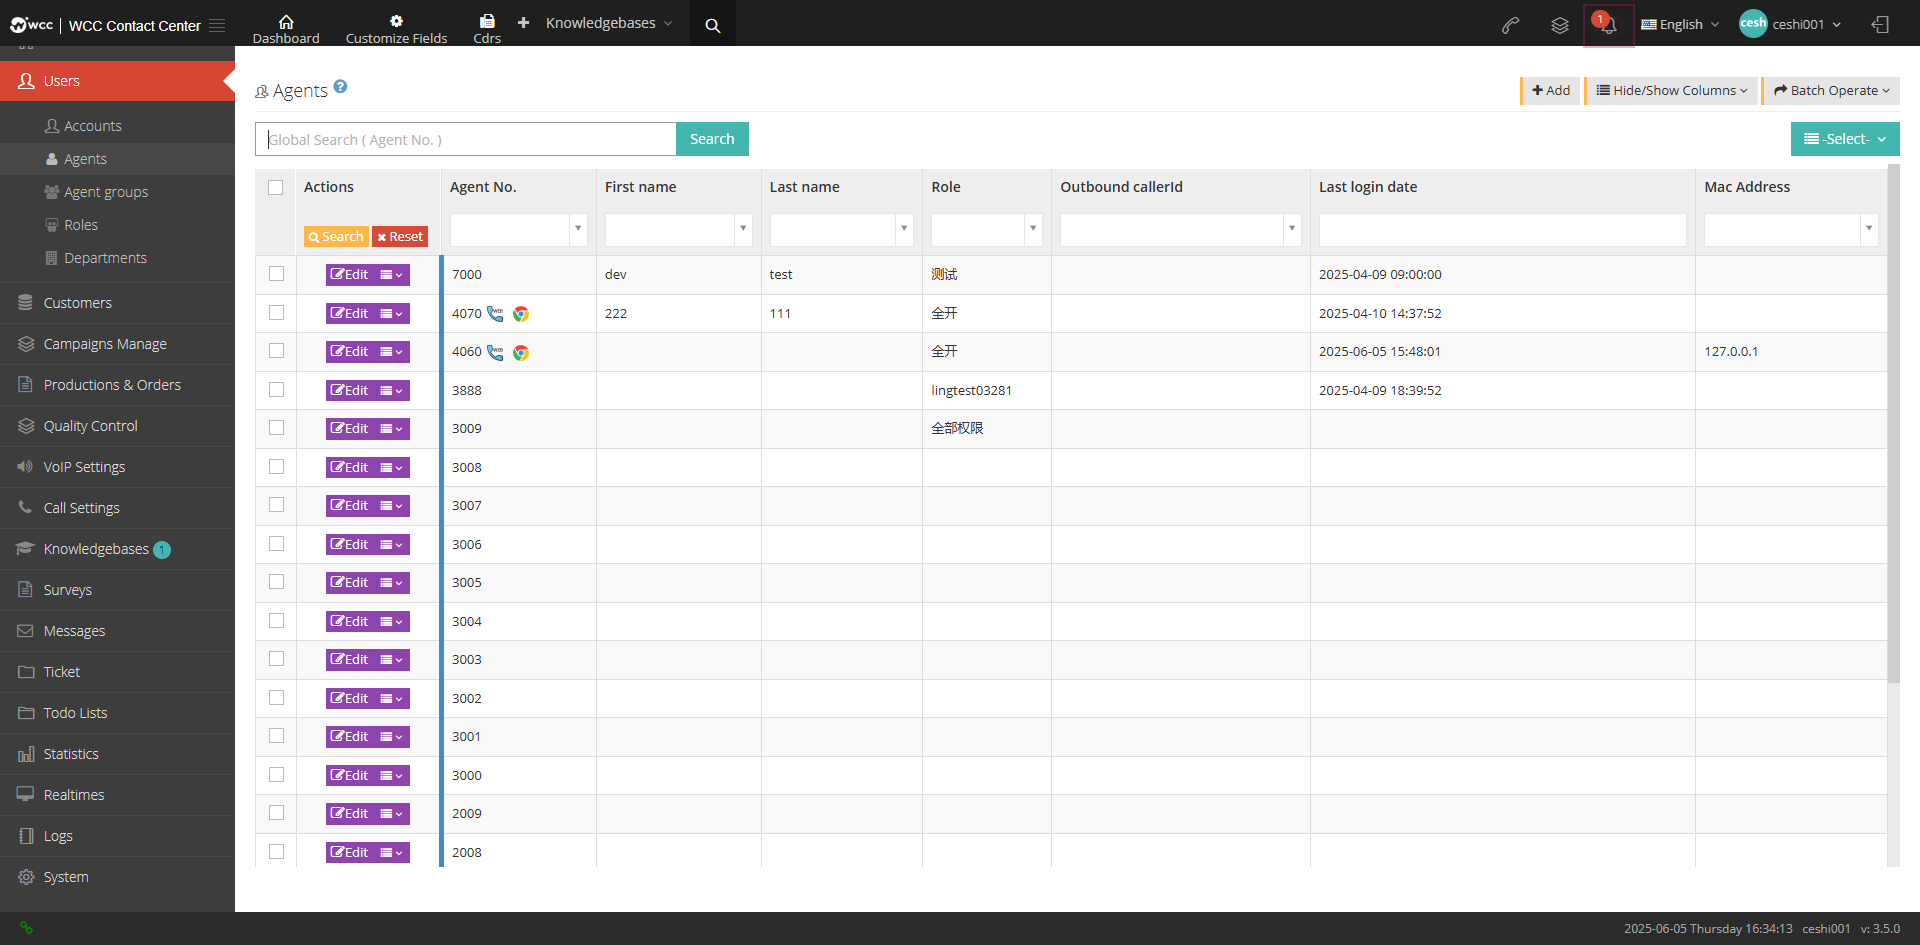
[Search] Global search only supports search for seat number.
【Add】Add a new seat.
【Show/Hide Field】Select the fields that need to be displayed or hidden on the agent page.
[Batch Operation] Perform - Batch Add - Batch Edit on the agent.
[Please select] Delete according to the conditions.
2 Hide/Show fields
Casual work number: Casual work number.
Name: Name of the seat.
Last name: the last surname of the seat.
Role: The seat character.
Display number: The display number set by the seat.
Created date: The date of creation of the seat.
Last Update: The agent has the last updated date.
Last login date: The date when the seat is logged in directly from the web page.
Telephone deployment template: The name of the telephone deployment template.
Phone MAC address: The phone’s MAC address.
3 Add a new seat
There are two ways to add a seat: add one by one or batch.
① Click Add to enter the general page of adding/editing agents:
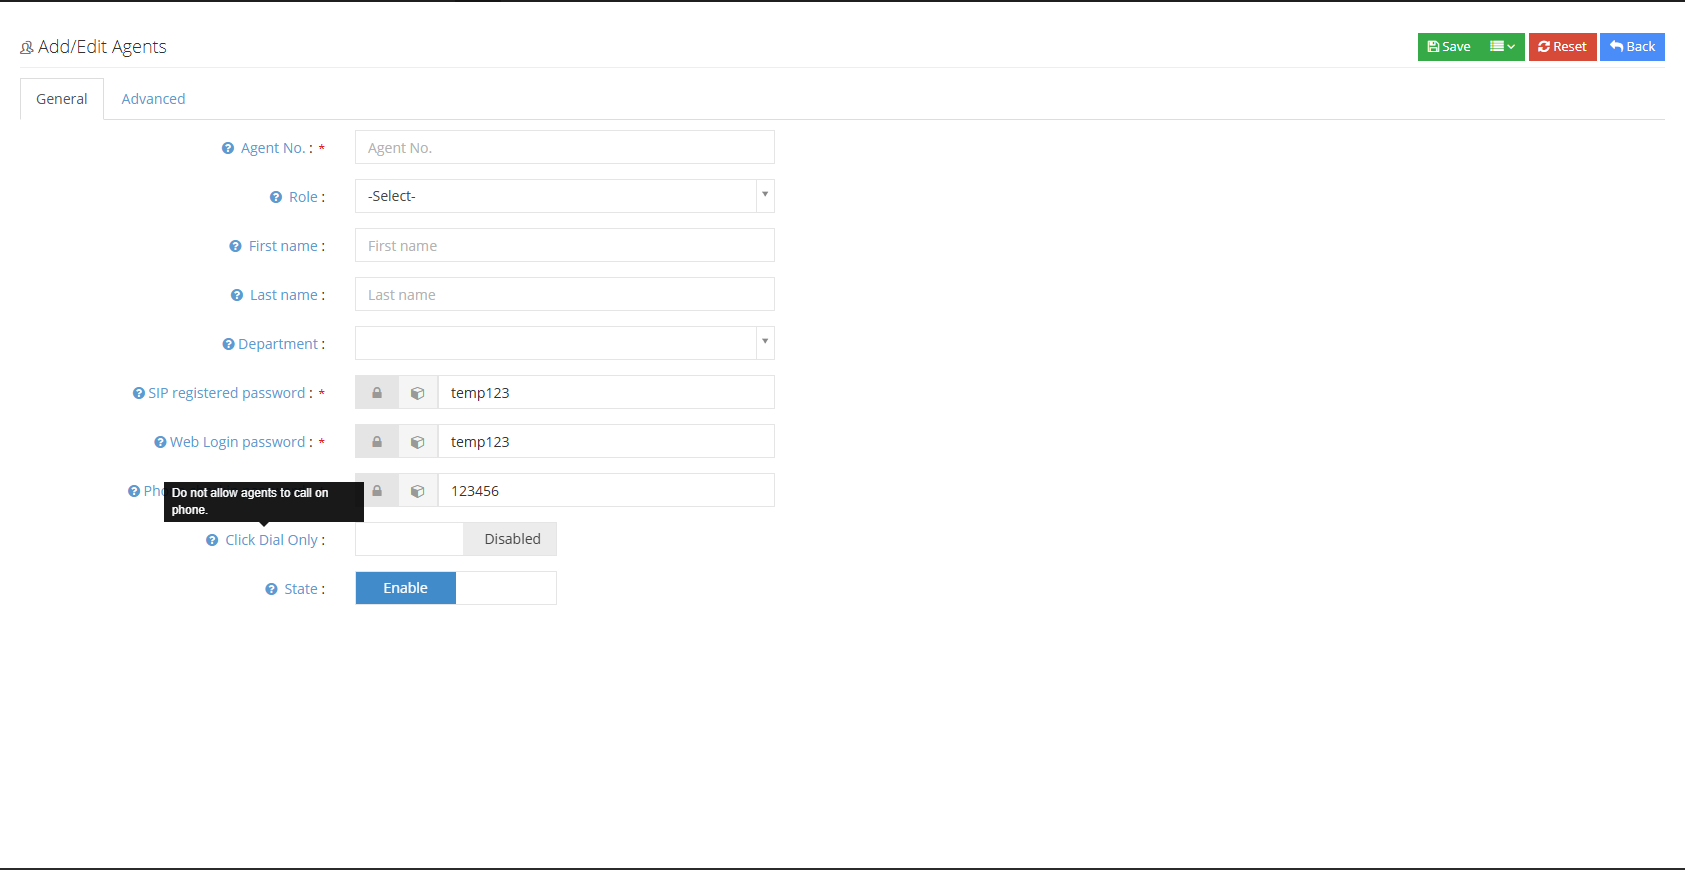
Agent No: The work number should be unique, it is the user name when registering a SIP phone.
Role: Assign permission roles to this agent.
First name: Fill in the name for this seat.
Secondary: Fill in the last name of the seat.
Department: Set up the department where this seat is located.
Sip extension registration password: When the agent needs to register a SIP device, this password is required.
web login password: The browser’s login password.
Telectronic check-in password: This password is required when the agent needs to check-in the system via telephone.
Click to call only: When this function is activated, the agent cannot directly press the key to dial to the customer by pressing the phone to the phone, and the agent is only allowed to click to call to the customer on the browser.
Status: When the agent is disabled, the agent cannot perform dialing operations, such as receiving calls and logging into the system.
②Click [Advanced] to enter the advanced page of adding/editing seats:
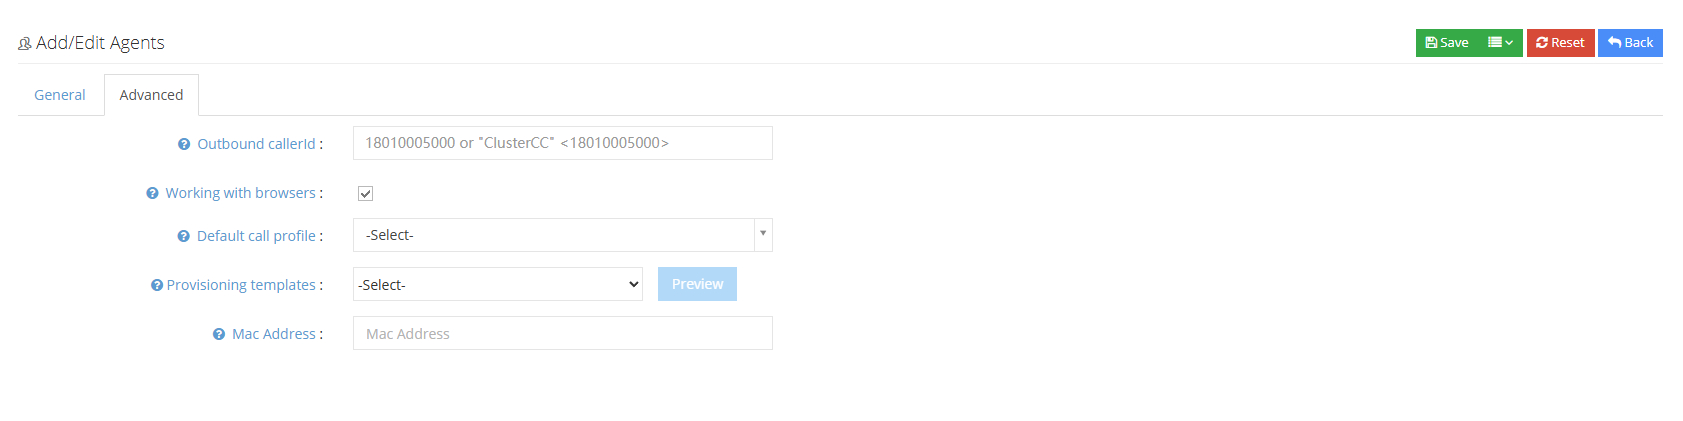
外显号码: 定义坐席外呼时显示的主叫号码。设置外显号码的地方有三处,分别是系统偏好,外呼任务,坐席,如果三处均设置不一样的外显号码,他们的显示关系为坐席>任务>系统偏好,坐席设置的外显号码最优先显示。如果该坐席设置了多个外显号码,显示规则受系统-外显号码轮询控制。
Work with a browser: Select whether the agent works in the browser. If you choose to work in the browser, if the agent does not log in to the browser, the agent will not be able to use the phone to check in to the agent group.
Default Outbound Call File: You can set a default outbound call file for this agent group. The seats checked in this agent will talk according to the other call rules.
Telephone deployment template: Please select the template name you need.
Telephone MAC address: Please fill in the MAC address of your phone response.
4 Build new seats
①Click “Batch Operation” - “Batch Add” to enter the “Batch Add” page:
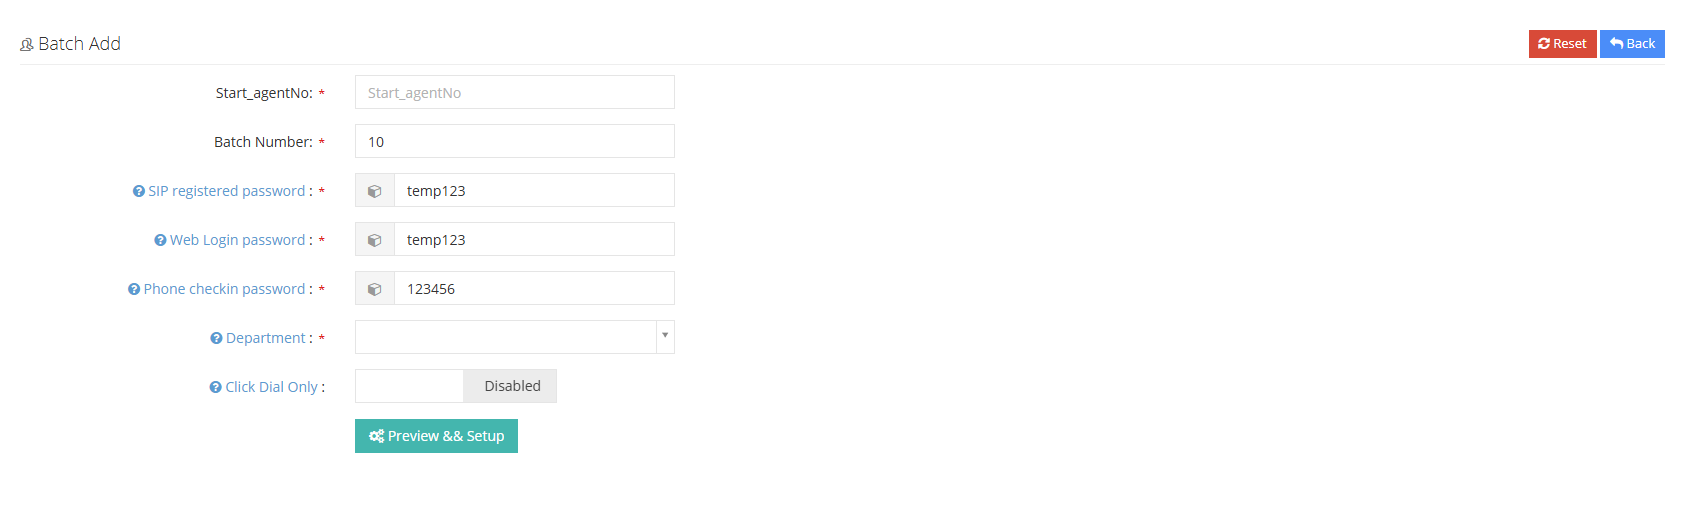
First seat work number: Add the first opening work number of the seat.
Batch value: The number of seats added in batches.
Sip extension registration password: When the agent needs to register a SIP device, this password is required.
web login password: The browser’s login password.
Telectronic check-in password: This password is required when the agent needs to check-in the system via telephone.
Department: Please set up the departments where these seats are located.
Click to call only: When this function is activated, the agent cannot directly press the key to dial to the customer by pressing the phone to the phone, and the agent is only allowed to click to call the customer in the system.
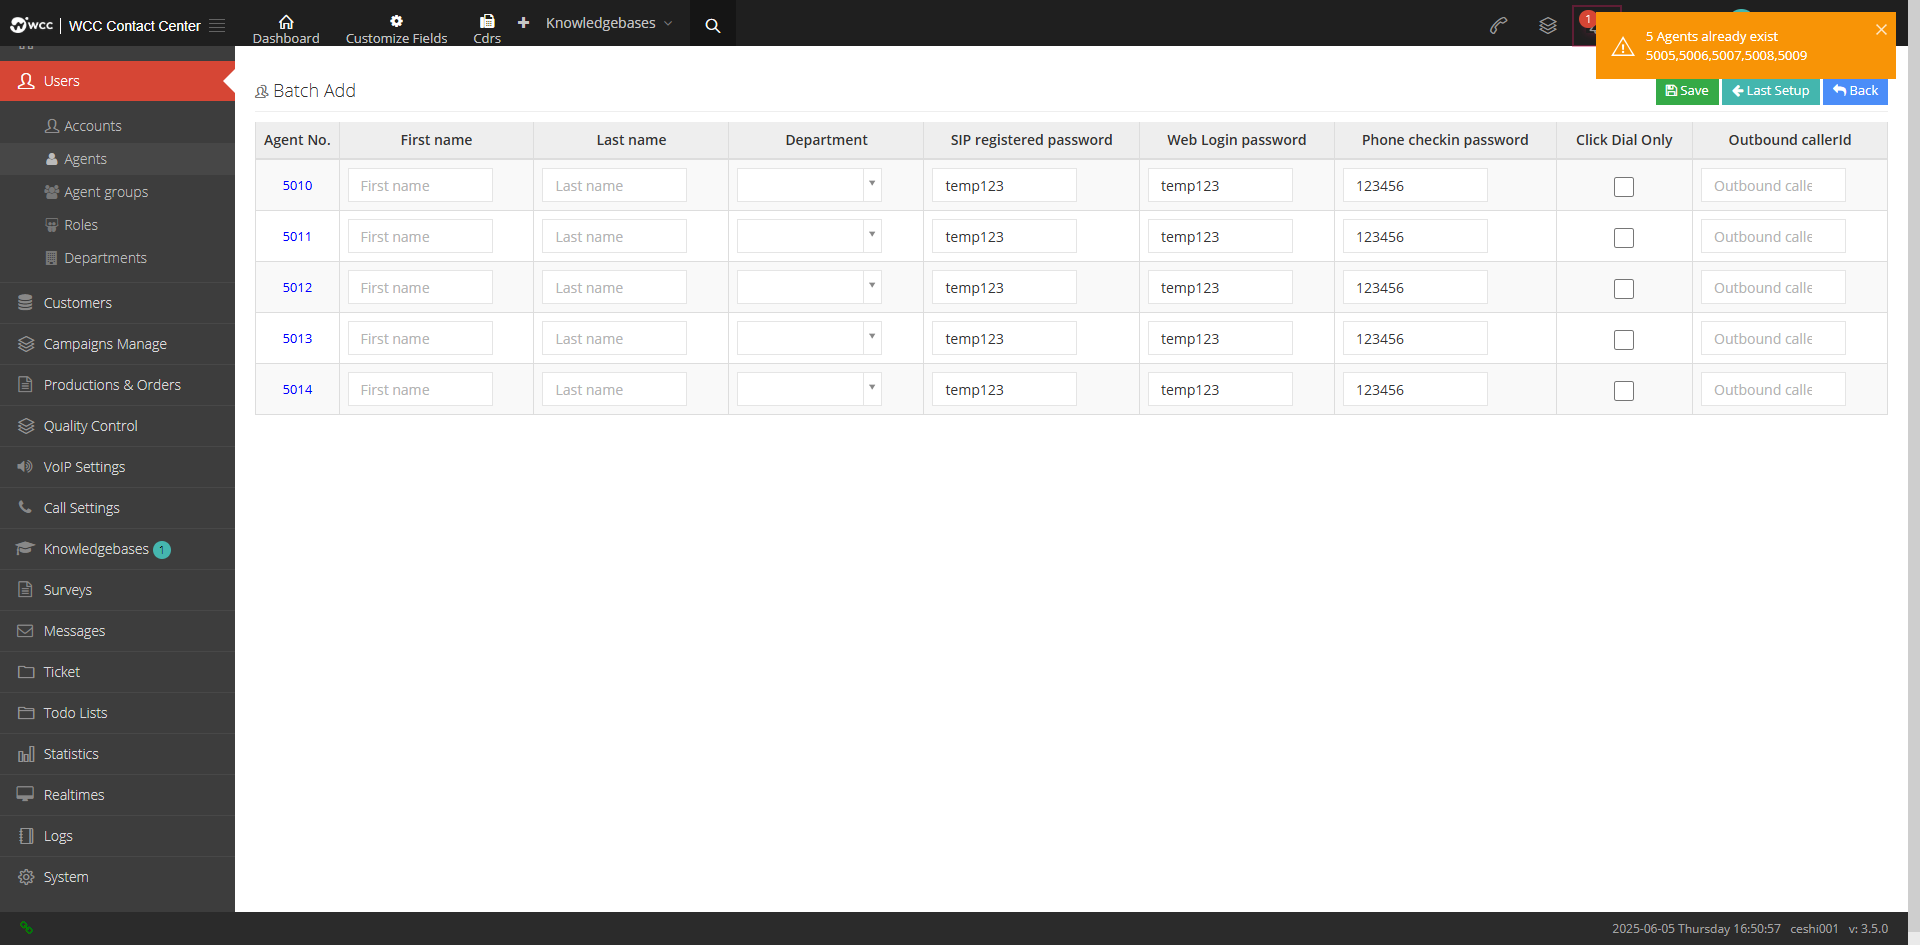
Note: If there are duplicate seat numbers in the seat numbers starting from the start number to the end of the batch value, these existing seats will be automatically skipped when the seat is established, and there will be a system prompt in the upper right corner.
② Click [Preview and Configuration] to appear in the batch import form, and you can make detailed settings:
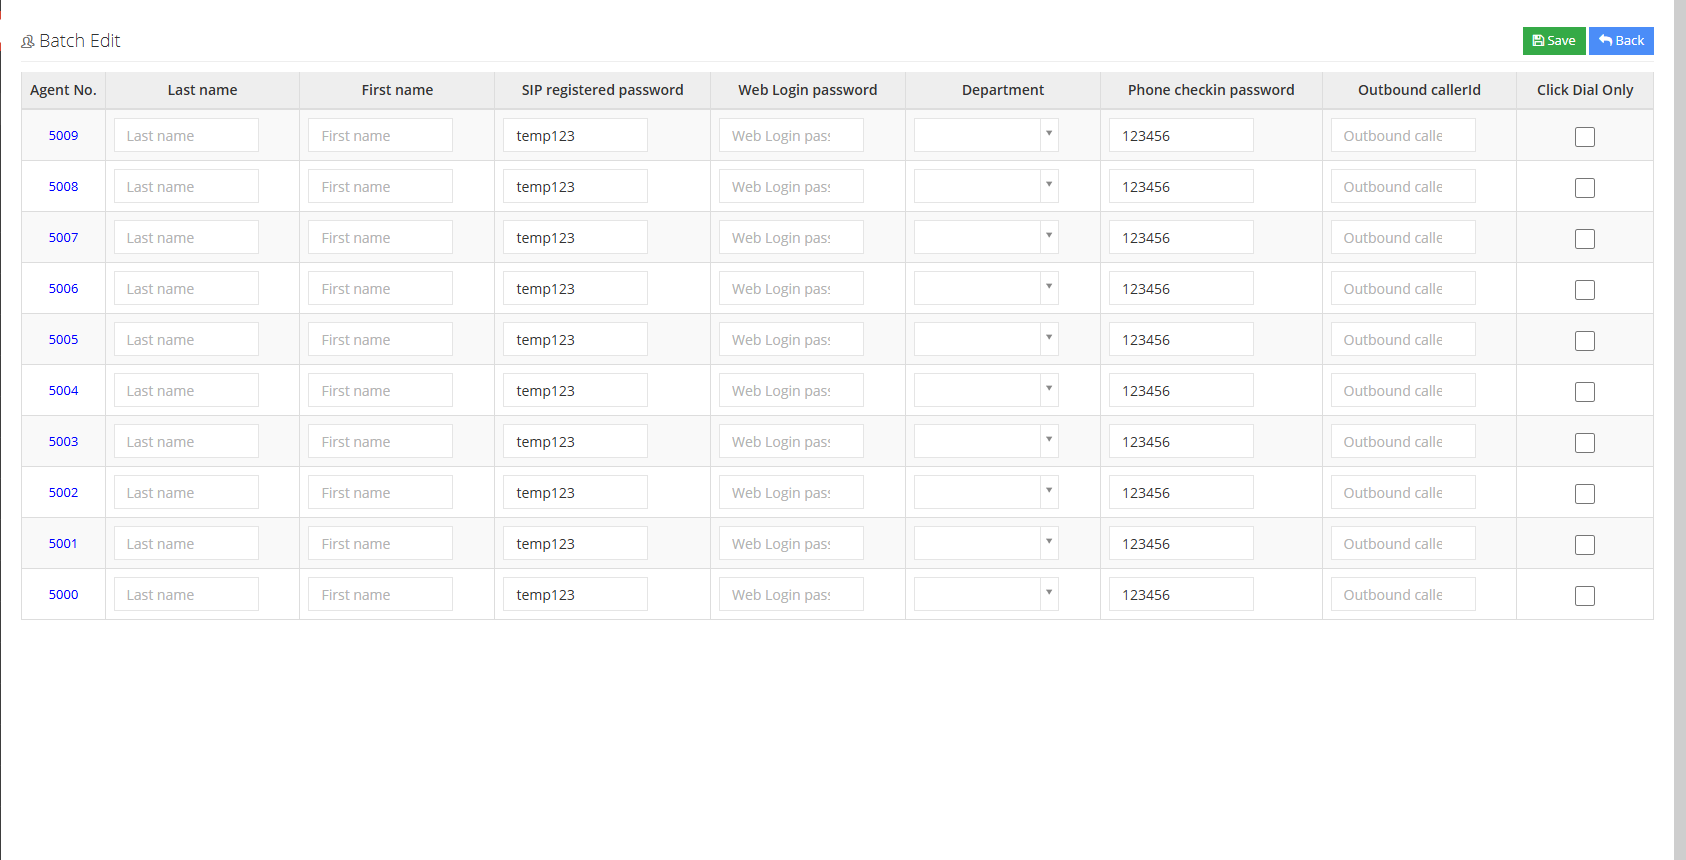
③ For the already established agent seat, users can also select the required agent seat, click [Batch Edit] in the tool to quickly edit the agent in batches:
3.1.3 Seating Group
1 Introduction to the seat group page
Agent Group is used to manage seats. The seat group includes static seats, dynamic seats and seat leader.
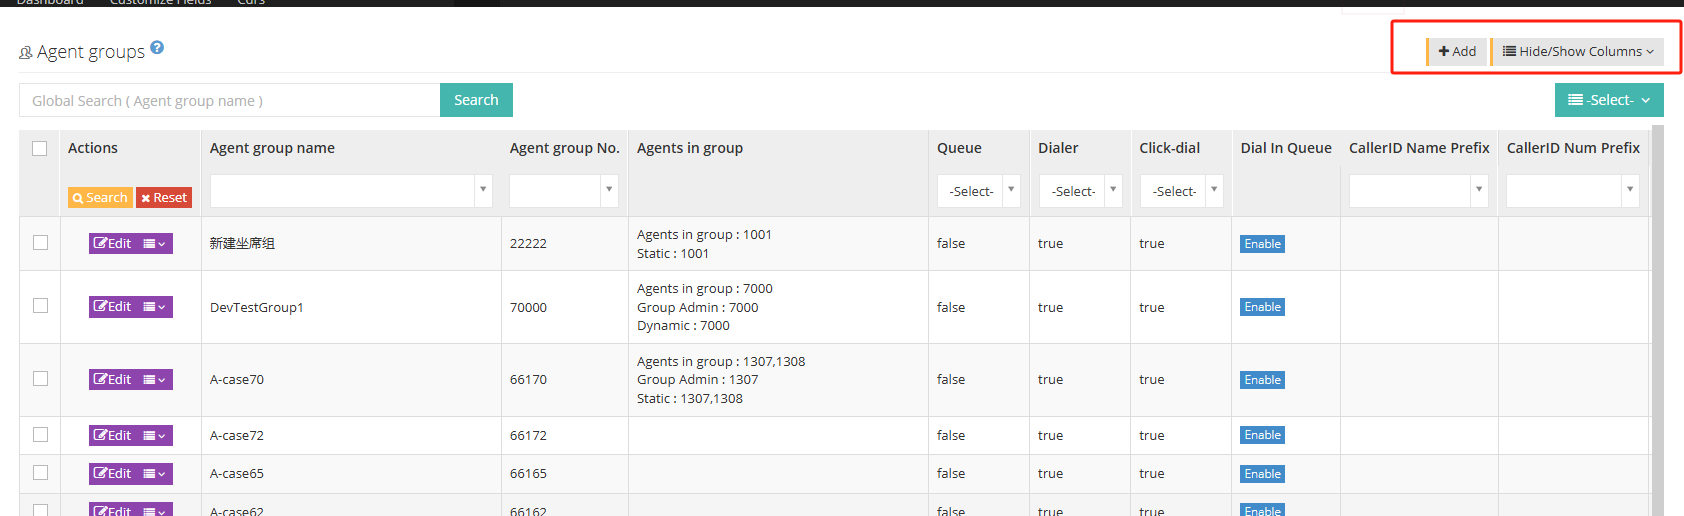
[Search] Global search only supports agent group name search.
【Add】Add a new seat group.
【Show/Hide Field】Select the fields that need to be displayed or hidden on the agent group page.
[Please select] Delete according to the conditions.
[Edit] Edit this seat group.
[Drop-down menu] Delete the seat group.
2 Show/Hide fields
Agent group name: The name of the agent group.
Seat group number: The seat group number.
Seats within the group: All seats within the seat.
Queue: In the advanced settings of the agent group, whether the queue is selected in SIP automatic reply. If the queue is selected, when a call is incoming into the queue agent rings, the agent registered with the phone will automatically answer the call.
Pre-dial: In the advanced settings of the agent group, whether pre-dial is selected in SIP automatic response. If pre-dial is selected, a call will ring through the pre-dial call agent. The agent registered with the phone will automatically answer the call.
Click to dial: In the advanced settings of the agent group, whether click to dial is selected in SIP automatic response. If click to dial is selected, when the agent is double-checked, the agent registered with the phone will automatically answer the call.
Incoming queue: Whether to start the incoming queue.
Caller name prefix: A caller name that can be distinguished can be added through the queue for incoming or outgoing calls.
Calling number prefix: A caller number prefix that can be distinguished can be added to the caller number prefix through the queue.
队列设置为0且无可用坐席时的转发地:当呼叫限制设置为开启时,指定无应答用户组内的呼叫转发地址。
Overflow steering: The steering when there is no space in the queue.
Skill alias: The name provided by the agent in the consultation service.
Add a new seat group
①Click [Add] to enter the general page of the Add agent group:
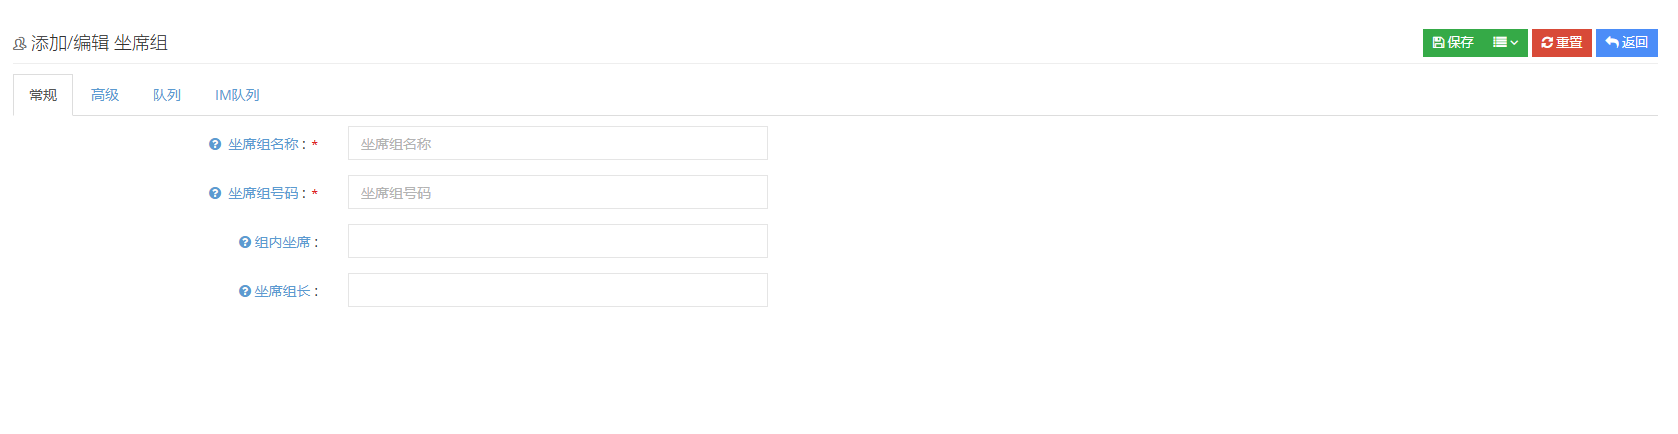
Agent Group Name: The agent group name is used to identify the agent group in the system, and you can modify the name at any time.
Agent group number: The seat group number can only use numbers, and different seat groups must use different numbers. Once set, they cannot be modified.
Agent in group: Add a seat to this seat group. The added seat is a dynamic seat by default. You can add multiple seats to this seat group.
Attendant team leader: The seat group can set multiple seat leaders.
②Click [Advanced] to enter the Advanced Settings page for Adding a Seat Group:

After automatically exiting the conversation: Set the seat to enter the conversation state, and after how many seconds the conversation will be automatically terminated.
Post-talk processing: It means that when the call is over, the system will pause the seat so that he can complete the remaining work instead of being interrupted by a new call.
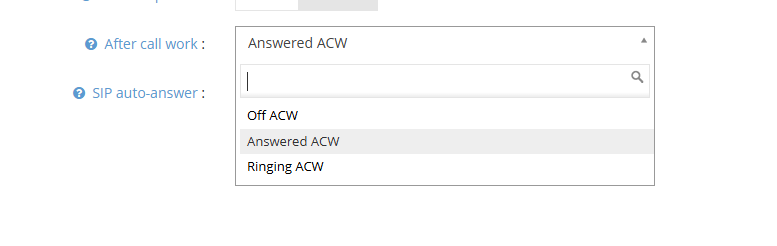
SIP automatic answer: Most IP phones support a special SIP header message. When this message is included in the call request, the phone will automatically answer, such as click dialing and pre-dialing.
Quote: When a call is in the queue, the agent registered by SIP will be checked into the queue and is idle. The agent will be automatically connected when the call is in the queue.
Pre-dial: When the pre-dial call is out, the agent checks in the queue and is idle. After the external line connects to the phone, the phone will be automatically connected when the call reaches the agent.
Click to dial: The agent can dial out the phone with the phone symbol in [My Customer] for dual calls. During dual calls, there is no need for the agent to connect to the phone first and then make an outgoing call, but can be automatically connected and then make an outgoing call.
③Click [Quote] to enter the queue settings page for adding a seat group:
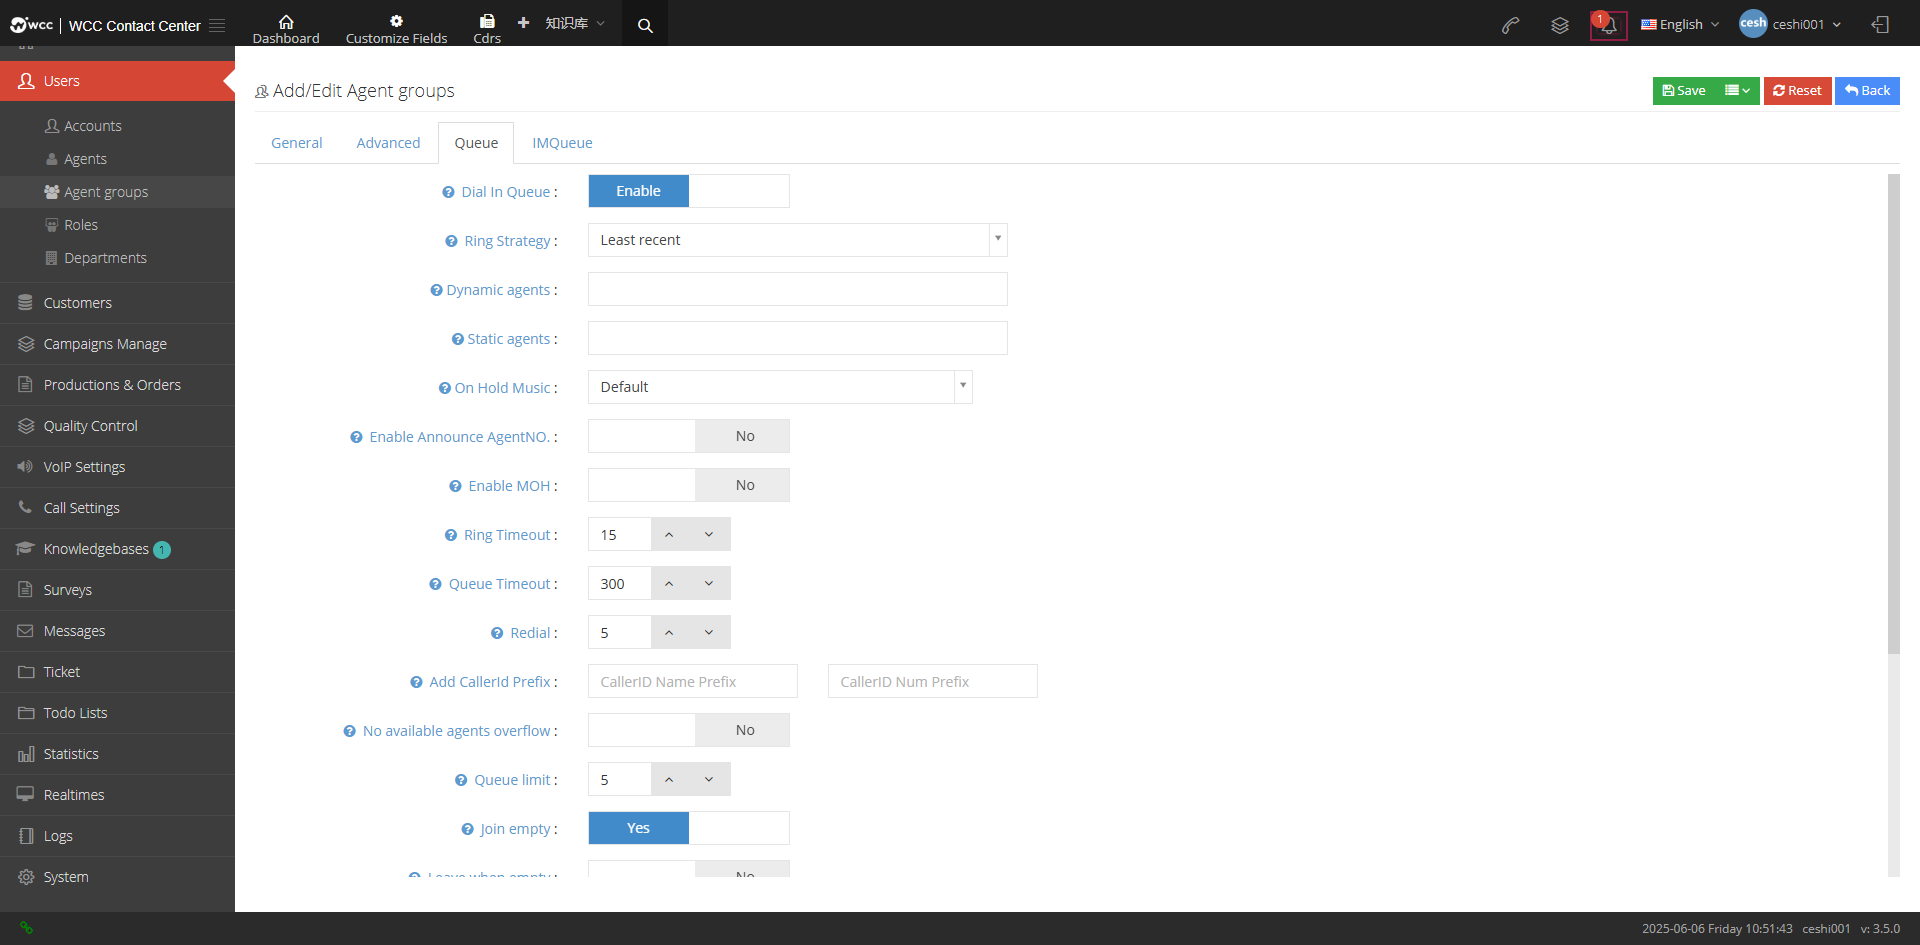
Incoming queue: If you want to use this agent group to handle incoming calls or pre-dial, you need to enable and configure the queue function.
Ringing Strategy:
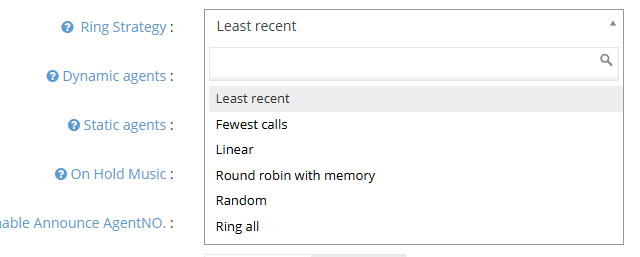
The longest-lasting call-The longest-lasting agent in the group will be called first. If there are seats that have not ringed at the same time, the calls will be called in sequence in the order of seats in the group on the seat group page.
Nearly calls- The agents in the group that have the least calls on the day will be called first. If the number of calls on the seats is the same, the calls will be called in sequence in the order of the seats in the group on the seat group page.
Sequence-Each call will be called in sequence in the order of seats in the group on the seat group page.
Memory Poll-The first call will be called in sequence in the order of seats in the group on the agent group page. The next call will start from the next seat in the last call-up seat, and so on.
Random-Randomly select agent calls, no fixed order.
All rings-All seats in the check-in seat group ring together. There is no restriction on all seats. It is recommended to be within thirty seats.
Dynamic seats: Dynamic seats indicate that these seats can be freely checked in and out from the seat group.
Static seat: The static seat will be checked into this seat group, and the static seat is not allowed to be deleted on the seat page.
Keep Music: Select a piece of music to play when queue calls are in hold state. If not selected, the default playback system keeps music.
Enable work number voice: If this queue needs to report work number, you can achieve it by setting work number notification. The system provides “Before Work Number Voice” and “Before Work Number Voice”. If [Yes] is selected, the work number voice and work number voice will appear.
Personal voice before work number: After selecting to enable work number voice, you can select a voice file that is played before the work number is broadcast.
Voice after work number: After selecting to enable work number voice, you can select a voice file, which is played after the work number is broadcast.
Enable Waiting Music: Whether to play the waiting music while the customer is waiting in the queue.
Waiting for Music: If Enable Hold Tone is selected, select a Waiting Music so that the music will be played when the seat calls in.
Agent timeout timeout: The maximum number of seconds for a seat to not answer the call is the timeout timeout. After the time is reached, the queue will call the next priority seat.
Maximum waiting time: The maximum time that customers can wait in the queue, 0 means no limit.
Retry time: Waiting time before re-dializing the next available seat.
Add caller number prefix: The queue will add a prefix before the assistant number to help the agent identify the source of the call.
无可用坐席溢出:根据组所属的内部线路的状态来确定是否可以来电。如果没有可接受的用户,则不进入此组并转发。转发目的地设置为”队列设置为0且无可用坐席时的转发地”。
队列设置为0且无可用坐席时的转发地:当呼叫限制设置为开启时,指定无应答用户组内的呼叫转发地址。
Maximum queue queues: After the number of queues in the queue reaches this limit, new customers are not allowed to enter the queue.
Allow to enter empty queue: Whether to allow clients to enter a queue without any agent check-in.
Original Queue Exits the Empty Queue: When there is a customer in the queue, the last seat will be checked out, and whether the remaining customers will be removed from the queue.
Auto Pause: After automatic pause is enabled, if the agent in the current agent group is called without answering or hanging up, the agent will be automatically paused.
Enable queue announcement: Queue announcement is the voice that you want to play to the customer as soon as you enter the queue.
Quantity Notice: Queue Notice is the voice that you want to play to the customer as soon as you enter the queue.
Enable agent notice: When the agent answers incoming calls in the queue, the voice announcement will be played before the caller is called.
Agent announcement voice: The call announcement voice is the voice that the call is assigned to the agent to play.
Recurring Announcement: Whether the system allows you to periodically play information to customers queued in the queue.
Play period: After selecting periodic playback, the playback period will appear. You can set the announcement cycle time, that is, how many seconds will the announcement be cycled once.
Cycle Voice: Periodic Voice will appear after selecting periodic announcements. Periodic Voice refers to the voice that can be selected for cyclic announcements.
Agent position notice: Whether to enable the notification voice of the agent’s location.
Notice period: Whether the system allows you to periodically play messages to customers queued in the queue
Overflow steering: When there are no empty slots in the call queue, there are other options such as IVR voice menu, ringing group, conditions, voice broadcast, seat group, seat, display number, etc. for steering selection.
④Click [IM Queue] to enter the IM queue setting page for adding a seat group:
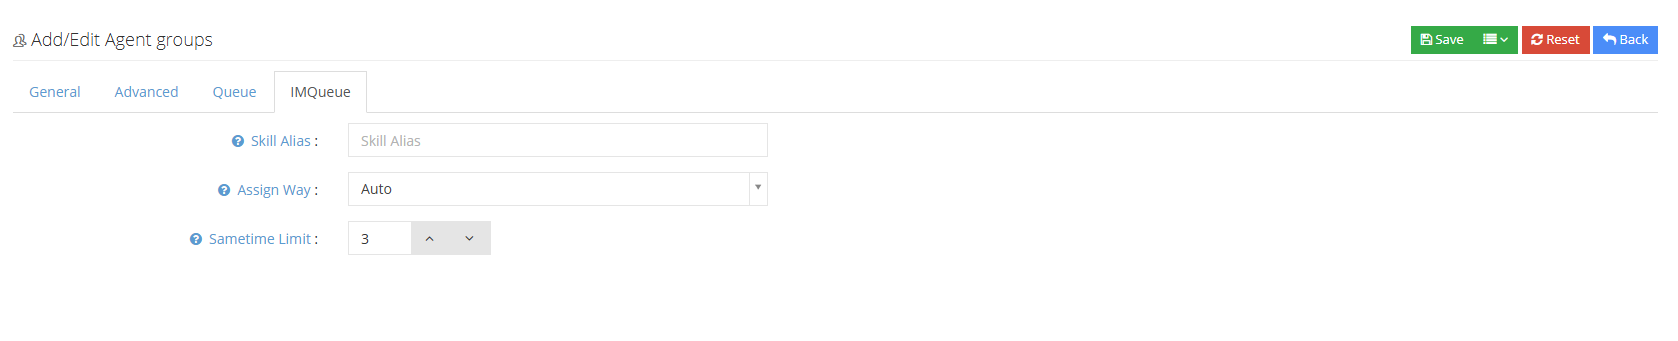
Skill Alias: The agent group can be assigned to online consultation services.
Assignment method: When an online consultation service generates a request, how can the agent obtain this request?
Number of simultaneous reception: The maximum number of requests that the agent group can handle simultaneously.
3.1.4 Roles and Permissions
1 Page introduction
Role Used to control user permissions.
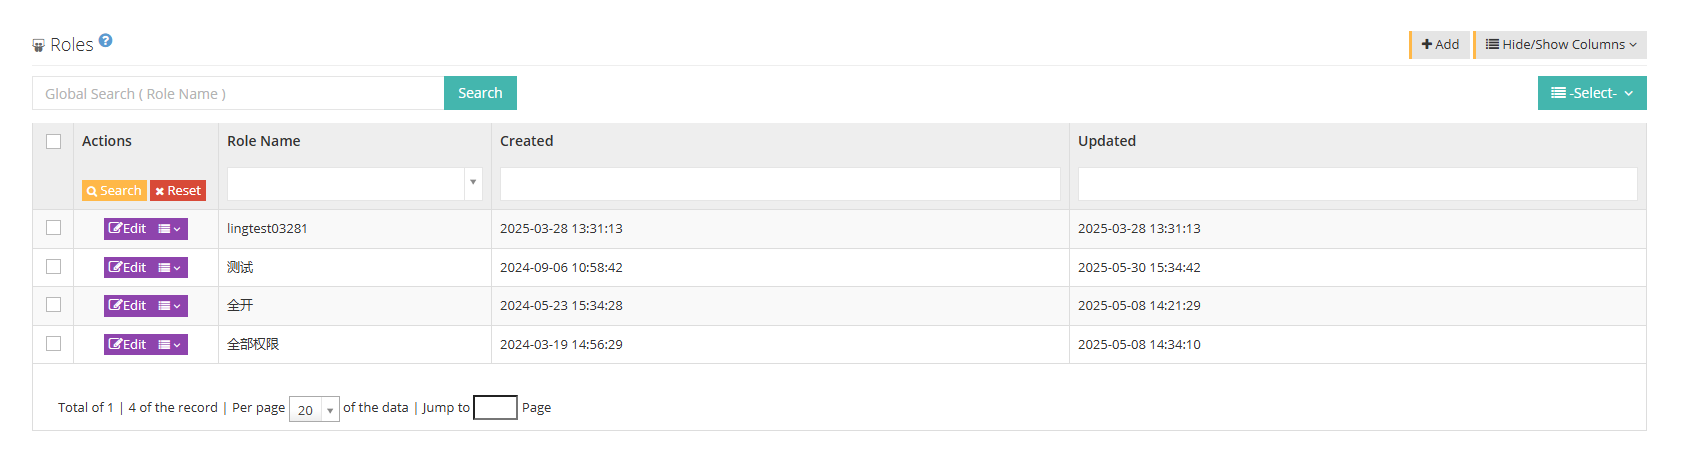
【Search】Only all-domain searches are supported with role names.
【Add】Add a new role.
【Show/Hide Field】Show or hide the fields of this page.
[Please select] Delete according to the conditions.
【Edit】Edit this role.
【Drop-down menu】Clone or delete the role.
2 Show/Hide fields
Name: Role name.
Created date: The creation date of the role.
Last Update: The last updated date for the character.
3 Add a new role
① Click Add to enter the [General] interface to add/edit role permissions:

名称:请为这个权限的角色命名。
②Click Advanced to enter the advanced page of adding/editing roles and permissions:
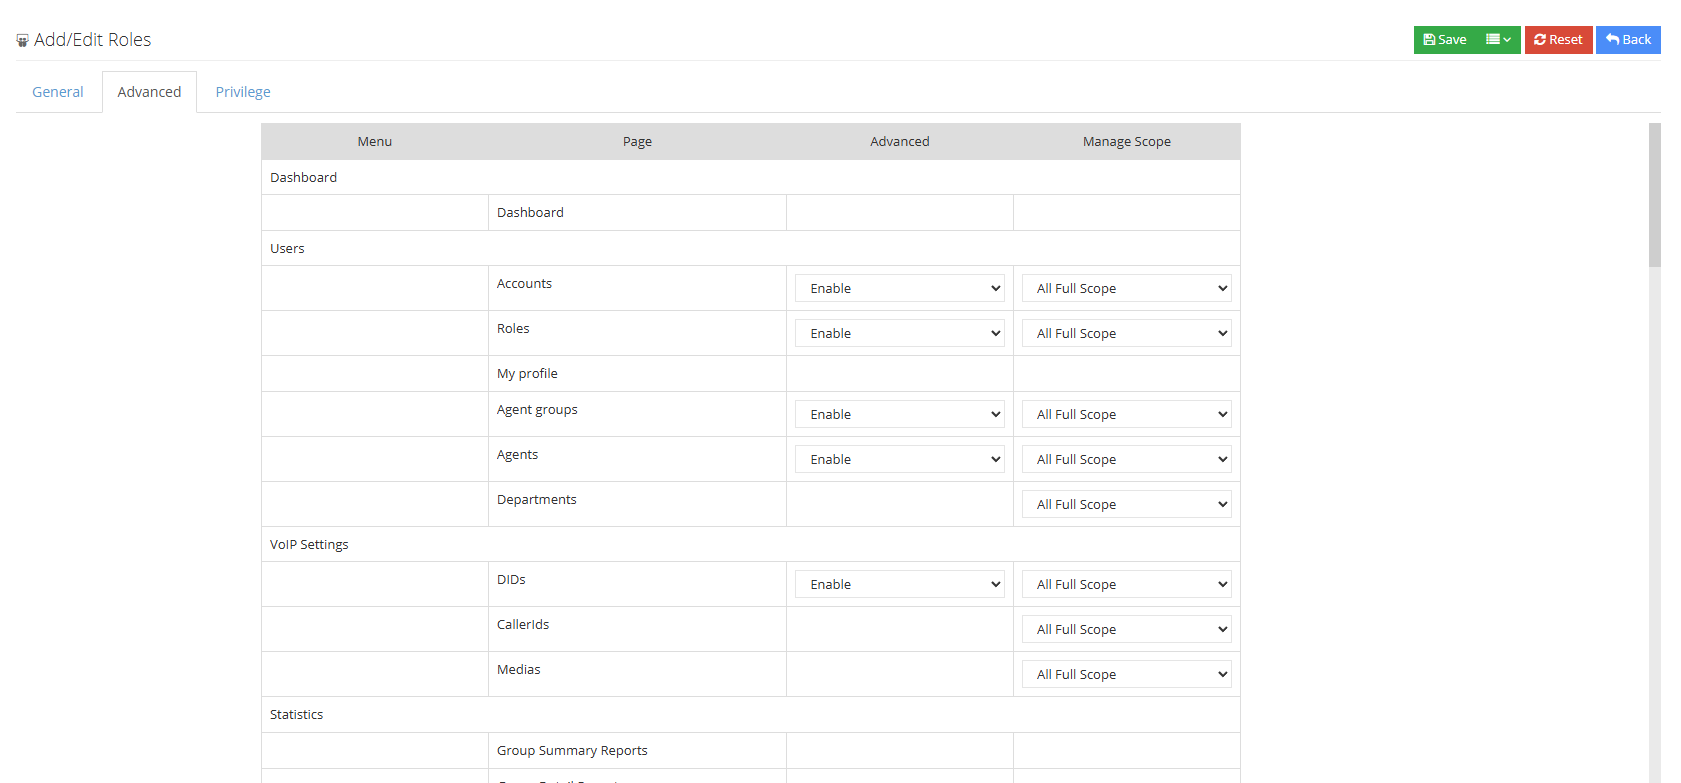
On the Advanced page, users can set the advanced page of the fields in the viewing table for the role to display or hide. If the user disables the advanced page permission of the role to view the agent group, then the agent or account that owns this role cannot view the advanced page of the edit agent group.

Users can also set viewing management scope for roles, and users set call records only themselves, which means only viewing their own call records (if you select all, you can view call records for all seats, and select the seat group to view call records for all members of the seat group). After setting, the seat or account that owns this role can only view their own call records, and the call records for other seats cannot be viewed.
③点击权限设置进入添加/编辑角色和权限的权限设置页面:
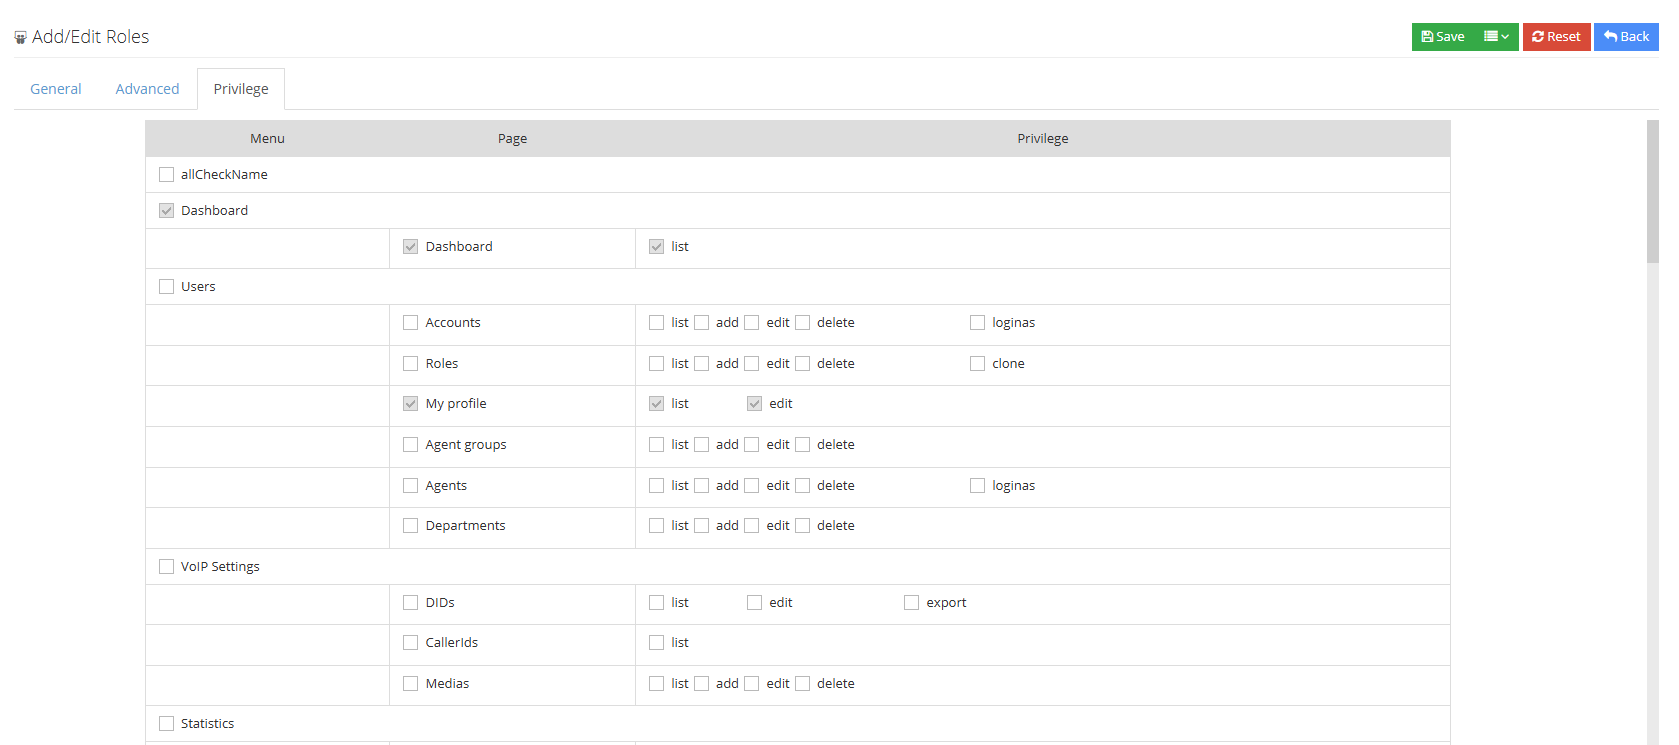
On the permission settings page, users can set permissions for the role to use the system function. The system will assign unclickable fields in the list (such as statistics pages, etc.) to the agent or account by default to explain the impact of permission settings on the agent or account. If the user disables the permission to add the agent to the role, the agent or account with the role does not have the permission to add the agent.
④完成以上步骤后点击保存即可保存该角色权限。
3.1.5 Department
1 Introduction to the functions of department pages
The department where the agent is located allows administrators to manage the agent more clearly.
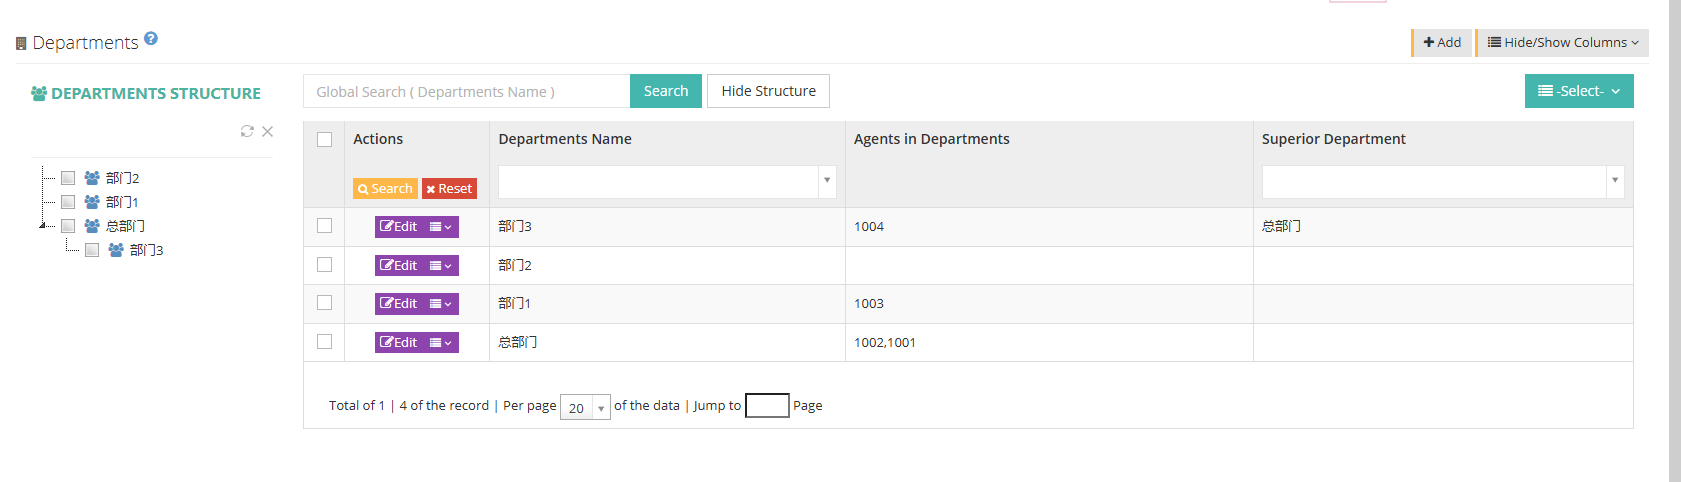
[Search] Global search only supports department name search.
【Hide (Show) Structure】Select whether to display department structure.

【Add】Add a new department
【显示/隐藏字段】选择在部门页面需要显示或是需要隐藏的字段。
[Please select] Users can delete according to conditions.
2 Show/Hide fields
Department name: The department name.
Department seat: The department seat belonging to the department.
Superior department: The superior department of this department.
3 Add a new department
① Click Add to enter the general page of the Add/Editor Department:
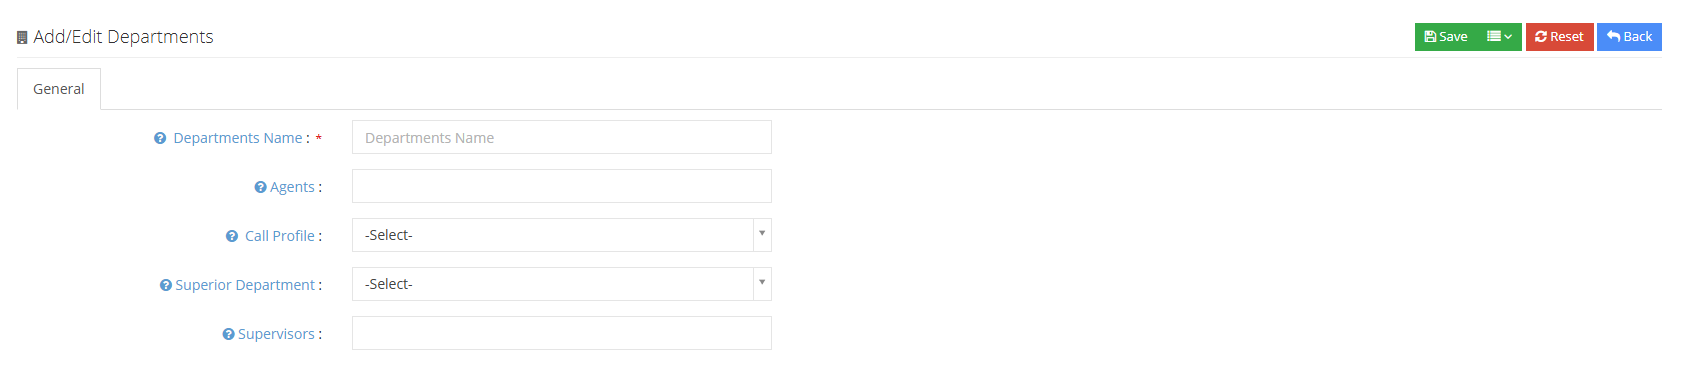
Department name: Please fill in the name of this department.
坐席:当前Client用户已创建的坐席,添加在该部门的坐席成员,可以选择多个坐席到此部门,但一个坐席只能在一个部门中。
Outgoing Call File: The outgoing call file of the task. After setting, this task will call according to the other call rules when it is outgoing or pre-dial.
Superior department: Please select the superior department.
Administrator: Please fill in the administrator.
②Click to save the department.
3.2 Customer Data
3.2.1 Custom fields
1 Page introduction
On the Custom Fields page, you can add/edit/delete customer information fields, or drag and drop the custom fields to reorder the field columns. The newly added custom fields are non-required fields by default and the administrator can edit or view the fields. If you need to modify, you can continue to set the display of the fields.
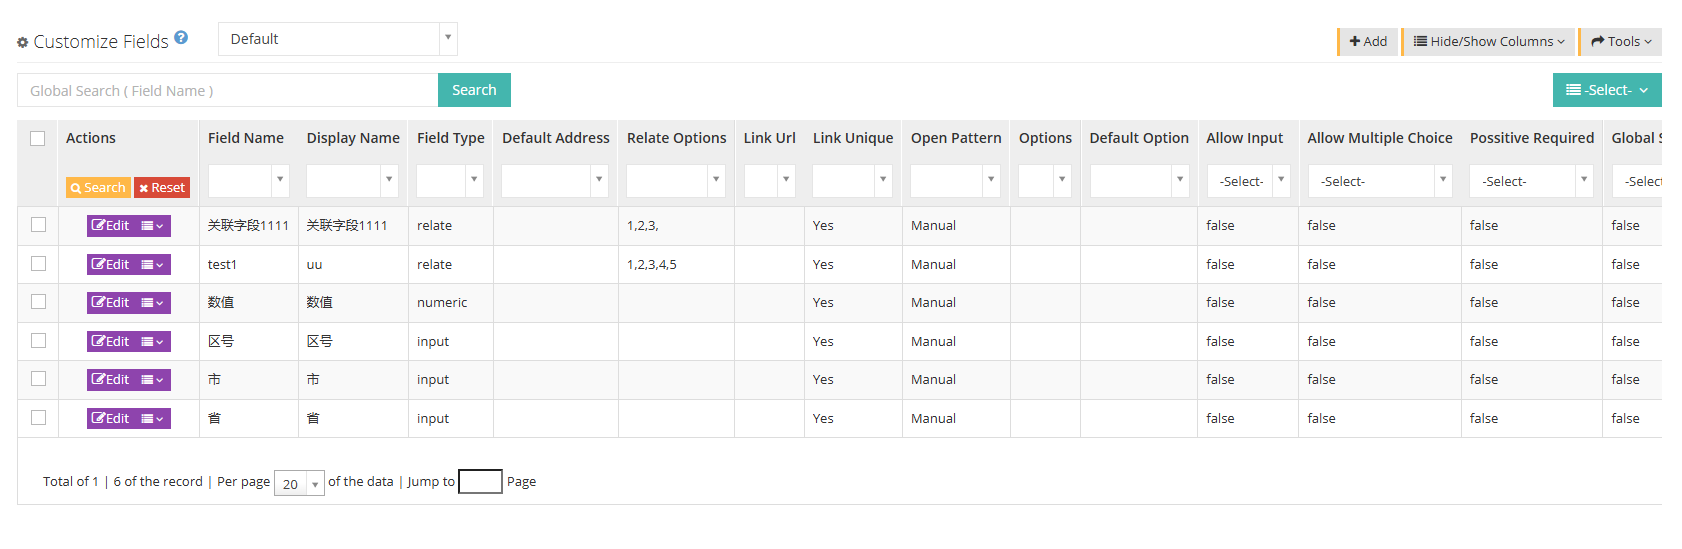
The [Default] in the figure above is the choice of the customer package. [Default] is the default customer package. You can also select the specific customer package for adding, editing or searching custom fields. If this client does not have the function of the customer package enabled, the customer package related display will not appear.
[Search] Global search can only search for key names, that is, custom field names in the custom database.
【Add】Add a custom field.
[Please select] Delete according to the conditions.
[Edit] or [Drop-down menu] can edit or delete newly created custom fields.
[Tools] You can perform field repair, field permission settings and field display order.
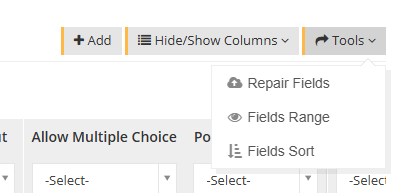
*** Field Fix***- Field Fixes can be performed when the custom fields are not displayed or there are not complete errors.
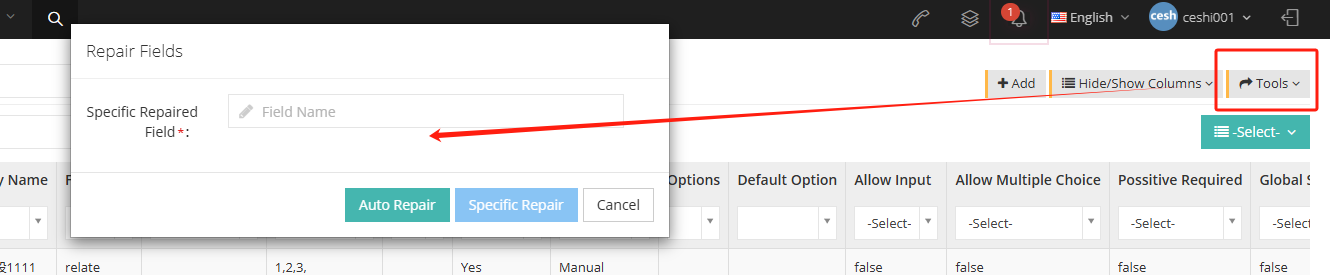
Specify the fix key: The function of missing custom fields on the customer data page, missing attachment upload function, including the customer pop-up interface, and abnormal attachment upload process.
Automatic repair: When there may be a custom field error but the specific field cannot be determined, just click Automatic Repair to repair all fields.
Specify Repair: When there is a custom field error and determine the specific field, click Specify Repair to repair the specific field.
*** Field permission settings***- Users can view and edit fields according to their roles.
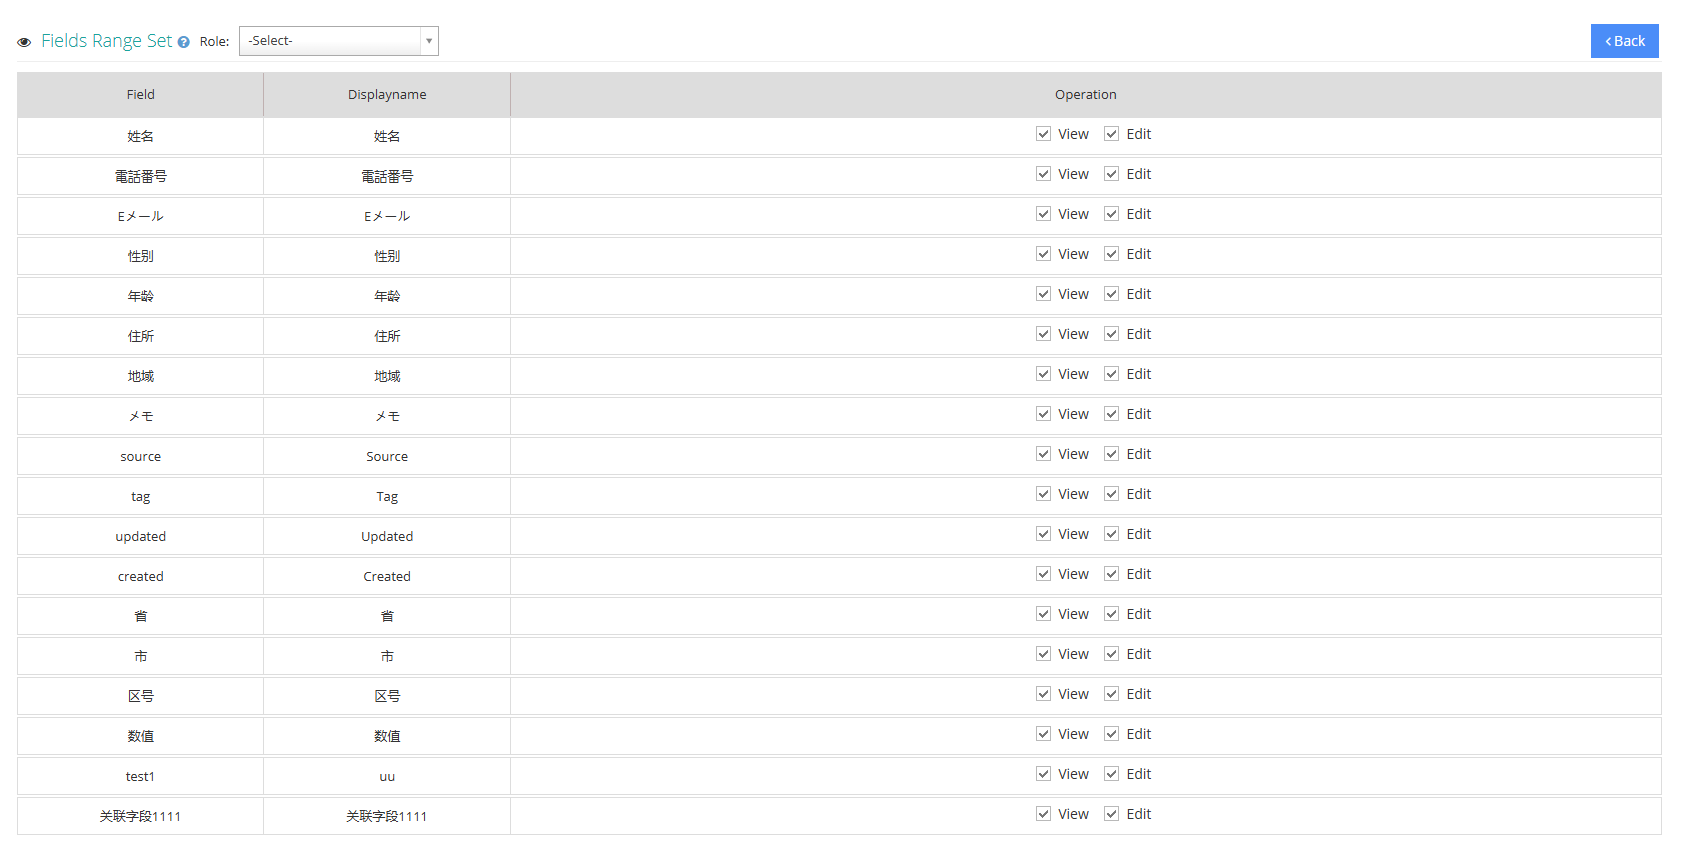
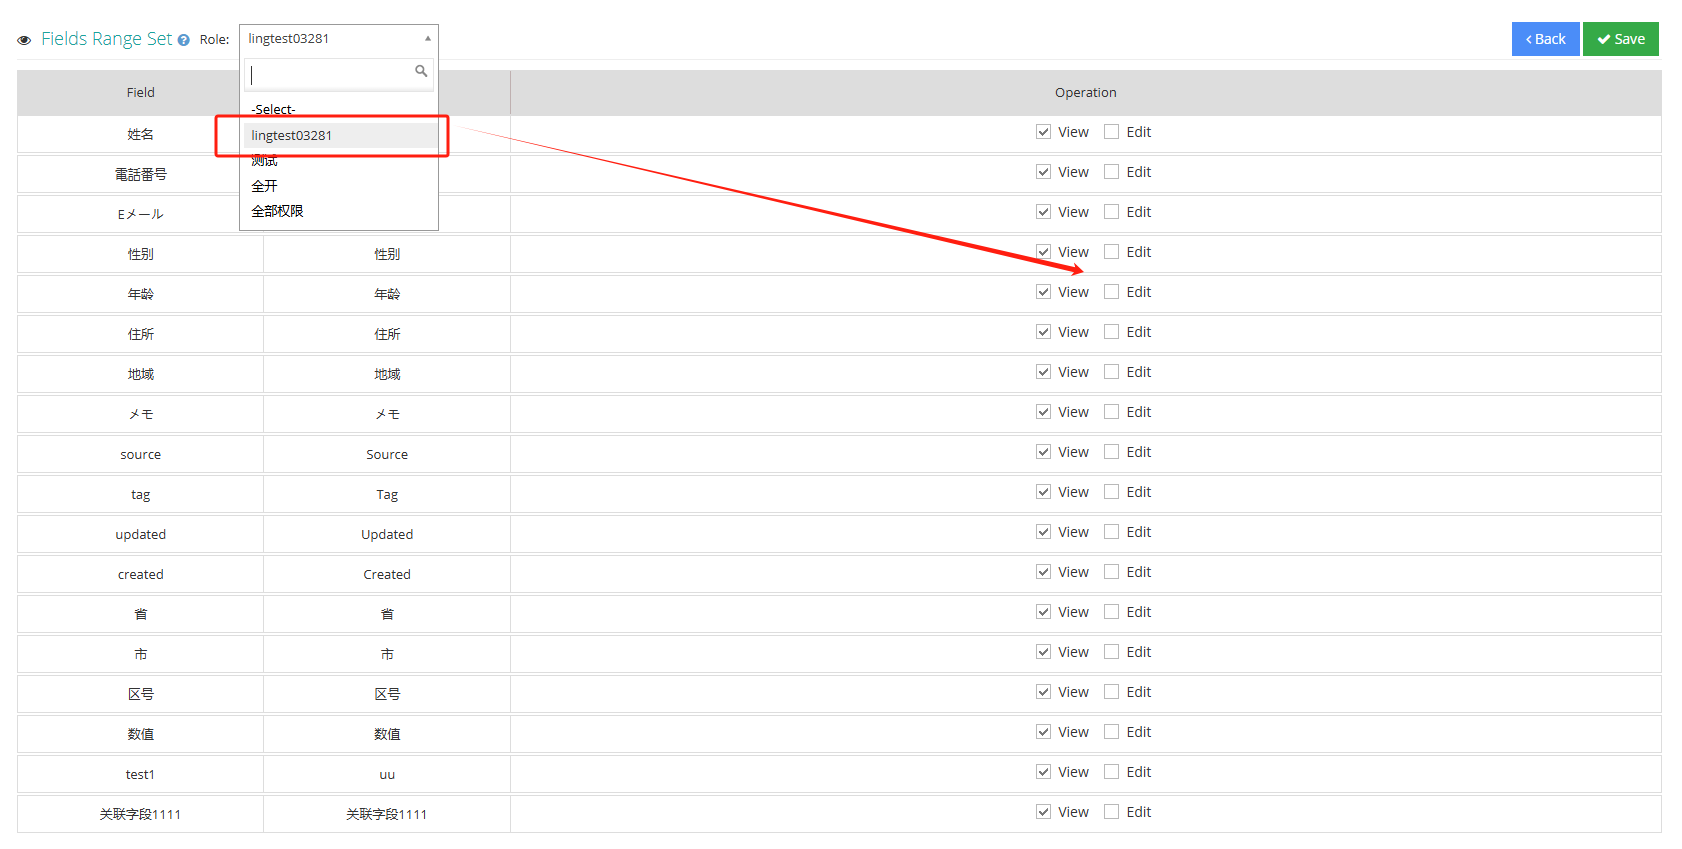
字段显示顺序- 用户可以在字段顺序设置中拖动字段,更该字段的排列顺序,姓名字段默认在第一位不可更改。字段可按标签A和标签B两个标签区分显示,标签B区背景颜色为高亮。在字段操作中,可以对字段是否必填,自定义字段是否在客户资料弹屏的自定义通话记录中进行编辑,字段和字段中填写内容的宽度可根据需要进行设置。
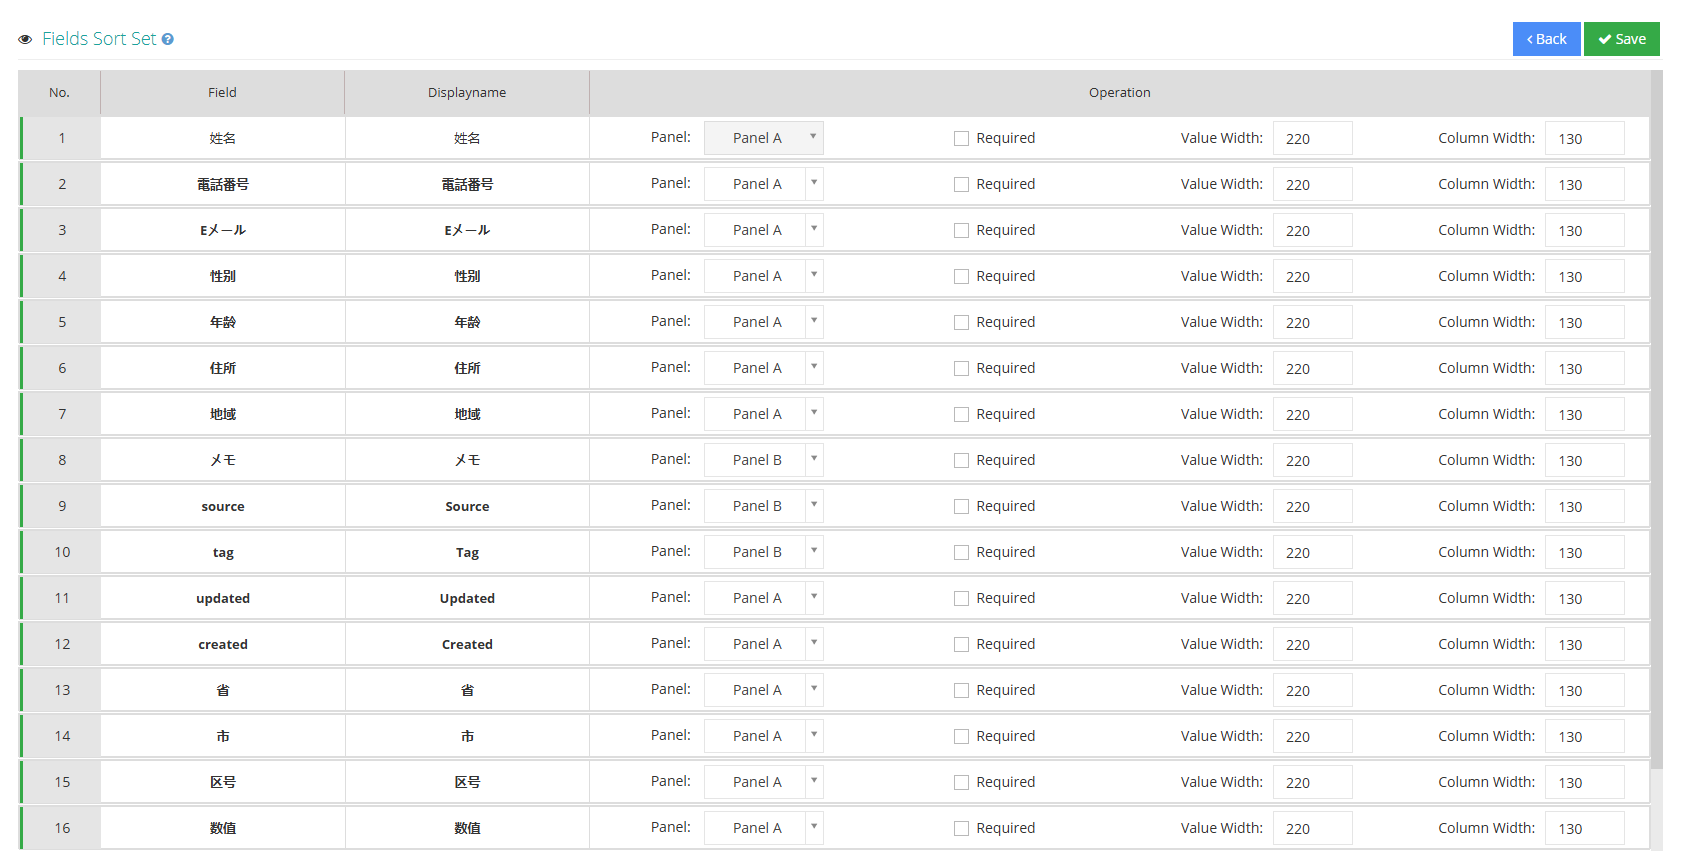
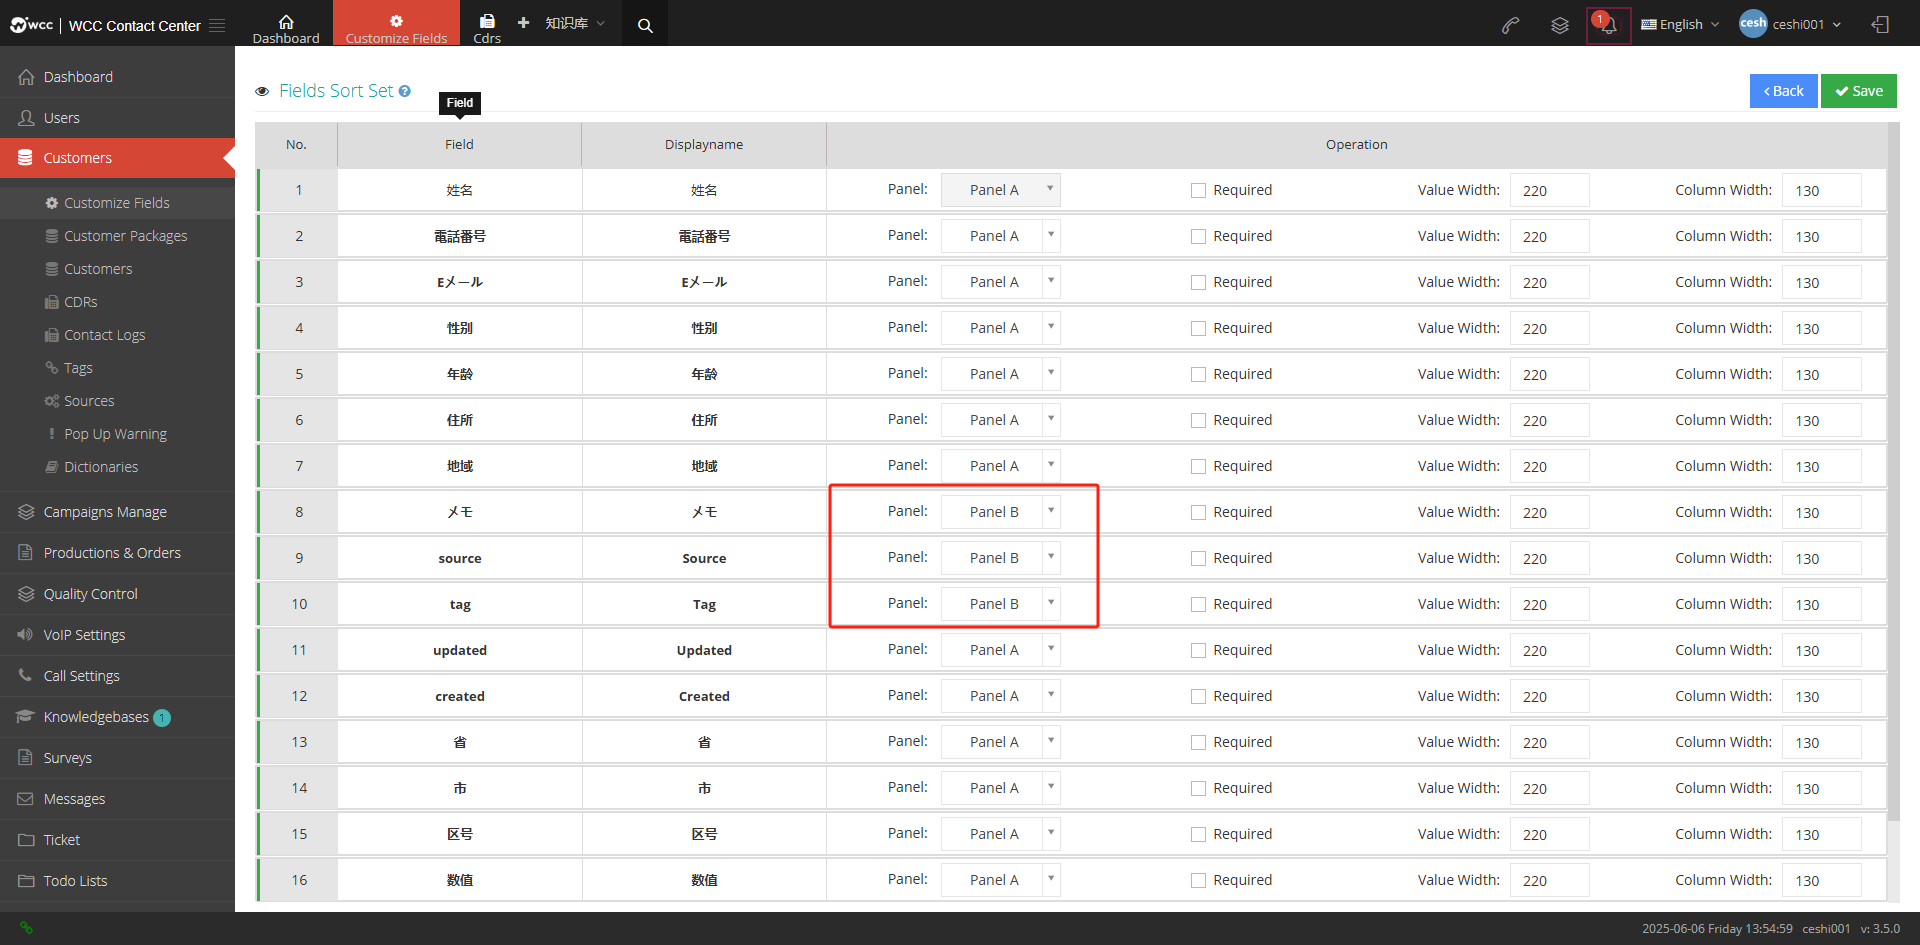
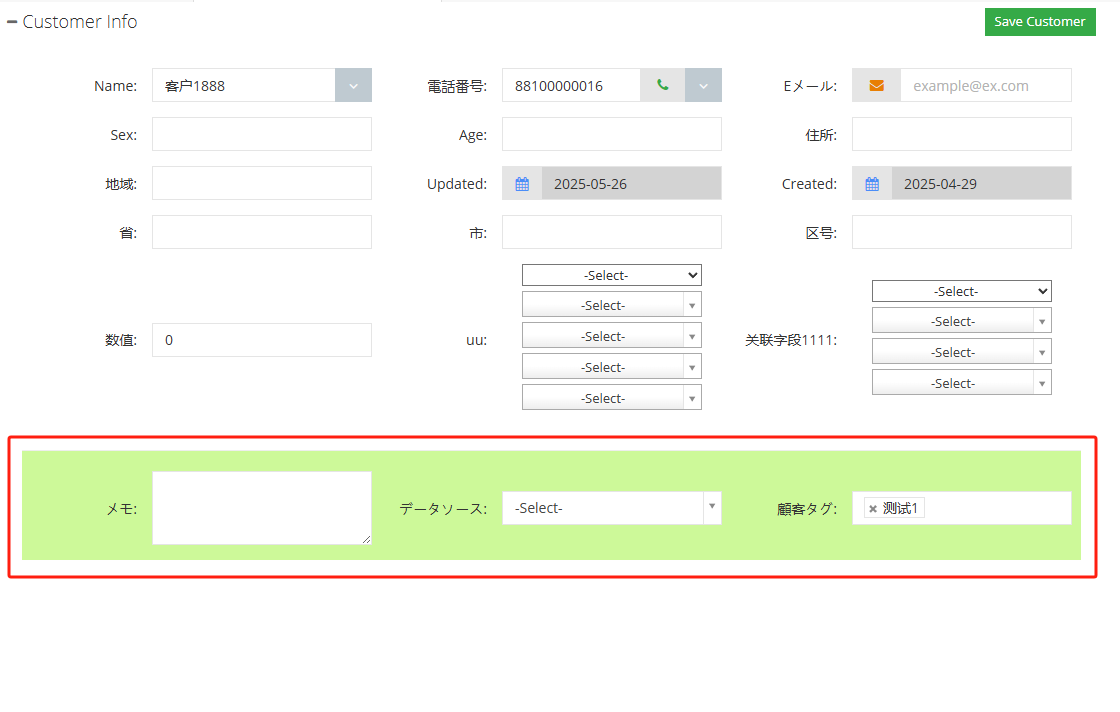
If the tag is set to B, the customer data pop-up screen will be displayed as highlighted after the agent logs in.
2 Show/Hide fields
Field name: field name in the database.
Field Display Name: The name that the field displays in customer data.
Field type: The input type of this field.
Default address: The default address you fill in after selecting the address in the field type.
Association Options: The default option to fill in when selecting association in the field type.
Link Address: The link address filled in when selecting a link in the field type.
Uniqueness of links: You can change it when selecting a link in the field type, and fill it in by default when selecting other fields.
Open Mode: The open mode of the link when selecting a link in the field type.
Options: Custom options when the field type is custom.
Default options: Default options when field type is custom.
Enterable: Whether it is possible to enter when the field type is custom.
Supports multiple selection: Whether multiple selection is supported when the field type is customized.
Required fields for success: Whether this field is a required field when successfully submitted.
Global Search: Allow global search for this field.
Required: Whether this field is required.
唯一索引:该字段是否有唯一性。
Created date: The creation date of this field.
Last updated: The latest update date for this field.
3 Add custom fields
① Click Add to enter the Add/Edit Custom Field General Page:
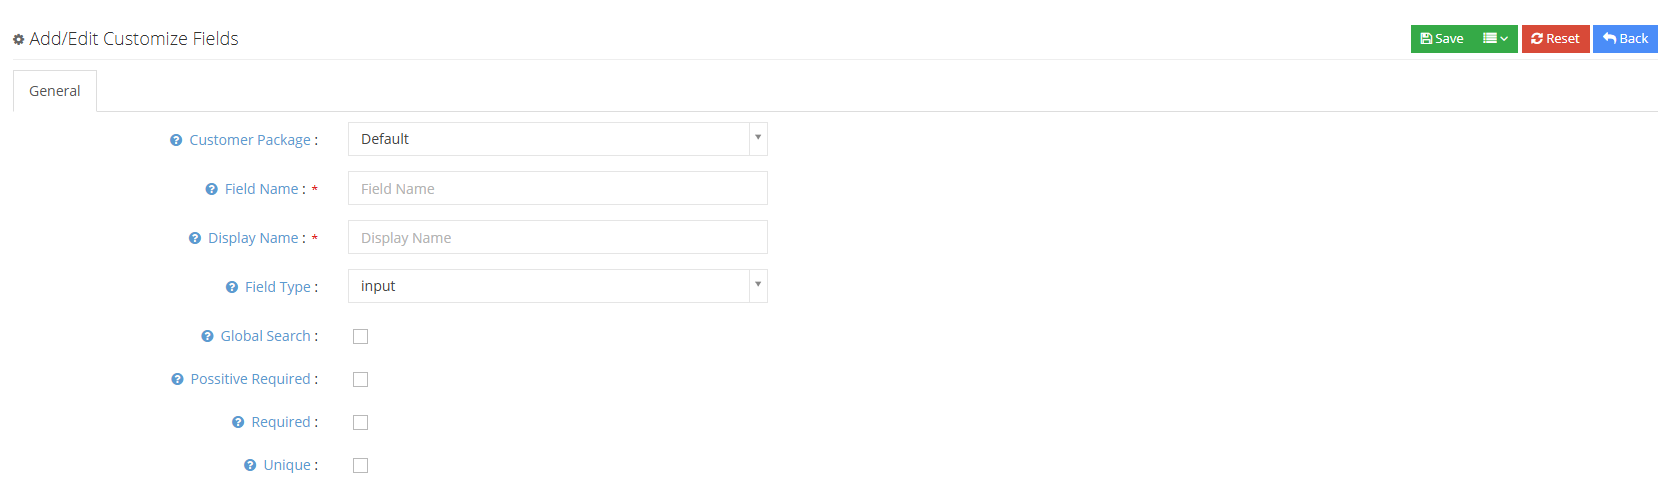
Customer Package: The customer package where the set field is located is, only customers under the customer package can view this custom field.
Field Name: The definition name of the custom field in the database.
** Field name display**: Defines the display name of the custom field displayed on the page.
Field Type: Define the type of a custom field, including:
Input box-Users can enter data but cannot wrap lines;
电话号码-填写一个电话号码;
Text box-Users can enter data or wrap lines;
Email-Fill in an email address;
Date-Select a date to fill in;
Link-Add a link user can set the link opening method, etc.;
Attachment-Select an attachment to upload;
地址-选择一个默认地址;
Custom-Custom multi-choice or input type;
Association Field-Customize the associated field options, such as region, fill in the province and the city of the province will appear.
Value-Custom fields that only fill in numbers.
Global Search: Whether the current field participates in the global search will speed up the search speed of this custom field.
成功必填字段:当提交成功状态联络记录(销售漏斗的值大于0)时,当前字段是否必填
必填:是否为必填字段。
唯一索引:是否是唯一性(什么是唯一性?表里数据的当前字段没有重复值)。
②Click Save to save the new custom field.
3.2.2 Customer Package
1 Page introduction
When a user sets a client at the agency level, if the user checks the multiple customer package function for the client, under the client user, multiple customer package combinations can be held at the same time. Each customer package will not interfere with each other, and the agent can handle customers in different customer packages at the same time.
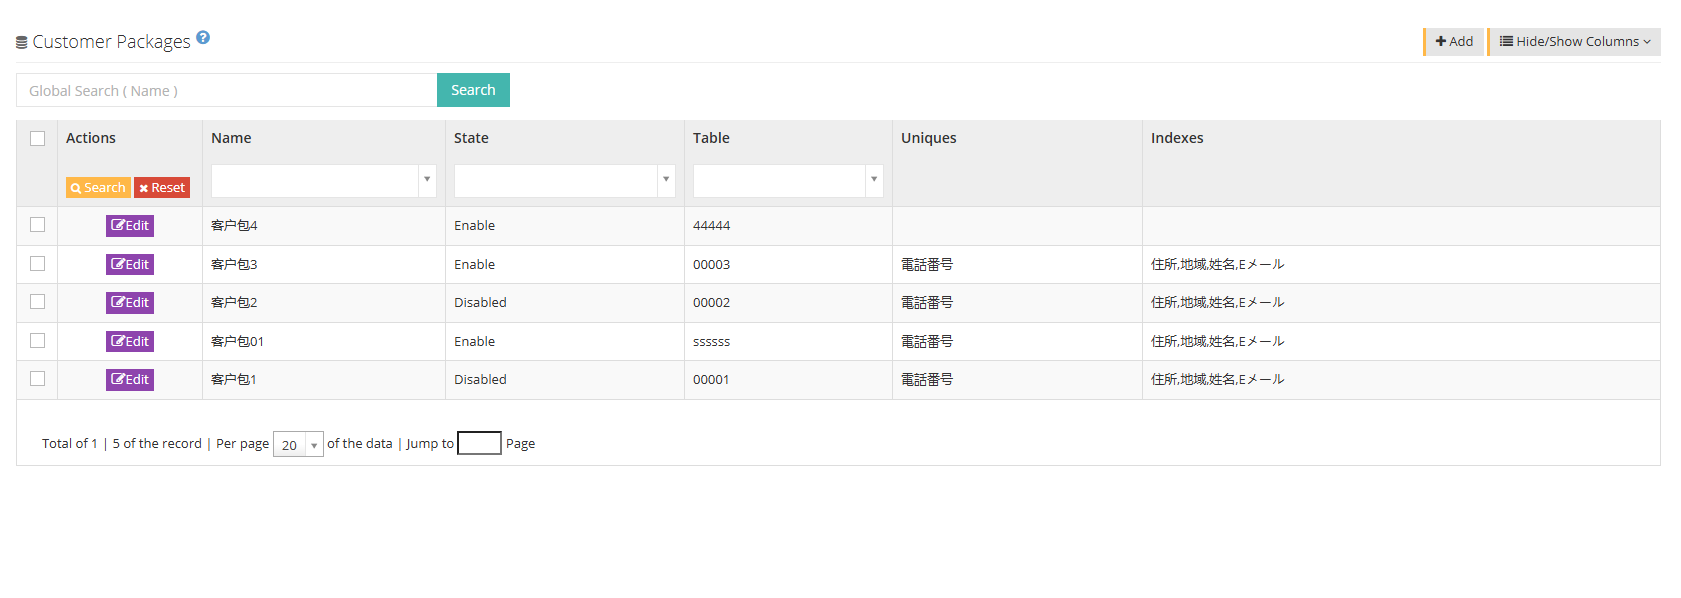
[Global Search] This page supports searching using the display name of the customer package.
【Add】Add a new customer package.
[Show hidden fields] Select the fields that need to be displayed or hidden on this page.
[Edit] Users can edit the customer package that has been added.
2 Show/Hide fields
Display name: The name of the customer package.
Status: Is the client package visible or hidden.
Unique ID: The unique ID reported by the customer.
唯一键值:该客户包的不可重复的加速搜索字段,对常用字段来说设置比较方便查找。
Index field: Accelerated search field of this customer package, which is convenient for searching after setting.
3 Create a new customer package
①Click Add to enter the regular page of adding/editing customer package:
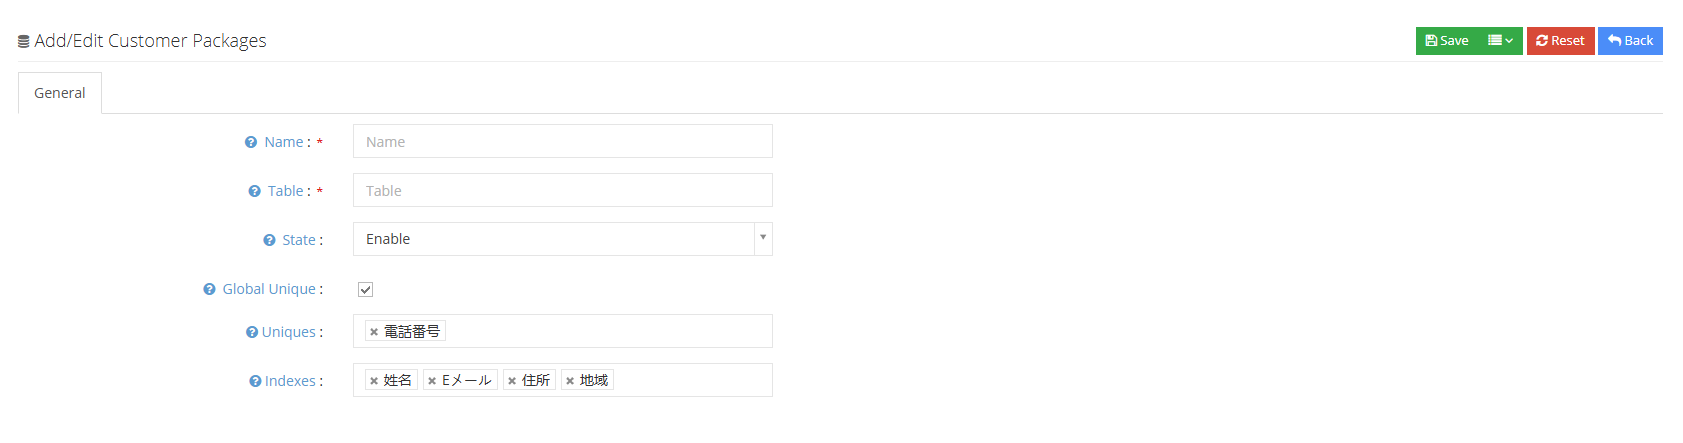
Display Name: The name of the customer package displayed by this customer package.
Unique ID: Set a unique ID for this customer package, only numbers and letters are supported.
Status: When the customer package is closed, you can select the custom field/customer/CDR/contact log/activity/survey answers/QC/sales funnel page to close the customer package for viewing.
全局唯一:选中代表客户包下的客户号码全局唯一,即使用一个客户的多个同一号码字段,也会提示重复。
唯一键值:用户可以设置唯一索引字段,索引字段可添加多个,添加成唯一唯一索引字段后,在该客户包下该索引字段下不可以重复。
Index Field: Users can set fields with higher frequency usage as indexes, which can optimize the speed of users querying them (referring to querying them in the database).
②Click to save the new customer package.
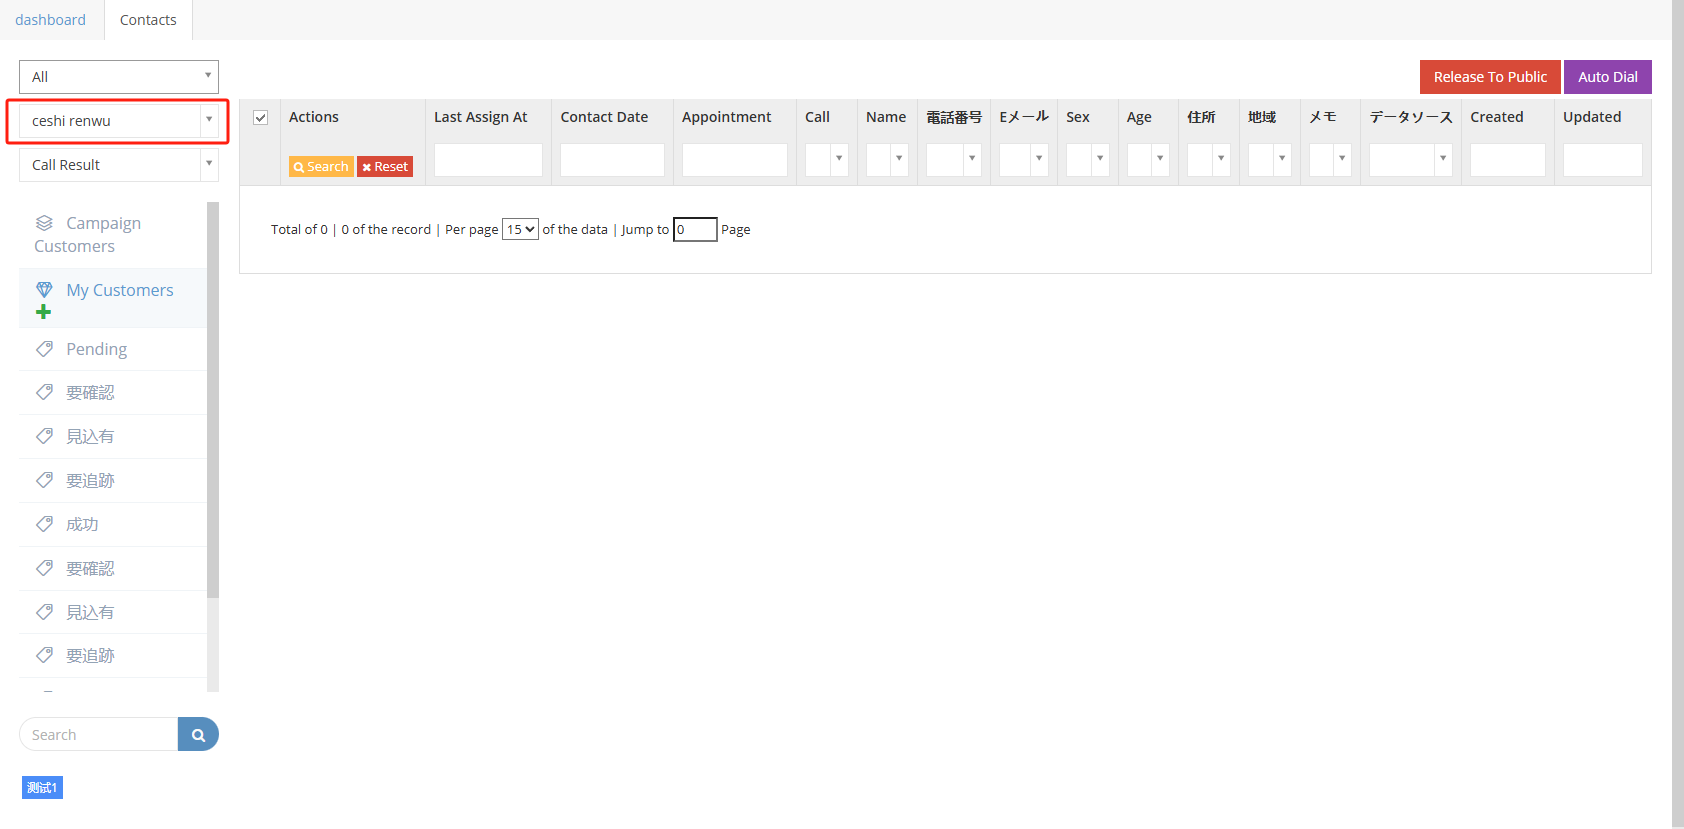
3.3.3 Customer Data
1 Page introduction
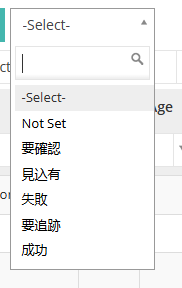
Customer Data The page displays the customer data dialed by the agent. The corresponding customer data can be viewed by filtering through customer packages/projects/tasks/sales funnels/call results/customer tags, etc.
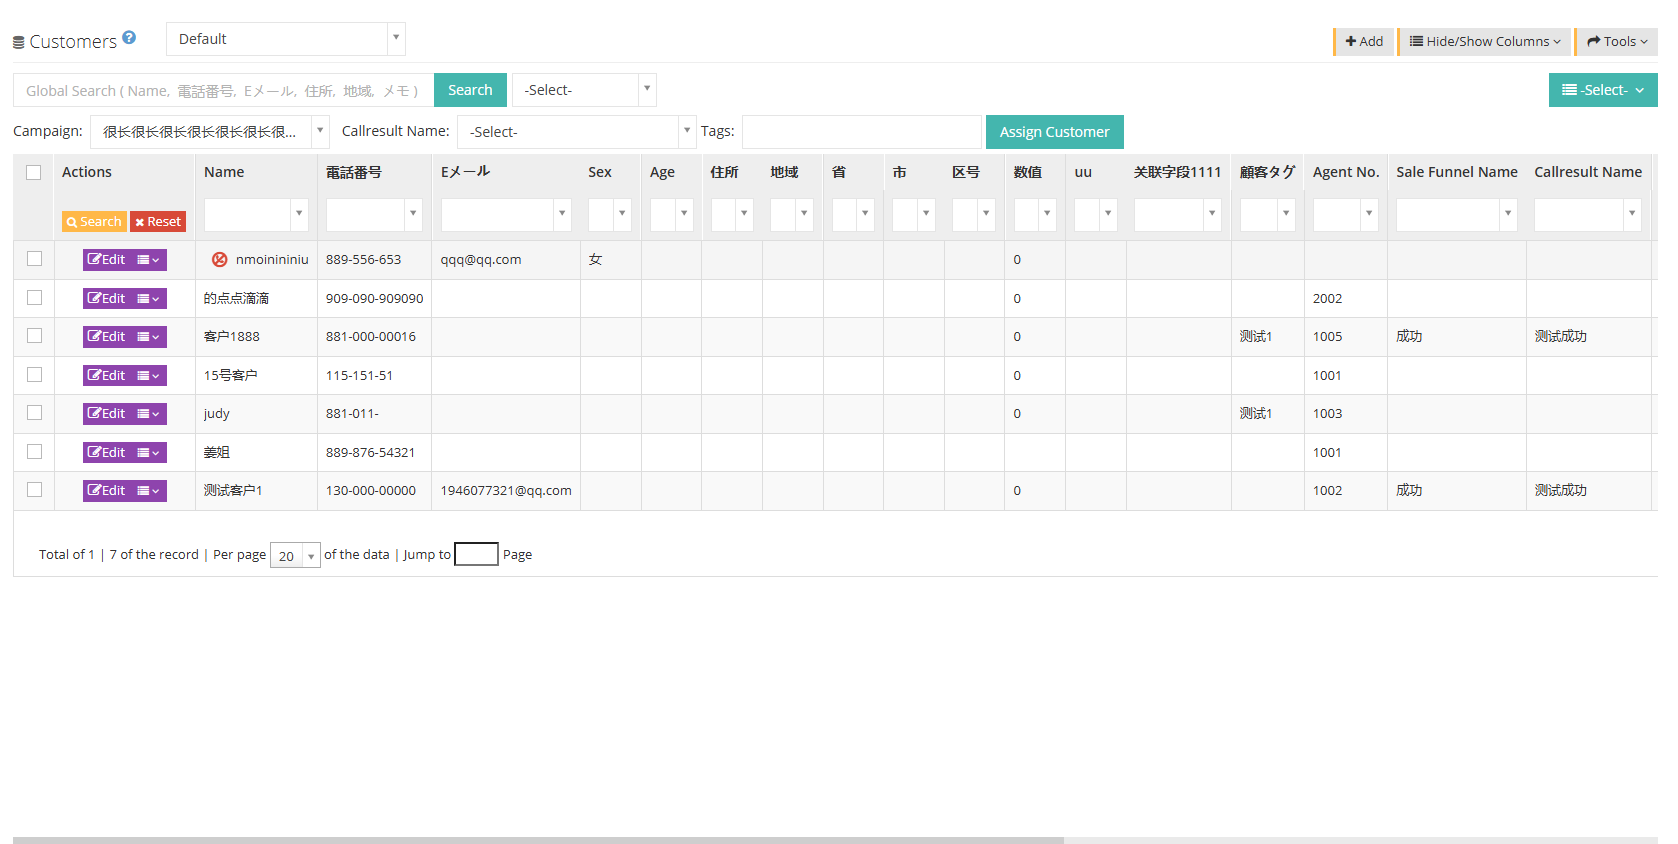
**The following defaults, global search, sales funnel, affiliated tasks, call results, and customer tags are all search conditions.
[Default] Customer package selection, the default status is the default customer package that is all customer data, and you can also select specific customer packages. The creation and editing of customer packages will be explained in detail in the customer package.
[Search] The global search scope includes name, phone number, email, urban area, area, and notes.
【搜索】后面的【请选择】为销售漏斗,显示该客户包下的所有销售漏斗,根据坐席提交的销售漏斗,用户可以搜索销售漏斗里的客户数据。.
[Affiliated Task]] Users can search for customer data based on their affiliated tasks, and the customer data assigned to the task can be assigned to the designated agent.
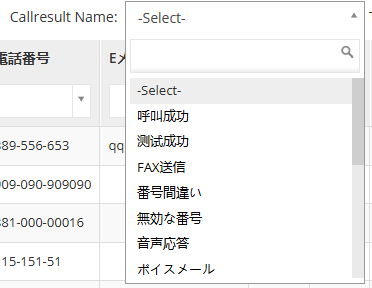
[Call Results] Based on the call results submitted by the agent, the user can search for customer data in the call results.
[Customer Tags] Search customer data based on the customer tags set by the user.
[Customer Allocation] Allocate customer data.
客户数据可以从以下三种形式进行分配:
Release Customer to - Customer Table: Customers assigned to agents or tasks are released to the high seas of customers and become customers without belongings.
Assign to Task - Select a task: Select customer data and assign it to a task. The agent can crawl customer data in the customer pool to complete the task.
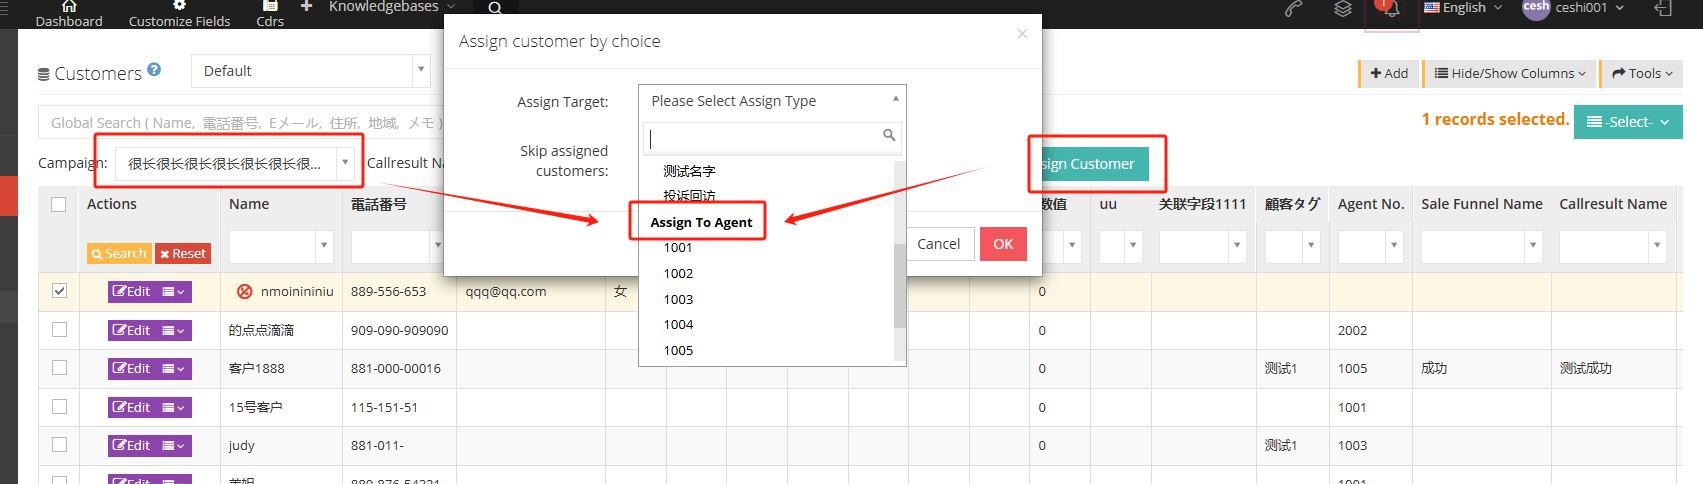
Assign to agent: If you select a task first and then click Customer Assignment, you can directly assign customer data to the agent.
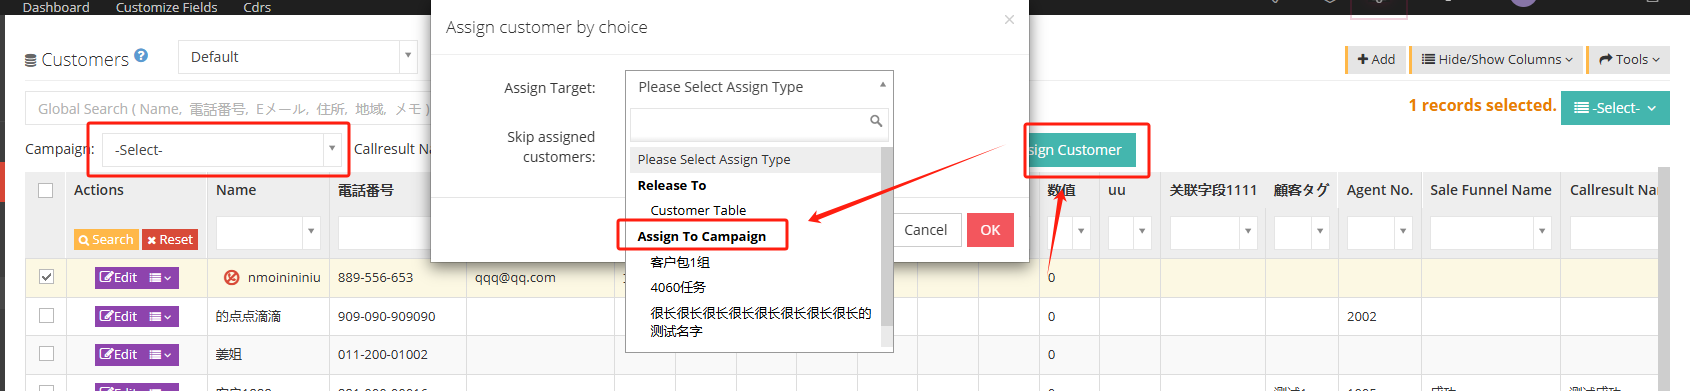
↓↓↓ Directly assigned to the seat
【工具】
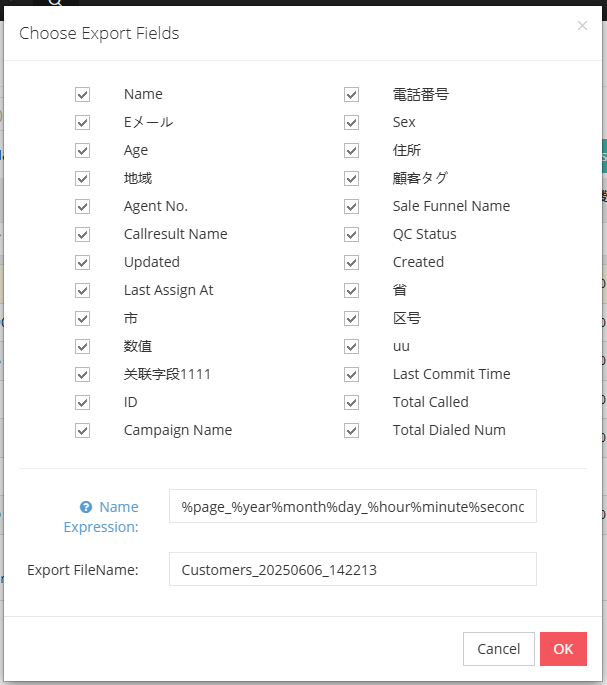
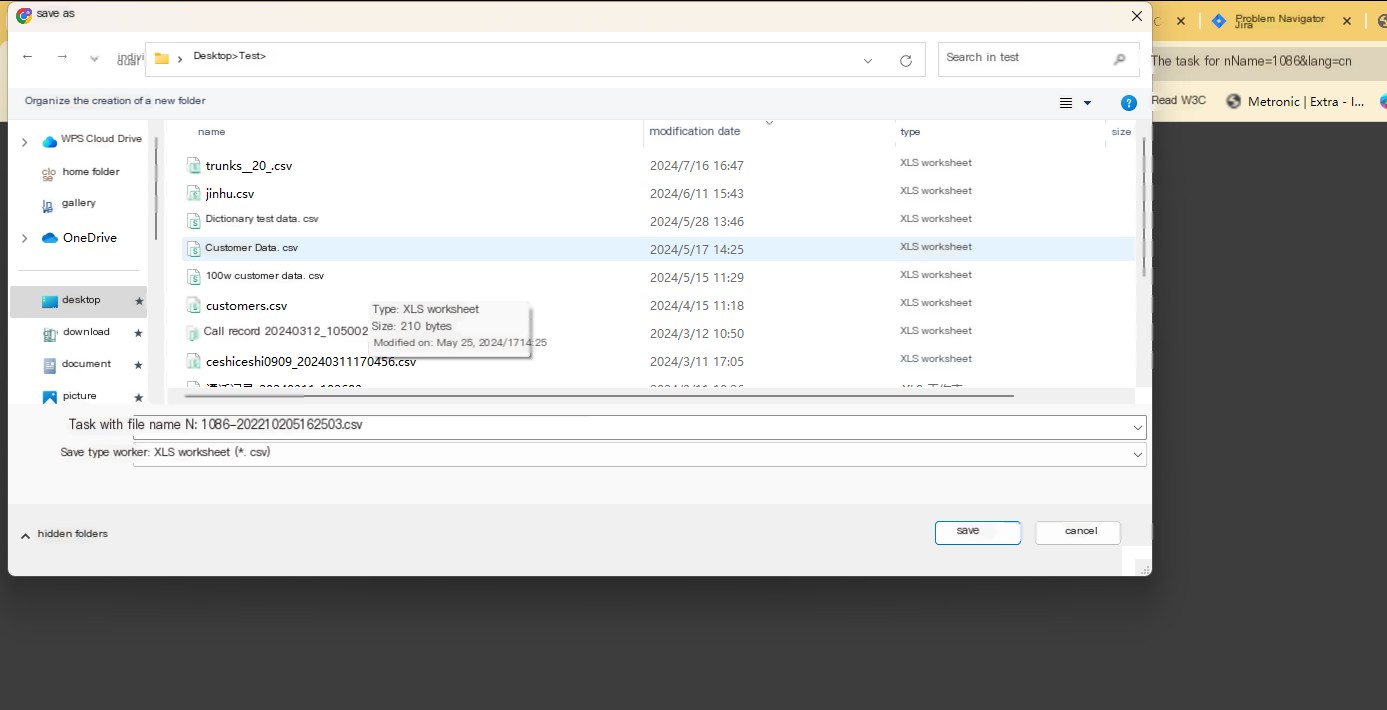
Export CSV file-Export data in CSV format;
数据导入-将CSV格式的数据批量导入; (导入的客户数据文件不能超过 20 MB)
添加至禁呼列表-将选中的客户数据添加到禁呼列表;
Removal from the banned call list-Move customer data from the banned call list.
[Edit] or [Drop-down menu] can edit the newly created successful customer data.

2 Show/Hide fields
Name: The customer’s name.
電話番号:客户的电话号码
Eメール: 客户的邮箱地址。
Gender: Client Gender.
Age: Client age.
Residence: The client’s address.
地域:客户所在地区。
顧客タグ:设置的客户标签。
Cabin number: The work number assigned by the customer.
Sales Funnel: The sales funnel that was last submitted for this customer data.
Call result: The last call result submitted by this customer data.
Quality inspection results: The quality inspection results of this customer data.
Last updated: The last time this customer data was updated.
Created date: The creation date of this customer data.
Last allocated time: The last time allocated by the client.
Last submitted update time; last submitted update time for customers
ID:客户ID,具有唯一性
Total number of calls: Total number of calls to the customer.
3 Add new customer data
3.1单条数据创建
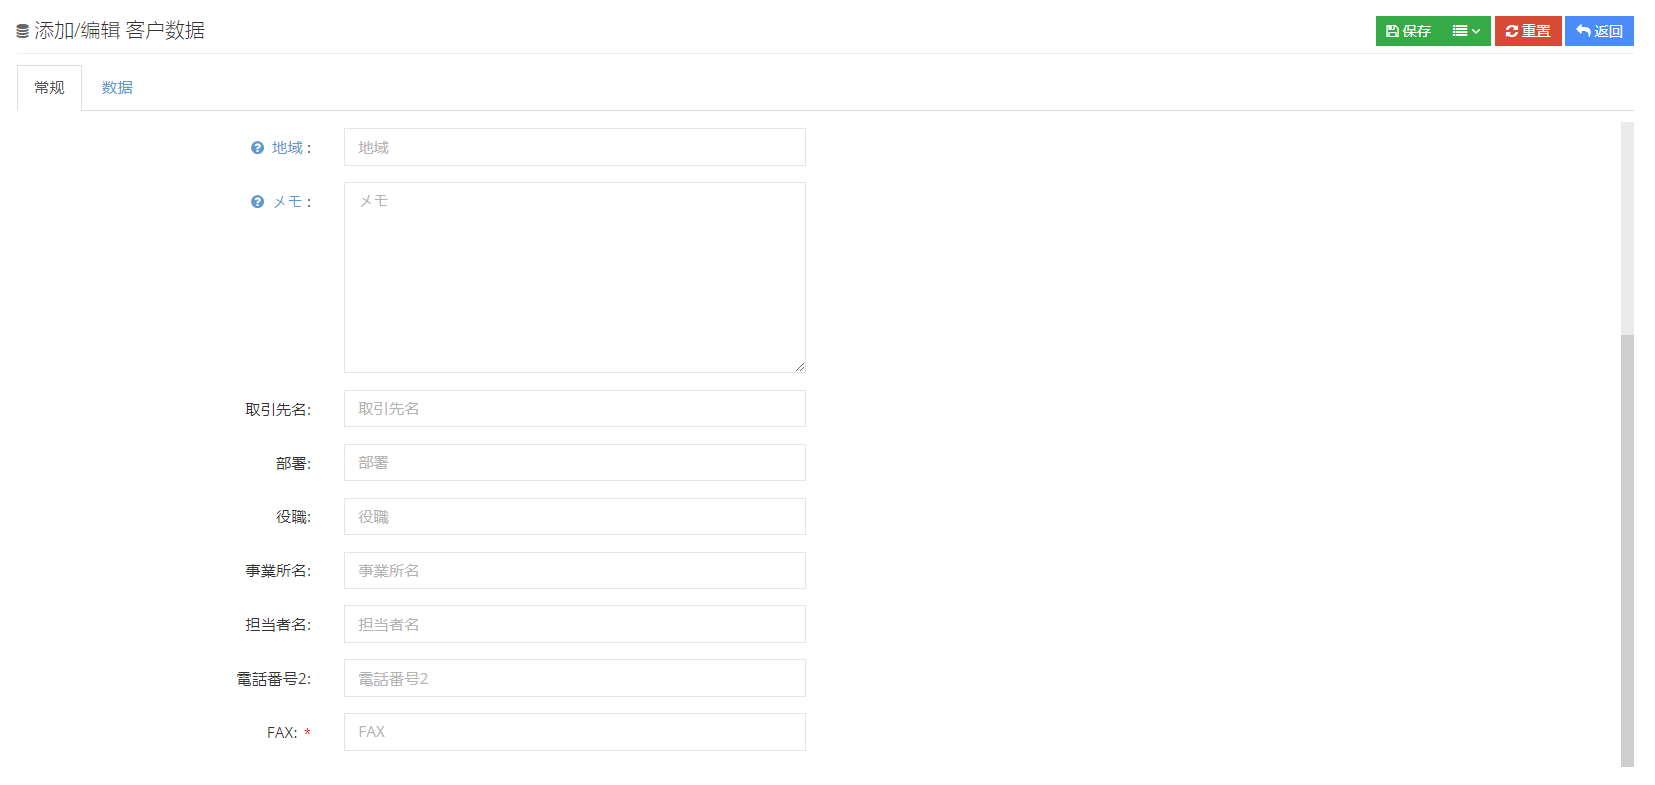
①点击添加进入添加/编辑客户数据的常规页面:
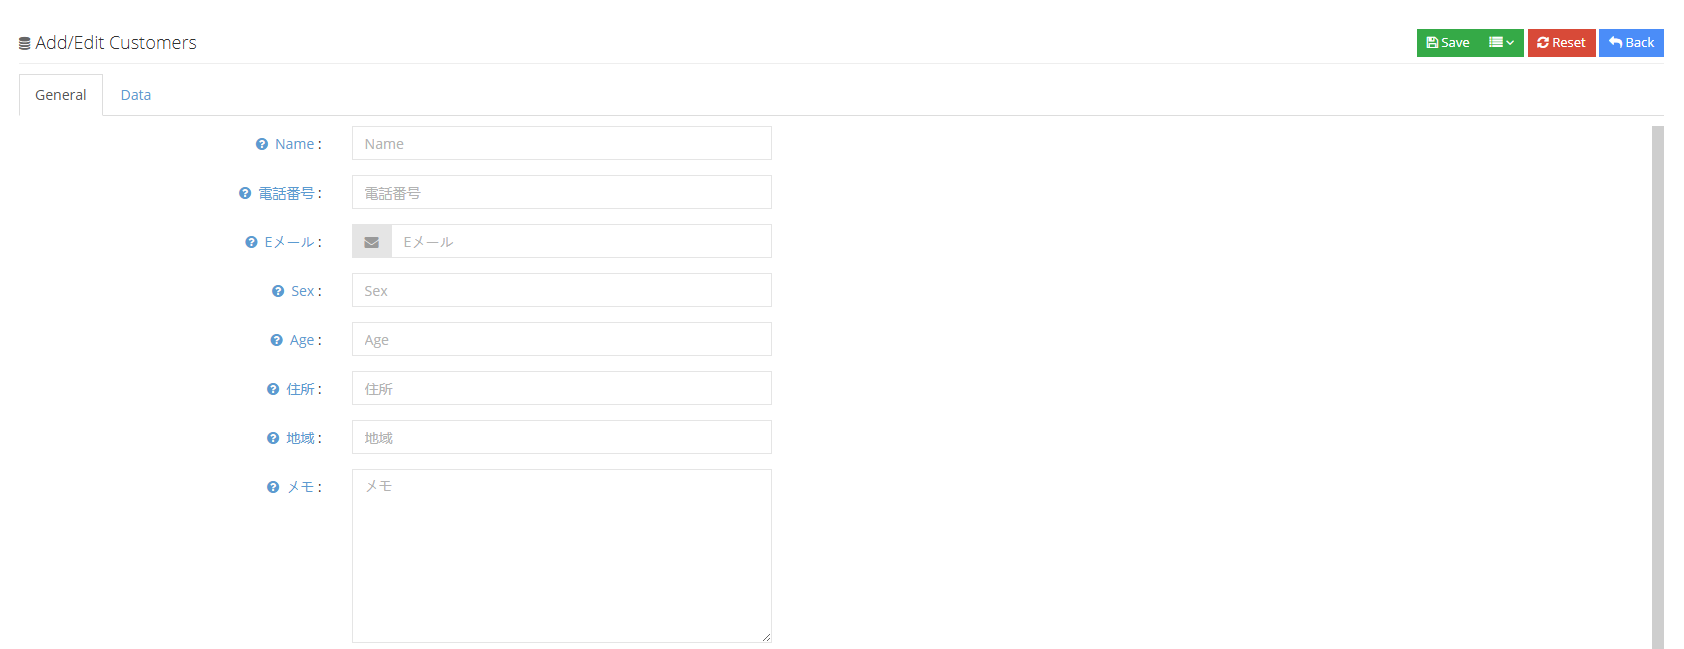
Name: Customer name.
Telephone number: The customer’s phone number. In the default customer package, the customer’s phone number is unique and cannot be added repeatedly.
Eメール: 客户的邮箱地址。
性别:客户的性别
Age: The age of the client.
住所:客户的住址。
Gate: Customer’s address.
メモ: Fill in the notes.
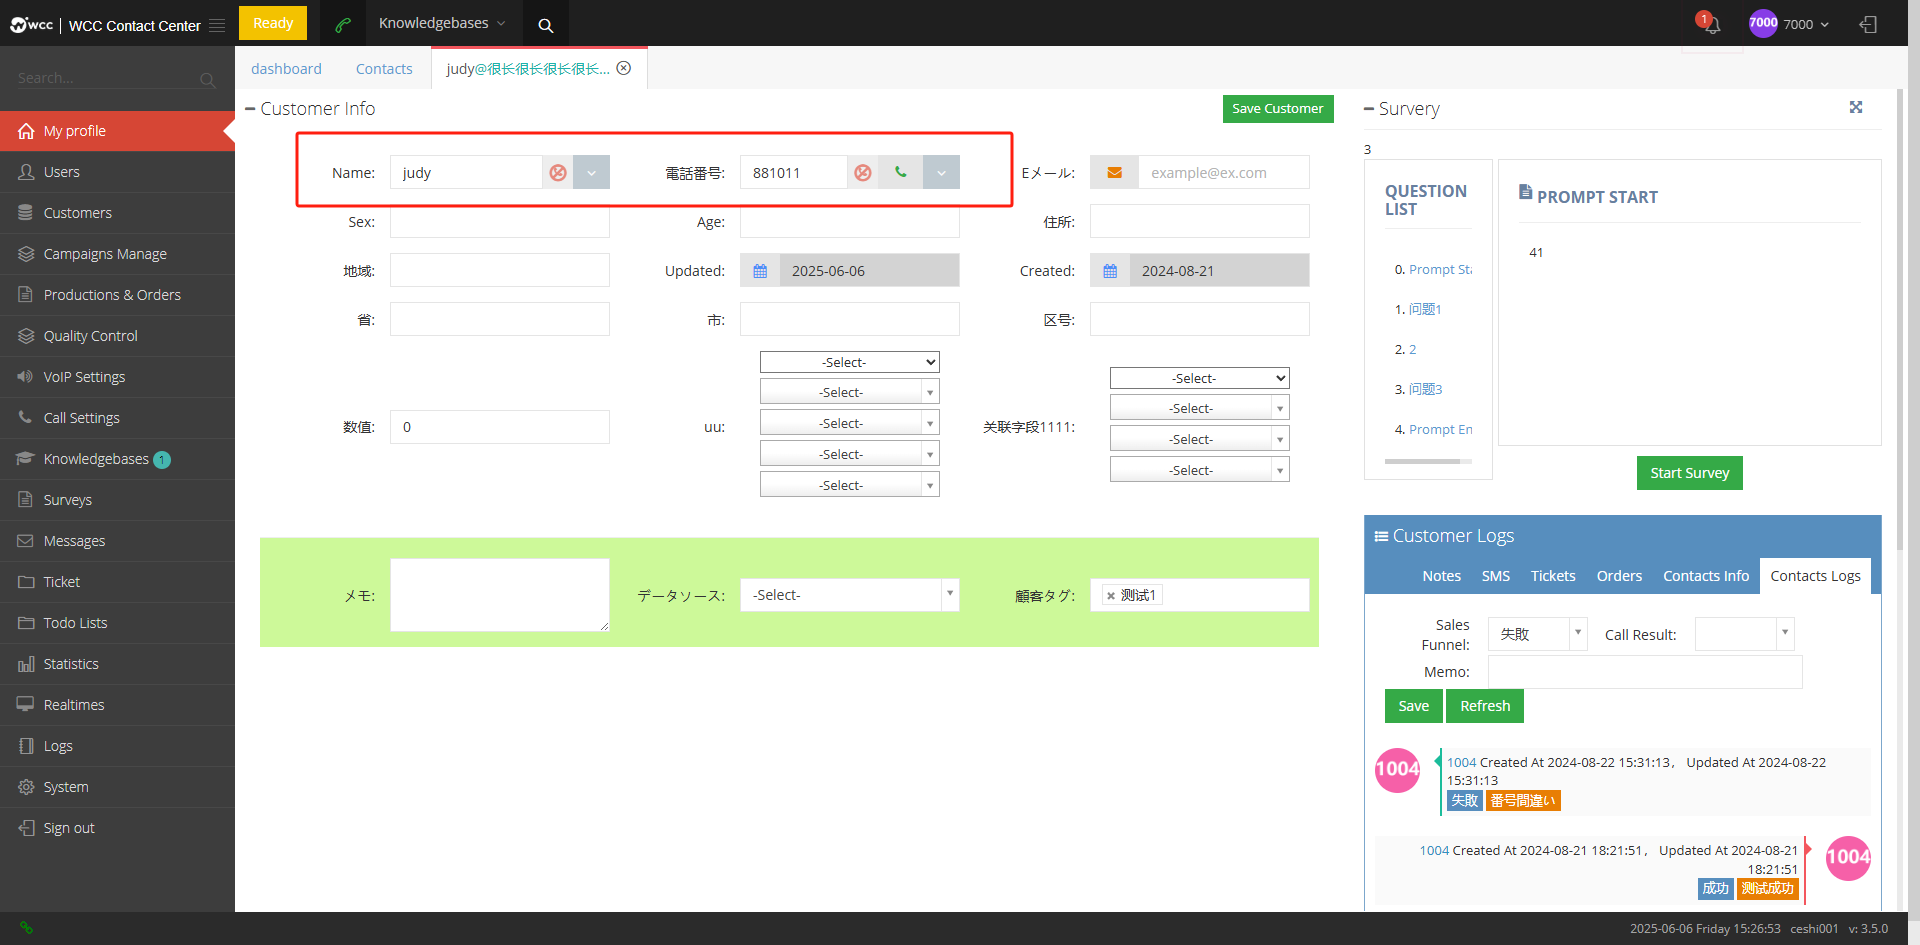
If a new field is added to the custom field, you can edit the contents of the new field in the Add/Edit Customer Data page.
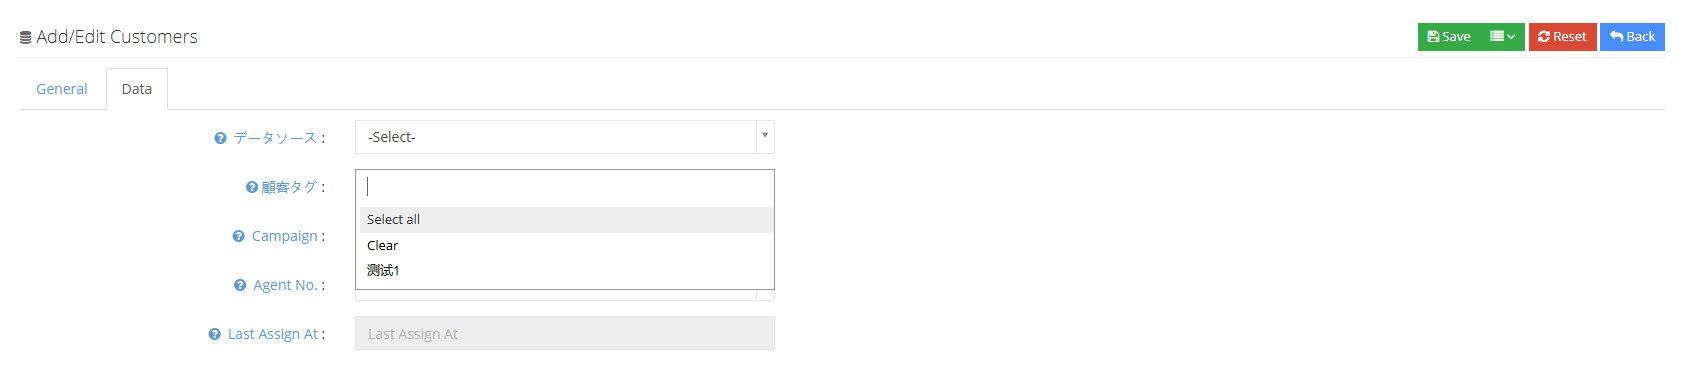
②Click the data to enter the data page for adding/editing customer data:
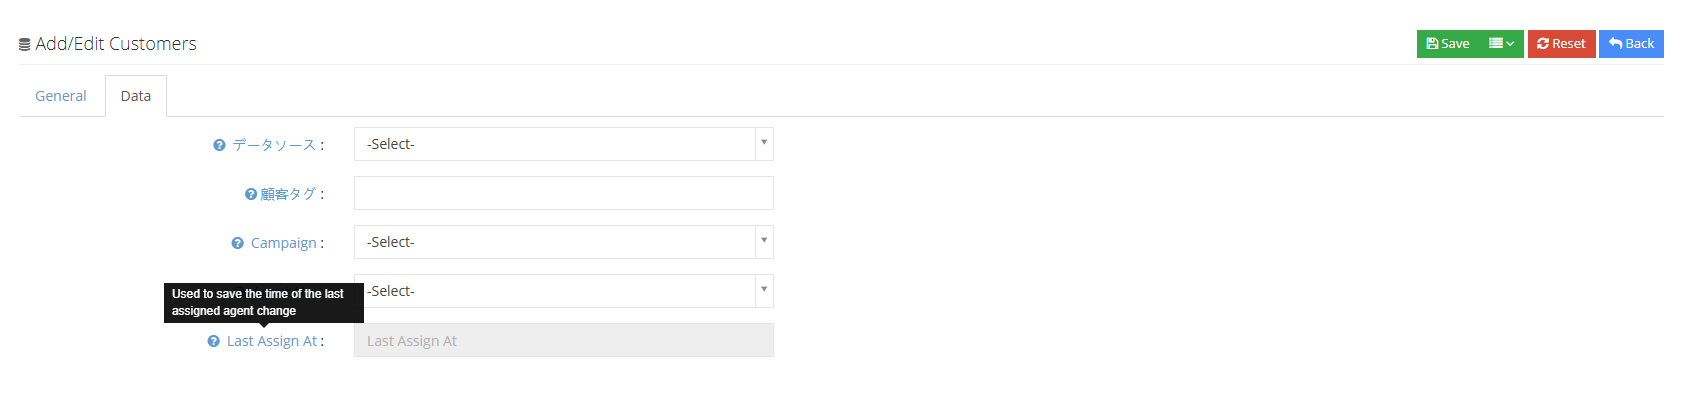
Data source: Users can edit data sources on the data source page, mainly used to group customer data.
Customer Tag: Users can edit customer tags on the customer tag page, which is mainly used to group customer data.
Affiliated Task: The user can assign this piece of data directly to the task. If the grouping is not selected at this time, the user can also group it in the customer data page - allocated data.
Agent Work Number: The exclusive seat specified by this customer data.
Last allocated time: Used for the last time the customer data is assigned to the agent.
③Click Save to save new customer data.
3.2 Batch data import
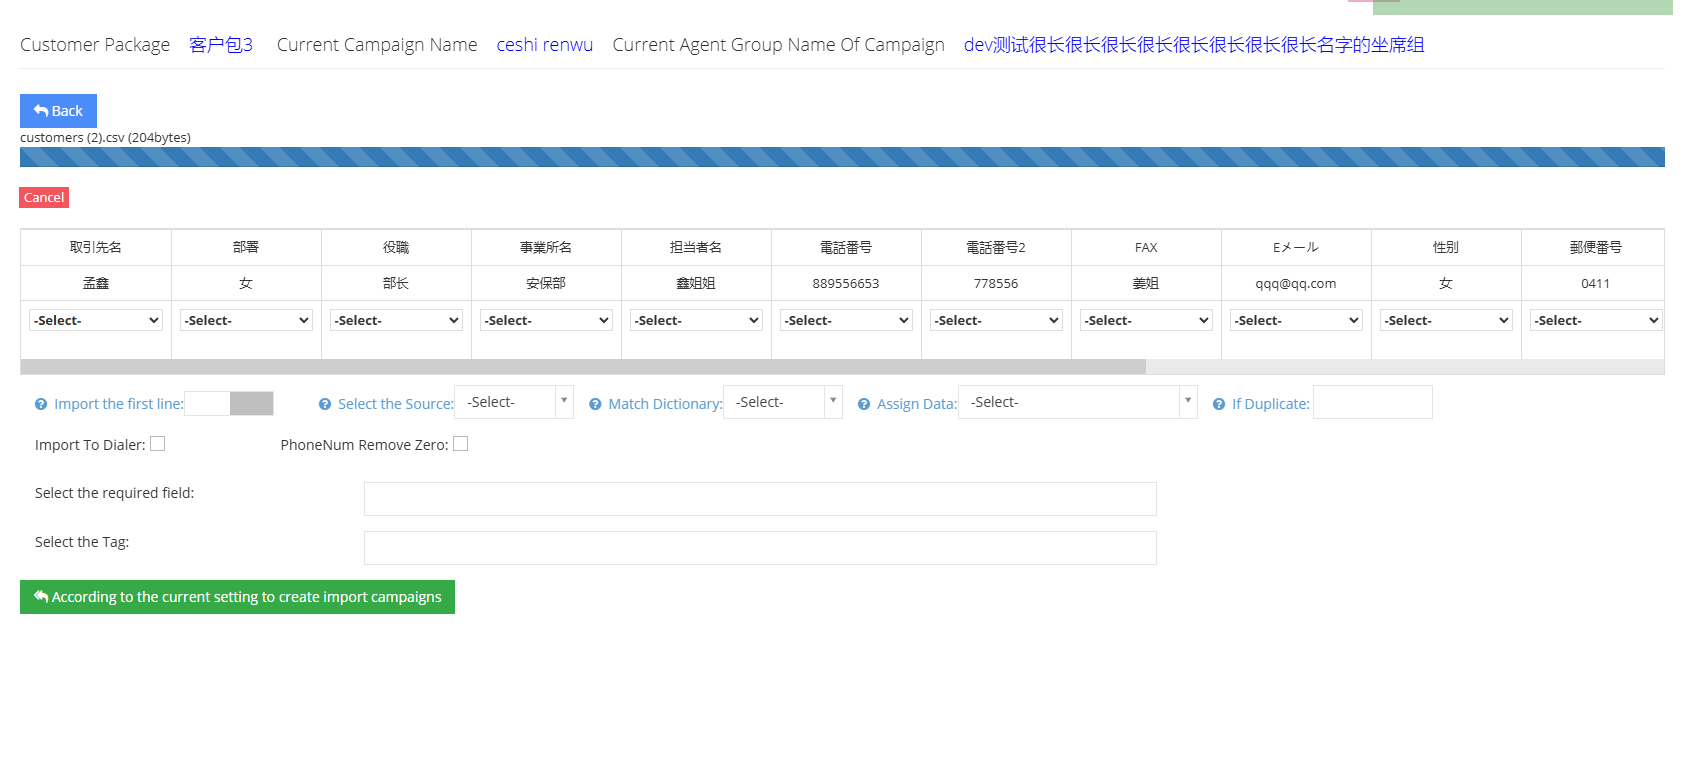
① If you need to import a batch of customer data, you can directly click Tools - Data Import on the customer data page.
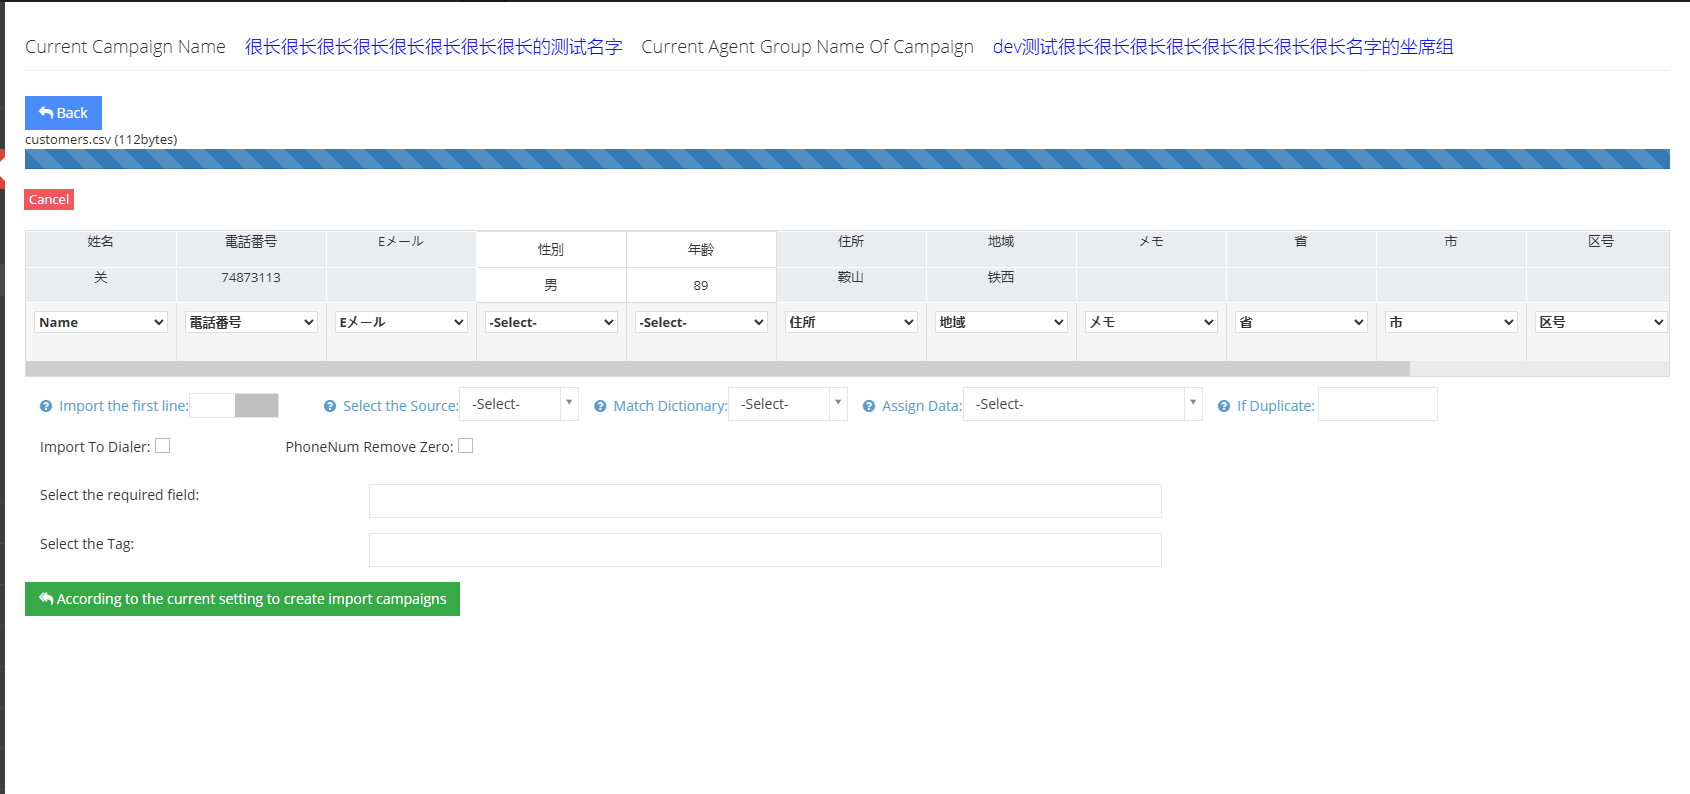
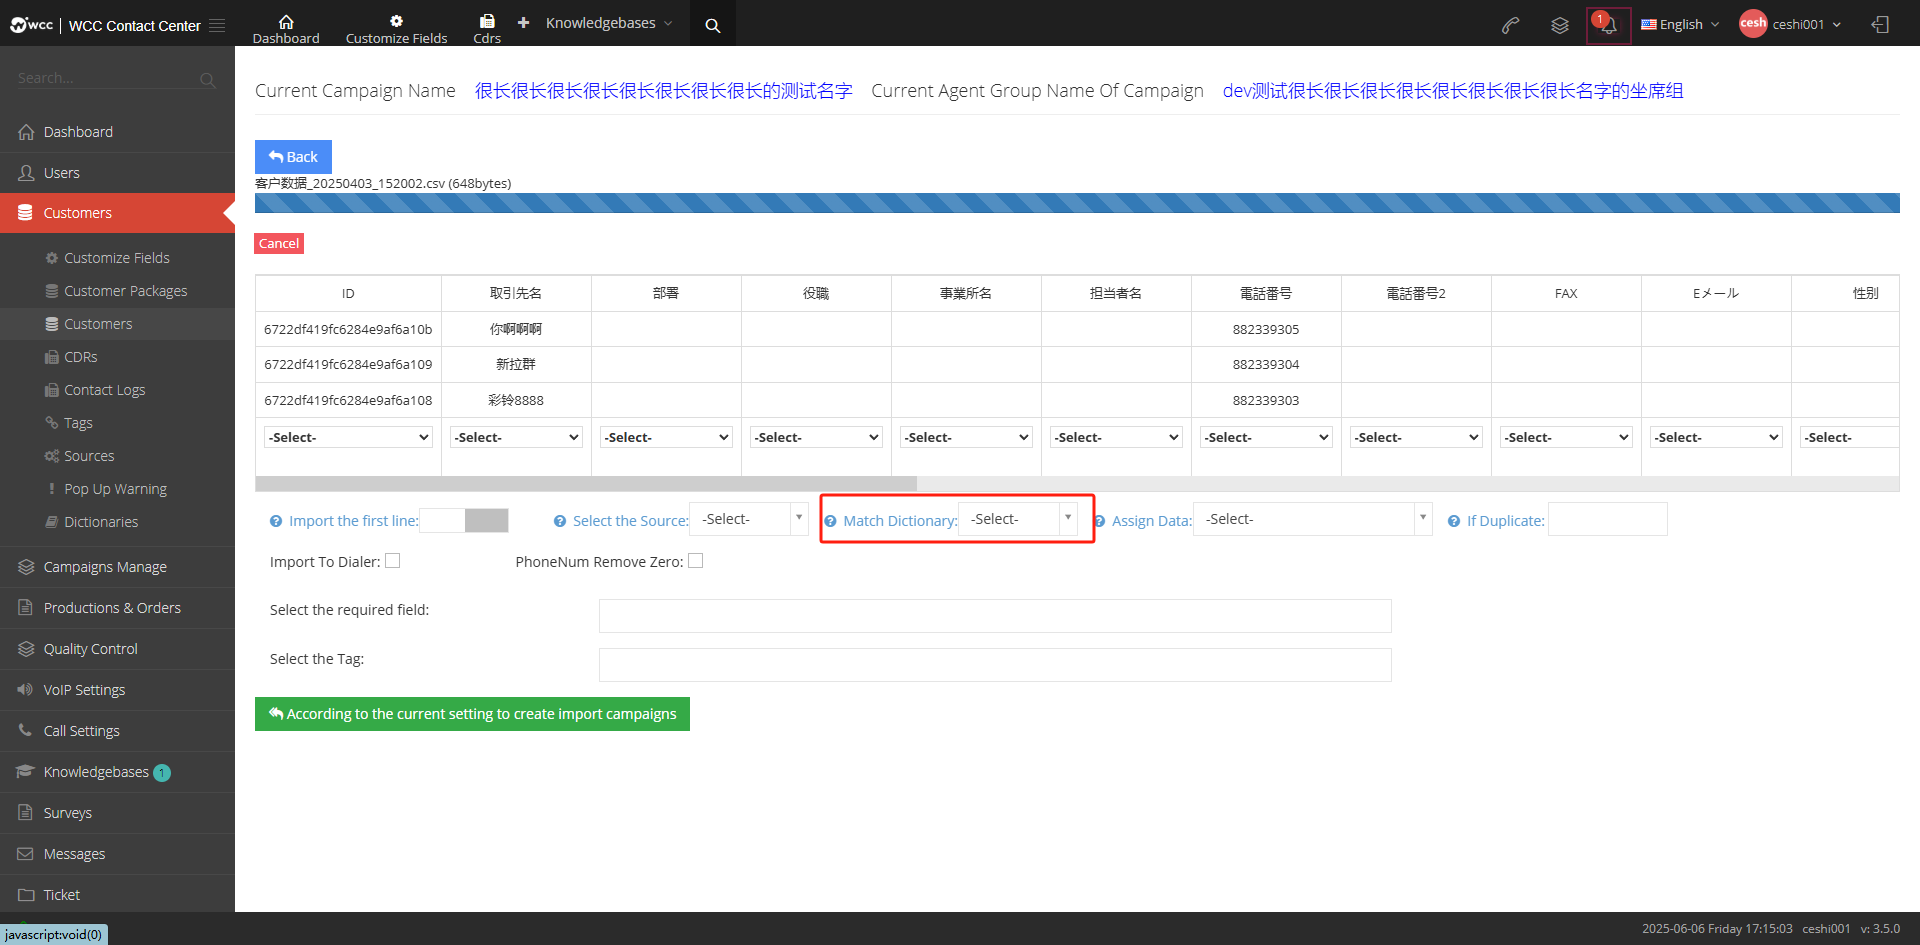
After importing data, the system will automatically match the same fields as the data. Fields that the system does not have need to be clicked by the user to select the drop-down menu to create new: Please select - New Field - Input box (enter a new field).
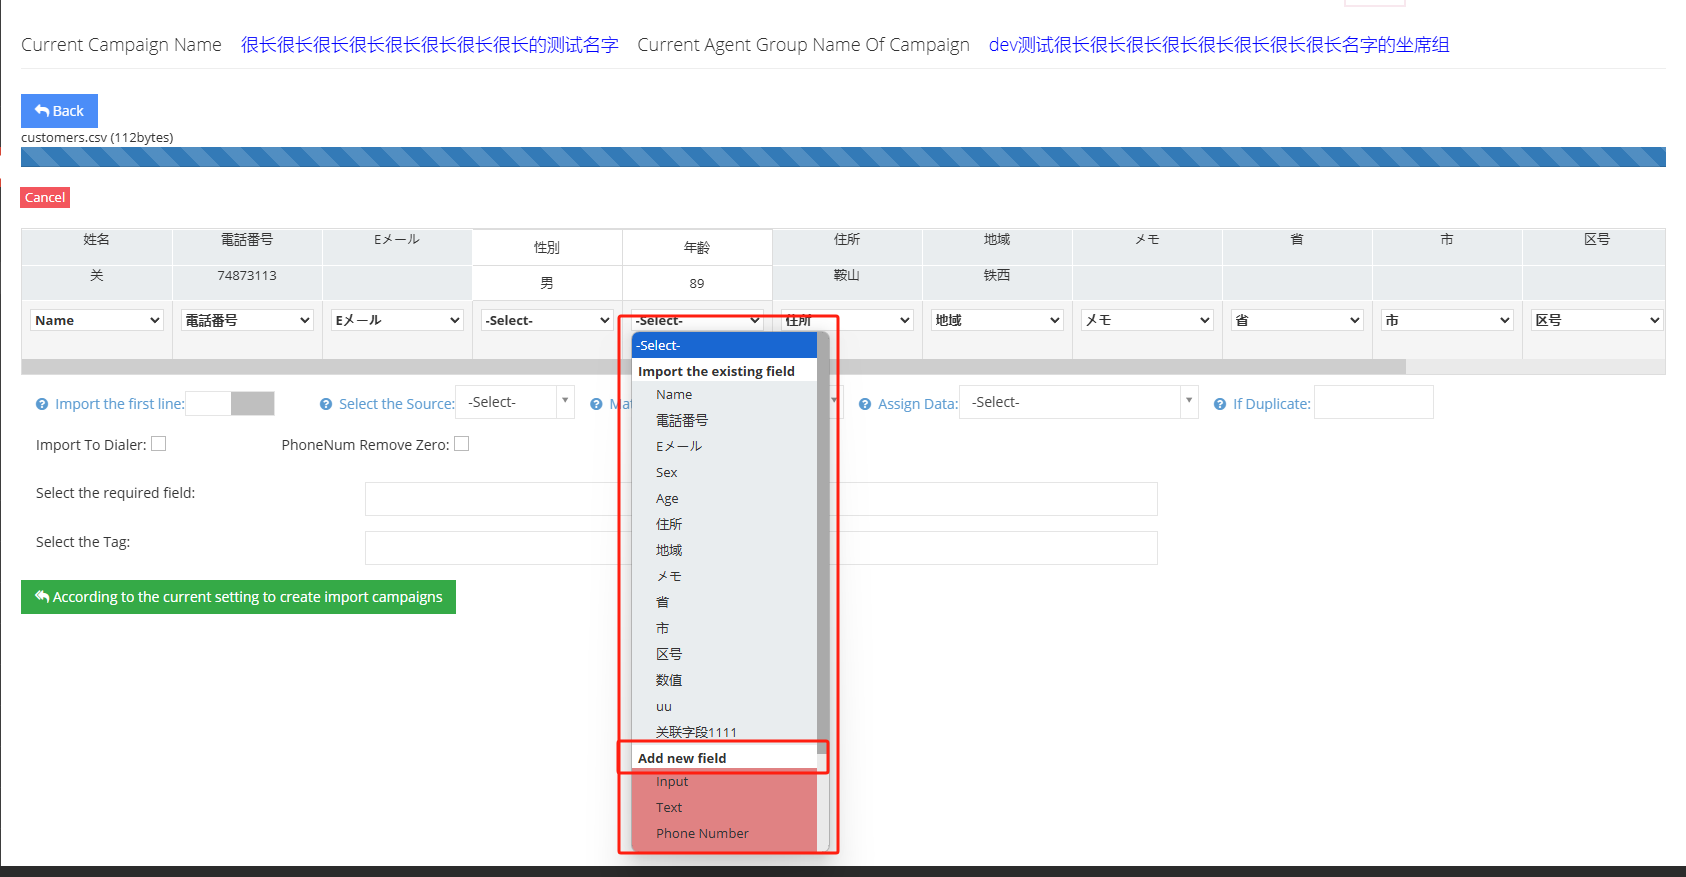
[Import the first row] Select whether to import the first row of data in the data.
[Select data source] The source of customer data can be added to customer data - data source. There are no special settings. The data will be marked by time and color by default.
[Match Dictionary] Match according to the data set in the dictionary, and the dictionary is set in customer data - dictionary management.
[Assign data] Here you can manually allocate customer data to a certain seat.
[When data is repeated] If the imported customer data system already exists, the user can have two options: ① directly import the duplicate data into the pre-dial list; ② Update the data and update the original customer data in the system to the imported data
Note: Several situations of importing pre-dial and importing pre-dial when data is repeated:
Import pre-dial when data is repeated + import pre-dial = all data is imported to pre-dial list
Import pre-dial when data is repeated + not import pre-dial = duplicate data in pre-dial list
Pre-dial is not imported when data is repeated + pre-dial is imported = new data except duplicate data is in the pre-dial list.
[Import Pre-Dial] Import the imported customer data into the pre-Dial.
[Phone number to zero] When the first digit of the phone number is zero, remove the first digit 0.
[Select Required Fields] Select the fields that must be filled in.
[Select Customer Tag] Select a tag for customer data.
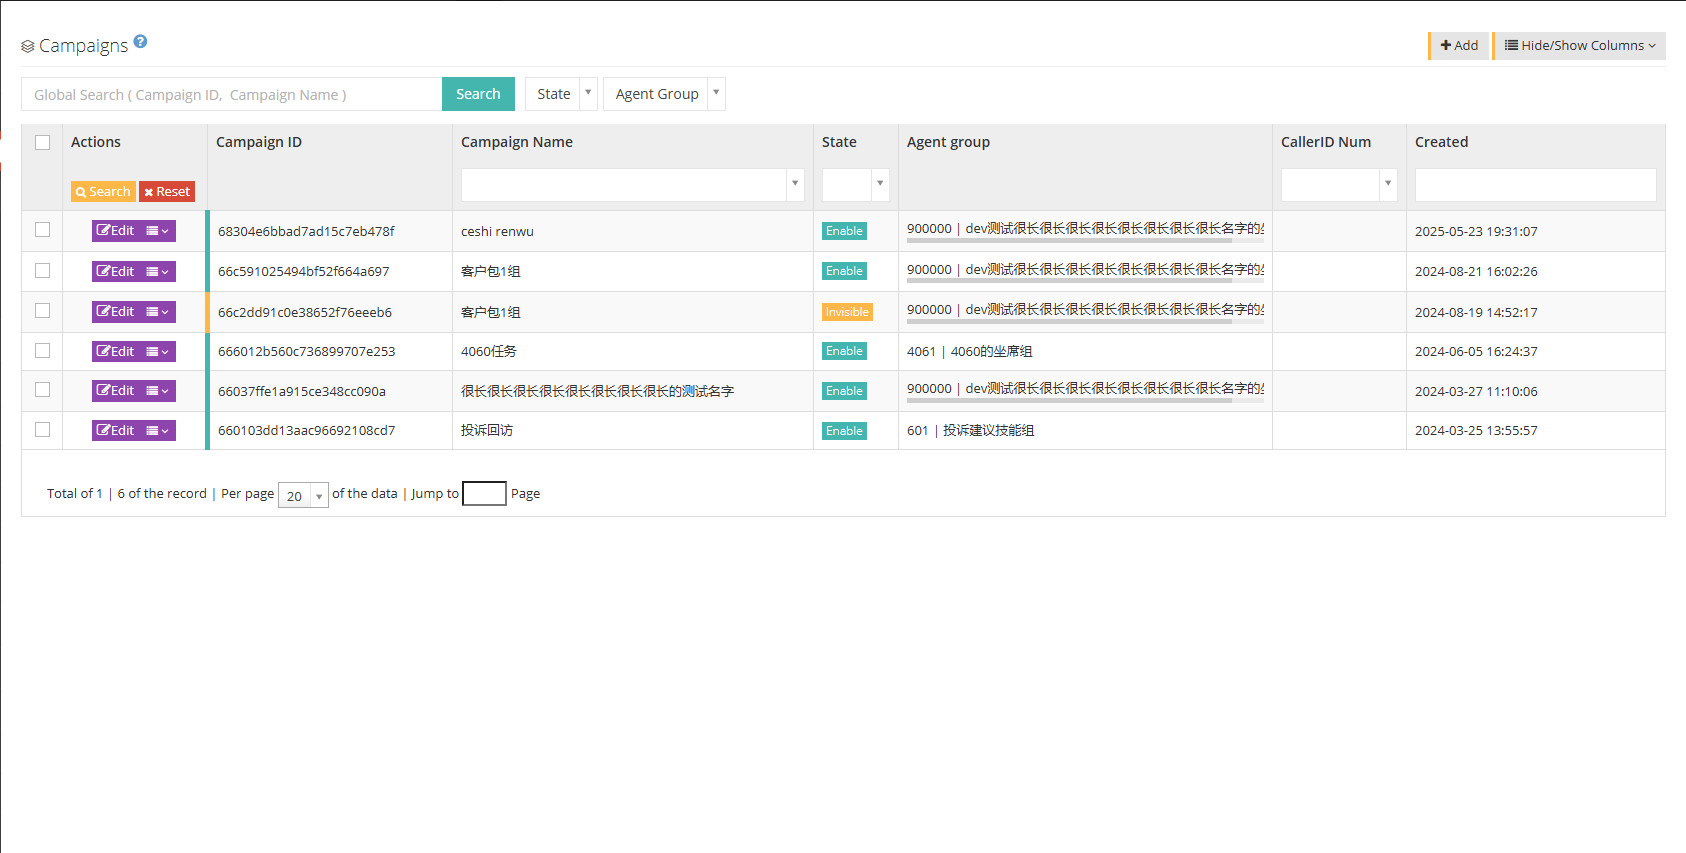
②Click [Create import task according to current settings] to complete batch upload of data. The data upload status will be displayed in real time in the upper right corner of the page. After the upload is successful, click [Return] to return to the customer data page.

3.3 Add to the banned call list
Adding the customer to the ban call list will give you a choice of highlighting.
Adding highlighted customer data will display a no call flag on the customer data page, but the number under that customer data will not be displayed in the call-ban list.
If you do not add highlights, just add a no-call. This number will not display the no-call flag. The prohibited number will be displayed in the no-call list.


After logging in, you can see that the pop-up screen of this customer is marked as highlighted, and the highlighted customer cannot make calls.
3.4 Remove from the banned call list
Users can also remove highlights or remove customers from the DNC list.
【Remove highlighting】Remove highlighting of customer data.
【Remove DNC】Remove the number from the banned call list.
If a client is marked as highlighted and one number of that client is set in the no call list, if only one type of no call is deleted, the other no call will still take effect.

3.3.4 Call history
1 page introduction
All call records on the system exist on this page. The list shows all call customer records of the client seat under the client. Users can choose the department or the time and tasks of the recent call to view. On this page, you can also listen to the call records between the agent and the customer. Users can also use tools to export call records in batches.
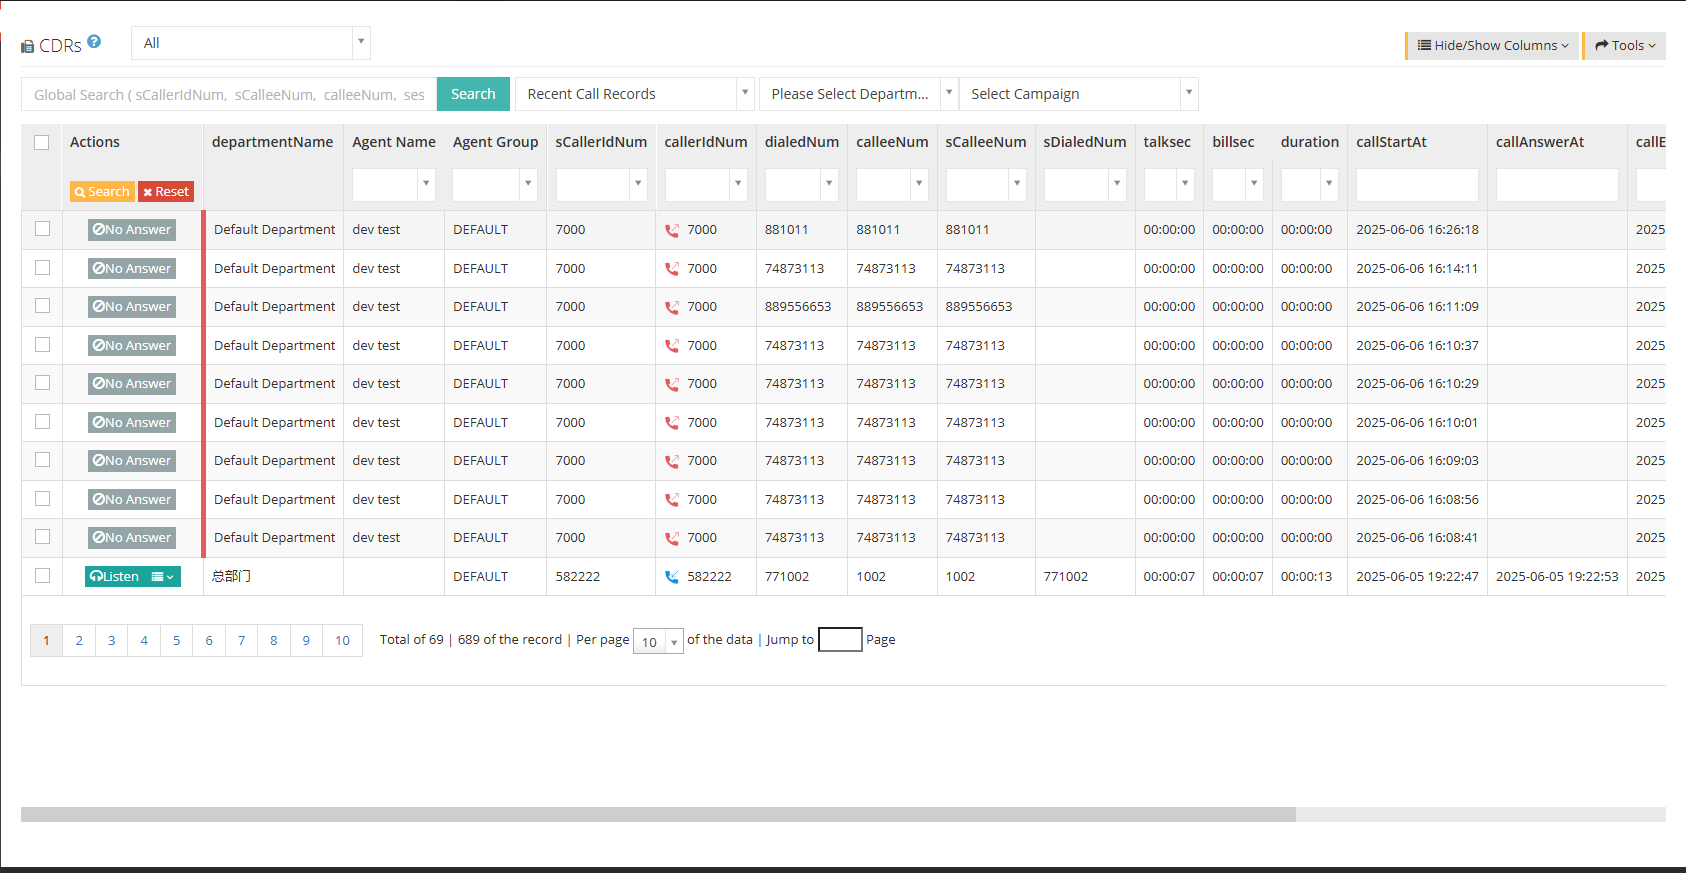
[All] in the above figure can filter call records by all, default customer packages and customer packages.
[Search] Users can query the call records based on the original calling number, the original called number, etc.
[Recent Call Records] Users can search for call records for the past six months.
[Please select a department] Select the department to query the call history.
【请选择任务】选择需要查询电话记录的任务。
【Show/Hide Field】Set the fields that need to be displayed or hidden on this page.
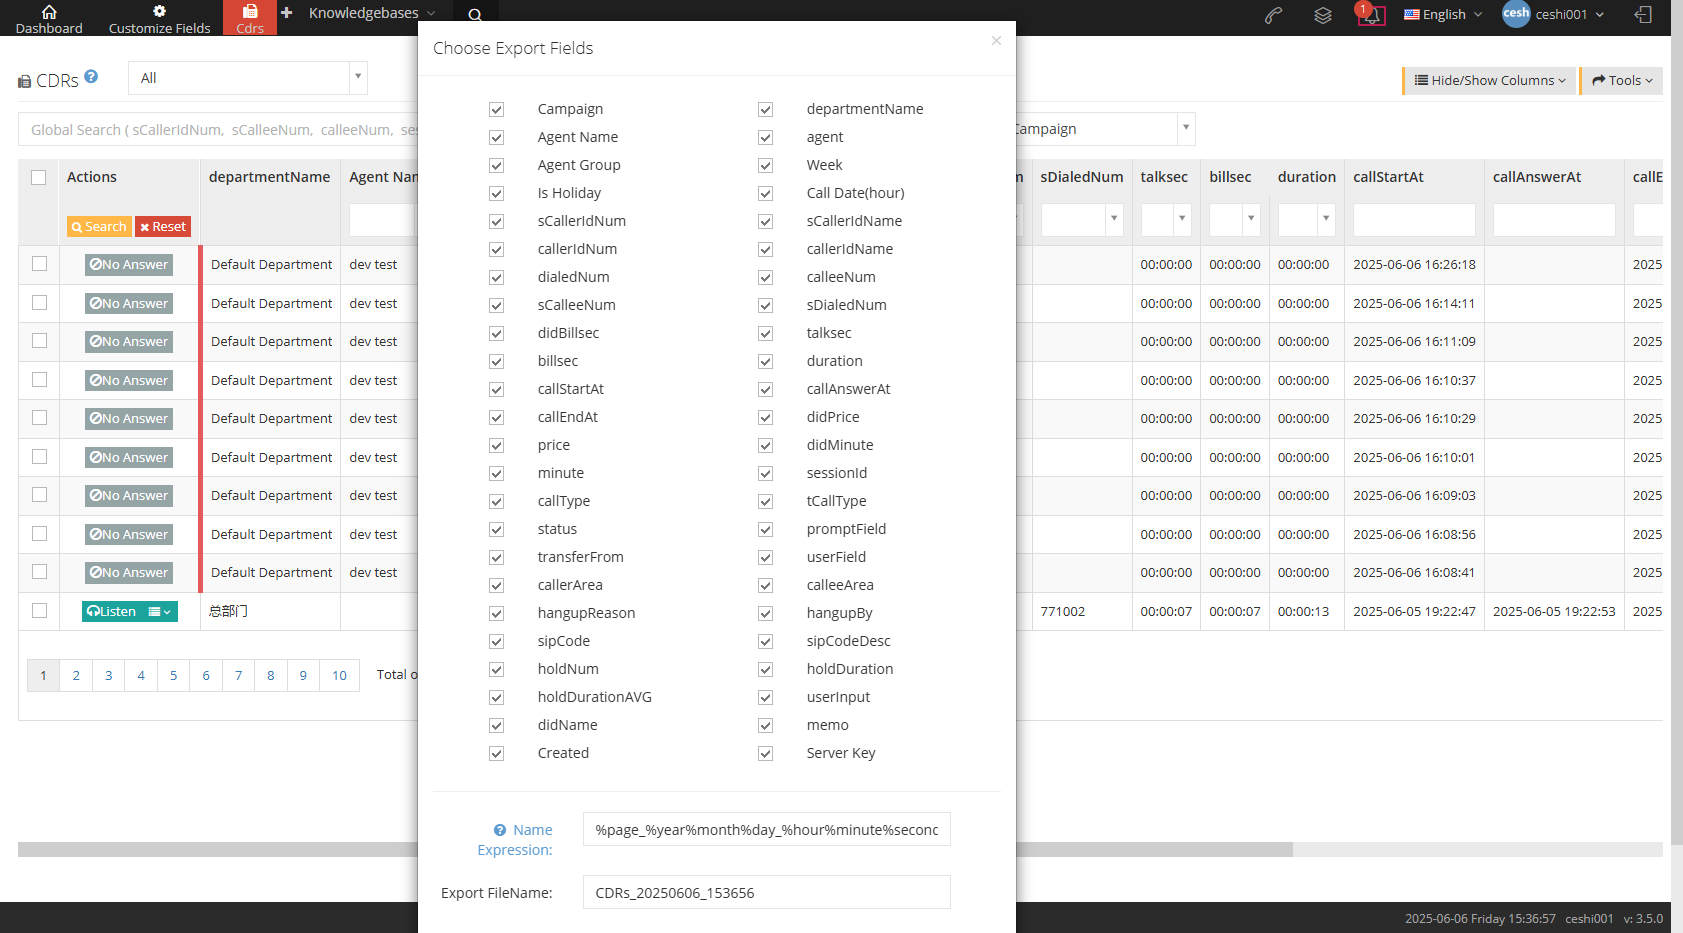
【Tools】The user can choose to export the CSV file by calling history.
[Address] Click to listen to the player that will display the recording above the call record. Users can choose to step in or slow down the playback speed of the recording.
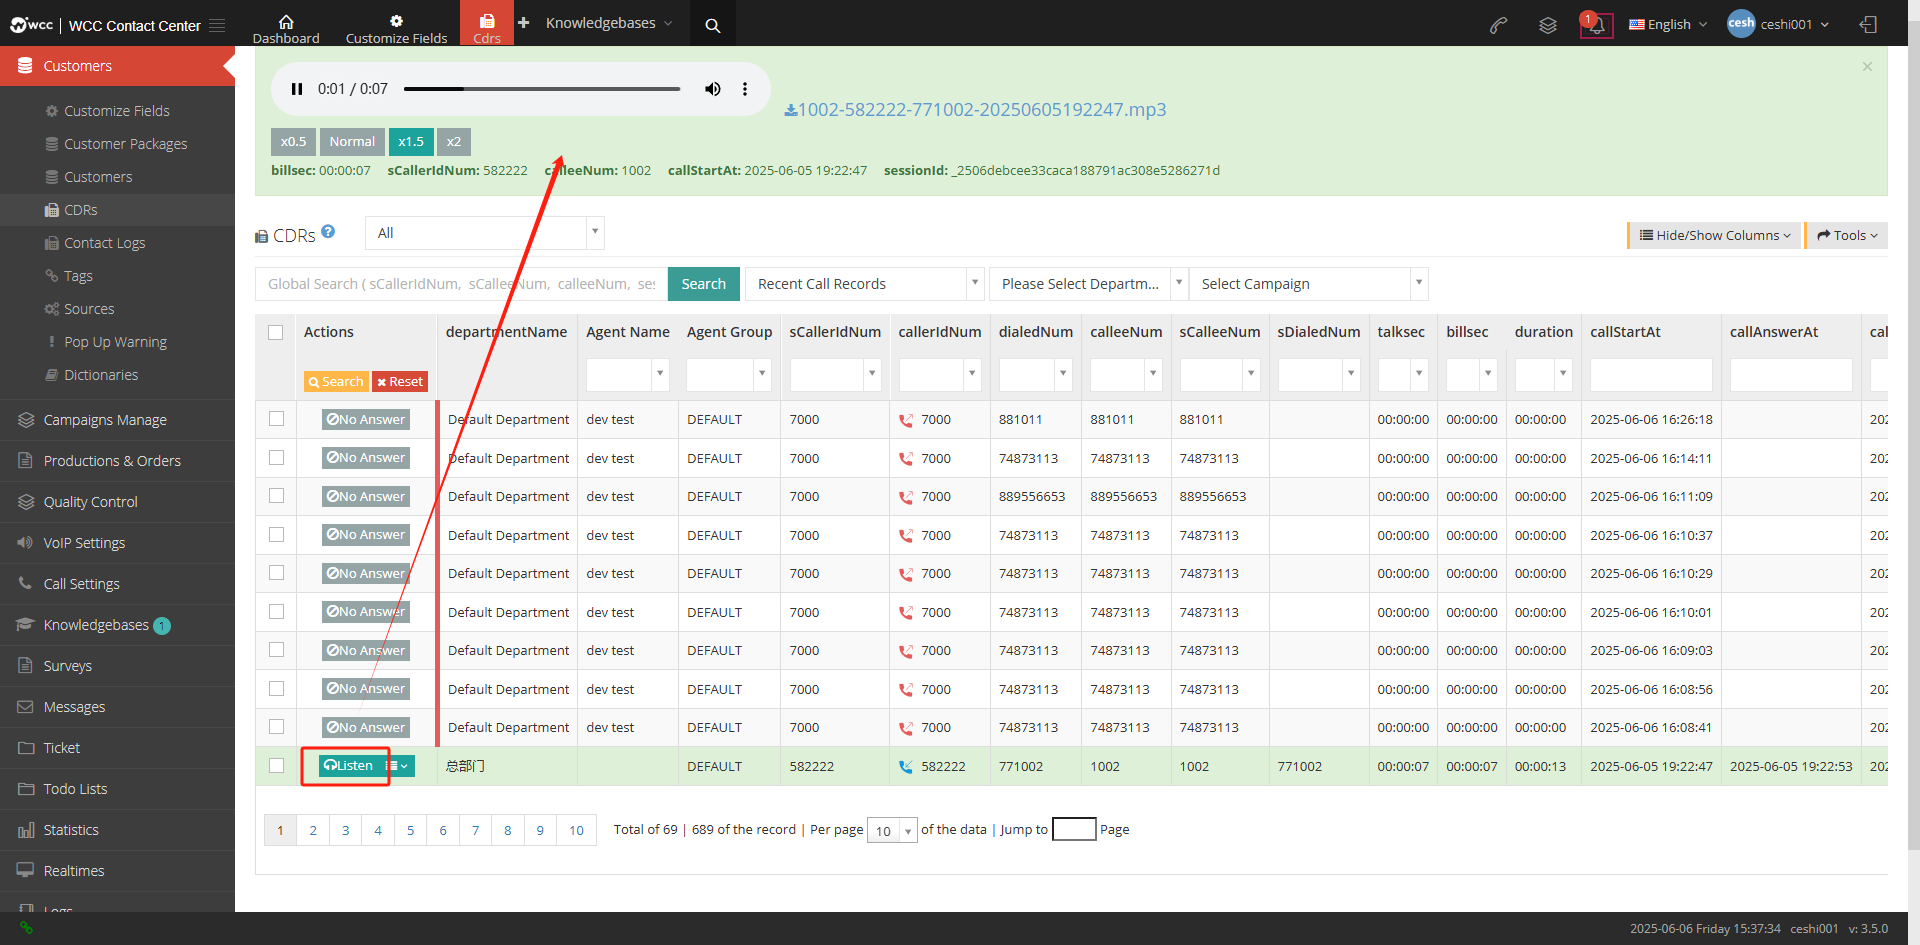
[Drop-down menu] Click to download the recording.

Show/Hide Fields
Task Name: The task name of the call.
Department name: The department to which the call belongs.
Casual name: The name of the casual name to which the call belongs.
Agent: The seat number of the call belongs to.
Seat Group: The seat group number to which the call belongs.
Weekly: What day of the week to call.
Is the holiday: Whether the call date is a holiday.
Call date (hour): At what time did the call be called on the day (statistics are made until the hour, for example, call at 18:20, then it will be displayed as 18:00)
Original Calling Number: Original Calling without any prefix when outgoing calls.
Original Calling Name: The original caller name without any prefix when calling out.
Actual calling number: The number displayed when the call is finally called.
Actual caller name: The name displayed when the call is finally called and released.
Access number: The access number with no prefix added when the client calls in.
Actual called number: the number that finally answers the incoming call.
Original called number: The original number that answered the call.
Original access number: Access number without any settings.
DID billing time: DID number billing time.
Call duration: The duration of the call that was answered for this call.
Billing time: call billing time.
Total duration: The time of this call.
Call start time: The time when the call starts.
Call answer time: The time when this call was answered.
End time of call: The end time of the call being hung up.
DID billing: The timely fee for the DID number of this call.
Outgoing billing: billing for outgoing calls on this call.
DID deduction minutes: the duration of the DID number deduction for this call.
Exit Deduction Minute: The deduction time of this call.
Call unique identifier: When a call starts, a call unique identifier will be generated.
Call Type: View call history according to the type of call.
Transfer type: View call history according to the transfer type.
Call result: The call result is displayed if the call is connected or not answered or the call failed.
Voice prompt information: a kind of prompt information from voice to text.
Transfer to: Shows where the call is transferred from.
Customer custom content: content defined by the customer.
Calling area code: The region code set by the system is set at the root level. After setting it, it matches this number and the calling area name will be displayed.
Called Region Code: The called party’s region code is set at the root level. After setting it, the called region name will be displayed.
Reason for hanging up: The reason for hanging up the call.
Hang-up party: Which party hangs up the phone?
SIP encoding: It is mainly used to judge the problem of calling, such as 200 is a normal call, and L415 is the outgoing call file that does not match.
SIP encoding description: a description of SIP encoding.
Number of hold times: There is a hold button during the call to calculate the number of hold times.
Total duration of holding: Calculate the total duration of holding status during a call.
Maintain average duration: Calculate the average duration of holding state during a call.
Customer key input: Customer key input example according to voice prompts: Prompt input in IVR.
DID name: The name of the DID number set in the system.
Note: Notes for this call
Created date: The date of creation of the call.
Server: The server where the call is located.
Note: When logging in, login from a high-level login. If you select “Yes” when logging in, you will also have three fields: [Access Number Alias], [Access Number Alias Region], [Relay Name] in the call history.
Call type/hook-up reason
3.1 Call Type
Call in
Out out
Call on both ends
Pre-dial
Inside
Voice notification
Play the sound and receive the number
Forced insertion
Secret Word
monitor
Get it
Residence
Call Forwarding
3.2 Reason for hanging up
Connected: The call is connected.
No answer: Call in to the seat that is not online.
Call failed: The outgoing error number (the outgoing call cannot match the outgoing call file).
Blacklist: This number is set in the blacklist.
Number of calls limits: The system has set a limit on the number of calls, and will prompt when the limit is reached.
Called: If the caller is on the call or refuses to call, it will be displayed.
Called Denied: When calling a special model of sip phone (such as Polycom), it will be displayed when the phone refuses to connect.
The caller hangs up early: The wrong number was called, but the number can match the corresponding outgoing call file.
Caller hangs up early: Canceled and there may be residuals of old data.
Call timeout: The call (in and out) is to the online agent or client, but the agent or client is not connected until the timeout is hung up.
Queue waiting to exit: When the call is in the queue, the client hangs up when the agent is waiting in the queue for the call to be answered.
Queue timeout: When a call is in the queue, the client waits in the queue for the agent to answer the call until the queue timeout time and the call is hung up.
Empty queue prohibition: Set in the queue, call in is not allowed when there is no agent check-in.
Empty queue overflow: The queue is set to allow entry into the empty queue and allow automatic exit of the empty queue.
Quantity queue overflow: When the call incoming queue calls exceed the maximum queues set by the agent group, the call is hung up.
Identification error: Chinese-specific identification of voices returned by the operator (not available at the moment).
Shutdown: Chinese-specific recognition of voices returned by the operator (not available at the moment).
Shutdown: China-specific identification of voices returned by the operator (not available at the moment).
Other: Chinese-specific identification of voices returned by the operator (not available at the moment).
Call Error: China-specific identification of voices returned by the operator (not available at the moment).
Forward: Chinese-specific identification of voices returned by the operator (not available at the moment).
队列无可用坐席退出:队列开启了无可用坐席溢出并挂断
3.3.5 Contact history
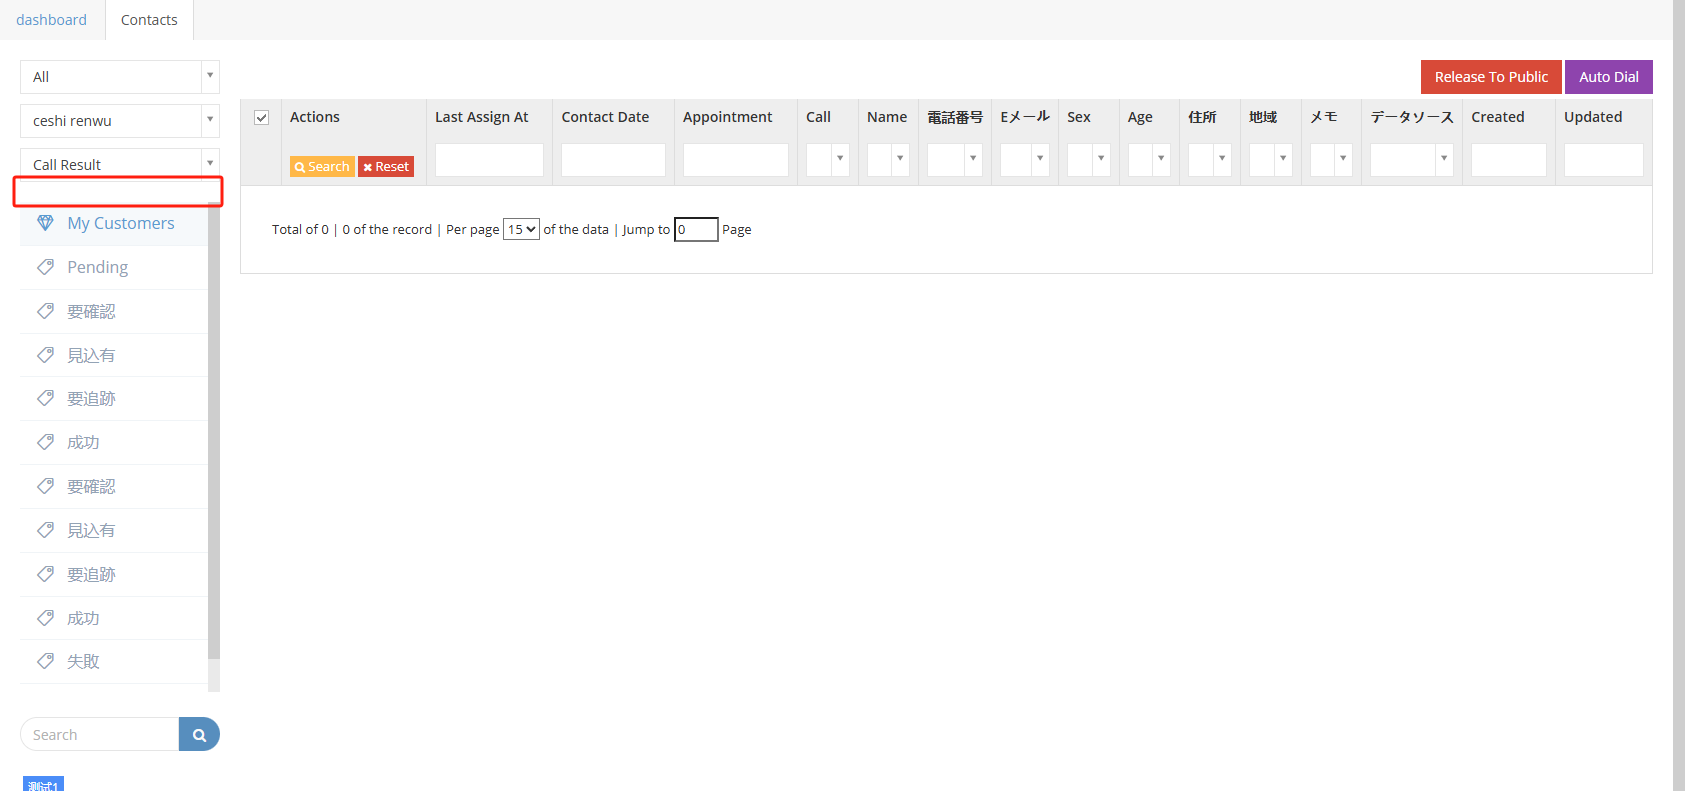
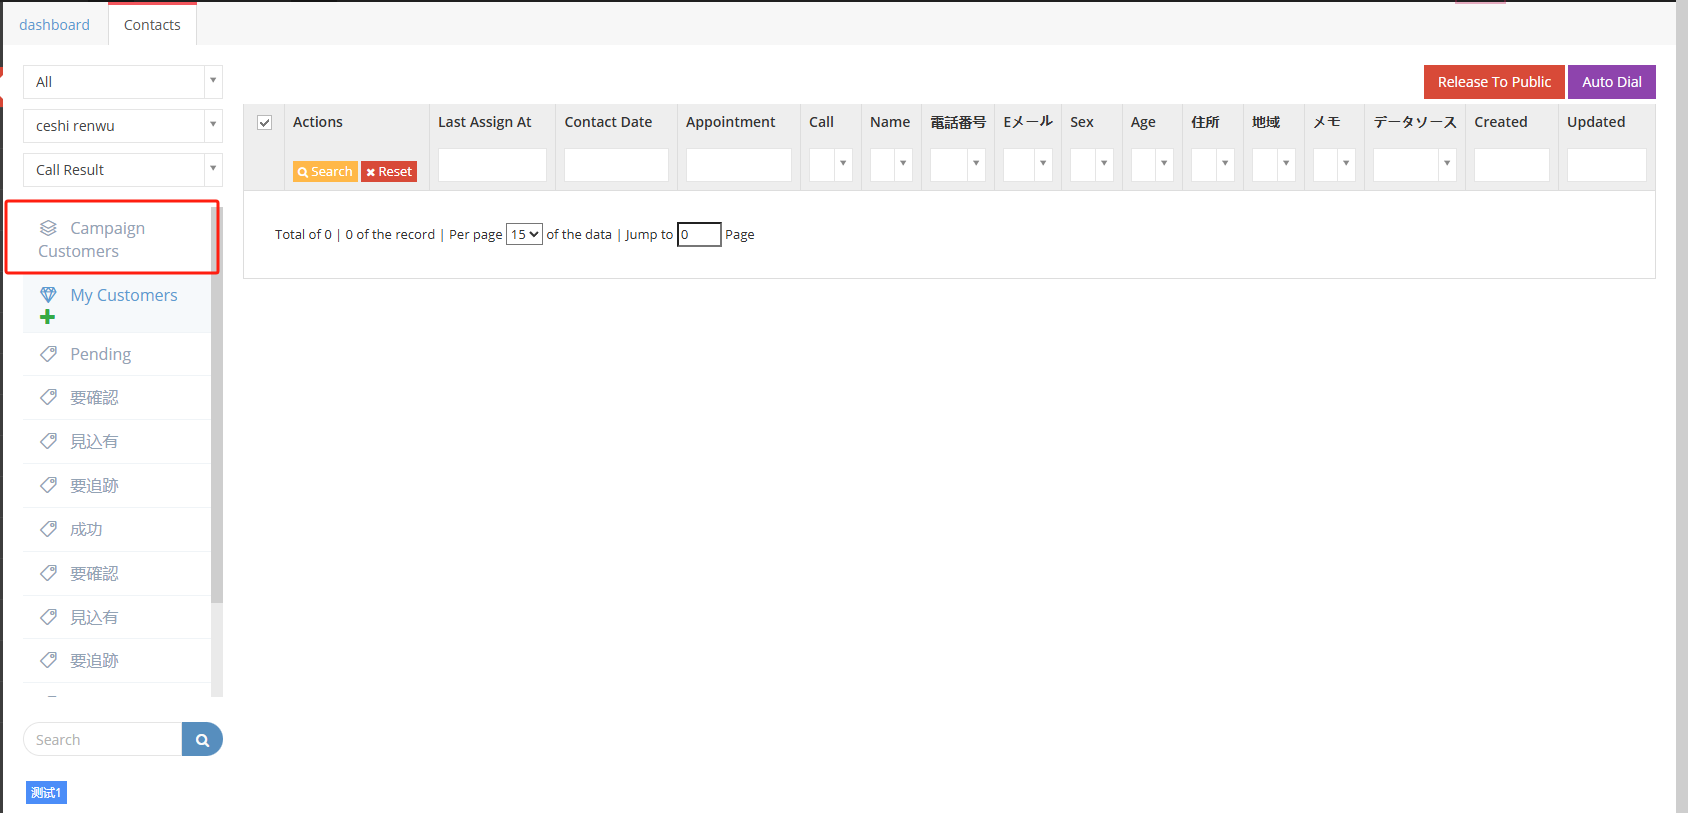
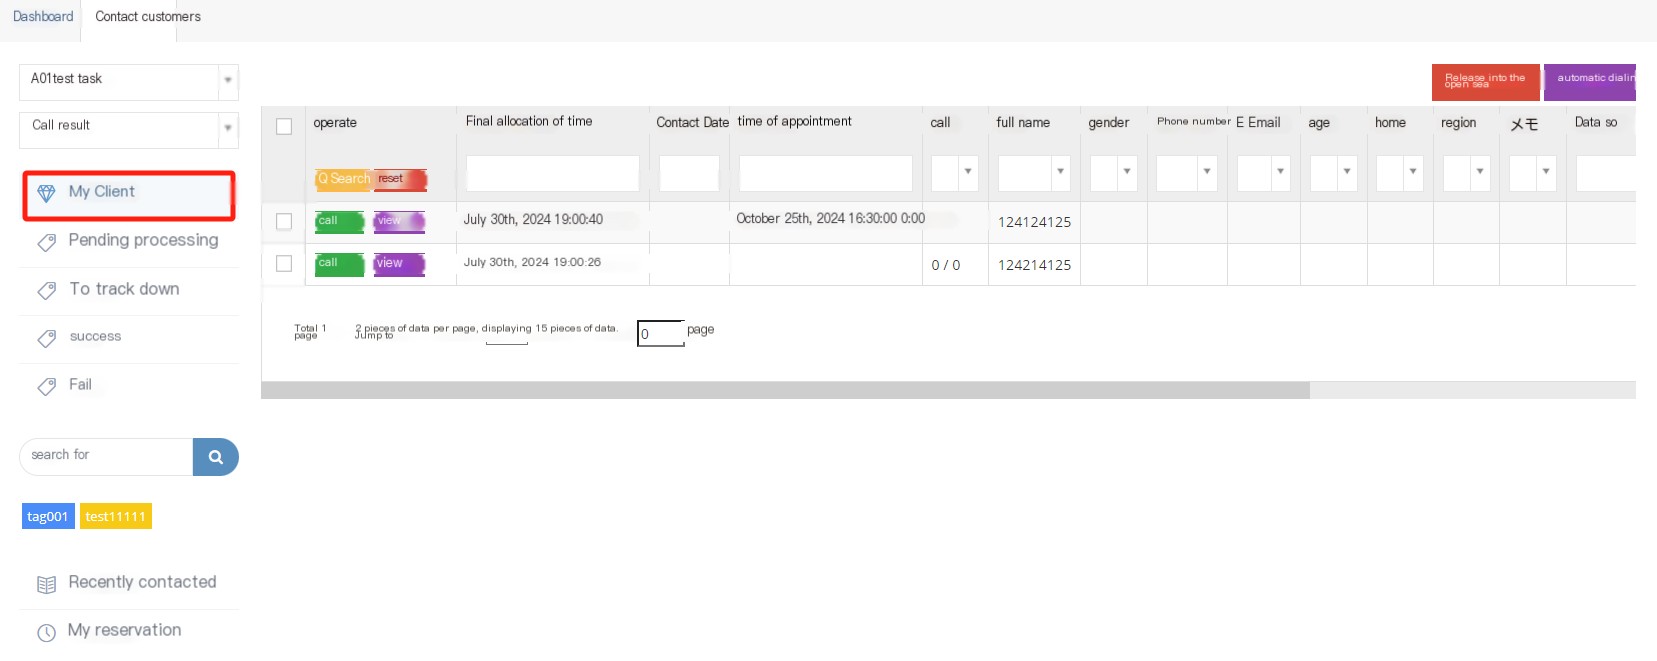
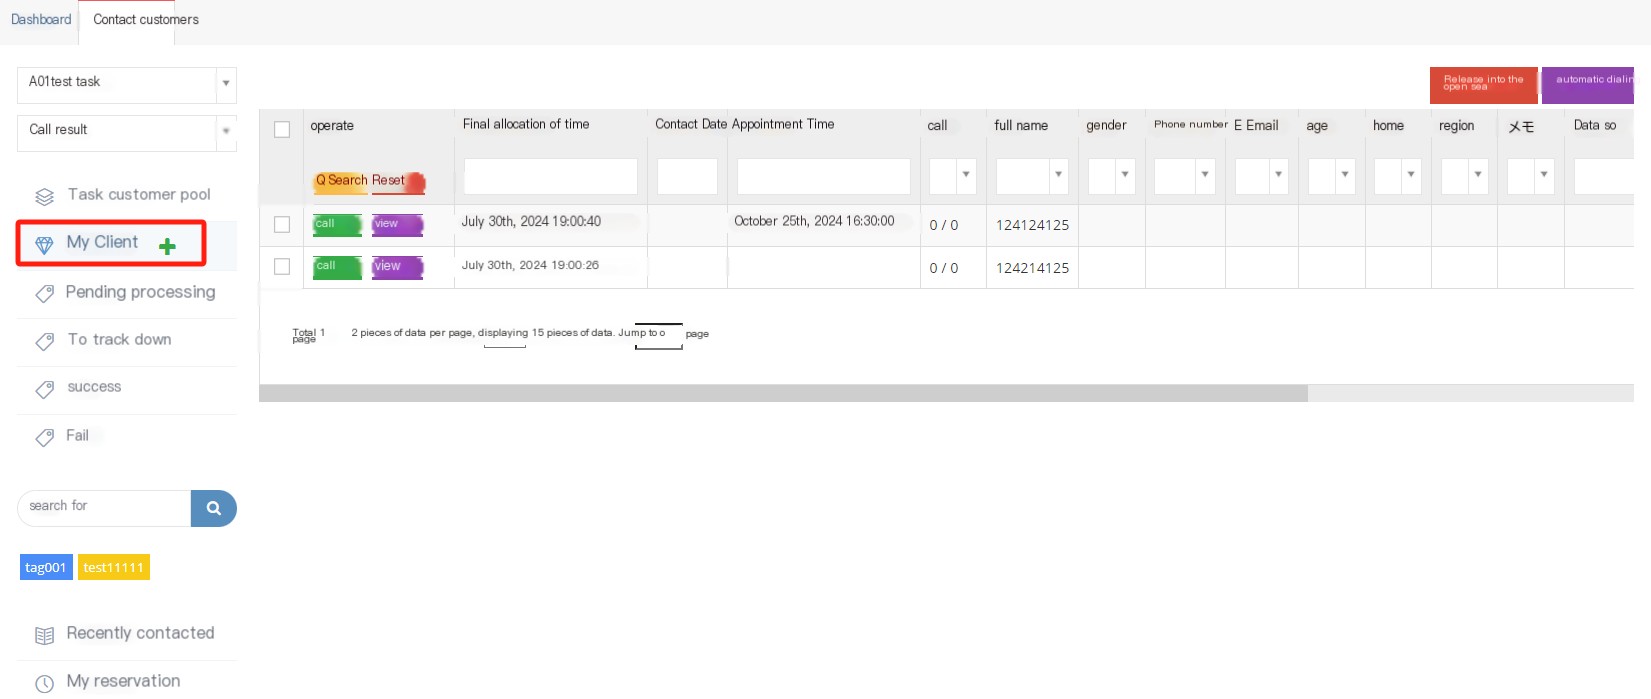
1 Contact record page introduction
Contact Records Different from call records, contact records are feedback on the call history of the agent and the customer after the call is called, including the call results, call status, call seats, data sources, etc. of the agent and the agent.
The contact record holds the record of the agent and the customer’s call by default. As long as the agent connects to the call with the customer, a default contact record will be generated; if the agent manually sets the sales funnel and call results for the customer, two contact records will be generated. The contact record generated by the manual settings will display the agent’s name and call results, call status, call seat, data source, etc. records.
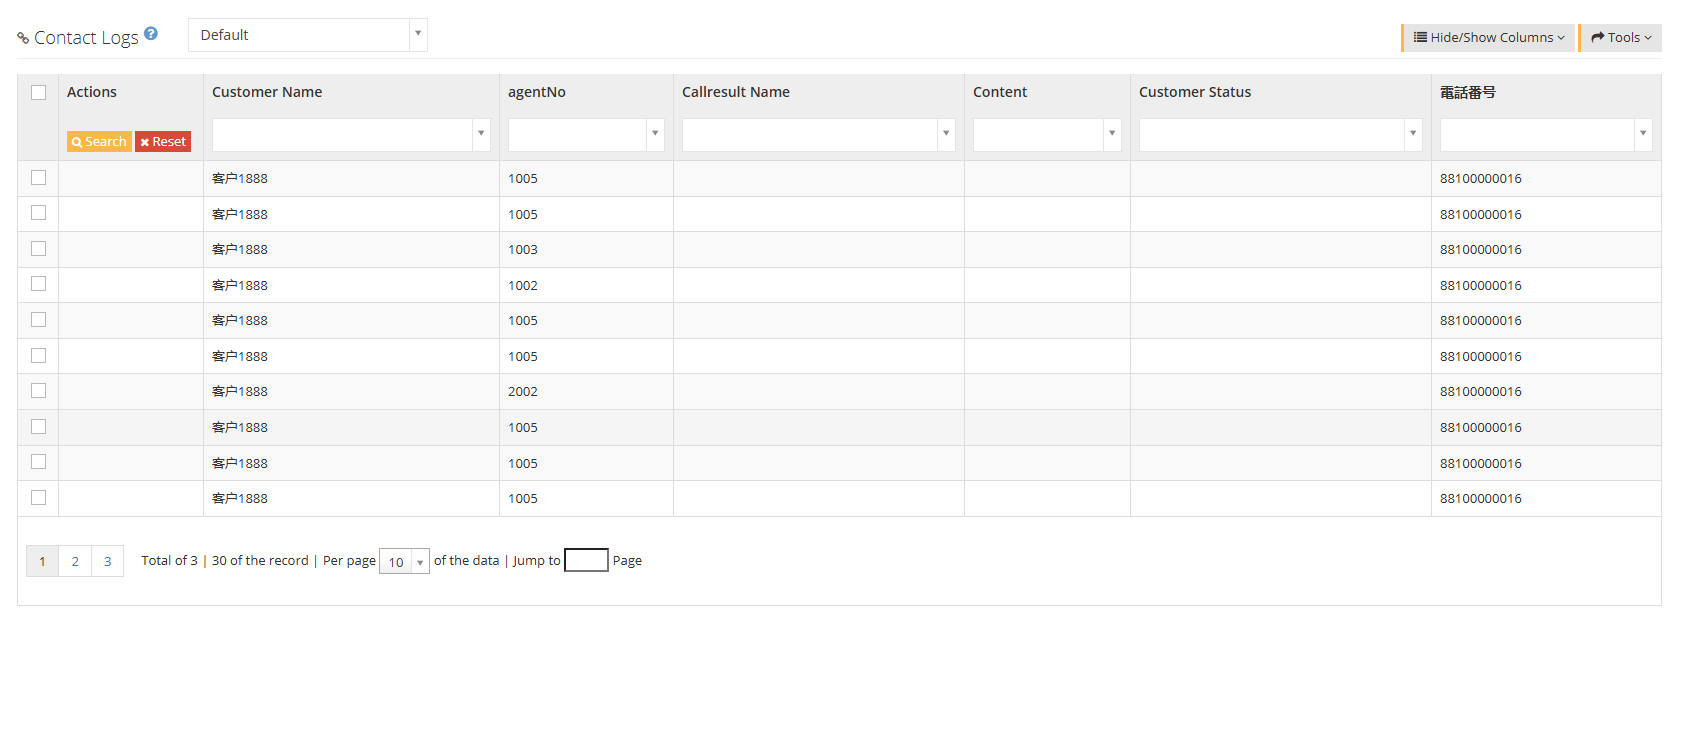
The [Default] in the above picture can filter the contact records by default and customer package.
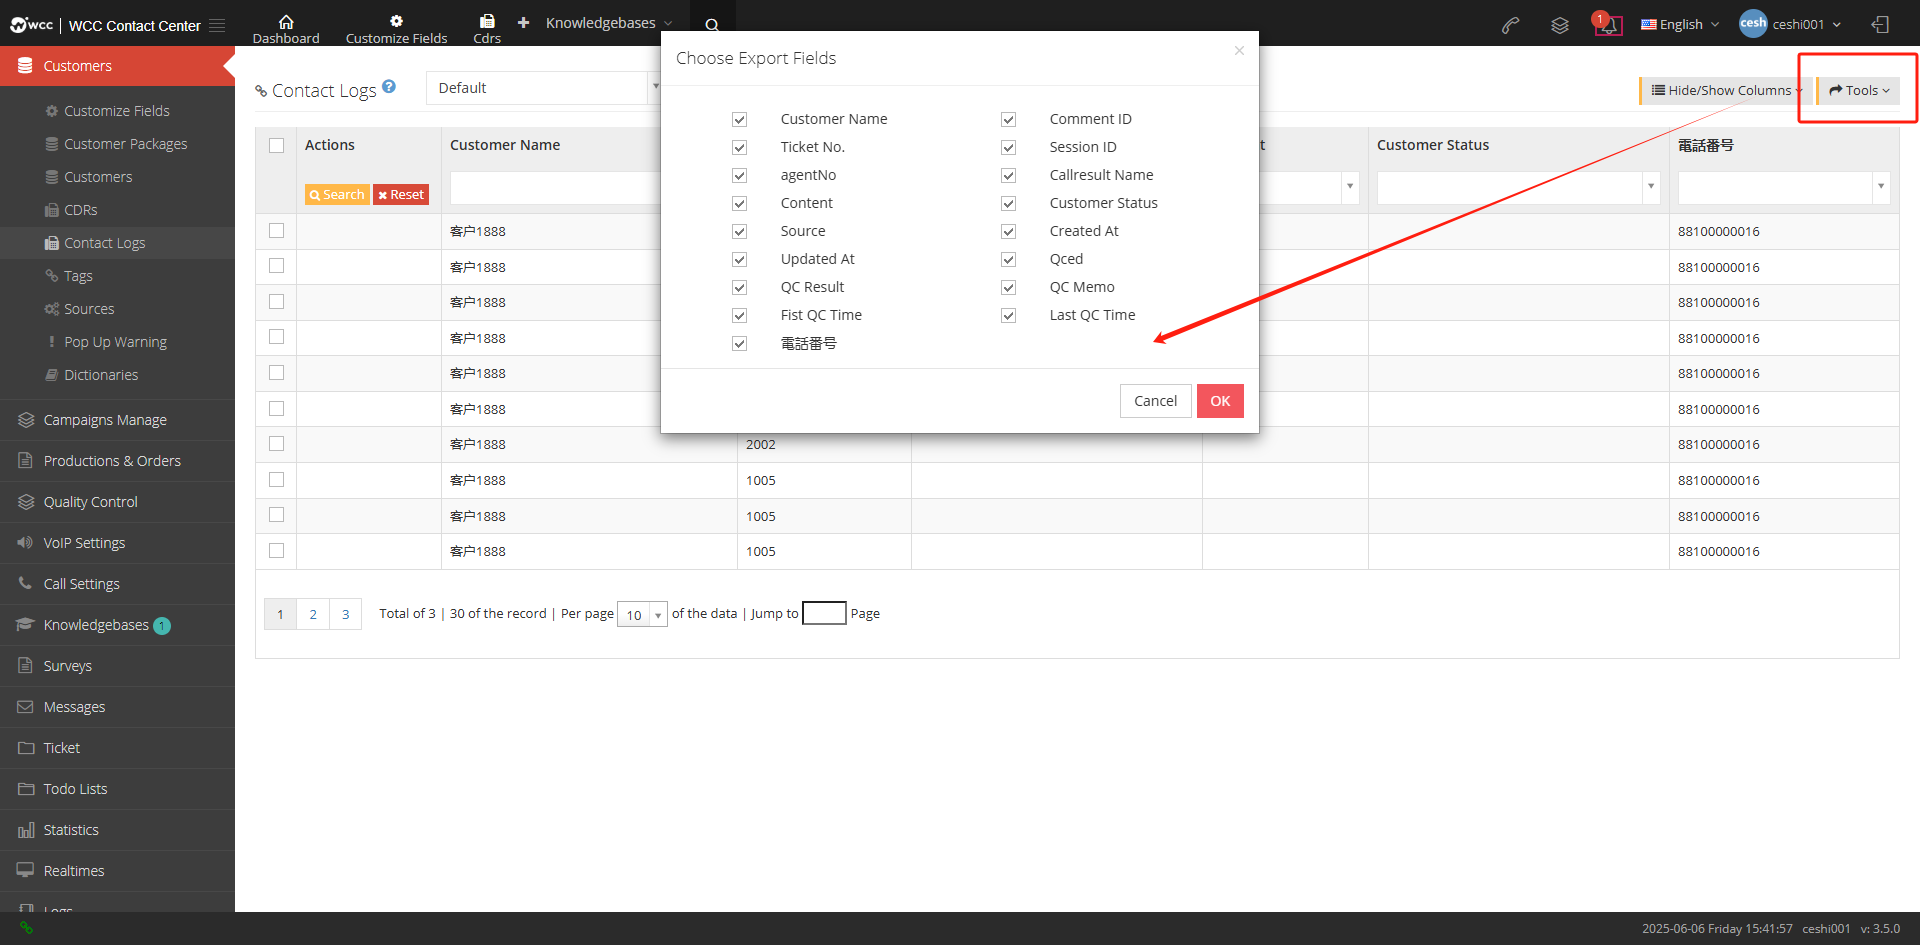
[Show/Hide Fields] Select the field to be displayed or hidden on this page.
【Tools】Export files in CSV format.
2Show/Hide fields
Name: The name of the customer in this contact record.
Contact record ID: Each customer’s contact record has a unique ID.
Work order number: All work order numbers in this contact.
Unique ID for call: The unique ID for this call.
Casual Work Number: Casual Work Number that keeps the contact record.
Call result: The call result of this contact record (save by the agent).
Contact Notes: Notes for this contact record.
Customer Status: The sales funnel selected for this contact record.
Data source: Source of contact records.
Creation time: The creation time of the contact record.
Update time: This contact record will be updated during the call status.
Whether to be quality inspection: Whether this contact record requires quality inspection.
Quality inspection results: The quality inspection results of this contact record.
Quality inspection notes: This contact record for quality inspection notes.
First quality inspection time: This contact record the time of the first quality inspection.
Last quality inspection time: This contact record the time of the last quality inspection.
Phone number: The phone number of this contact record.
If there is a required custom field, you can also display or hide custom fields here.
3.3.6 Customer Tags
1 Page Introduction
Customer Tag is used to select different customer tags for customers, and users can find customers through customer tags.
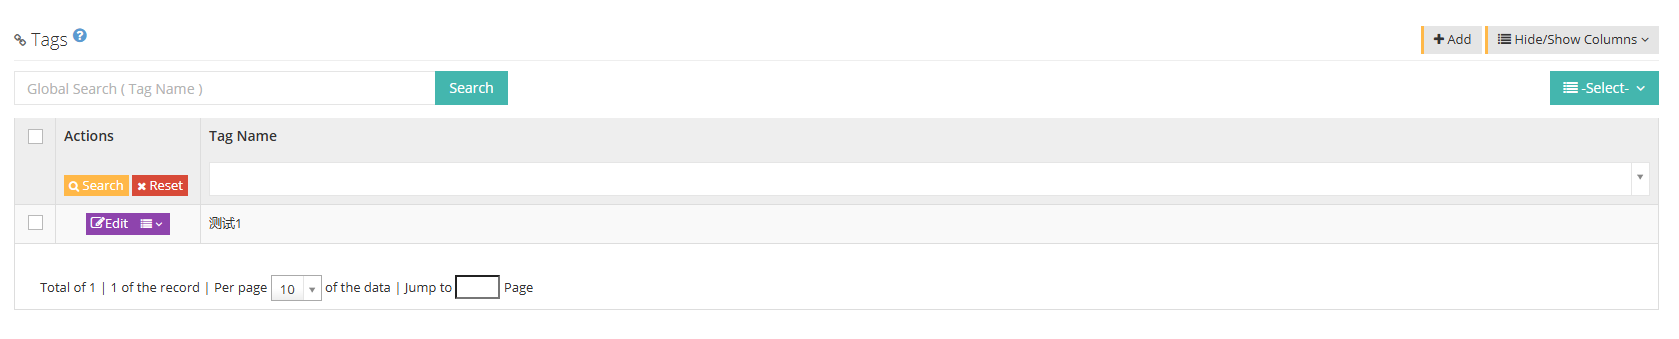
【Search】Global search only supports search using tag names.
【Add】Add a new tag name.
【Show/Hide Fields】Select the fields that this page needs to display or hide.
[Please select] Delete selected data according to conditions.
[Edit] Edit existing customer tags.
[Drop-down menu] You can delete the customer tag.
2 Add a new tag
① Click Add to enter the general interface of adding new customer tags

②Click Advanced to enter the advanced interface to add new customer tags:
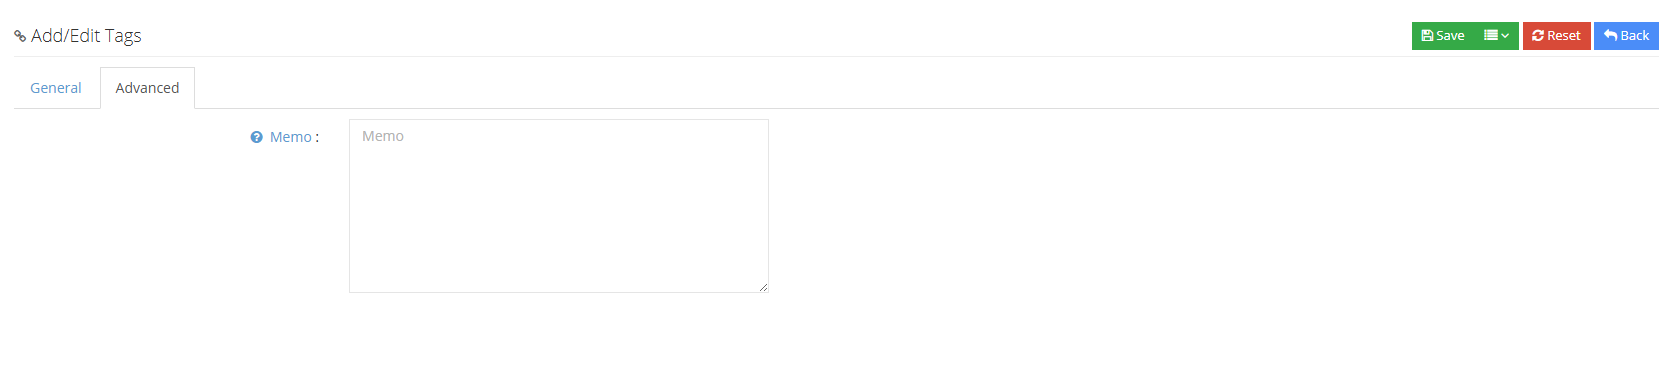
③After saving the new customer tag, you can select the customer tag in the data page of the customer data [Add/Edit Customer Data].
3.3.7 Data source
1 Page introduction
Data source refers to the data source of customer data. Once the customer data is imported, the data source will be added, marked with time and color.
A data source will be automatically generated when customer data is uploaded.
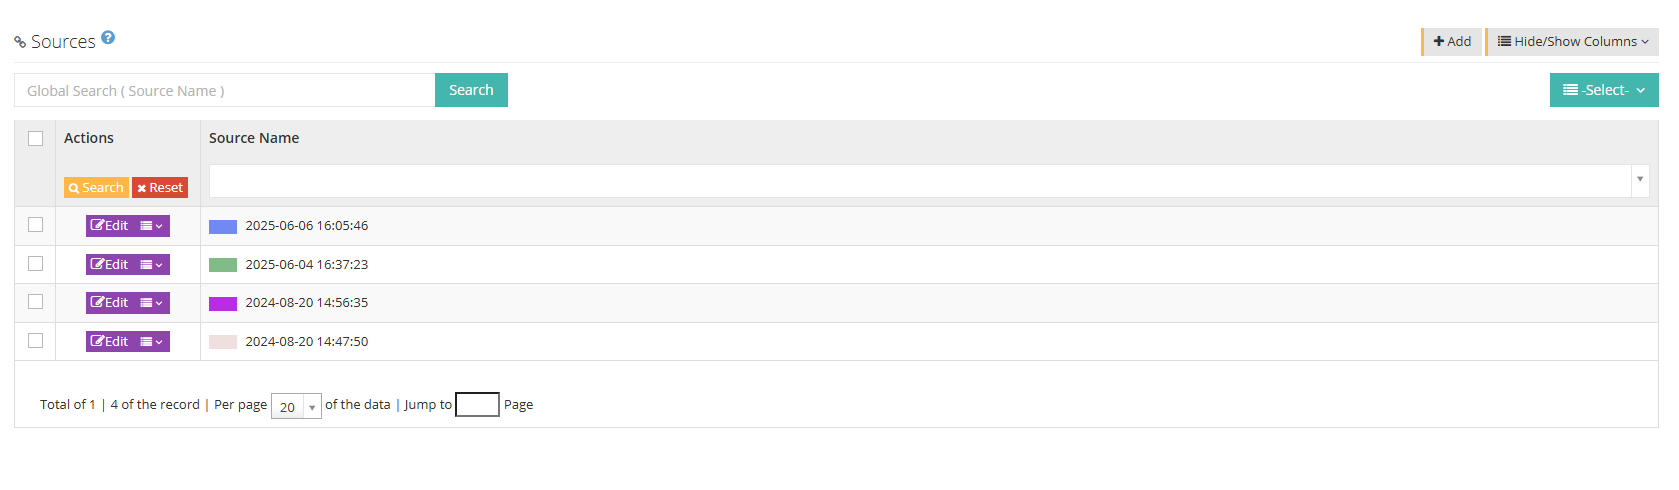
[Search] Global search only supports source name search.
【Add】Add a new source name.
【Show/Hide Word】Select the fields you want to add or hide on this page.
【Please select】Delete according to conditions
[Edit] You can edit the established data sources.
[Drop-down menu] You can delete the source of this data.
2 Add a new data source
① Click Add to enter the general page of adding/editing data source:
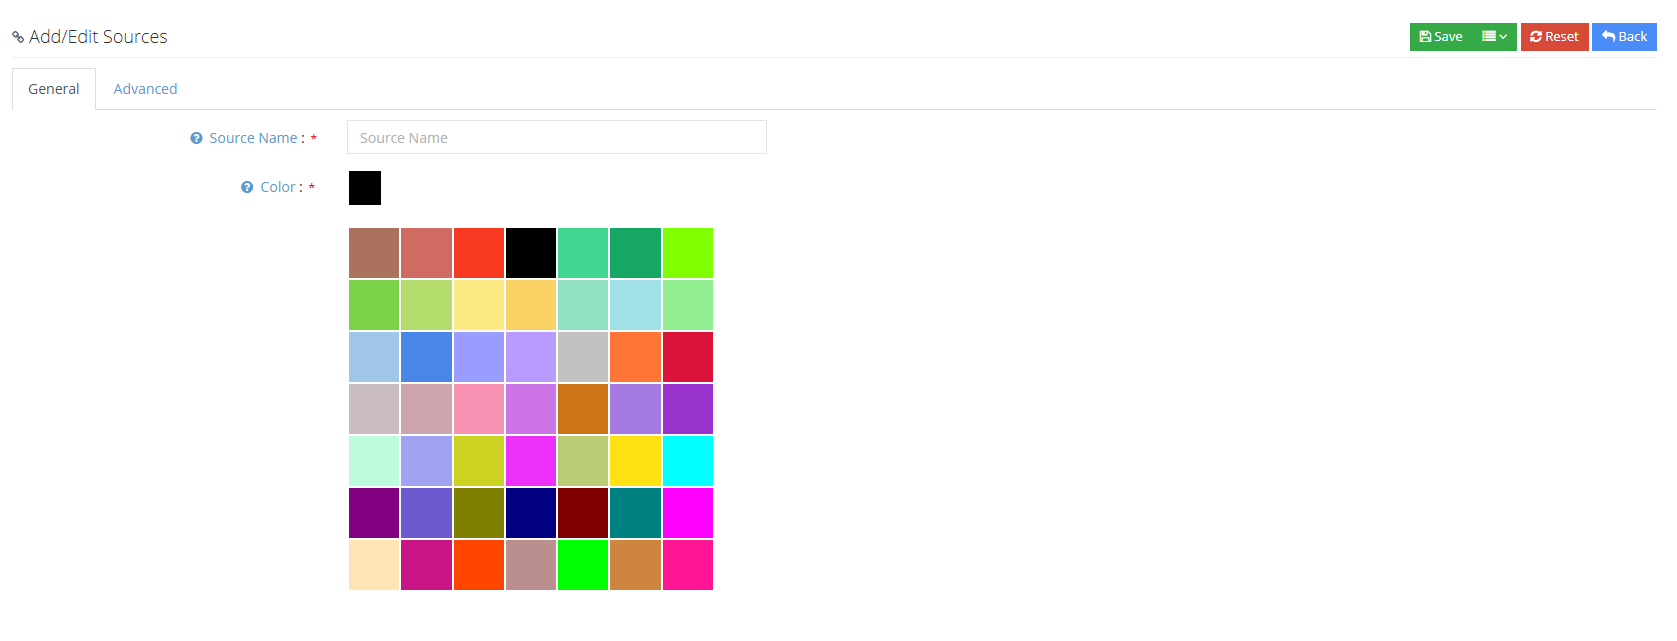
Source Name: Please enter the name of the data source.
Source Color: Please select the color of the source of the customer data.
②Click Advanced to enter the advanced page of adding/editing data source:
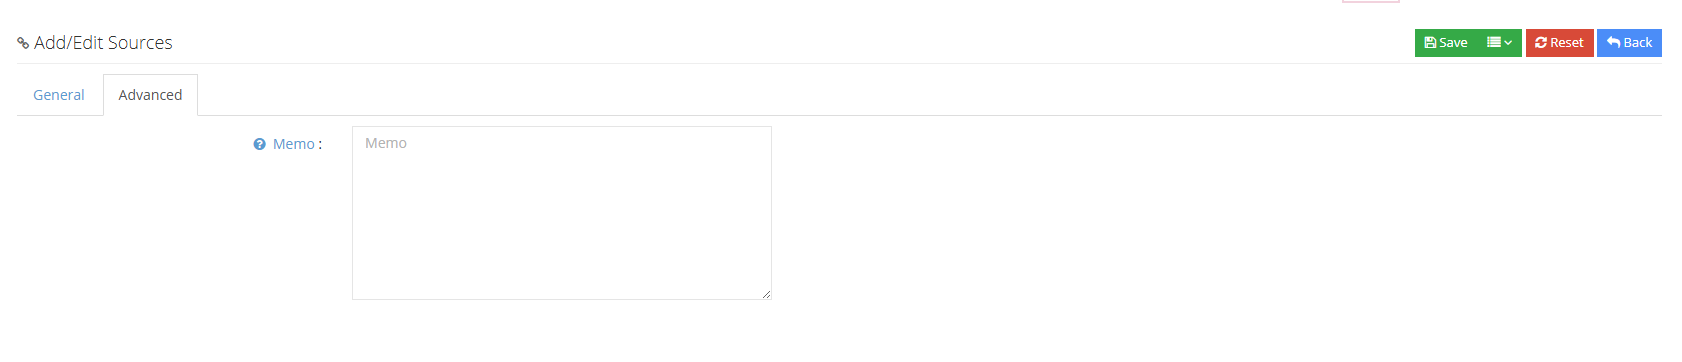
③Click to save the new data source
3.3.8 pop-up warning
1 Page introduction
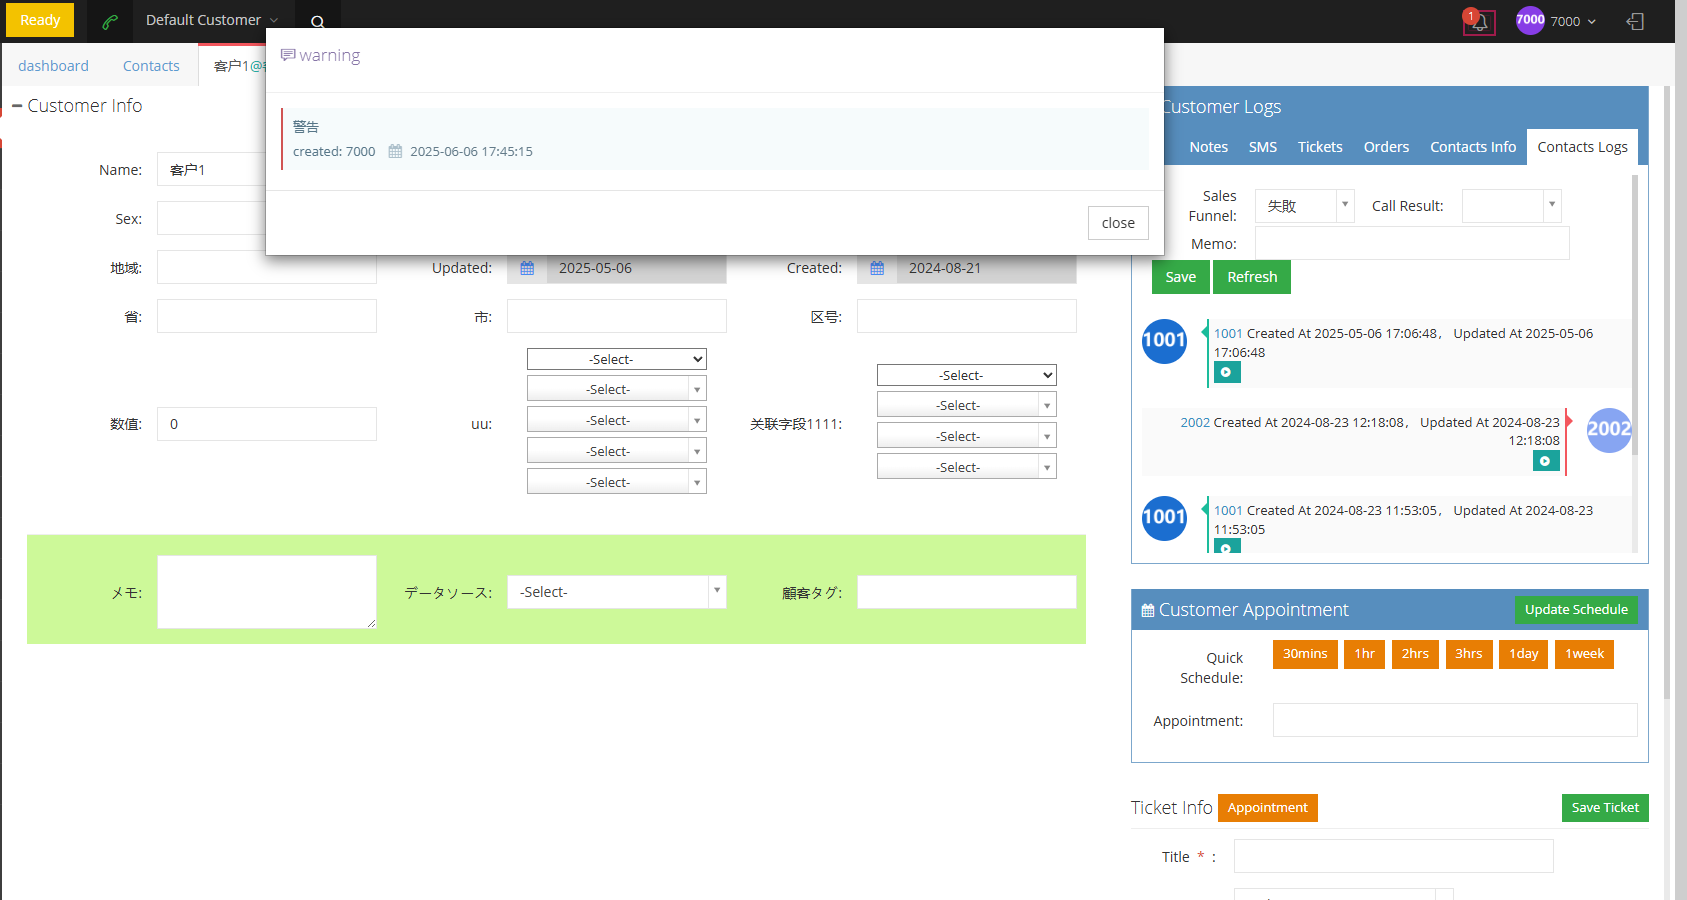
When the user sets the Popt-screen warning customer data, a pop-up reminder will appear when the agent opens the customer or dials the customer number.
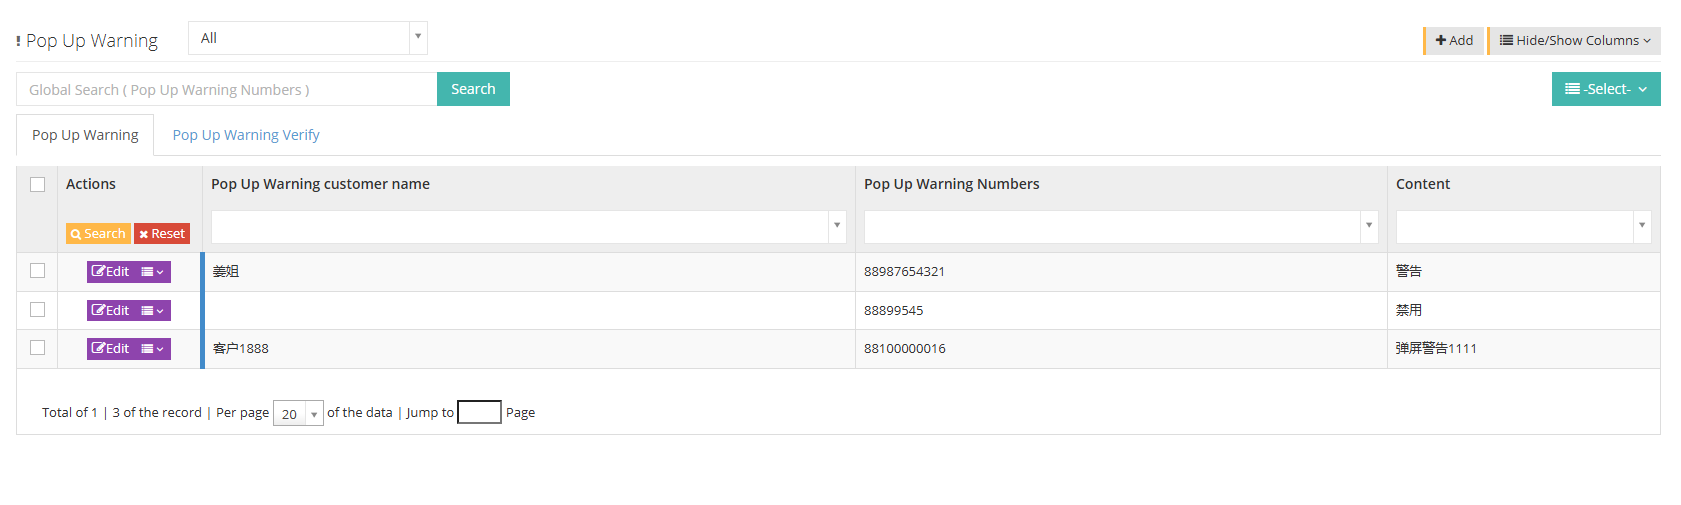
In the above picture, you can click to select the default and pop-up warning of customer package.
[Search] Global search can only be searched with pop-up warning numbers.
【Add】Add a new pop-up warning.
【Show/Hide Fields】Select the fields that this page wants to display or hide.
[Please select] Delete according to the conditions.
[Popt-screen warning] List of numbers with pop-screen warning.
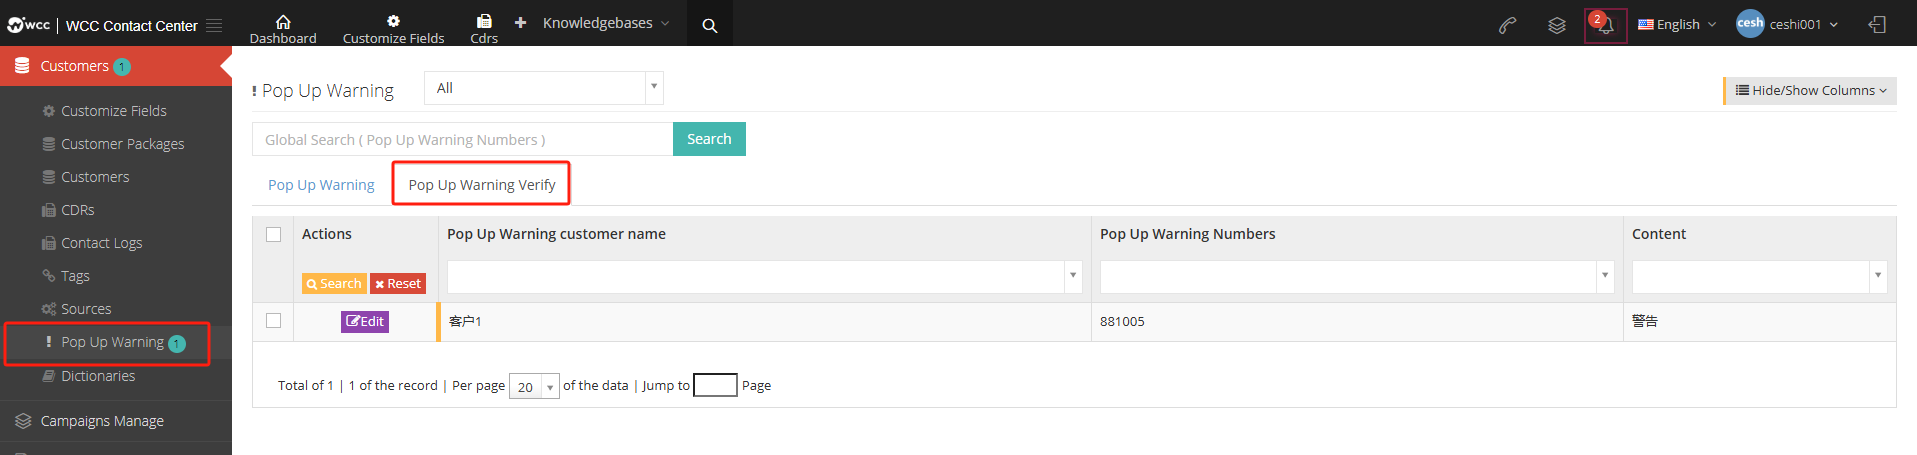
[Popt-screen warning review] The agent submits a list of pop-screen warning numbers that need to be reviewed.
2 Add a pop-up warning
2.1client user adds a new pop-up warning
① Click Add to enter the Add/Edit pop-up warning general page:
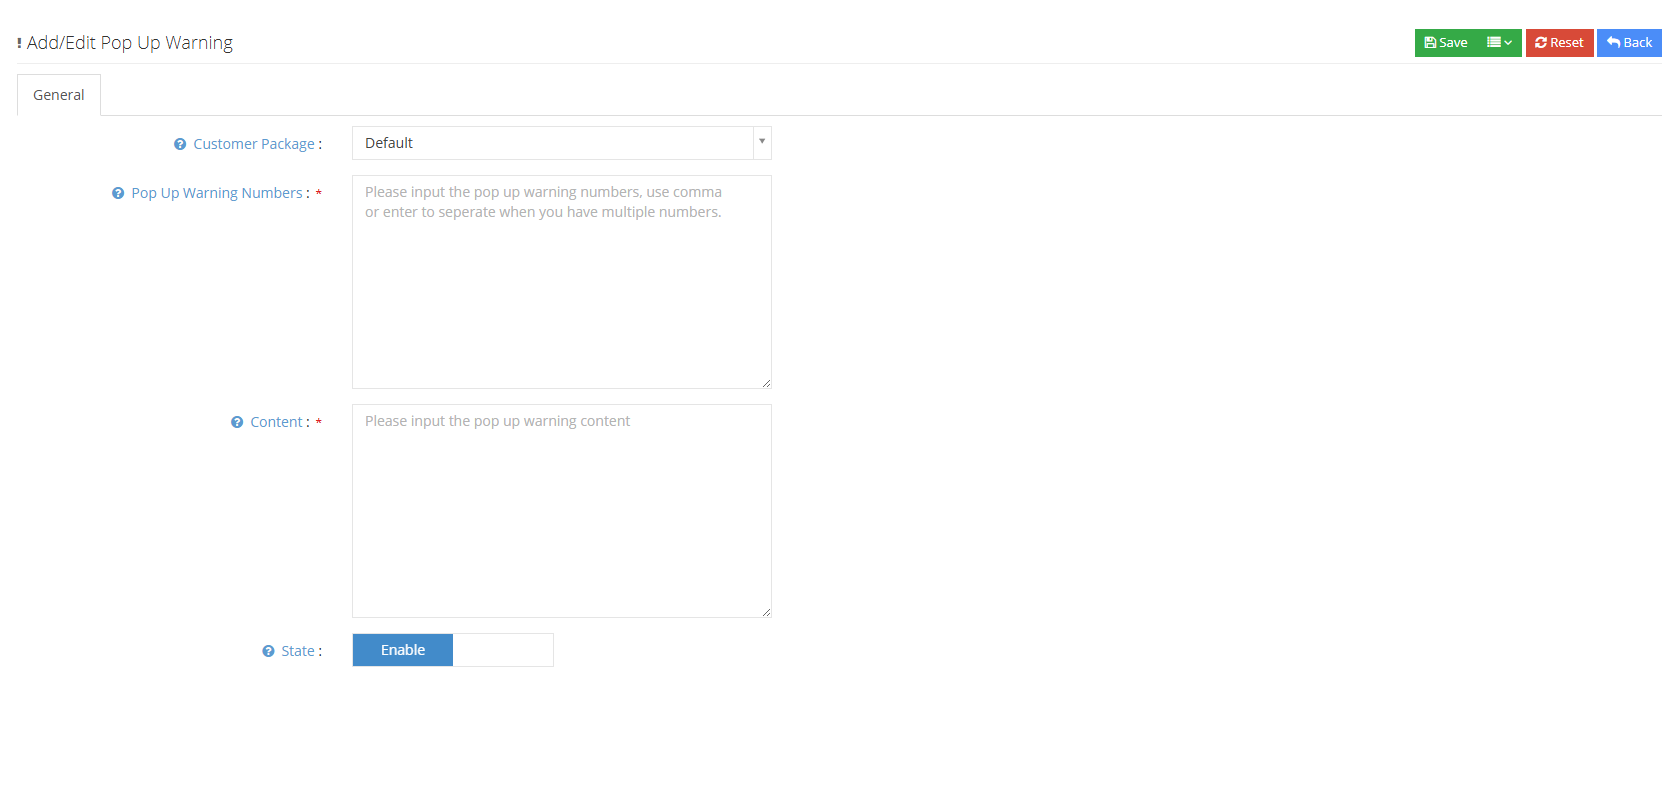
Affiliated customer package: Current customer package.
Popular screen warning number: Enter the pop-screen warning number, and you need to separate it with English commas or enter when entering batches.
Content: Please enter the pop-up warning content.
Status: Select the usage status of pop-up warning.
② Click Save to add a new pop-up warning.
2.2 Add a new pop-up warning to the agent
If the client user does not set the audit permission for pop-up warning for the agent role, then adding pop-up warning on the agent page must be successful before the client can take effect.
① The seat is on the customer information page - customer related records - note - add notes - note type Select pop-up warning, add pop-up content - confirm.
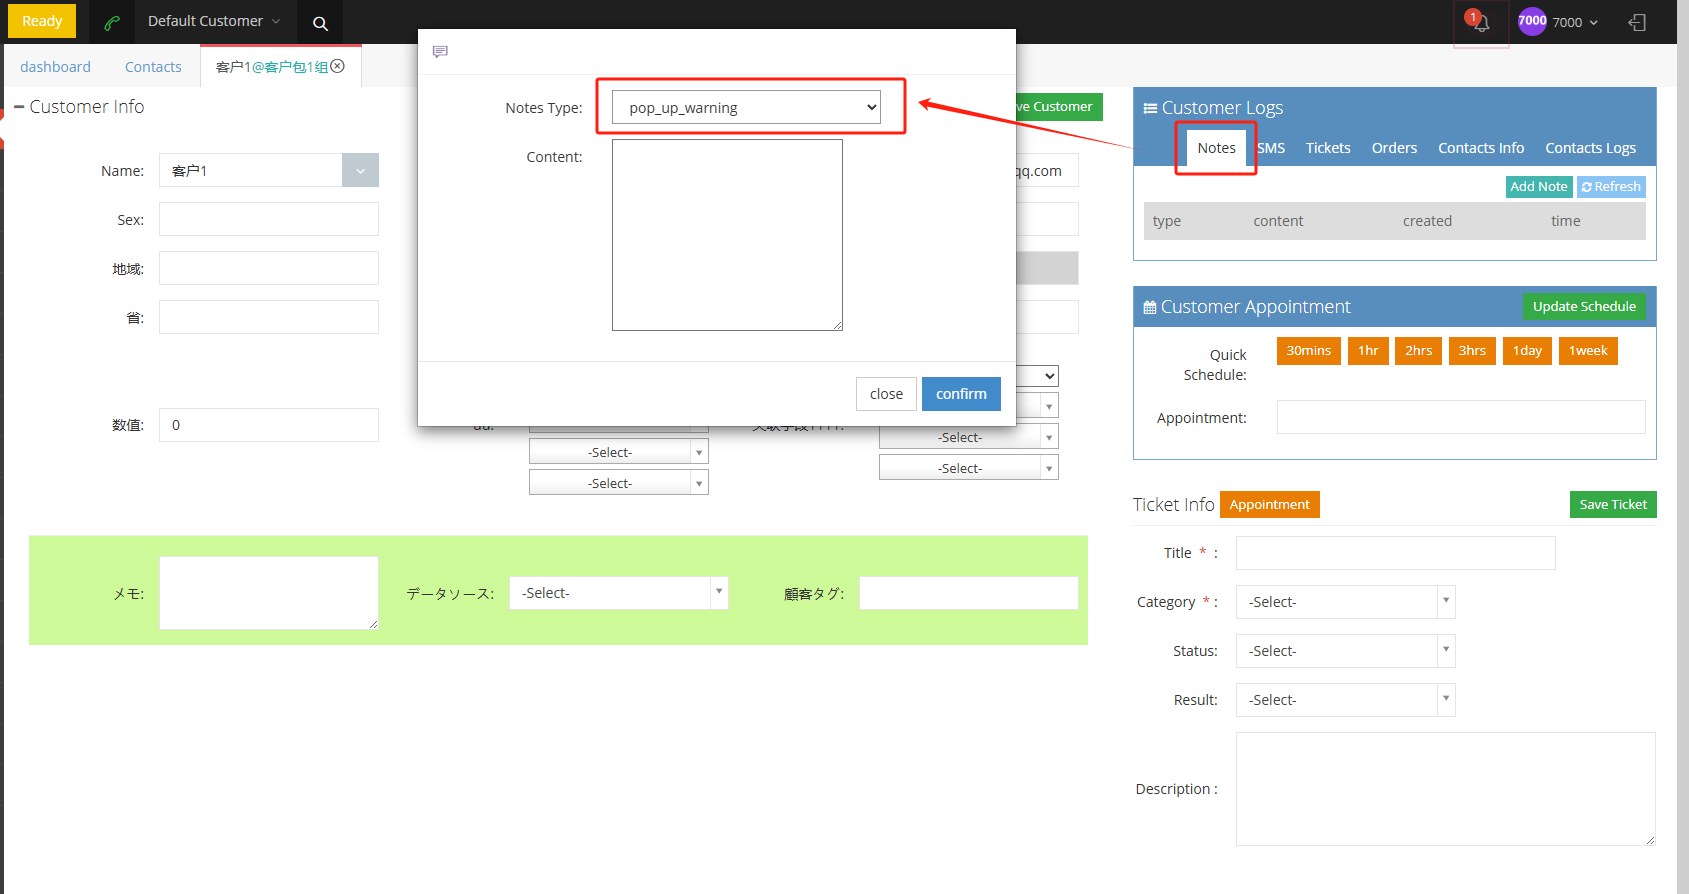
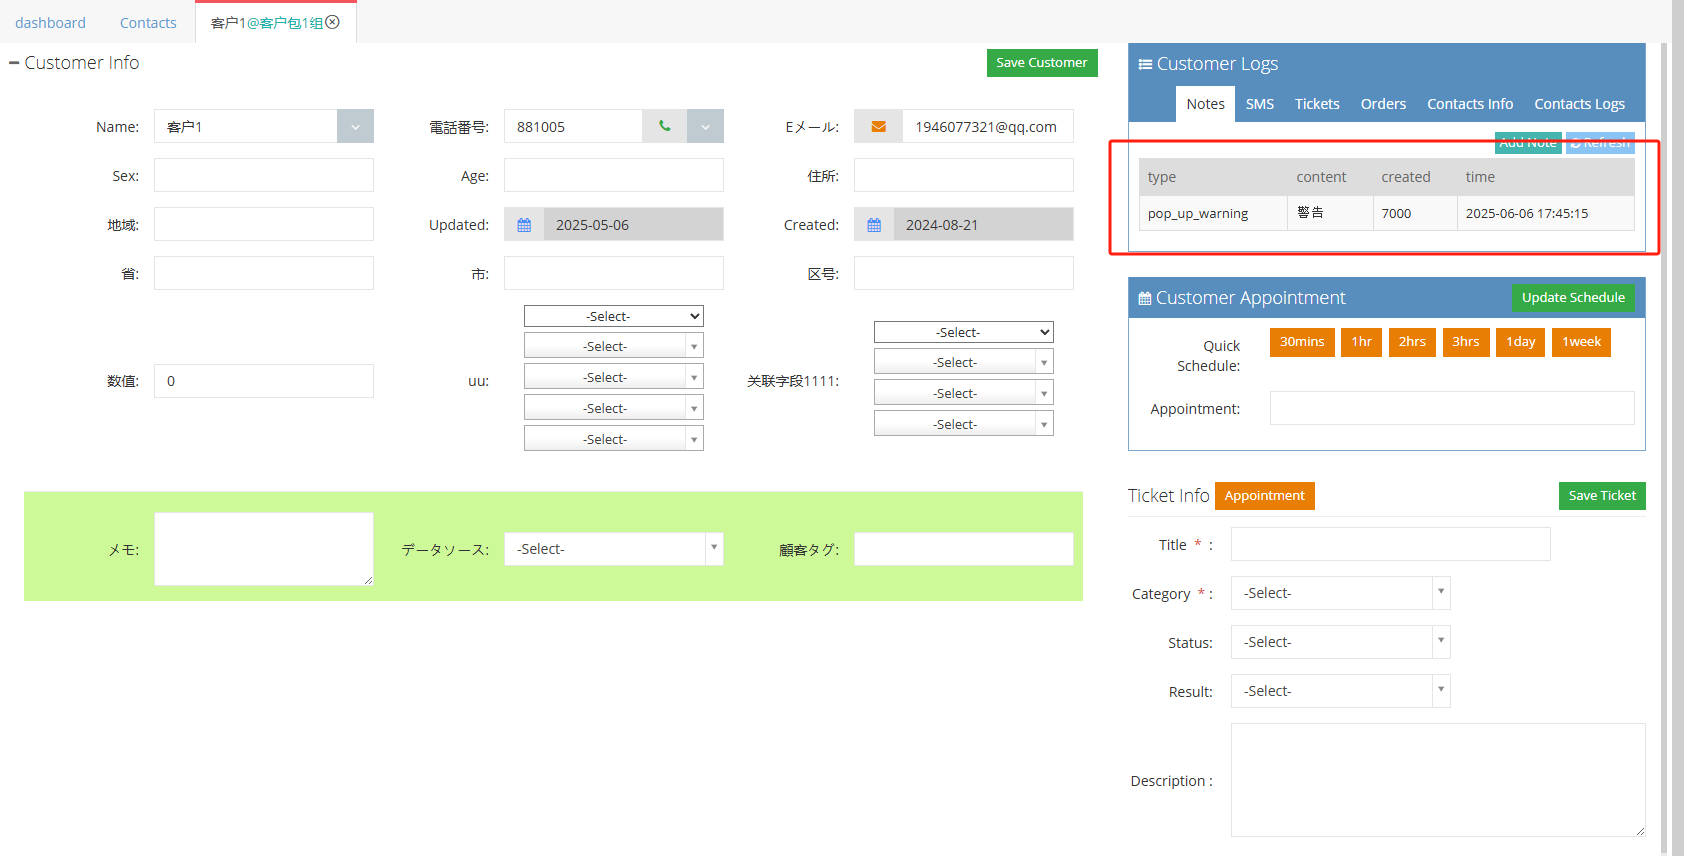
② The agent will view the pop-up warning you set on the customer note page. At this time, the pop-up warning does not take effect.
③ The client user receives a pop-up warning review notice from the agent.
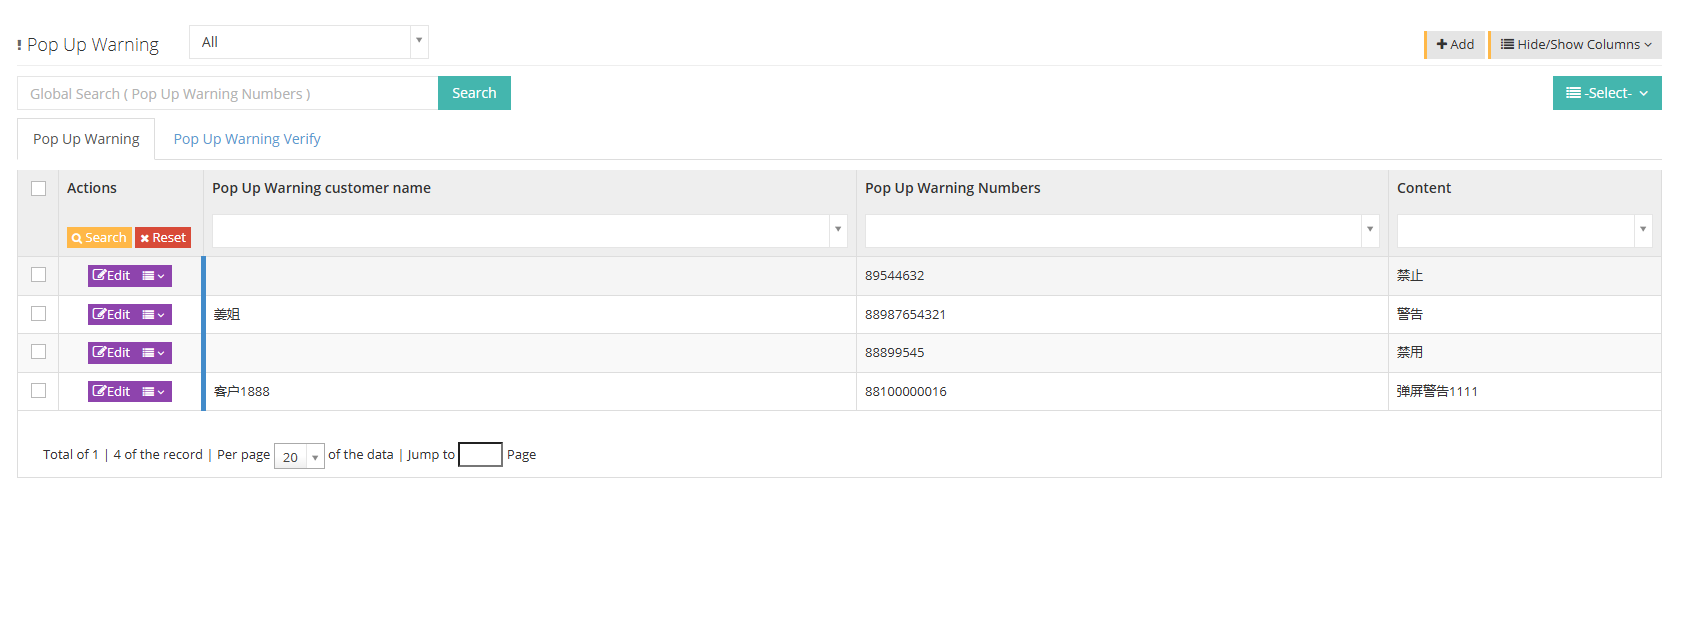
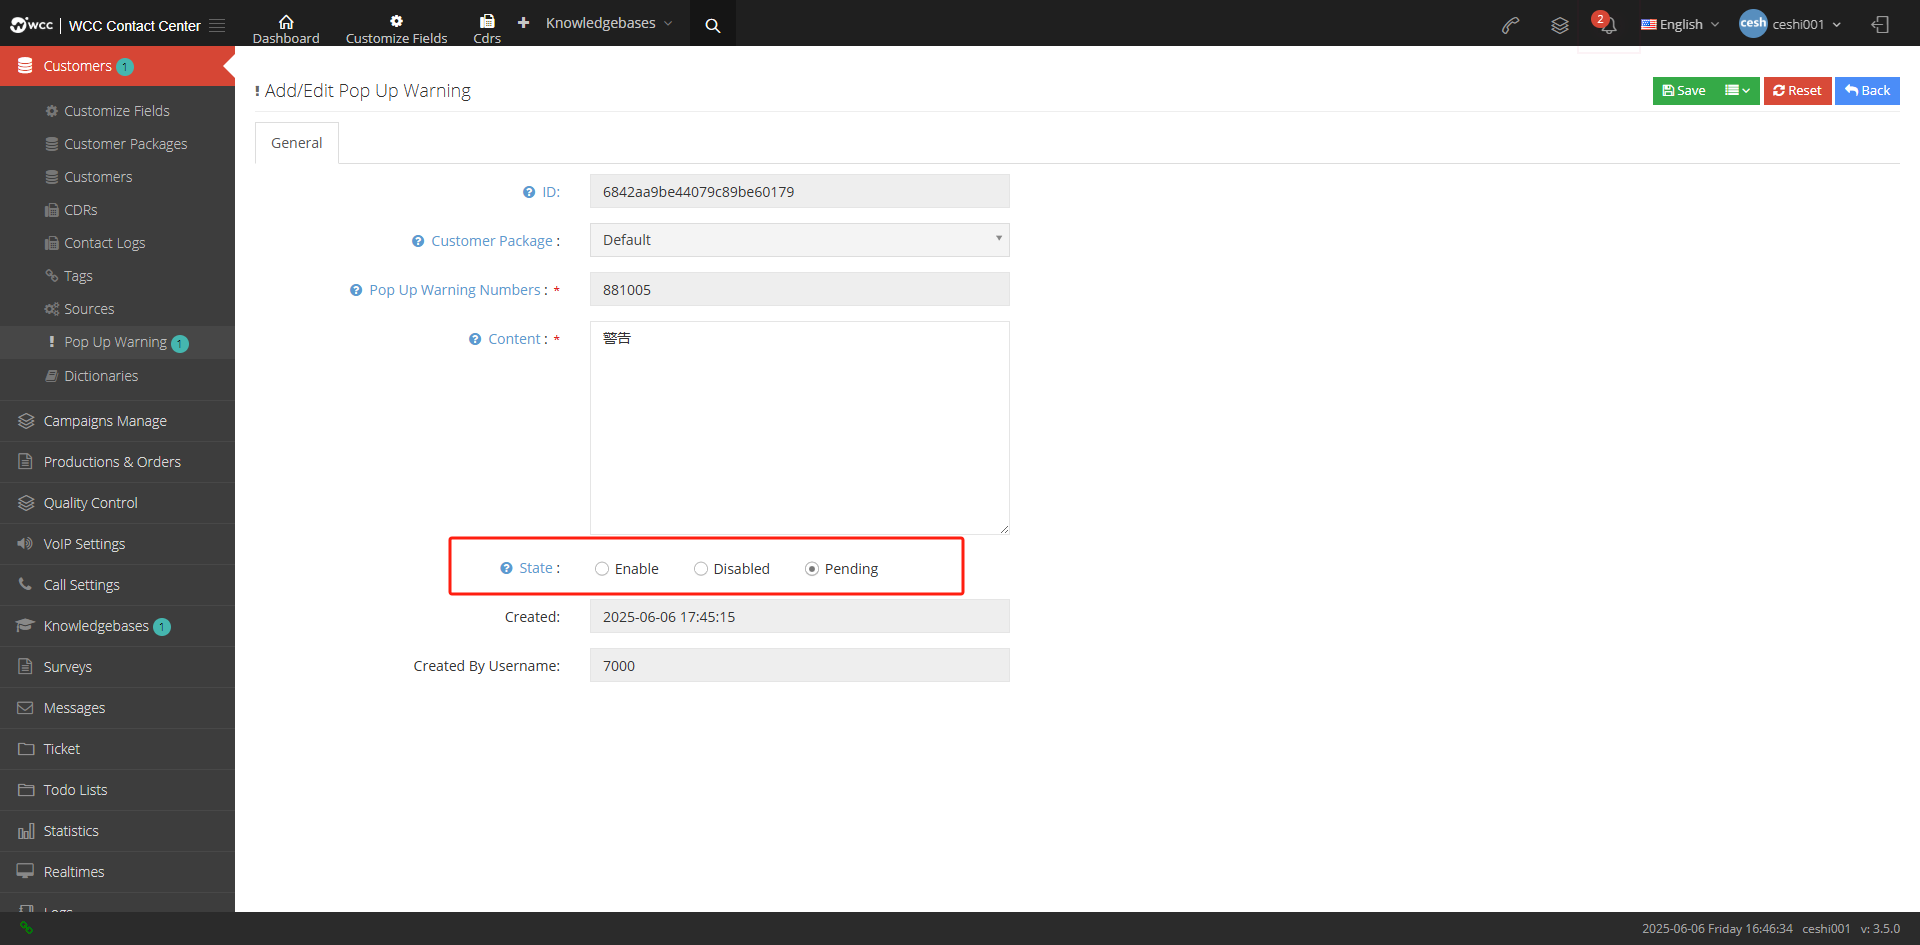
④client user clicks edit to enter the regular page of adding/editing pop-up warning, change the status from waiting to be reviewed to enable and save it, and the pop-up review submitted by the agent will be passed.
⑤ After the pop-up warning is set successfully, the agent will check the customer’s information and receive the pop-up warning when calling the customer or answering the customer’s call.
2 Show/Hide fields
Customer Name: Customer Name of pop-up warning.
Customer package: Customer package to which the customer belongs.
pop-up warning number: the number of pop-up warning.
Content: Content of pop-up warning.
3.3.9 Dictionary Management
1 Introduction to dictionary management functions
When the Dictionary content matches the customer data field, if the customer data matches the dictionary, a field does not contain data. Enable the dictionary function to automatically fill fields without data and automatically fill the customer data intact.
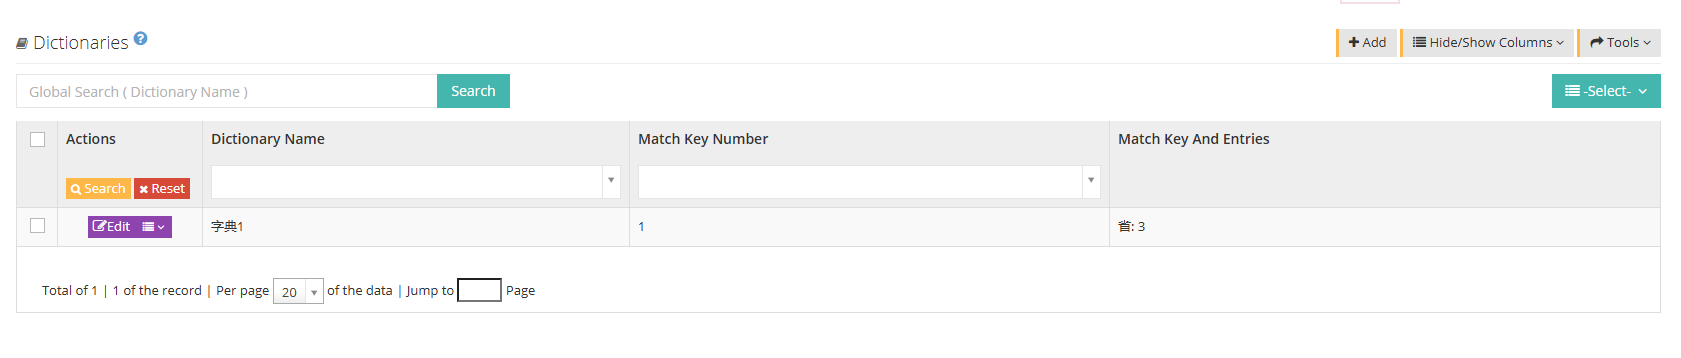
[Search] Global search only supports searching dictionary names.
【Add】Add a new dictionary.
【Show/Hide Field】Select the fields displayed or hidden on this page.
[Tools] Import a dictionary content in CSV format.
[Please select] Delete according to the conditions.
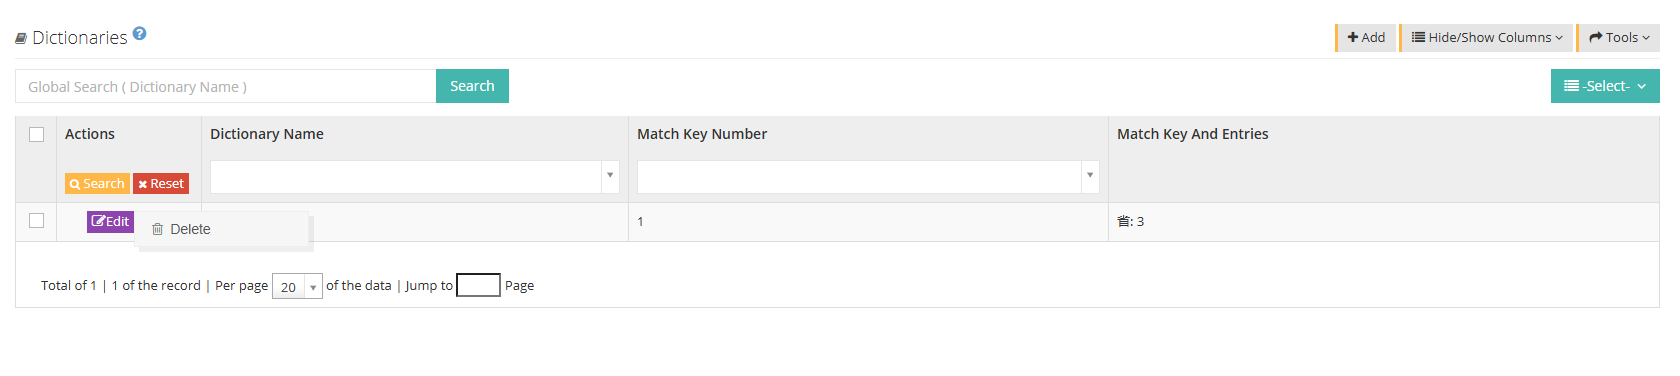
[Edit] or [Drop-down menu] edit or delete the current dictionary.
2 Show/Hide fields
Dictionary name: The name of the dictionary.
Number of matching key values: The number of imported dictionary data information that needs to be matched.
Match key value and number of entries: the dictionary data information that needs to be matched and the number of items under this information.
3 How to use dictionary
Simply put, the dictionary function is like a template that does not fully fill in information.
For example dictionary example:
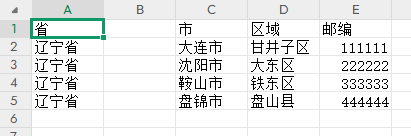
原始导入客户数据示例:
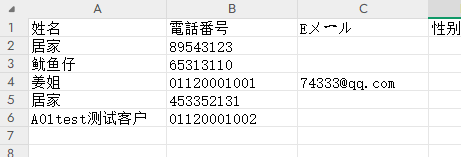
Final import data:

4 The process of dictionary use
①User clicks Add in Customer Data-Dictionary Management to add a new dictionary name.

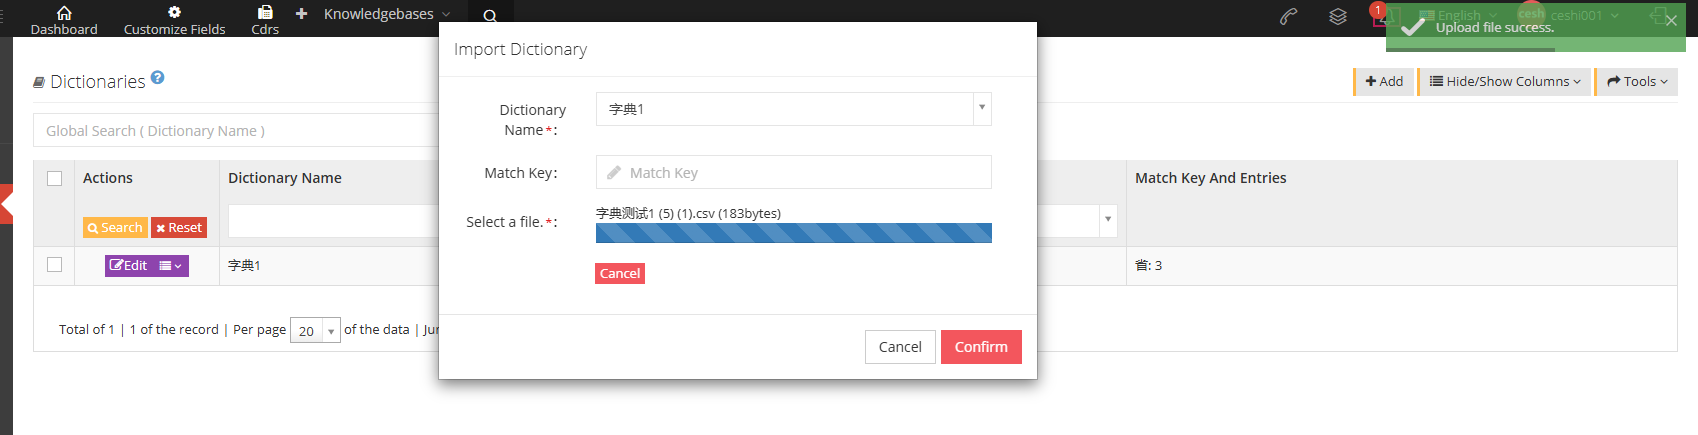
② Select tool on the dictionary management page - import dictionary:

Dictionary name: Select the dictionary to import the data.
Match key value: Fill in the data name that needs to be matched, and only one can be filled in at a time. If you do not fill in the system, the data in the first column of the imported file will be matched by default.
Select file: Select the dictionary file to be imported. (The selected dictionary file should be in the CSV file format, with the encoding set to UTF-8 file)
③Dictionary creation is completed. When batch import data, select the required dictionary content to complete the required data filling.
3.3 Task Management
3.3.1 Task Management
1 Page Introduction
Task Management is the process of creating assigned tasks. After the agent is assigned to the task, customers can be obtained in the task for services.
【Search】Global search only supports searching for task names.
【Add】Add a new task.
【Show/Hide Field】Select the fields that the task on this page needs to display or hide.
【状态】为用户可以选择任务的状态,例如启用、隐藏、关闭来查看任务。
[Agent Group] Select the tasks you need to view according to the seat group.
[Drop-down menu] In the edit drop-down menu of tasks:

Import: Importing customer data, users can directly import customer data into this task or download the customer data template of the task.
Download Import Template: Download the CSV format template to upload customer data under this promotion activity.
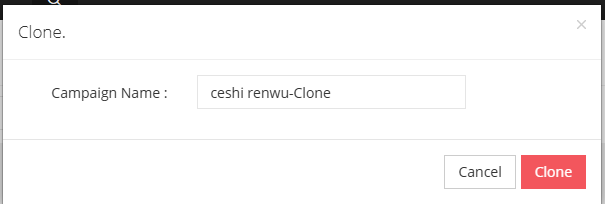
Clone: Click on clone, the user can copy a task with the same settings and name the copy task, but the copy content does not include the customer data in the copied task.
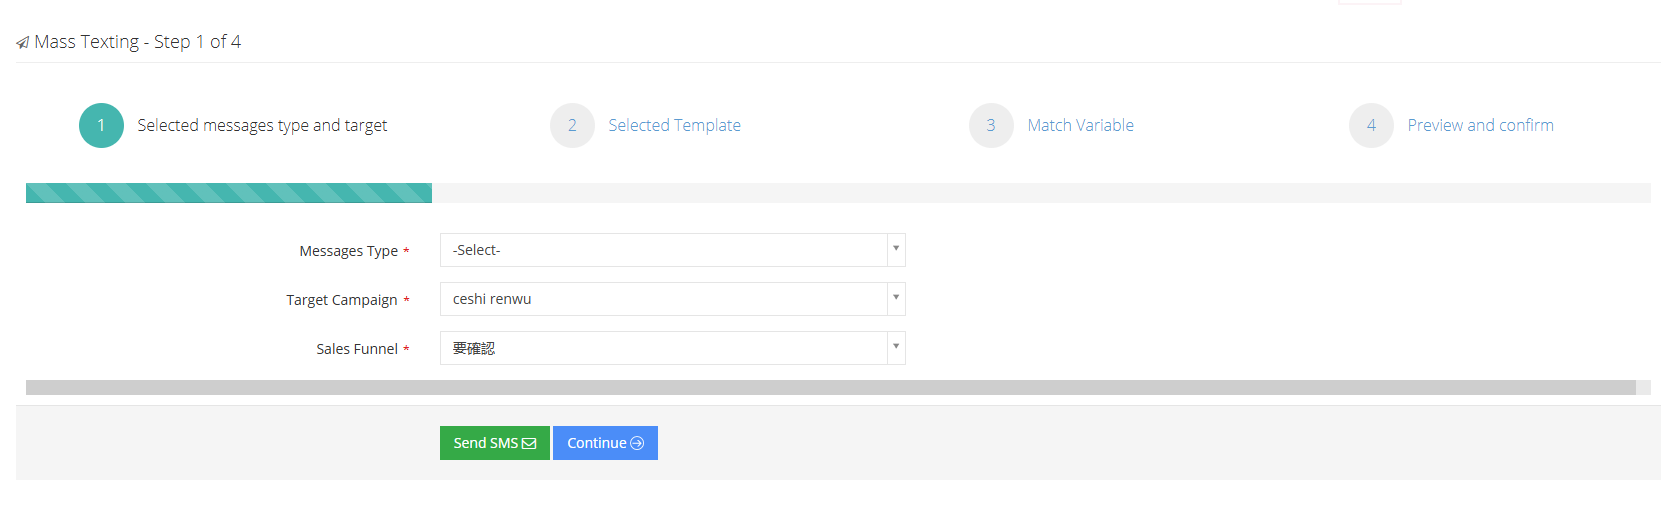
Information mass sending: Conduct information mass sending to customers in this task.
Call result settings: The user can select the call result that needs to be set in this task.
2 Show/Hide fields
Task ID: Each successful task will have its own ID.
Task Name: The name of the task.
Status: The start status of the task.
Whether to check quality: Whether the call data between the agent and the customer in this task requires quality inspection.
Agent group: The agent group assigned to this task.
Voice broadcast: Selected voice broadcast content.
Number of replays: The number of replays of this voice broadcast.
Maximum input length: The maximum length of characters that the user can enter after hearing the voice.
Quota: Quota limits the number of successful submissions. If the quota is 100, then the number of successful submissions of the task reaches 100. This task will not require a seat to access it again, preventing resource waste.
Quality inspection ratio: Used to remind quality inspection personnel to inform this task of quality inspection ratio.
Maximum customer sample number: The number of customers obtained from the customer pool for a single time.
Send statistics CSV to the specified address: After the pre-dial dial is completed, send the pre-dial customer statistics CSV to the specified address. For address details, please contact the supplier or administrator.
3 Add a new task
Task management is a process of creating or assigning tasks. Only when customer data is assigned to the task can the agent make dialing.
① Click to add to the general page such as adding/editing task management:
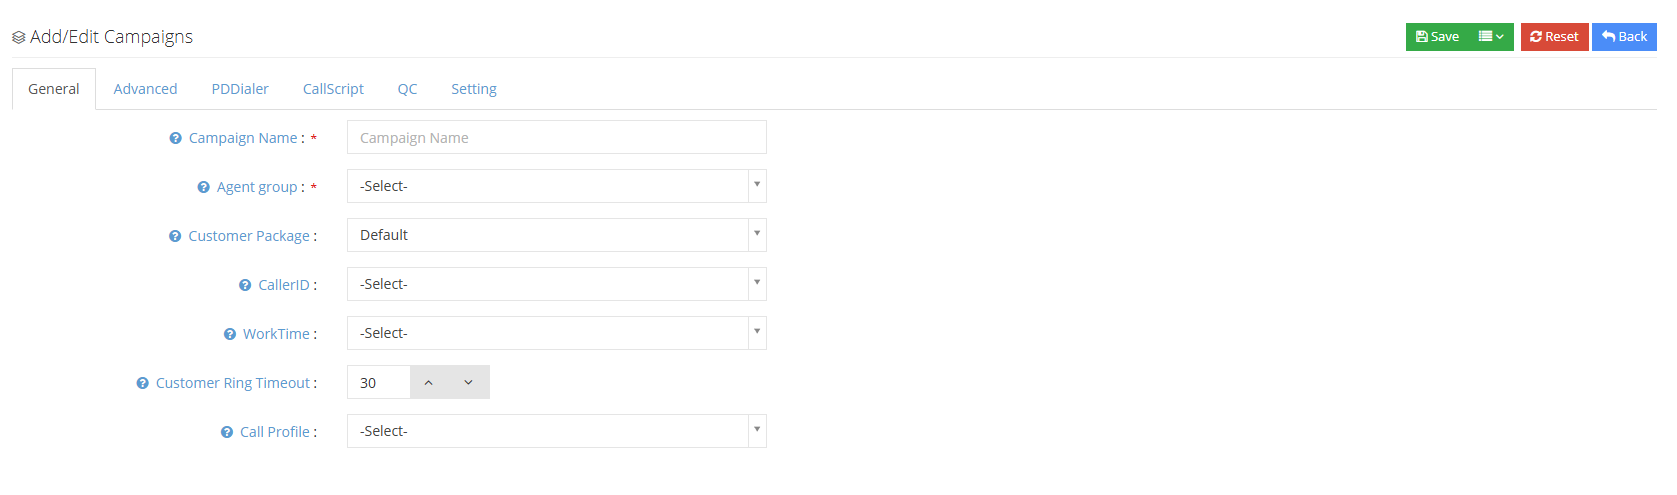
Task Name: Please name this task.
Agent Group: Please select the agent group that performs this task. Modifications are not allowed after saving.
Customer Pack: Select the customer package where the task is located.
External Number: The calling number used by the system in this task.
工作时间:设置任务的工作时间,如果不在任务的工作时间内,坐席将不能接听或是拨打来自此任务的客户数据。
Customer ringing timeout timeout: The maximum ringing time when calling a customer, the call will be hung up after that time.
Outgoing call file: Set up outgoing call file, and customers who call out from this task will follow the rules of the outgoing call file.
②Click Advanced to enter the advanced page of adding/editing task management:
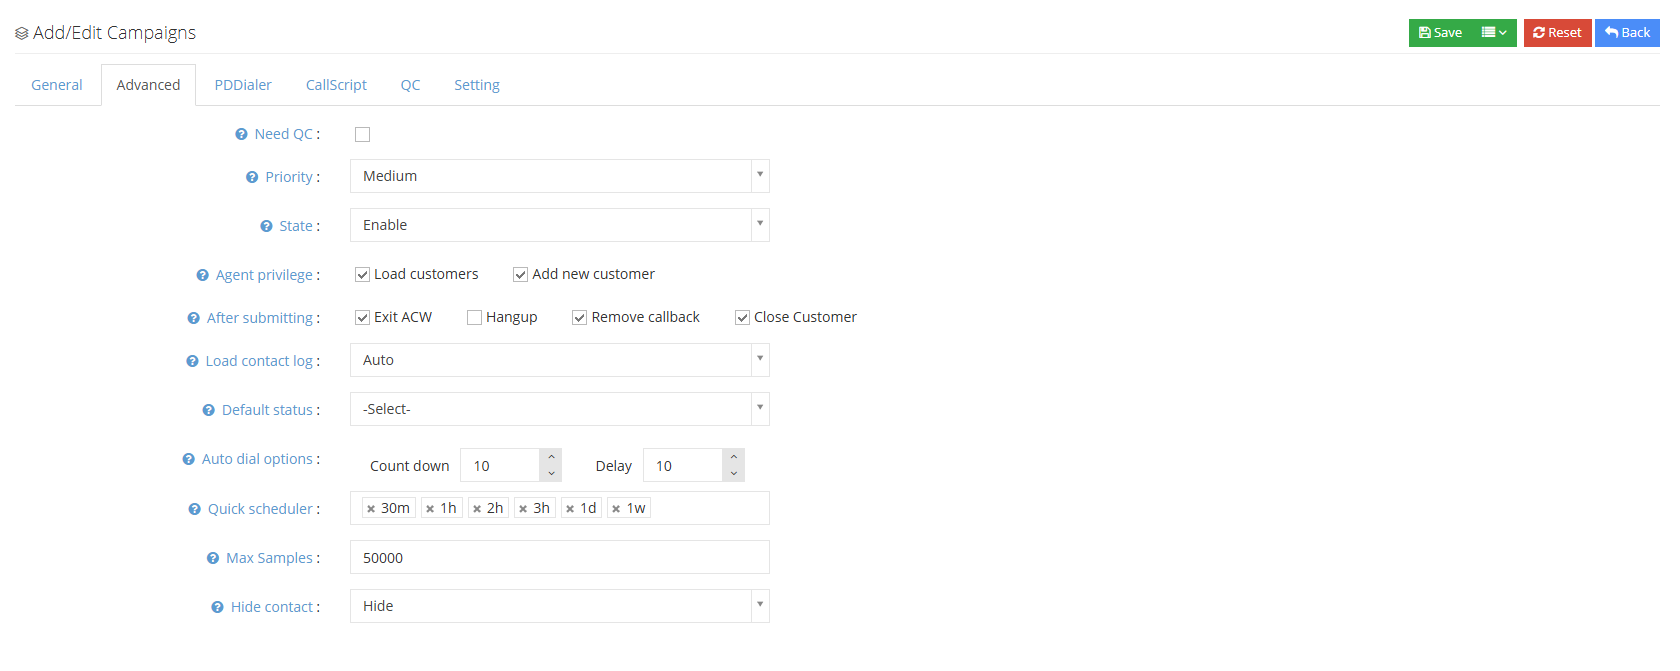
Whether to quality inspection: If you choose quality inspection for this task, and when the agent saves the customer’s contact record, the sales funnel score is greater than 0, the customer data will enter the quality inspection status and you can no longer call or change the contact record.
Priority: The order of the arrangement is displayed when switching tasks on the agent contact customer page. The higher the priority, the higher the arrangement.
Status: The user can select the status of this task, including: start, pending review, closing, settlement, and pause.
Agent permissions:
Get Customer-Whether the agents in this task are allowed to obtain customer data from the outbound call task pool? If the function is not activated, except in the pre-dial state, the customer data needs to be manually assigned to the agent to obtain customer data.
Add Customer- Whether to allow agents to add new customers to this task.
Action after submission: When the agent saves the contact record with the customer:
*** After exiting the call***-Save the contact record and exit the call status. If the contact record is saved during the call, the call will not enter the call.
Hang UP-If you save the contact record during the call, the call will be hung up directly.
Delete appointment call-Delete the appointment call from the customer and enclose the appointment for this call.
Close the customer tag-After saving the contact history, close the pop-up screen of this customer.
Loading contact history: Whether to allow agents to view customer contact history:
Auto- When the agent opens the customer information, the system automatically loads the contact record.
Disable- When the disabled state is activated, the agent cannot view the customer’s historical contact history.
Manual-When you start manually loading the contact record, after opening the customer’s pop-up screen, you need to manually click to view the historical contact record yourself.
Default Customer Status: When the agent opens a customer, the system will select the sales funnel status by default.
Auto Dial Options: When the agent uses automatic dial mode:
Countdown- When the agent completes a call, the system will start counting down, and the next number will be automatically dialed after the countdown is over.
Delay-The time is not enough after the call is over, and the seat can click the delay button to get time to sort it out.
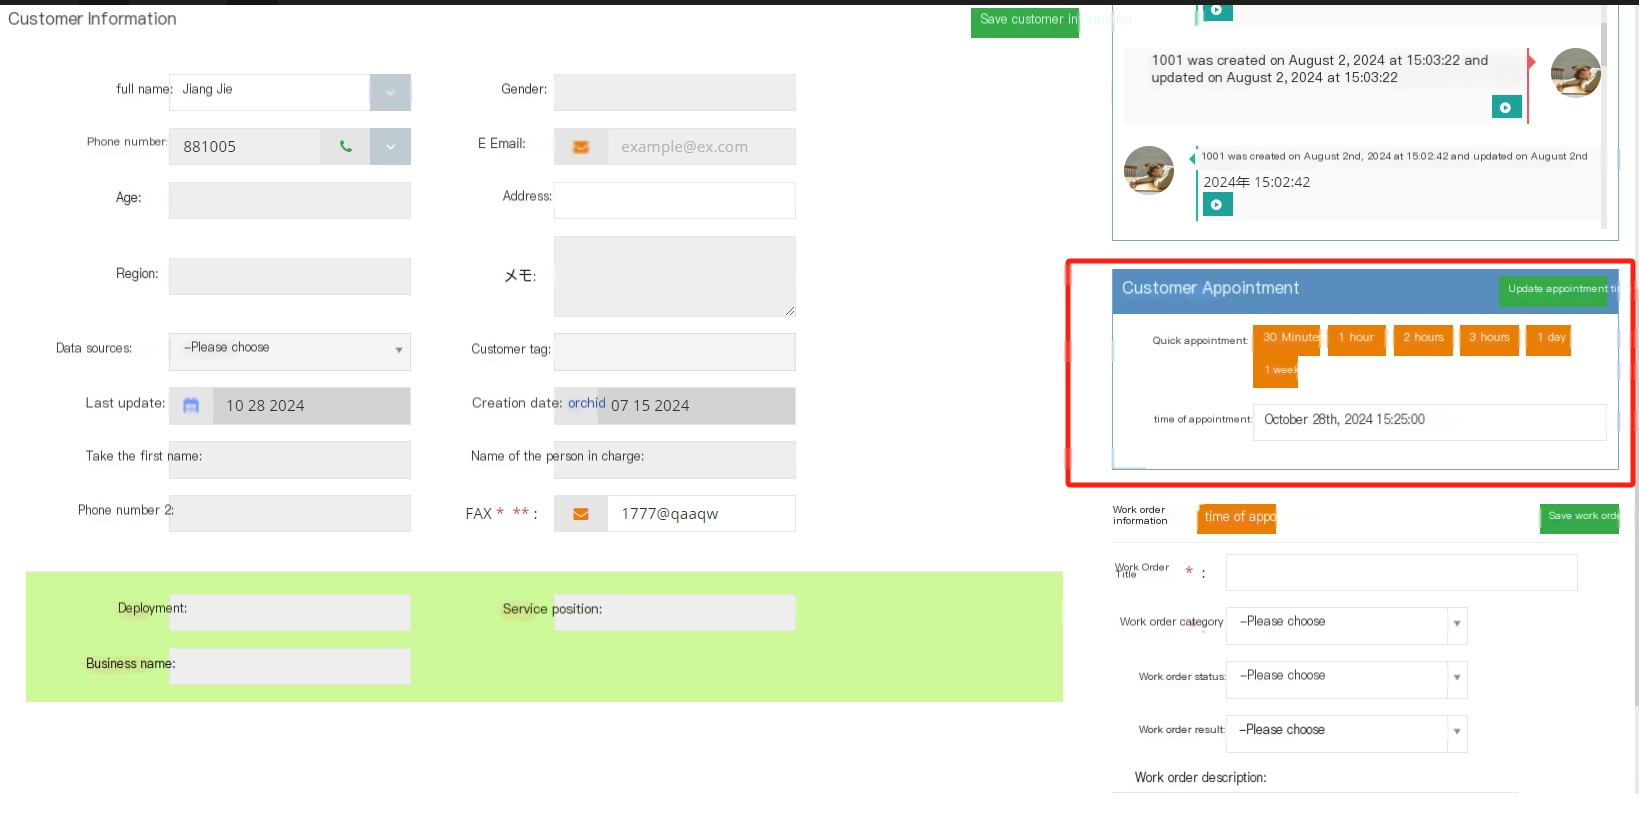
Quick appointment: The user can set several times. These options will help the agent quickly set the time to call back the customer. This time needs to be represented in English time h and minute m, such as 10m and 1h.
Maximum customer sample number: The number of customers obtained by the agent from the project customer pool for a single time.
Hide contact information:
Hide-Hide the customer’s contact information, four digits in the middle (the number needs to be seven or above before it will be hidden).
Do not hide-Agents can directly see the contact information of customer data.
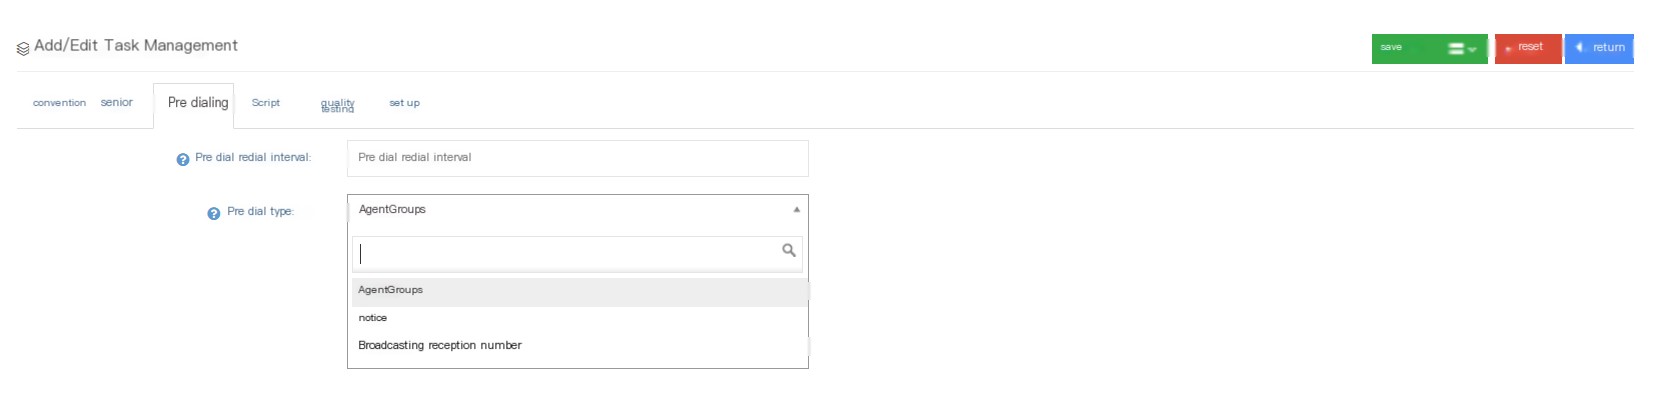
③Click the pre-dial to enter the pre-dial page of adding/editing task management:

Pre-dial replay interval: When pre-dial is enabled, the interval time of the customer number that fails to make a call. The supported format is “number + [m,h,d,w,M]”, such as “1m,2h…”, where m is minutes, h is hour, d is day, w is week, and M is month.
Pre-dial type:
Agent Group-When pre-dial is turned on, the agent responds normally after the customer answers the call.
Notification-The phone hangs up after playing the voice notification.
Voice broadcast: Select a voice required for broadcasting to prompt the customer for the next operation.
Replay times: The number of repeated playbacks of this voice broadcast is 0. Only once.
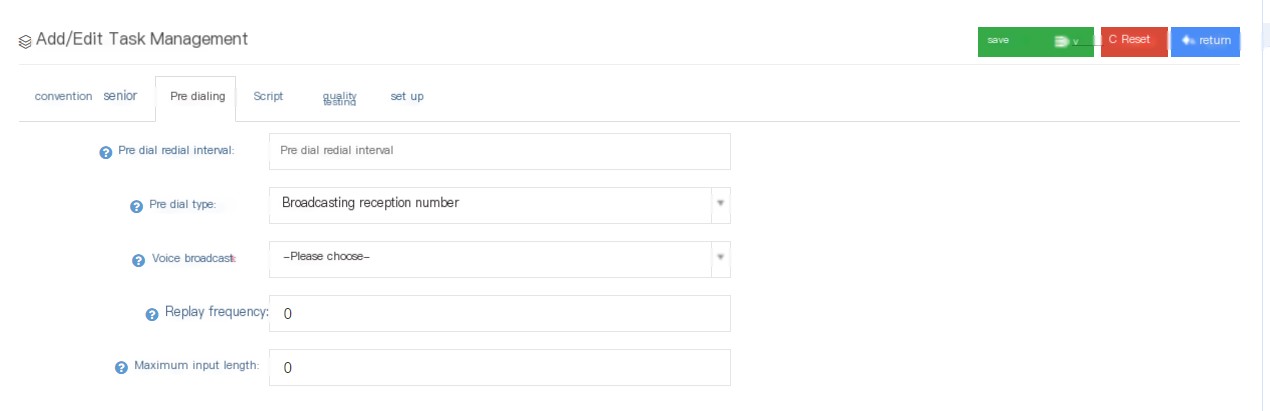
Play and receive the number-When the pre-dial is turned on, the customer will play a piece of the voice list when answering the call. The customer will input it by pressing the keys according to the content in the voice list. The input information can be viewed in the call record.
Voice broadcast-: Select a voice required for broadcasting to prompt the customer for the next operation.
Replay times-After pre-dial is turned on, the voice list will be played when the customer answers the call.
最大输入长度-:使用预拨号时,客户接通电话后,如果客户输入一个键并按任意一个键或自动挂断, 则记录中没有记录。
④Click the Script to enter the Add/Edit Task Management Vocabulary Page:
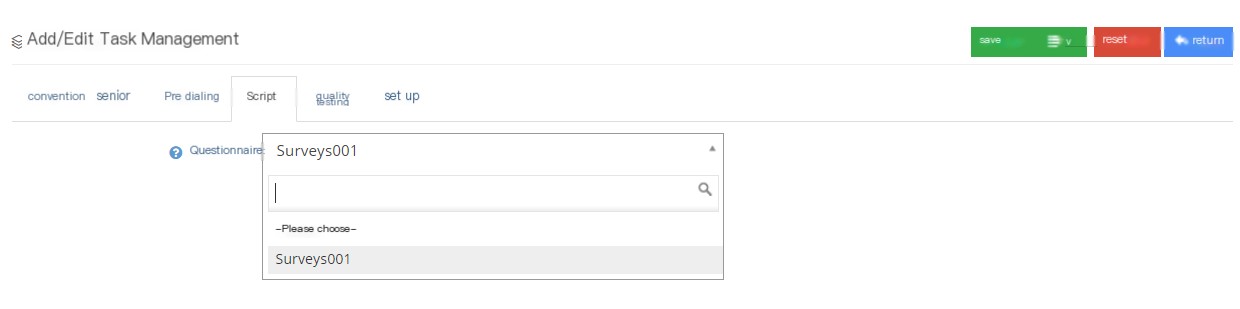
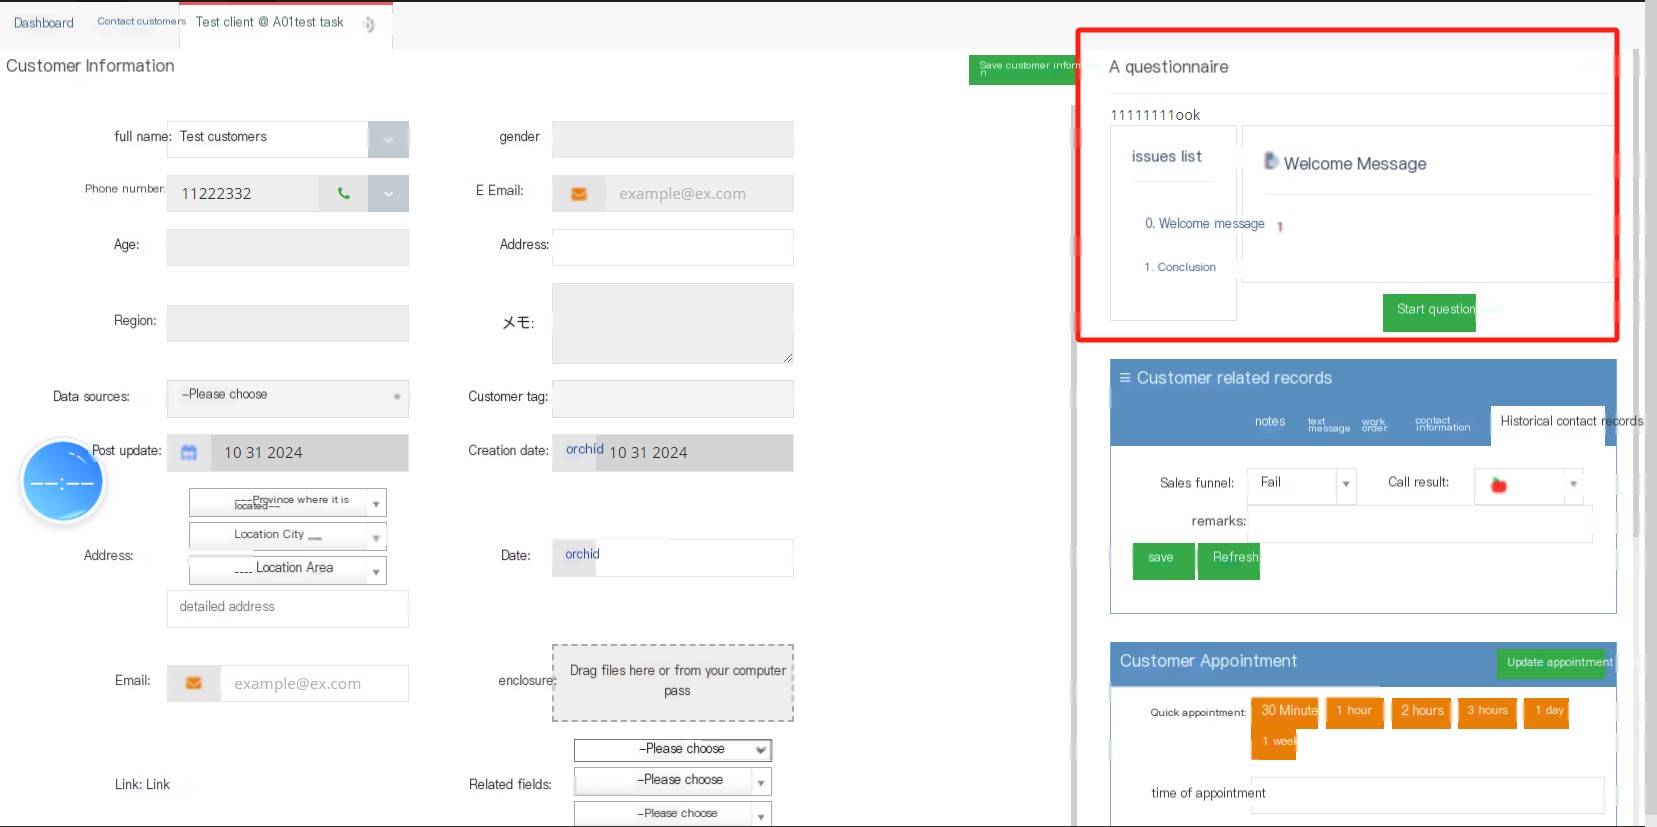
Question: Set a questionnaire in the [Question] to conduct a questionnaire survey of customers based on the questionnaire questions.
If a task sets up a questionnaire, the content of the questionnaire will be displayed when the agent opens the client’s screen.
⑤Click on quality inspection to enter the quality inspection page of adding/editing task management:

Quality Inspection Ratio: Used to remind quality inspection personnel to inform the quality inspection personnel of the quality inspection ratio for this task.
The set quality inspection ratio can be viewed on the quality inspection page to view the quality inspection quantity.

⑥Click Settings to enter the settings page for adding/editing task management:
Send statistics CSV to the specified address: After the pre-dial dial is completed, the pre-dial customer statistics CSV is sent to the specified address.
3.3.2 Successfully submitted to the client
1 page introduction
Successful Customer Submit Customer data for displaying the sales funnel (score greater than 0) selected by the latest contact record.
On the successful customer submission page, users can view the required customer information based on outbound call marketing tasks, call results, quality inspection status, sales funnel, etc.
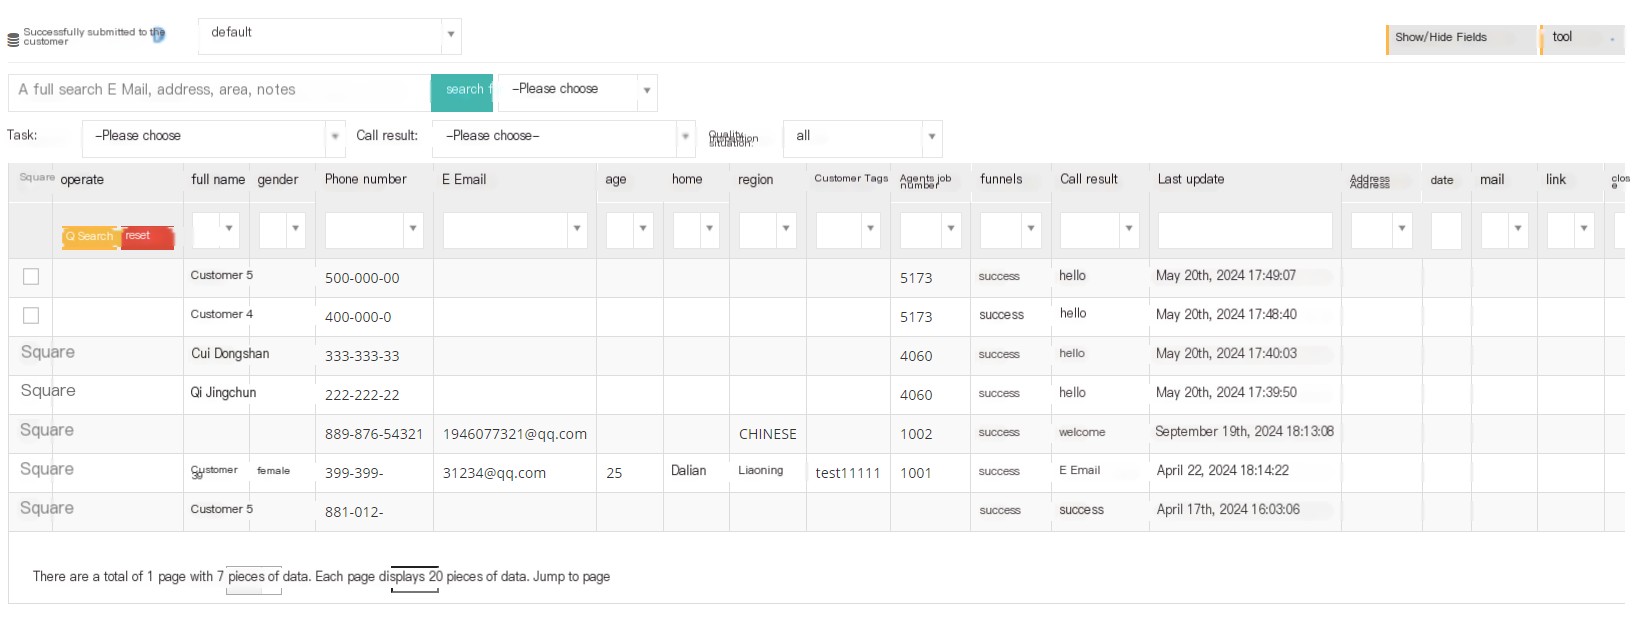
The [Default] user in the figure above can choose the default customer package or customer package to view the successful submission of customer data.
[Search] Global search supports users to search customer names, phone numbers, emails, cities, regions, notes, etc.
[Please select] after [Search] to select the sales funnel to view.
[Affiliated Task] Select to successfully submit the task to which the client belongs.
【Call Results】Select to submit the call result of the customer successfully.
[Quality Inspection Situation] Select the quality inspection status of the customer successfully submitted.
【Show/Hide Field】Select the fields that the page wants to display or hide.
【In the Tools Menu】
Export CSV file: Users can export successfully submitted data as needed, without selecting any data to export all data by default.
2 Show/Hide fields
Name: Successfully submitted the customer’s name.
Phone number: Submit the customer phone number successfully.
电子邮件:成功提交客户的电子邮件。
性别:成功提交客户的性别。
年龄:成功提交客户的年龄。
住所:成功提交客户的住址。
地域:成功提交客户所在的地区。
客户标签:该成功提交客户保存的客户标签。
Casual Work Number: The customer’s Casual Work Number was successfully submitted.
Sales Funnel: The sales funnel that is successfully submitted to the customer.
Call result: The client’s call result is successfully submitted.
最后更新:该成功提交客户最后更新客户资料的时间。
Creation Date: The creation date when this post was successfully submitted to the client.
最后分配时间:该成功提交客户最后分配的时间。
Agent name: Submit the client’s agent name.
Quality inspection results: The quality inspection results of the customer successfully submitted.
Quality inspection notes: Remarks during quality inspection.
Last Submission Time: The time of the last successful submission.
Last call duration: The duration of the last call between the client and the agent.
3.3.3 Pre-dial
1 Page Introduction
Agent group pre-dial is mainly used to predict dialing when users have a certain understanding of the work efficiency of the entire agent group and to save more time.
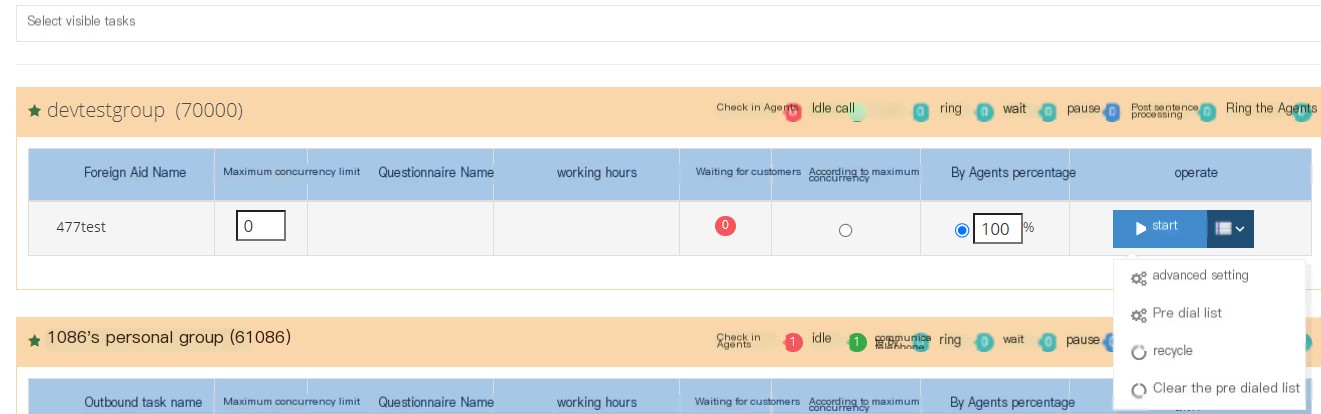
After assigning an outgoing call task, you can set the pre-dial before starting it.
① In the drop-down menu in the operation, you can perform [Advanced Settings] on the pre-dial of the seat group. The settings here require users to have a certain understanding of the work efficiency of the seat group:
Select Maximum Concurrency to enable the Advanced option. At this time, pre-dial will dial according to the number of seconds set in the dial interval in the Advanced options and the maximum concurrency for each dial.
Select the percentage of the seat and set the advanced option to enable it. At this time, pre-dial will be pre-dialized according to the advanced settings, such as answering rate, short call order, short call order duration, and average call duration in the advanced settings.
The maximum concurrency is how much concurrency is set. Each time, dial according to the set number of concurrencies, the seat percentage needs to be calculated, and advanced settings are enabled to make the seat percentage calculation more accurate.
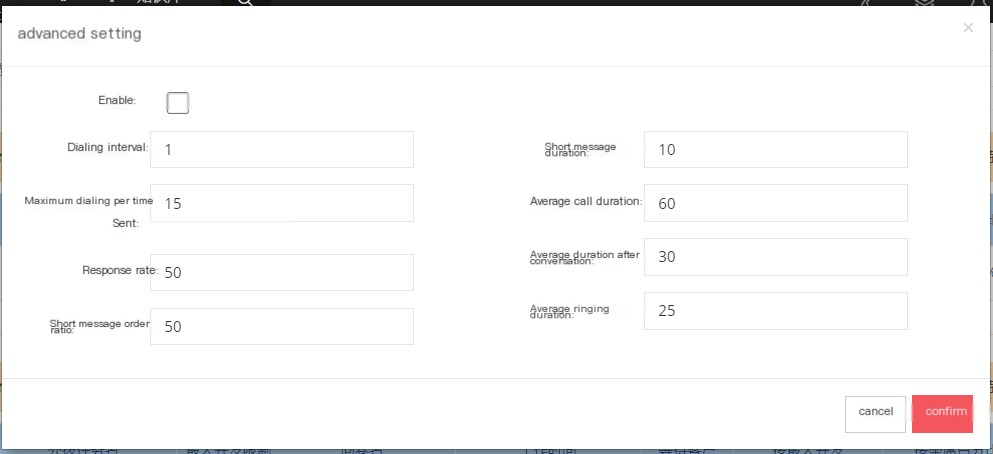
Enable: Activate this pre-dial advanced settings.
Dial interval: The unit is seconds, the dial interval for every two numbers when pre-dial is started.
Maximum concurrency per dial: The maximum number of dial concurrencies that can be accepted in each agent group.
Answering rate: The rate at which the seats in the seat group can answer calls in a timely manner.
Short call order ratio: The ratio of the total call volume of short call orders.
Short call time: Users can choose the defined time of the short call order. If the time is less than that, it is a short call order (unit second).
Average call duration: Set the average call duration (seconds) of the agent group.
Average post-talk duration: Set the average post-talk duration (seconds) of the seat group.
Average ringing time: Set the average ringing time (seconds) of the seat group.
Selection of situations:
Total number of seats online: 10
Sitting 1: Call duration 20s
Sitting 2: Call duration 120s (greater than the average call duration 60s [talkend])
Sitting 3: Call duration 4s (less than the short call duration 10s short call rate 50% = 5s [shorttalk])
Sitting 4: 60s after conversation (30s after average conversation) only 90s after average conversation [acwend])
Sitting 5: 30s after the conversation
Other seats are idle seats [idleaagent]
Customer 1: Ringing, ringing 15S, has been connected, but no seat is connected
Customer 2: Ringing is turned on for 20s (less than the average ringing time 25s【ringing】)
Available seats = idleAgent + talkEnd + acwEnd + shortTalk - waiting
Predict the number of available seats next time = 5 idle seats + 2 seats (at this time the system judges that the call is about to be hung up) + 4 seats (more than the average time after the system predicts that the seat will leave the conversation) + 3 seats (the short call is about to end) - Customer 1=5+1+1+1-1=7
Dial number = (Agent available × Percentage of seats)/Response rate - ringing
Dial number = (7150%)/50%-1=20*
*The system will predict and calculate the number of next dials before each round pre-dial starts, which is probably the above steps.
Available seats refer to the number of seats. The settings in the advanced are used as the basis for the next pre-dial judgment.
②设置好预拨号的高级选项后,就可以进入开启预拨号的流程。如果等待客户数不为0,则需要先清空预拨号列表:
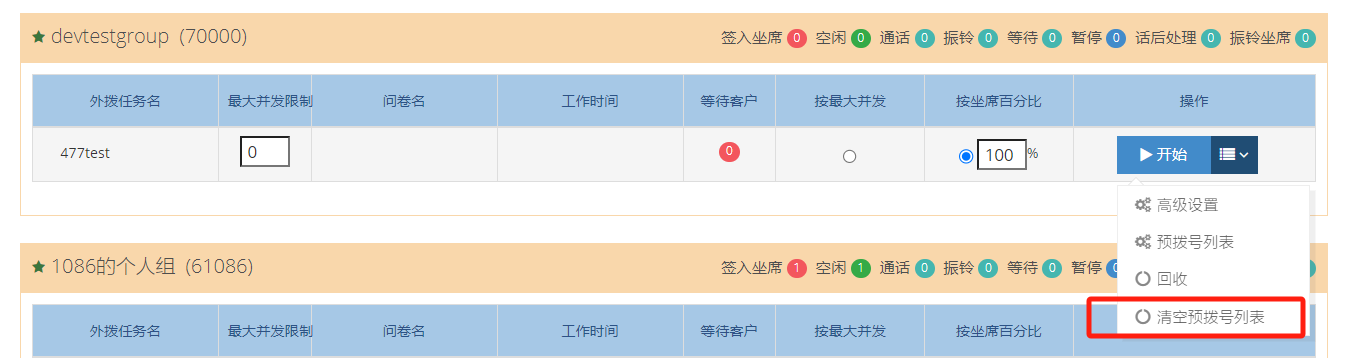
③点击【回收】,对任务中的客户数据进行回收。在【请选择】中有两种回收的方式:
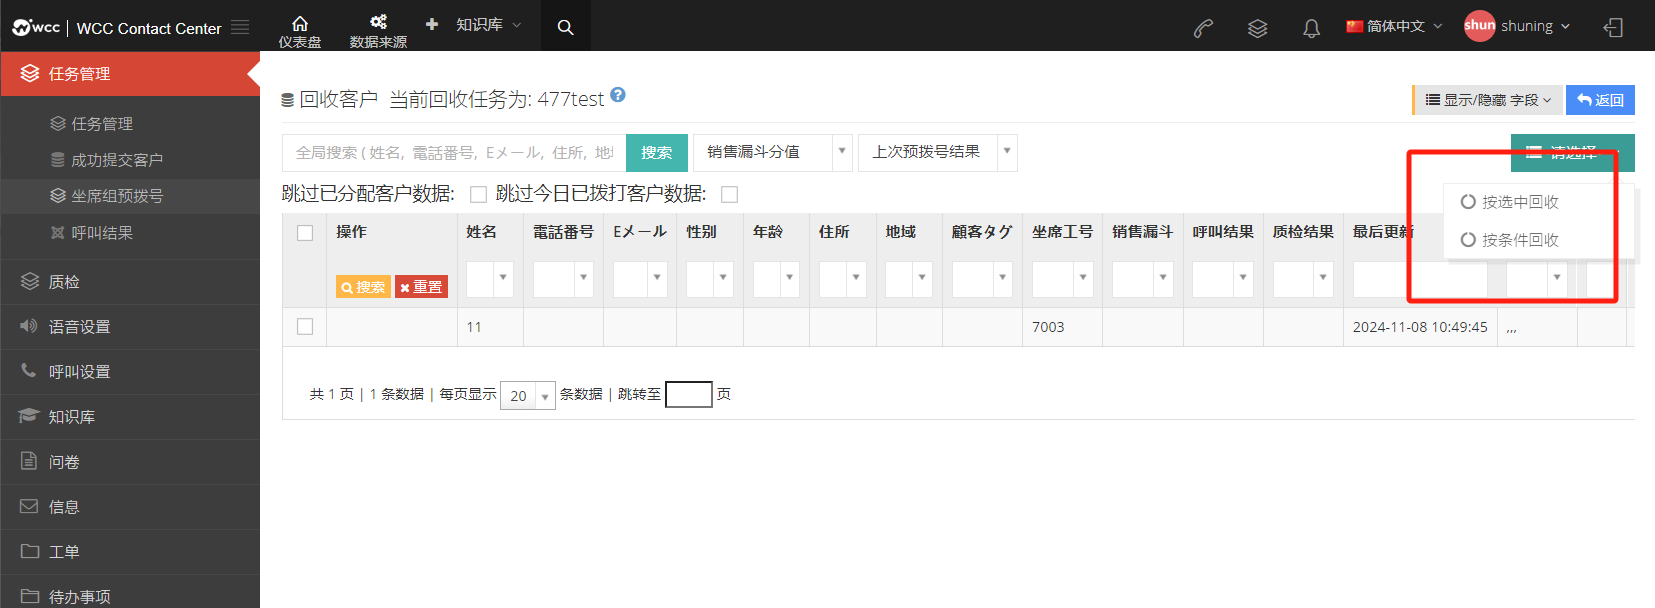
Press to select Recycle: Select the customer data to be recycled and click OK to recycle it.
Recycle by condition: Users choose the conditions for recycling data, such as skipping allocated customer data, skipping the number of customers called today, or a sales funnel data. After selecting this condition, click directly to retrieve data by condition. The data under this condition can be recycled.
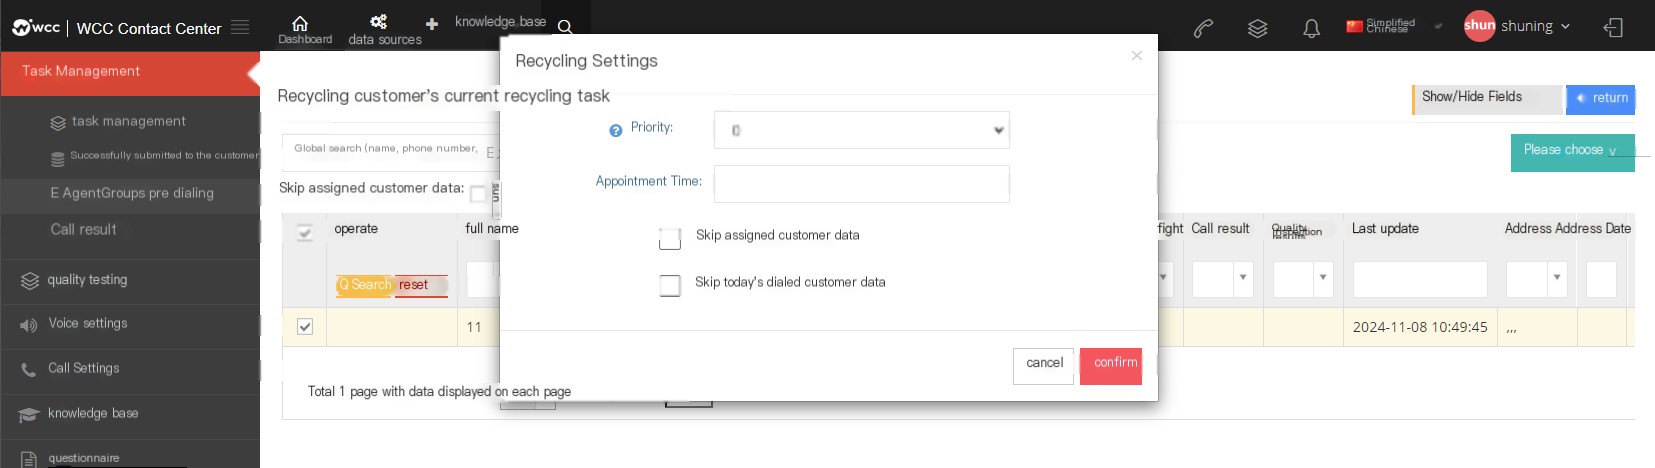
Priority: The smaller the customer data is assigned when pre-dial dialing, the higher the dialing order. The priority can be selected from 1-9 numbers.
Appointment time: Dial according to the reservation time when pre-dial dialing.
Skip assigned customer data: Skip the customer data that has been assigned to the designated agent.
Now return to the pre-dial page of the agent group and click Start to enable pre-dial.
Note: Pre-dial is performed in a stopped state during the entire recycling process.

During pre-dialing, you can click to view the [Pre-dialing List]. The list shows the number currently being pre-dialized.
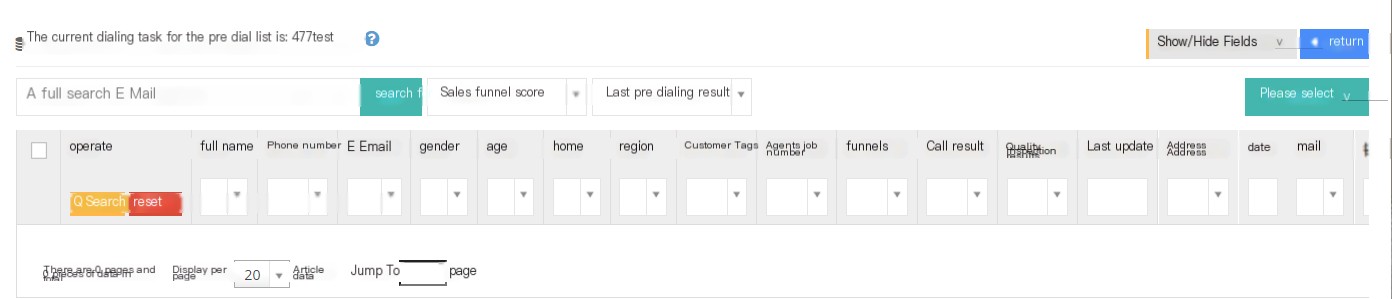
【Search】Global search (name, phone number, Eメール, residence, region, メモ ) …
[Sales funnel score] Use the sales funnel as the filter to view customers.
[Last pre-dial result] View the customers in the pre-dial list under the last pre-dial result conditions.
【Show hidden fields】Select the field you want to view.
【Please select】Delete or select data from the list according to the conditions.
Show status during pre-dial:
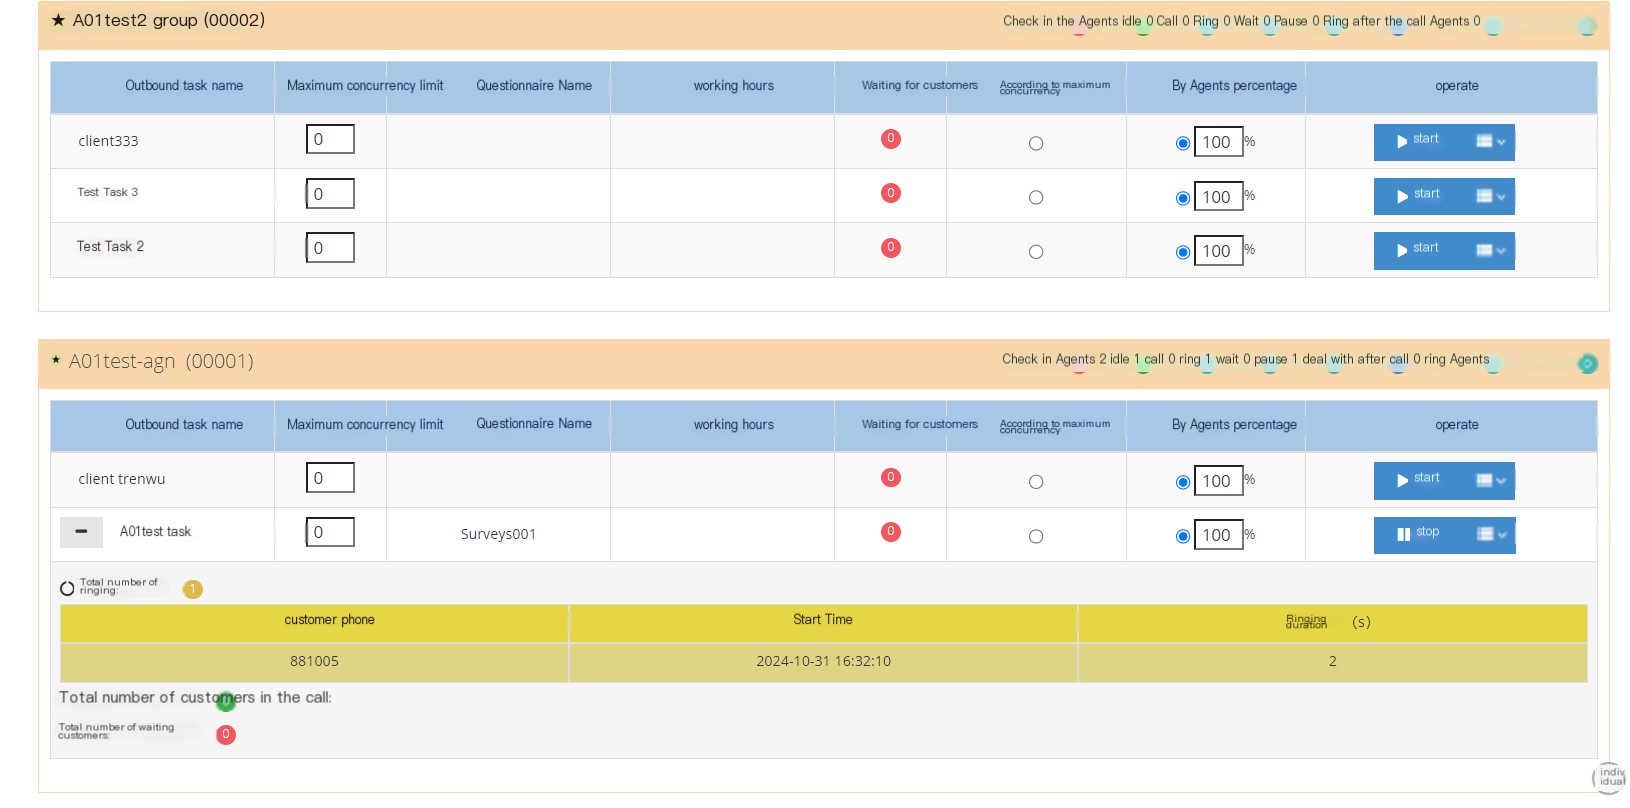
Customer phone number: Ring the customer’s phone number.
Start time: The time when the customer starts ringing.
振铃时长:客户振铃的时长。

Customer phone number: Connect the customer’s phone number.
Start time: The time when the customer starts ringing.
Customer response time: The time when the customer answers this call.
Waiting time: The waiting time calculated when the customer responds to this call.
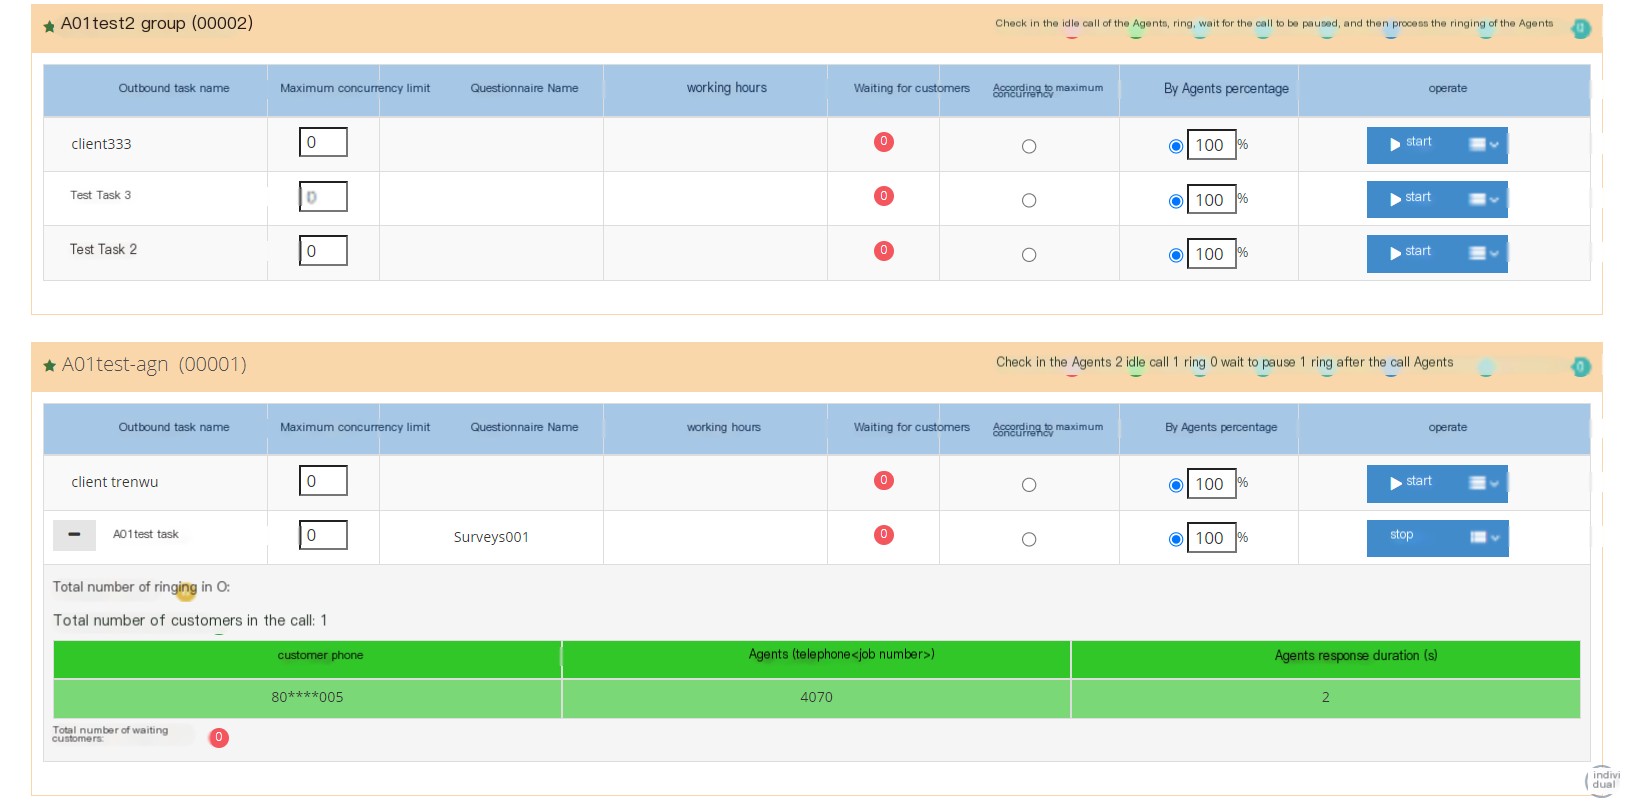
Customer phone number: The agent answers the customer’s phone number.
Agent (telephone-work number): The work number of the seat that connects this customer’s phone number.
Agent answer time: The time when the agent answers the customer’s call.
2 Show/Hide fields
Name: Customer Name
Phone: Customer’s phone number
Email: Customer’s email
Customer Tags: Customer Tag Category
Casual work number: The customer’s casual work number
Sales Funnel: The sales funnel recently saved by this customer.
Call result: The most recent call result saved by the customer.
Quality inspection results: The customer’s quality inspection results.
Last updated: When the customer’s profile was last updated.
Created date: The date of creation of the client.
Last pre-dial result: The result of the last pre-dial call from the customer
Pre-dial: The number of times the customer is pre-dialed.
Last dialing time: The time of the last dialing of the customer.
Priority: The priority of this customer when pre-dial.
Appointment time: The appointment time set by the customer during recycling. When the pre-dial is started, the customer will make a call at the time of the appointment.
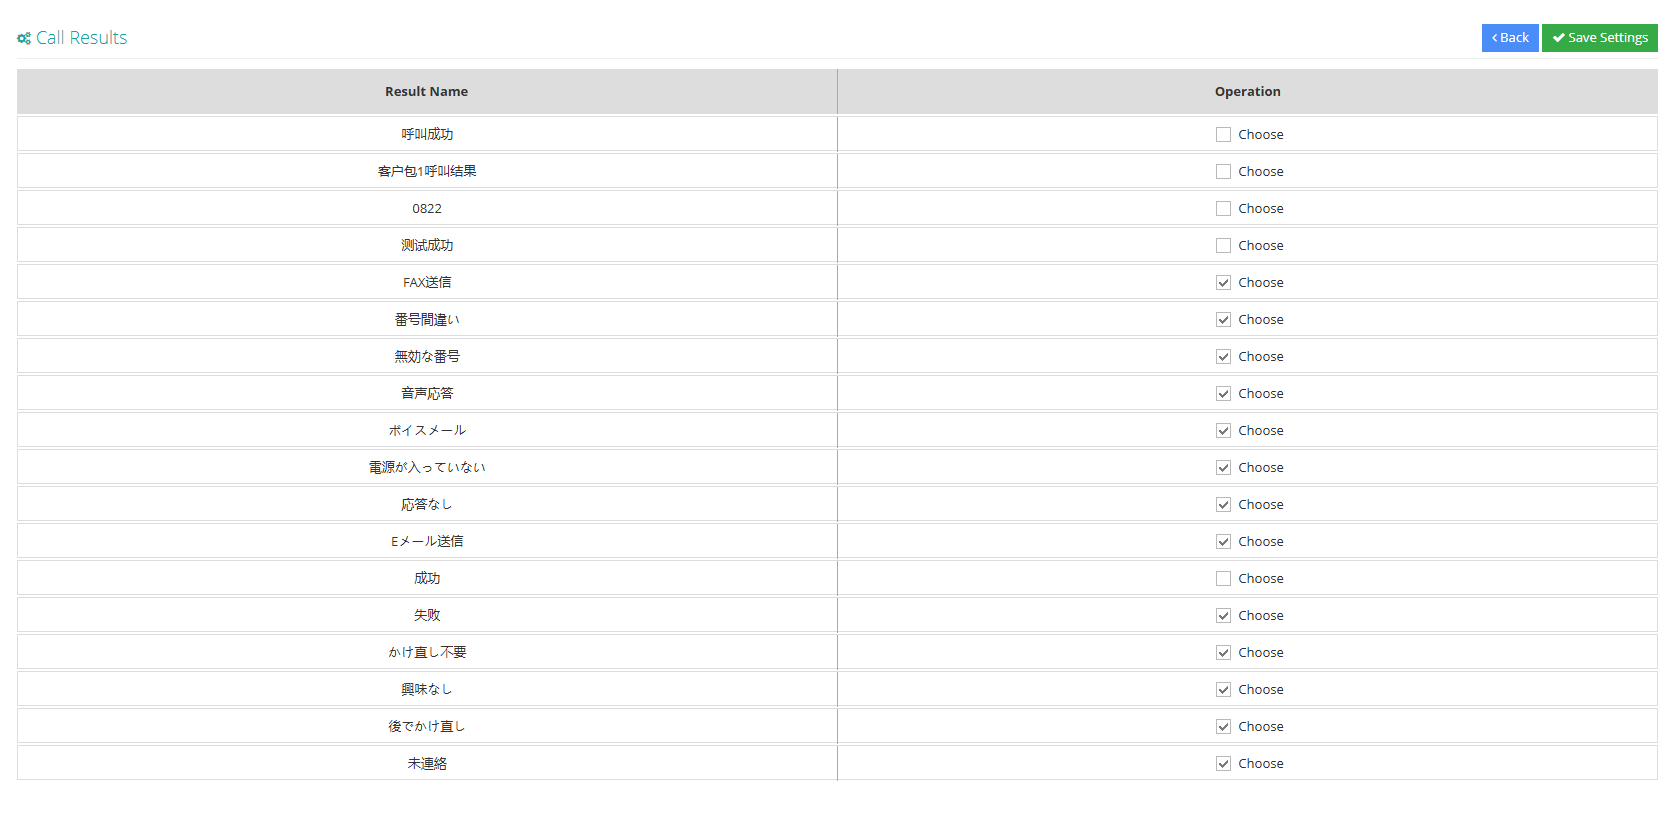
3.3.4 Call Results
1 page introduction
Call Results is the call result of the agent who saves the contact record after the agent calls the customer, and is used to classify the call result.
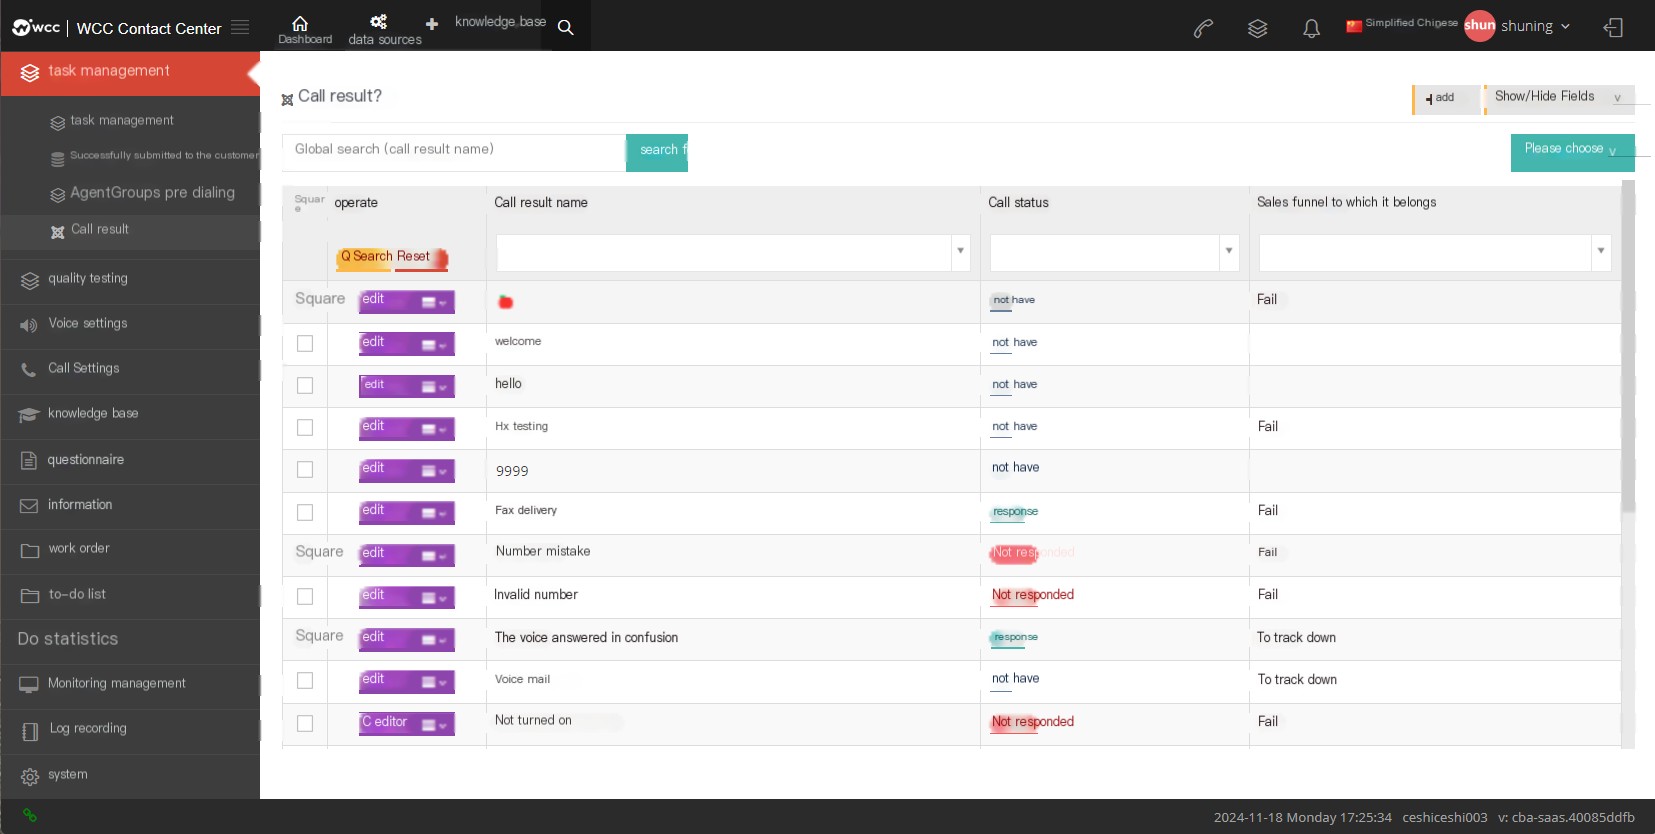
【Search】Global search can only be searched using the call result name.
【Add】Add a new call result.
【Show/Hide Field】Select the fields that this page needs to be displayed or hidden.
[Please select] Delete according to the conditions.
【Edit】Can edit the created call result.
[Drop-down menu] Delete this call result.
2 Show/Hide fields
Call result name: The name of the creation call result.
Call status: The call result can be set in this call status.
Sales funnel: The sales funnel to which the call result belongs
Created date: The date of creation of the call result.
Creator: The creator of the call result.
3 Add a new call result
① Click Add in the call result page to enter the Add/Edit Call result page:
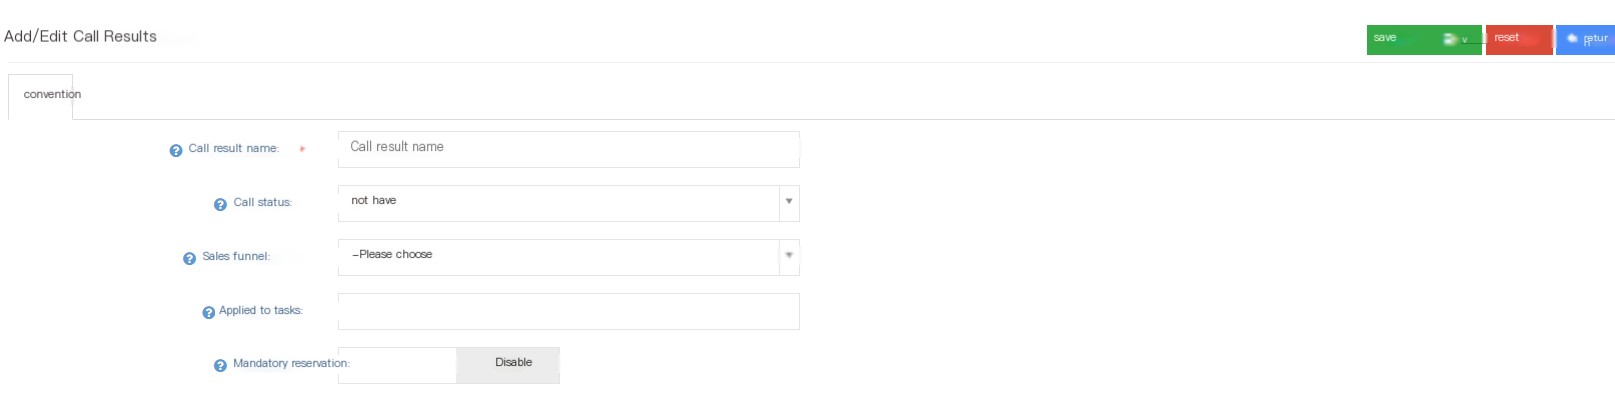
Call result name: The user can customize a call result. After the agent completes the call, the agent can select a call result to record the end of the call.
Call status: Answer - This call result can be set when the call is answered; None - means that the call result can be used in any state; None - This call result will be displayed only when the call is not answered.
Sales funnel: Set the specified sales funnel to display the call result under this specified sales funnel.
Apply to Task: Apply this call result to the specified outbound call task. The call result is only displayed in the specified task. If you select to apply to all or more tasks, the call result can be selected from all tasks or selected tasks.
Mandatory appointment: An appointment must be established, otherwise the customer and contact history cannot be saved.
After the user logs into the seat identity, he can select the call result in the customer pop-up page - customer related records - historical contact records
3.4 Quality inspection
3.4.1 Quality inspection
1 Page Introduction
Quality Inspection It is a quality inspection personnel who can randomly check the call results, play the recording simultaneously, verify whether the recording content is true, evaluate the seat communication skills, work attitude, etc., and conduct quality inspection and score.
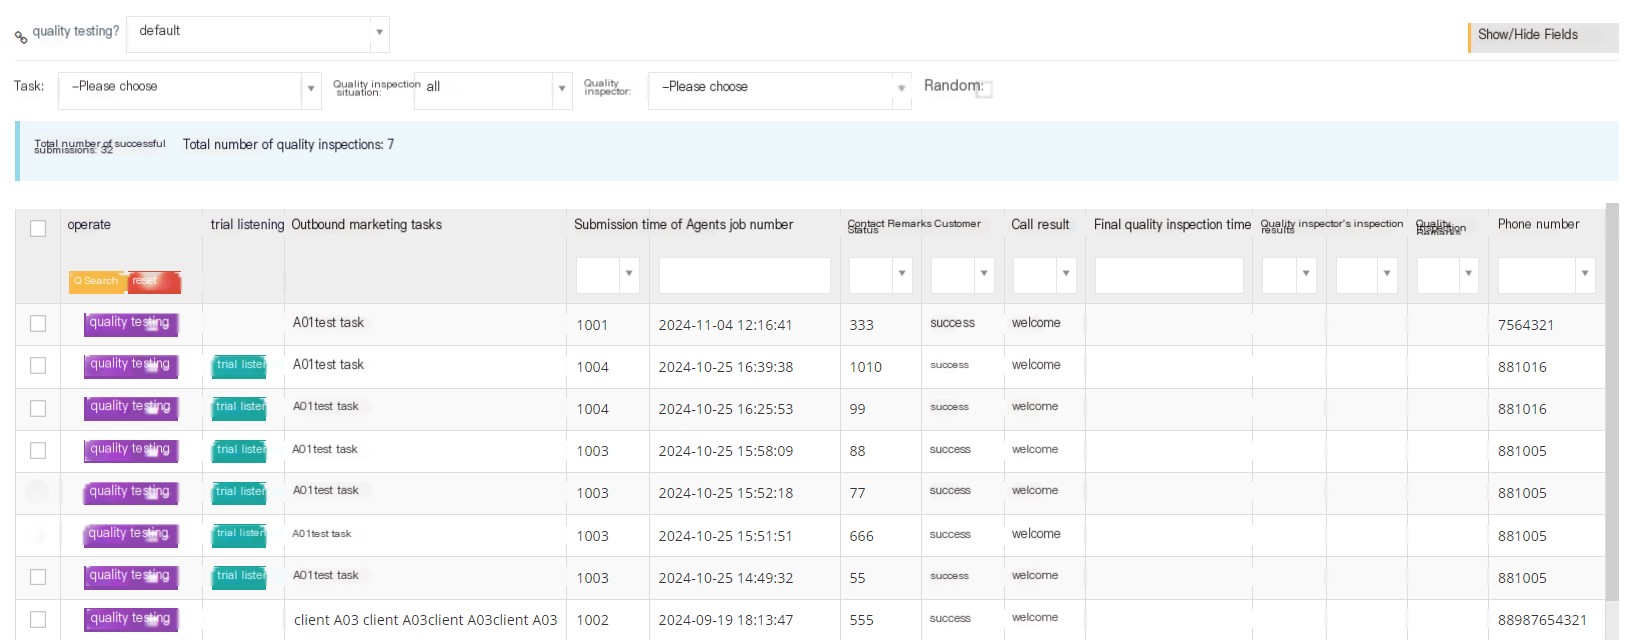
[Default] Select the customer package that requires quality inspection.
【Show/Hide Field】Select the fields that this page needs to be displayed or hidden.
[Task] Call tasks that require quality inspection.
【质检情况】根绝选择的质检情况查看质检数据。(抽检合格包含 质检成功、话术不规范、未质检;可回拨属于质检不合格中。)
[Quality inspector] Check the quality inspection data based on the selected quality inspector.
【Random】Randomly view the data that needs quality inspection.
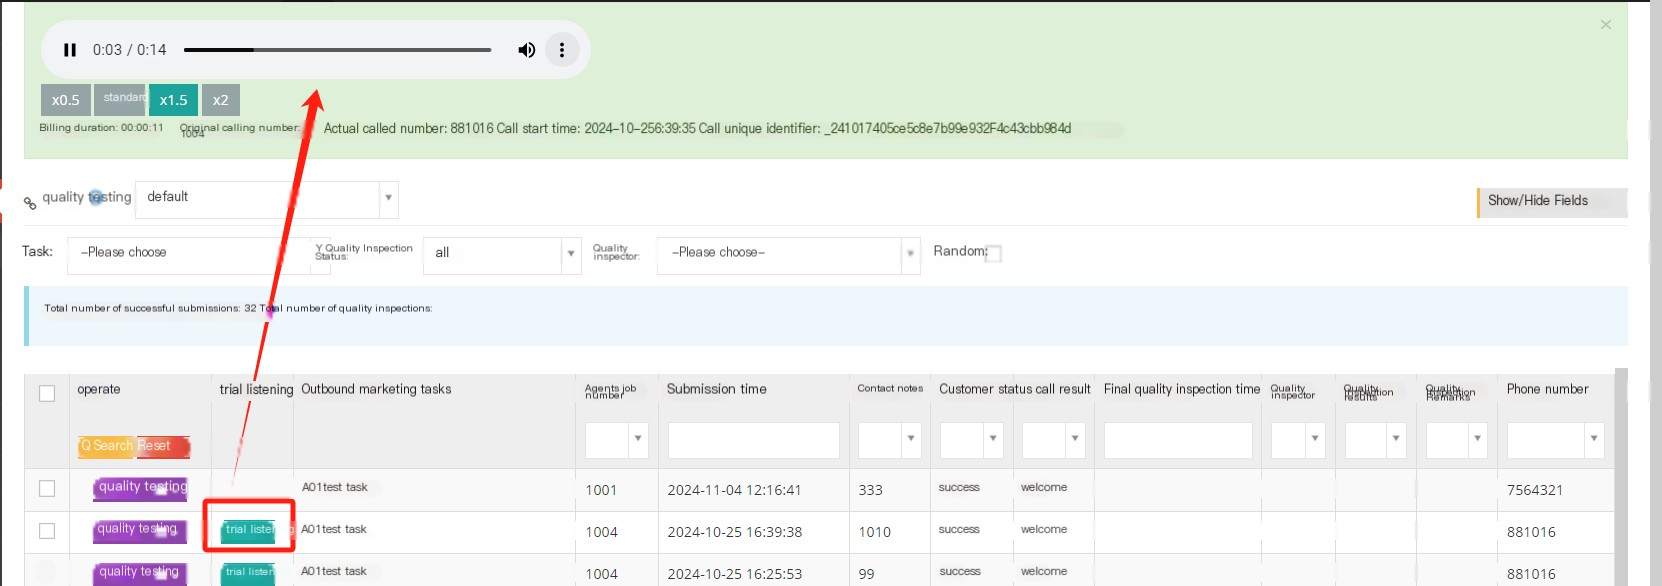
【试听】
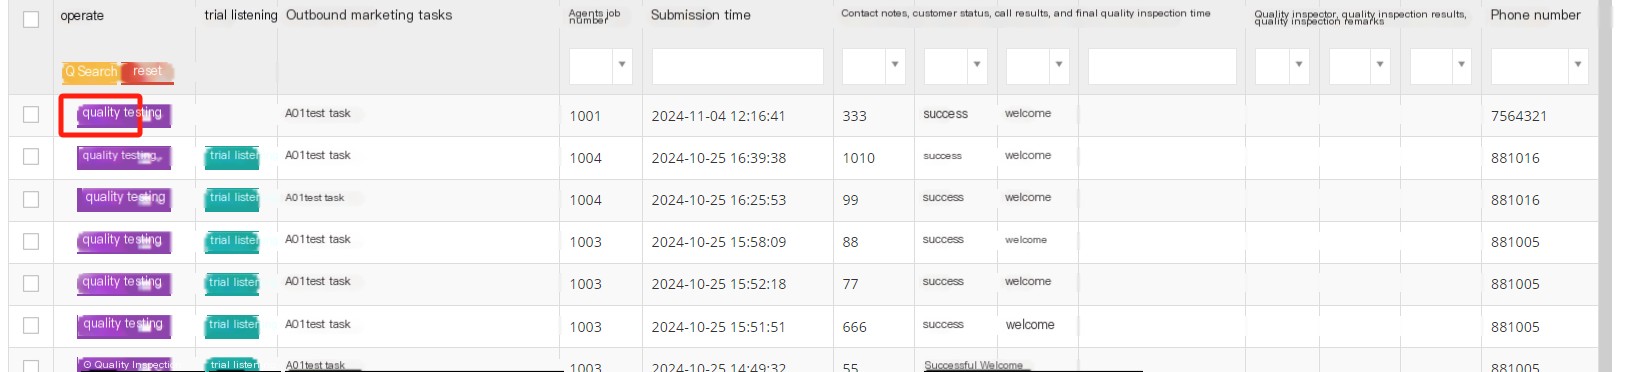
[Quality Inspection] Click on Quality Inspection to enter the quality inspection page.
[Drop-down menu] Select the results of the quality inspection to perform a quick quality inspection of the successfully submitted data.

2 Show/Hide fields
Outbound call task: The group needs to check the task to which the call is assigned.
Cabin number: The agent that requires quality inspection is the agent.
Submission time: Submission time of this quality inspection.
Modification date: The date when the quality inspection results are modified.
Contact Notes: Notes saved in historical contacts.
Customer Status: The status name saved by the customer sales funnel (score greater than 0).
Call result: The call result saved by the customer.
Last quality inspection time: The time of the customer’s last quality inspection.
Quality inspector: Personnel who conducts quality inspection of the call results.
Quality inspection results: The results of quality inspection.
Quality inspection notes: Quality inspection notes.
电话号码:客户的电话号码.
3 Quality inspection process
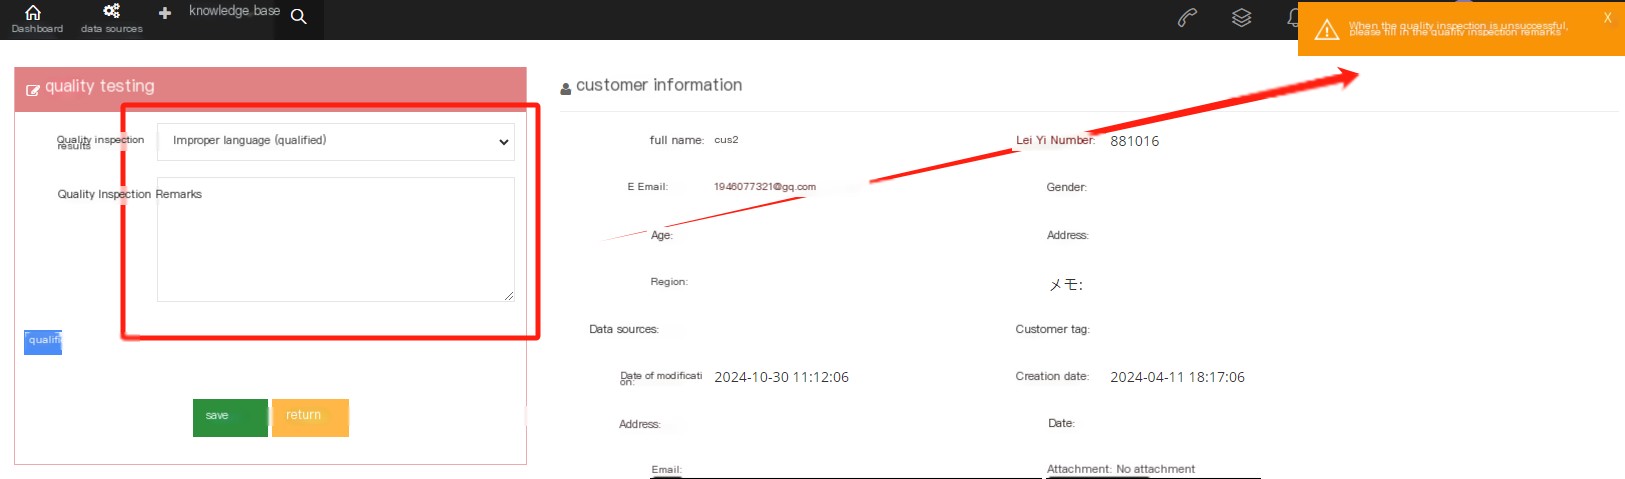
Click on Quality Inspection to enter the quality inspection process:

There are 4 functional blocks on the quality inspection page, including quality inspection, contact records, customer information functions and last quality inspection results.
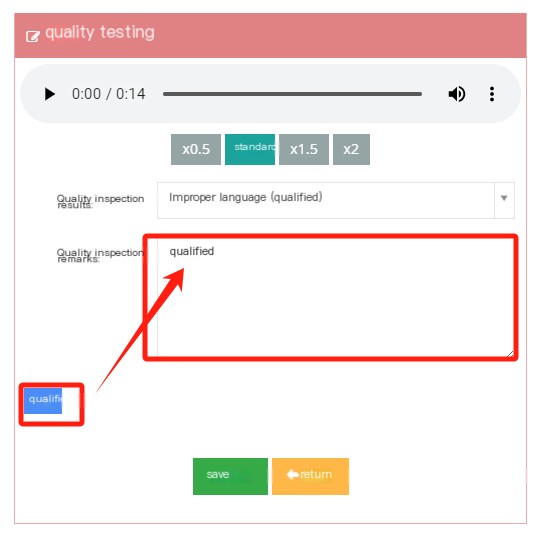
【Quality Inspection】
In the quality inspection page, the quality inspector can perform quality inspections on the calls successfully submitted by the agent, and the quality inspector can change the playback speed of the call or download the call.
In the quality inspection results, the quality inspector can choose the quality inspection results, including passing, irregular speech (qualification), failure or callback.
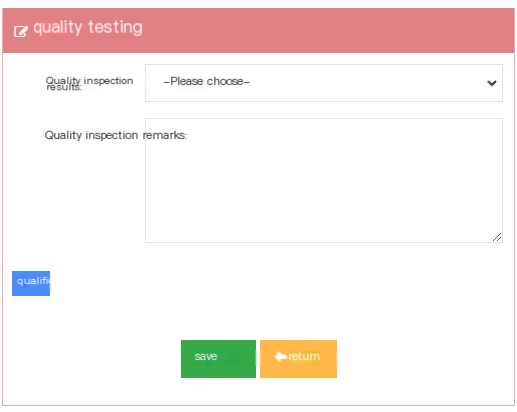
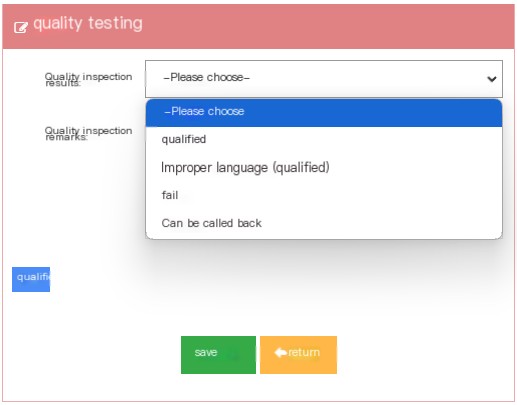
If the quality inspection results are not standardized, failed or can be called, the quality inspector needs to fill out the quality inspection notes (the quick selection entrance for quality inspection notes can be set in the quality inspection entry).
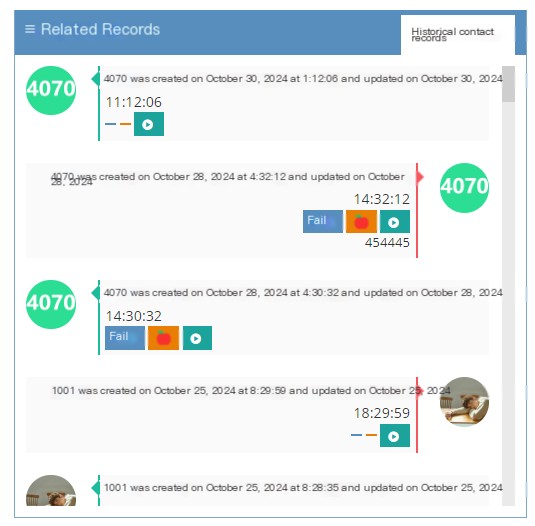
【Related records】
The relevant record page records the historical contact records between the agent and the customer. The quality inspector can view the contact records or listen to historical recordings.
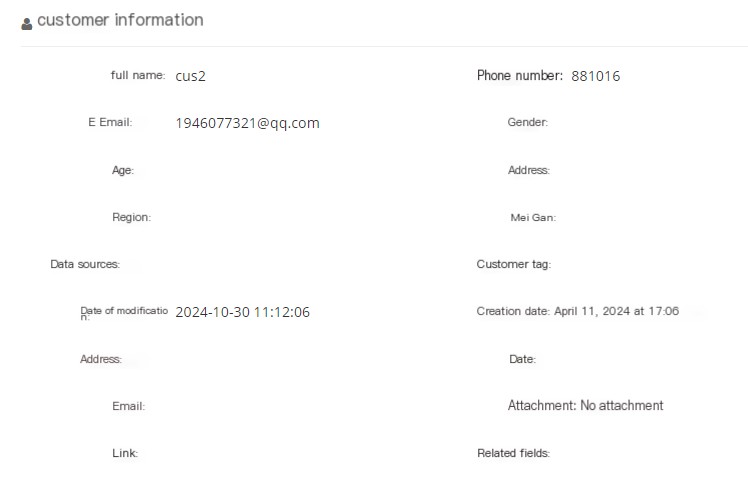
【Customer Information】
Inspectors can view customer information during quality inspection.
【Last quality inspection results】
If the last quality inspection result is because the quality inspection result of the customer who has been quality inspection is callable, when the agent successfully submits the customer’s contact record again, it is necessary to conduct quality inspection again. At this time, the last quality inspection result will appear on the customer page to facilitate the quality inspector to view it.
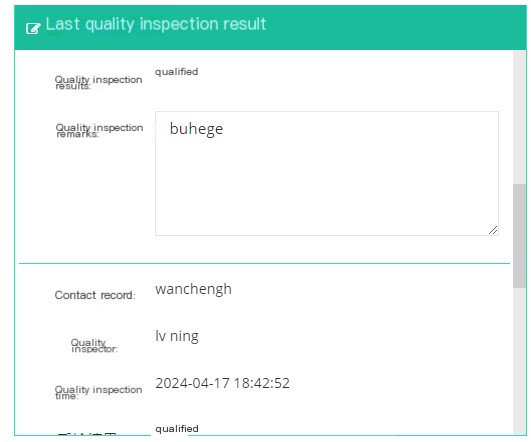
Contact history: Displays the notes written when the last successful submission is submitted.
Quality inspector: The quality inspector who was the last quality inspection.
Quality inspection time: The quality inspection time of the previous article.
Quality inspection results: The quality inspection results of the last quality inspection.
Quality inspection notes: The notes filled in when the last quality inspection was not successful.
3.4.2 Quality inspection entry
1 Page Introduction
Quality Inspection Entry is a commonly used quality note information set. During quality inspection, quality inspection personnel can quickly add quality inspection notes by clicking on the quality inspection entry with one click.
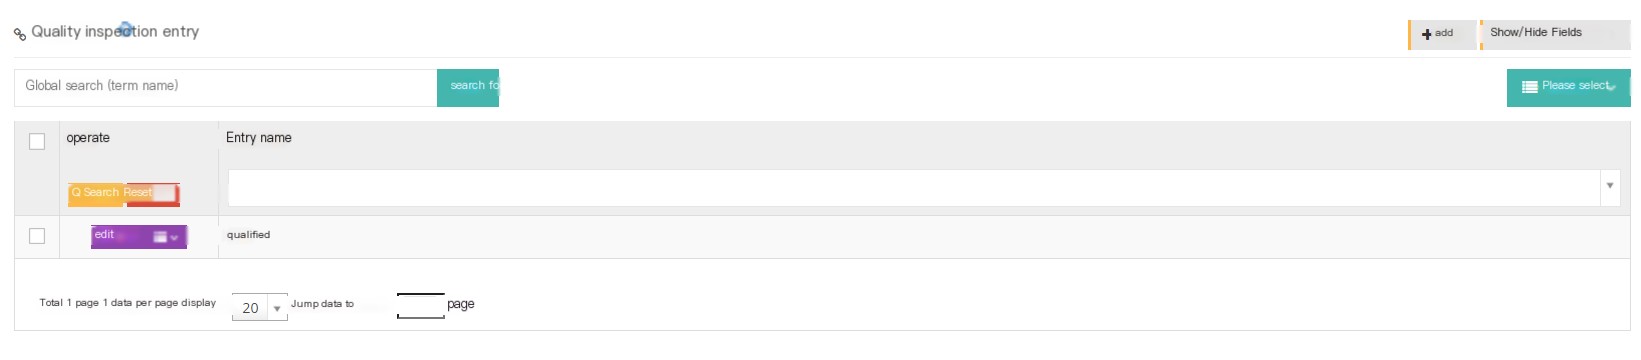
[Search] Global search can only use the quality inspection entry name to search.
[Add] Add a new quality inspection entry.
【Show/Hide Field】Select the fields that this page needs to be displayed or hidden.
[Please select] Please delete according to the conditions.
[Edit] The established quality inspection entries can be edited.
[Drop-down menu] Delete this quality inspection entry.
3.5 Voice settings
3.5.1did number
1 Page Introduction
DID number refers to the telephone number provided by the telecom operator that can be called into the system. It is the call number when the external call is in, that is, the phone number announced by the municipal company can also be understood as the number dialed by the customer.
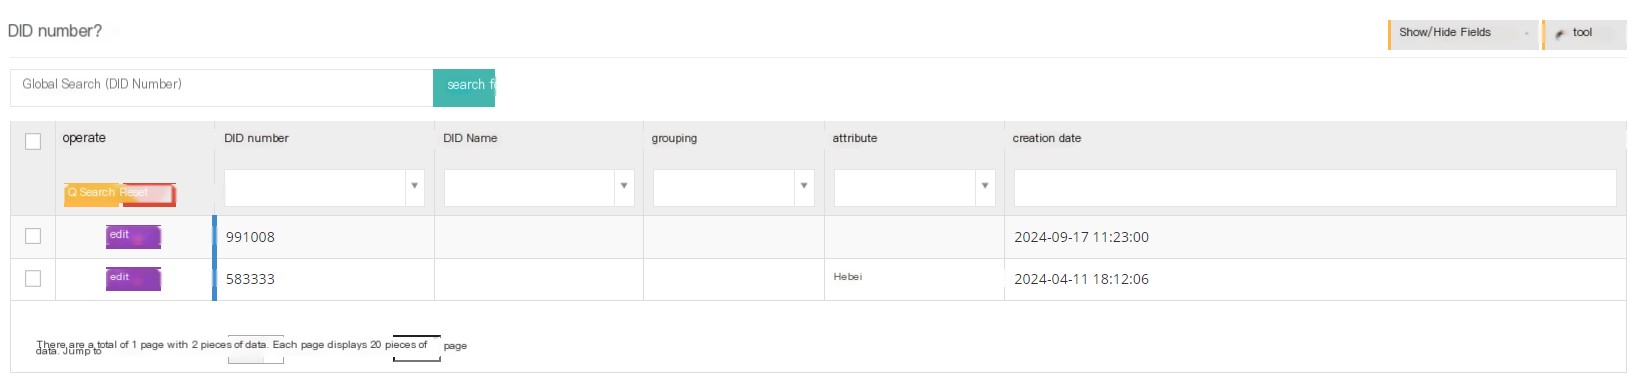
[Search] Global search supports did numbers, client and domain names for search.
【Show/Hide Field】Select the fields that this page needs to be displayed or hidden.
【Tools】Batch editing-export CSV file
[Edit] Edit can set the prefix of the steering, name, grouping and calling number of the did number.
2 Show/Hide fields
DID number: DID display number.
DID name: DID display name.
Grouping: Selected DID grouping.
Steering: The steering position of the DID.
Caller name: Add the name of the caller number prefix.
Calling number: Add the number prefix to the caller number.
Country: The country set in DID.
Attribute: Number home information set in the number area information.
Created date: The time when the DID number was created.
Last update: The time when the DID was last modified and saved.
3 Edit the DID number
① Click [Edit] to enter the general interface for adding/editing DID numbers:
It should be noted that the client user does not have the permission to add DID number. It needs to be established by the operator and distributed to the agent, and the agent will be assigned to the client. If necessary, please contact the agent or supplier.
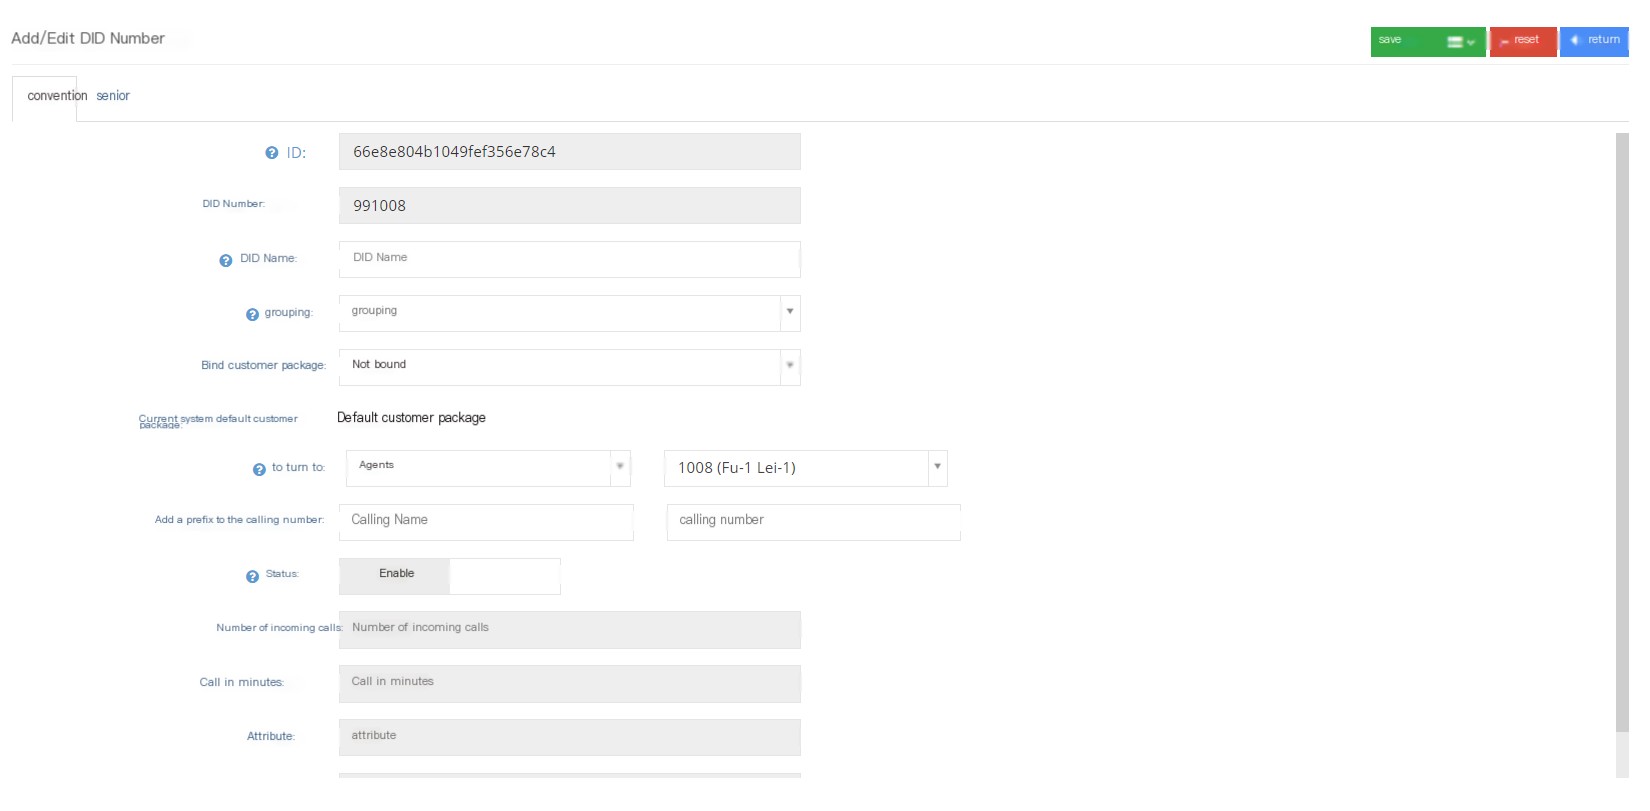
ID: Each DID number has a unique ID.
DID Number: If there are multiple DID numbers, they will be separated by spaces or English commas.
DID name: It is used to help users identify the number in the system. During statistics, if the DID name is set, this name will be used.
Group: Used to manage DID numbers, for example, you can group numbers that use the same incoming rules into a group.
绑定客户包:不绑定,将使用系统偏好设置下设置的默认客户包,默认客户包即使用默认客户表,绑定后选择具体客户包,标明当前DID与该客户包进行绑定,当客户包不可见时,会释放当前DID,并且该字段重置为不绑定。
Turning: After receiving the call, the system will determine whether the call should be called or transferred to the corresponding route, thereby continuing to provide services.
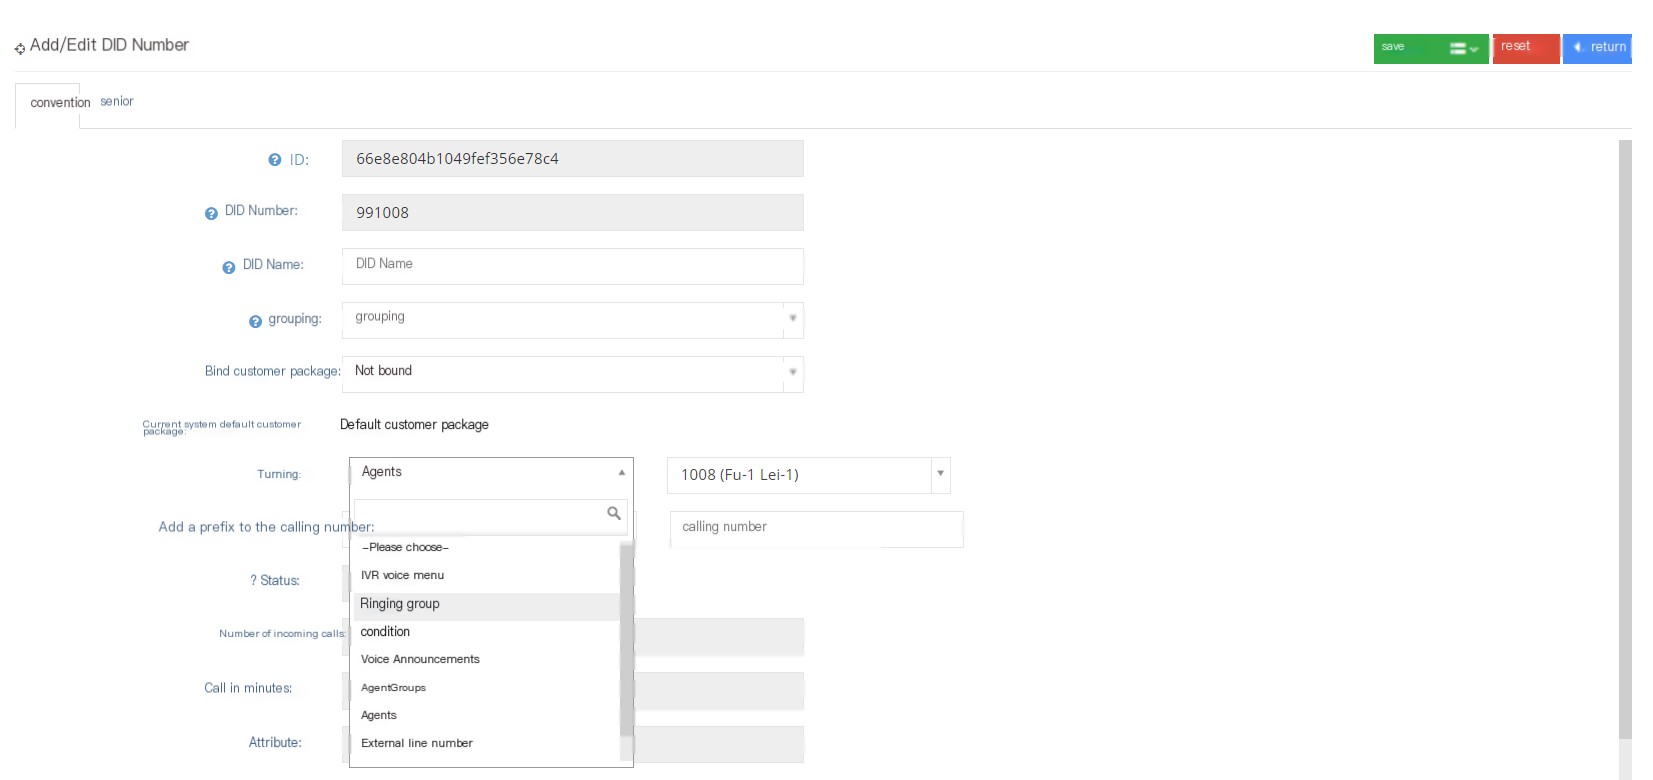
Select the transfer target according to your needs and set the IVR menu, ring group, conditions, playlist, seat, seat group, etc. in the steering.
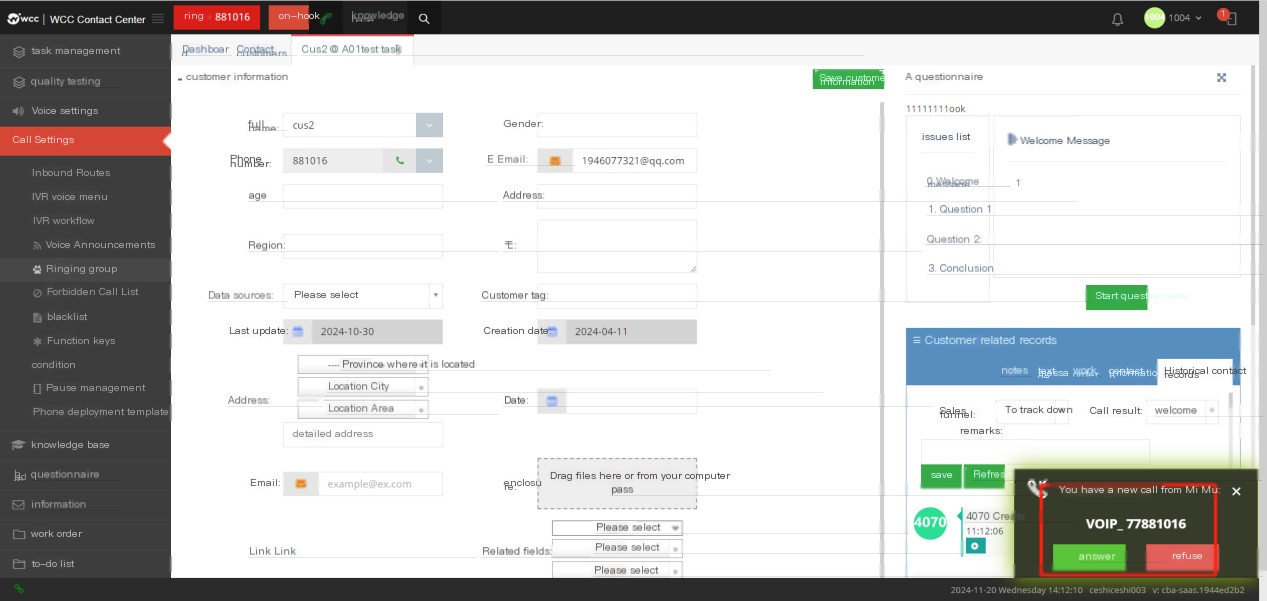
Add to the calling number prefix: After making this setting, the system will add a prefix to the calling number.
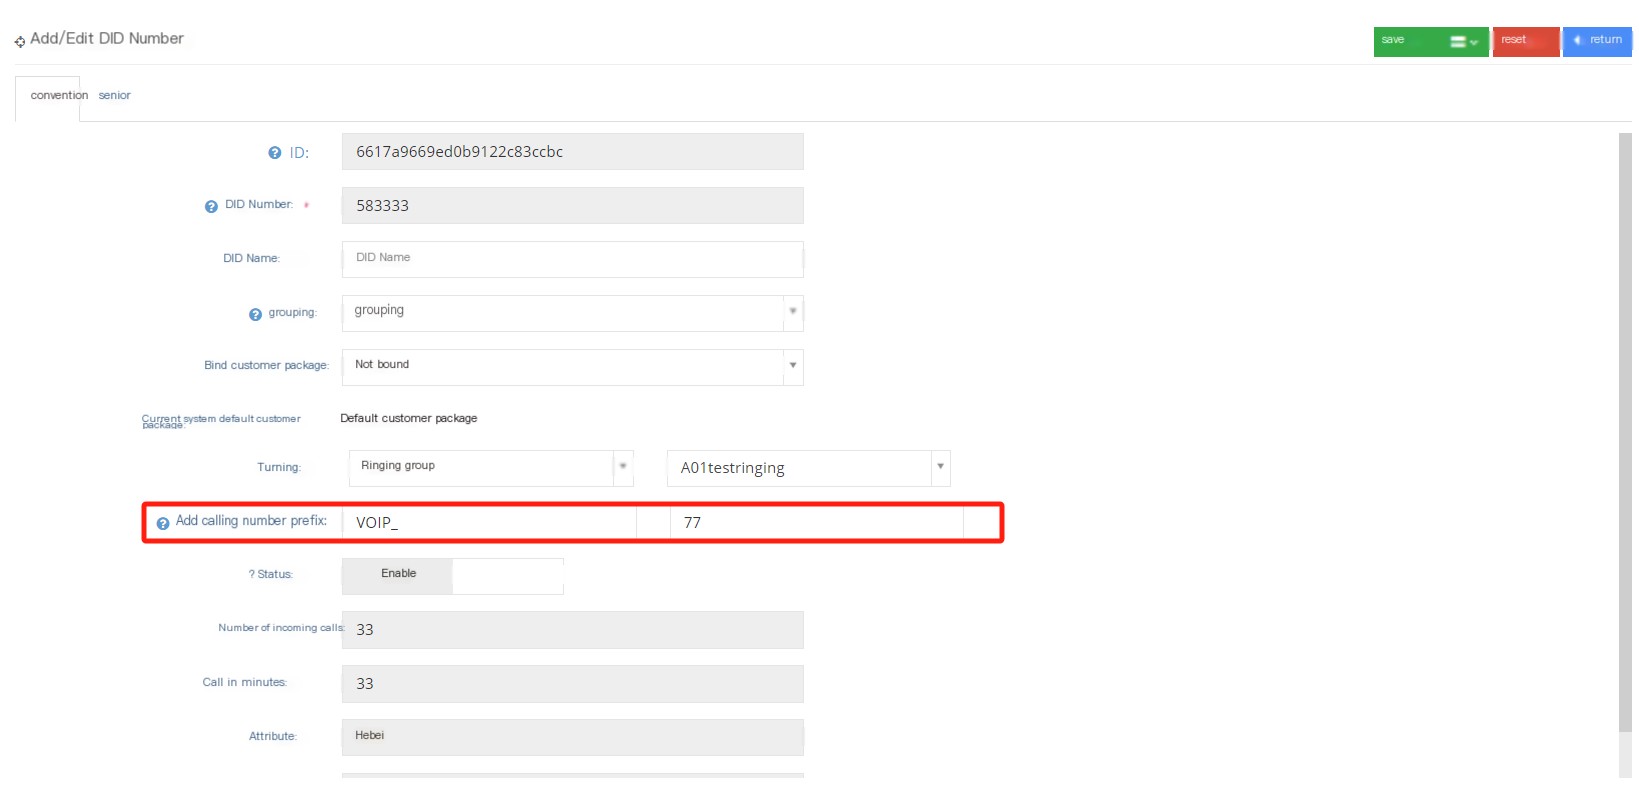
After setting, it is shown in the following figure ↓↓↓

Status: When the DID number is disabled, dialing the number will directly reject the call.
Number of incoming calls: The number of incoming calls by this DID number this month.
Incoming minutes: The number of incoming minutes this DID number this month.
Properties: Displays the DID number’s home information (configured under the agency level number homepage menu).
Last use date: The last time this number is called.
②Click Advanced to enter the advanced page of adding/editing DID numbers:
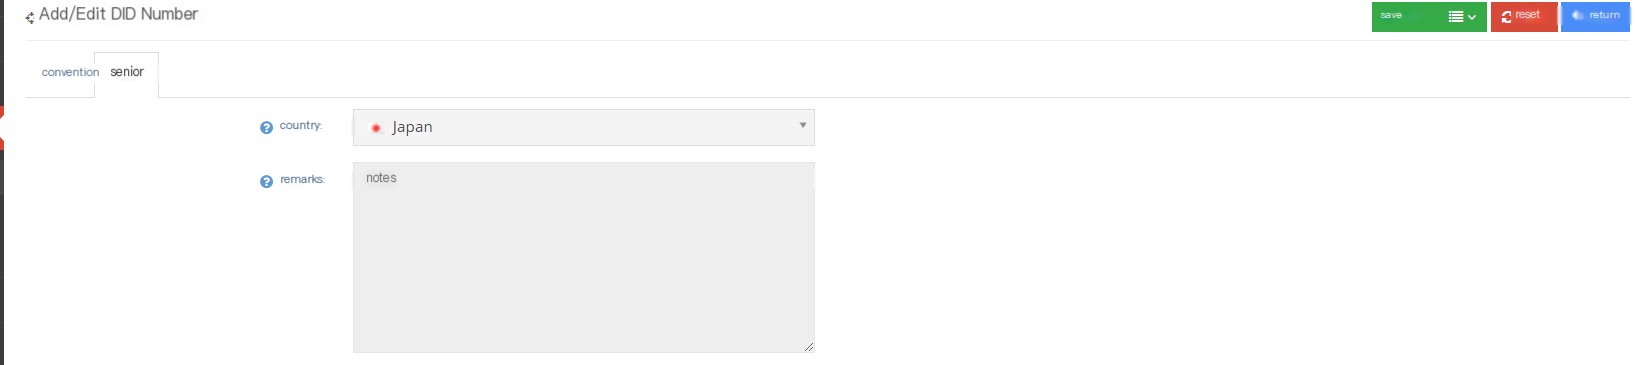
Countries: The client level cannot be changed in countries set at the agent or operator level.
Remarks: Fill in the notes as needed
Note: If the user is a client logged in as loginas from a higher level, if you select “Yes” when logging in, the [Agent] field will appear, and if you select “No”, the [Group] field will appear.

3.5.2 Display number
External number is the calling number displayed when calling a customer.
1 Three settings that affect the display number
Add/Edit Agent - Advanced Settings - Display Numbers
client system-system preference-call settings-call
Task Management - General - Display Numbers
When different display numbers are set in all three cases, the final display number is set by the seat.
2 Introduction to the function of the display number page
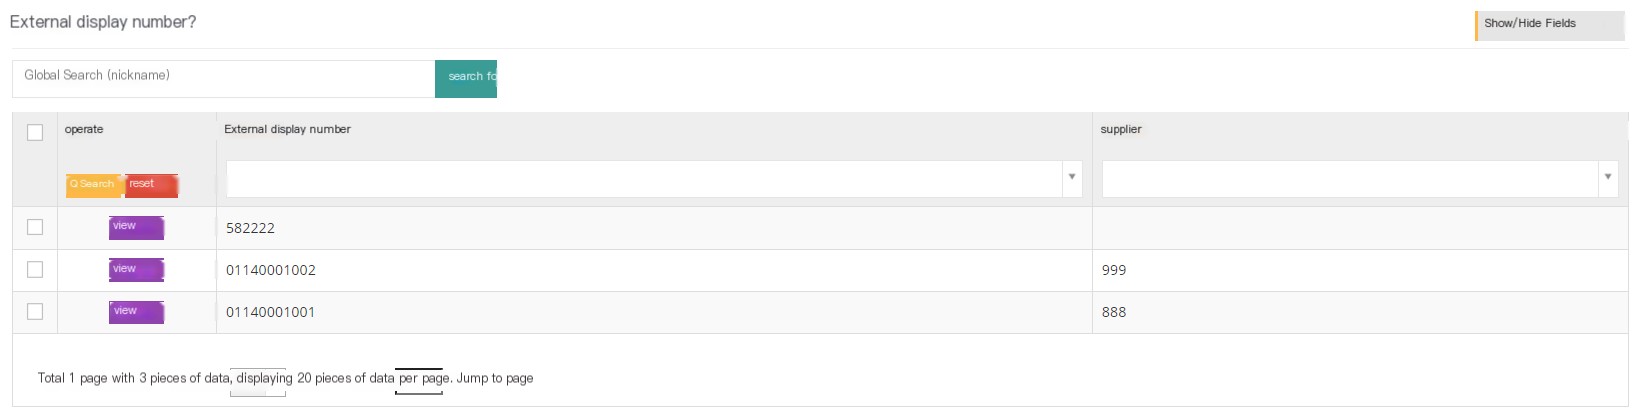
[Search] Global search only supports searching for external numbers.
【Show/Hide Field】Set the fields that users need to display or hide on this page.
[View] View the settings of this display number, cannot be edited.
3 Show/Hide fields
Appearance number: nickname number
Supplier: The supplier settings of this display number.
4 Settings of the display number
The display number needs to be set at the agent or operator level. After setting, the client can select the set display number.

ID: Each display number has an independent ID.
External Number: Enter the display number you want to add.
Supplier: You can fill in a supplier name for this display number and select the Enter key (this function needs to be set at the operator level)
3.5.3 Media Files
1 Page Introduction
Users add voice or wait for music to media files, and can use it in places where media files are needed, such as IVR, ringing groups, voice broadcasts.
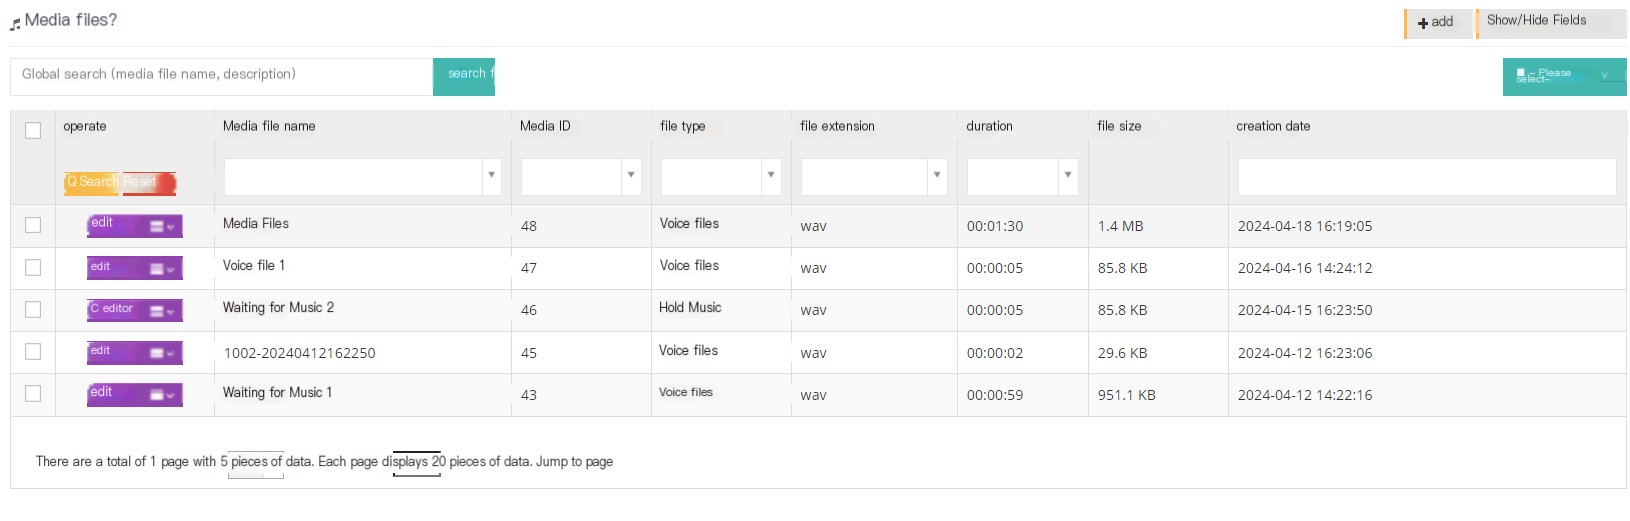
【Search】Global search supports media file name and media file description search.
【Add】Add a new media file.
【Show/Hide Field】Select the fields that this page needs to display or hide.
[Please select] Delete according to the conditions.
[Edit] Edit the established media files.
【下拉菜单】在下拉菜单中用户可以对该条媒体文件进行预览、下载或是删除操作。
Media File Preview
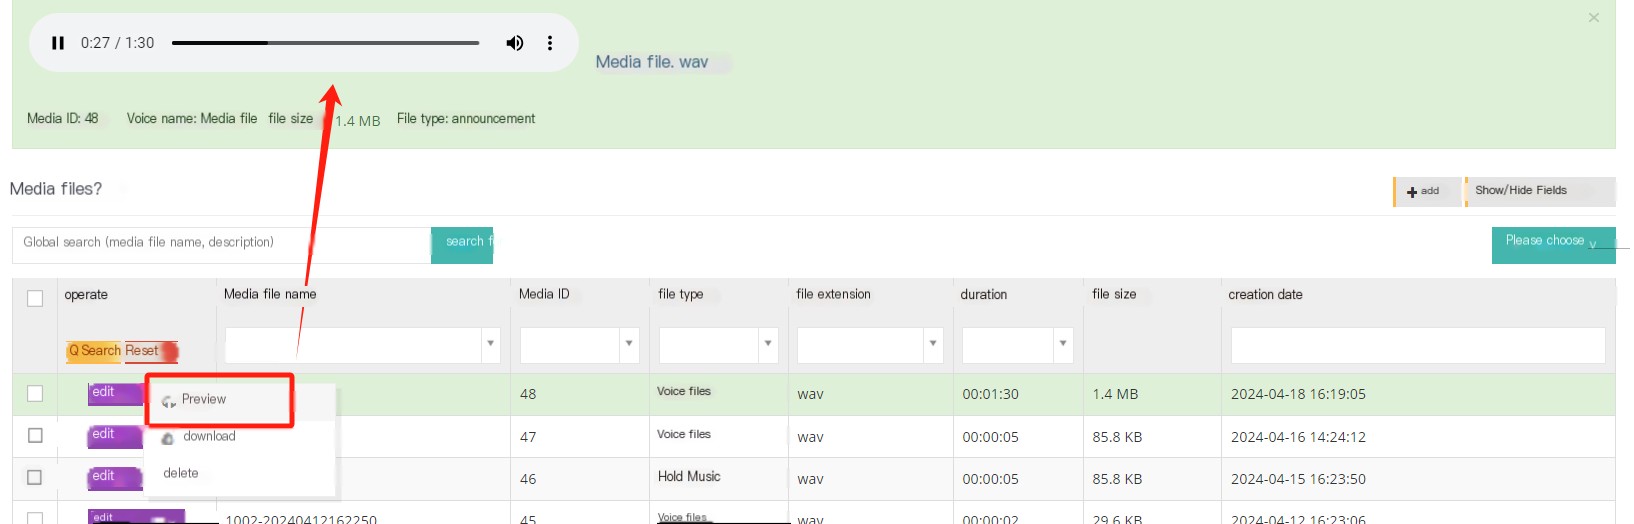
The saving format of the download media file is wav
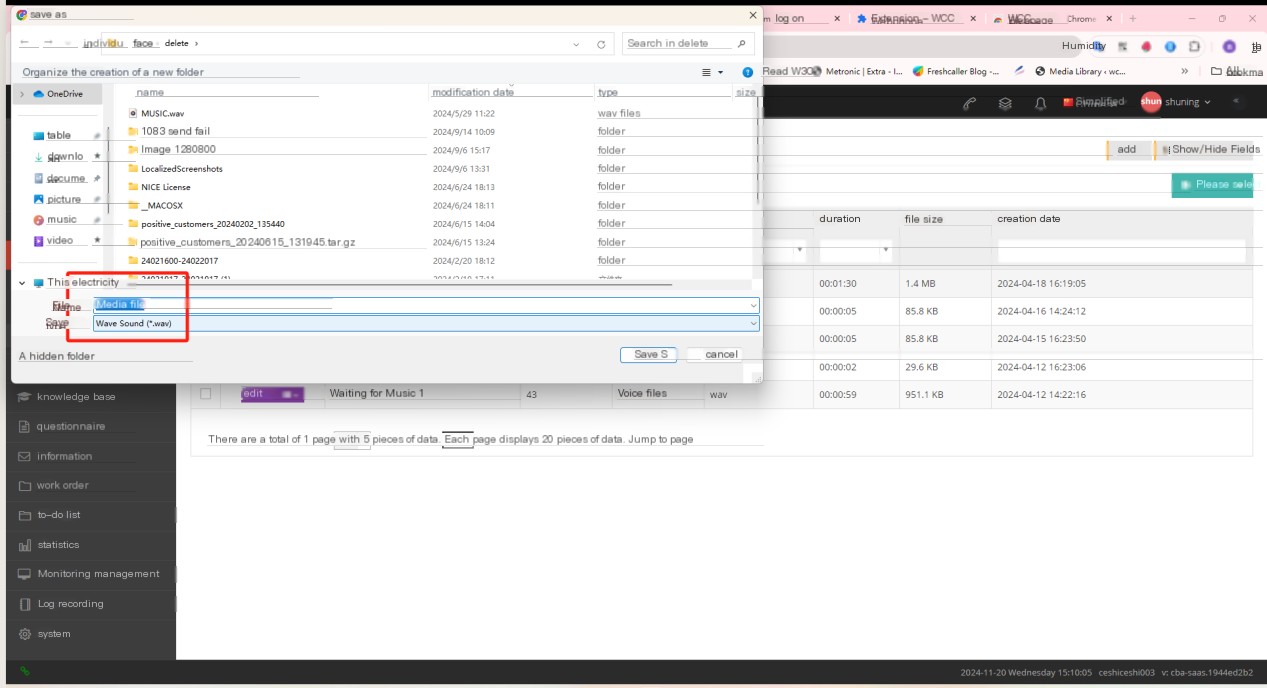
2 Show/Hide fields
Media file name: Media file name.
Media Number: Default Media Number.
File Type: The file type selected.
File extension: file format.
Duration: The duration of the media file.
Music category: The selected music category.
File size: The size of the media file.
Description: A description of the media file.
Created date: The creation date of the media file.
Last updated: The update date of this media file
3 Add a new media file
① Click Add to enter the regular page of adding/editing media files:
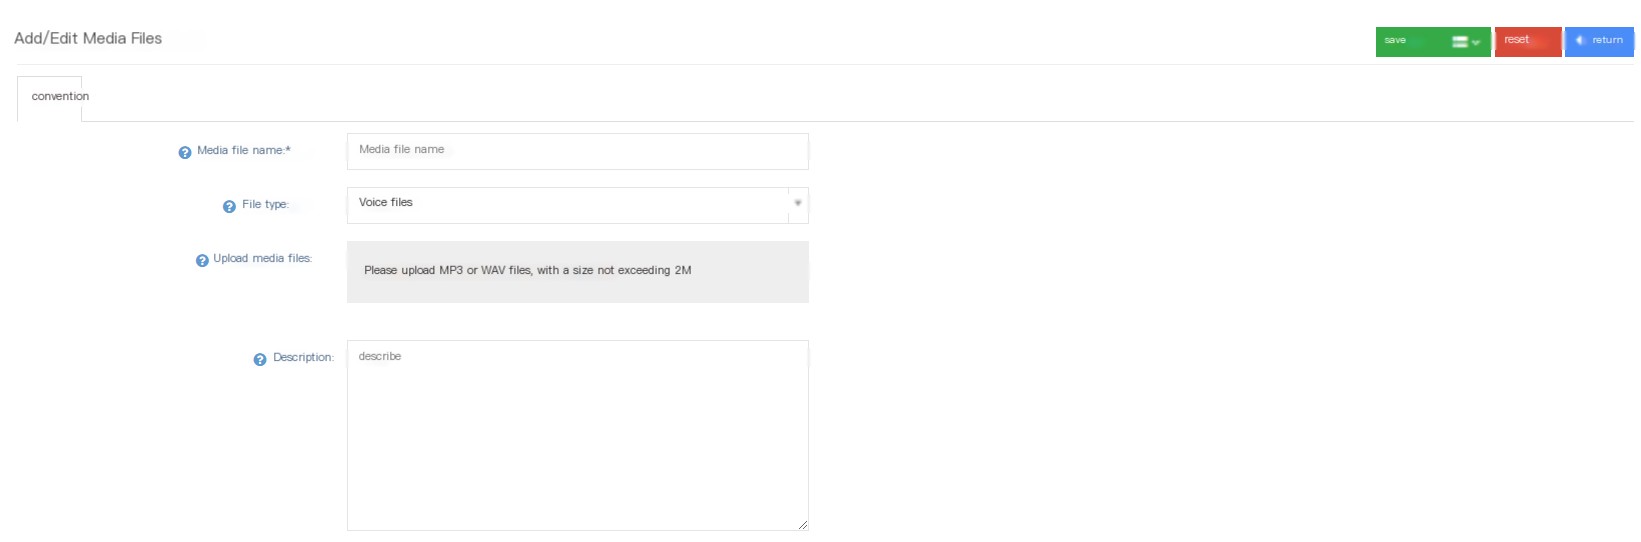
Media File Name: Please name this media file.
File Type:
语音文件:通常是一个短的语音消息,可以在IVR和语音播报中使用。
等待音乐:系统将在客户呼叫处于等待状态时播放的音乐,也可以在坐席组中使用。
Music Category: Fill in a category to enter and classify the music.
Upload media files: Users can upload a media file locally.
Listen: You can listen to or export media files here.
Description: You can describe and explain this media file.
②Click Save to add a successful new media file.
3.6 Call Settings
3.6.1 Incoming call routing
1 Page Introduction
Incoming route is used to control the process after an external telephone call is called to the system. The DID page can realize the same function, but if there are multiple numbers using the same process, or if there are more complex rules, it is easier to configure through incoming routes.
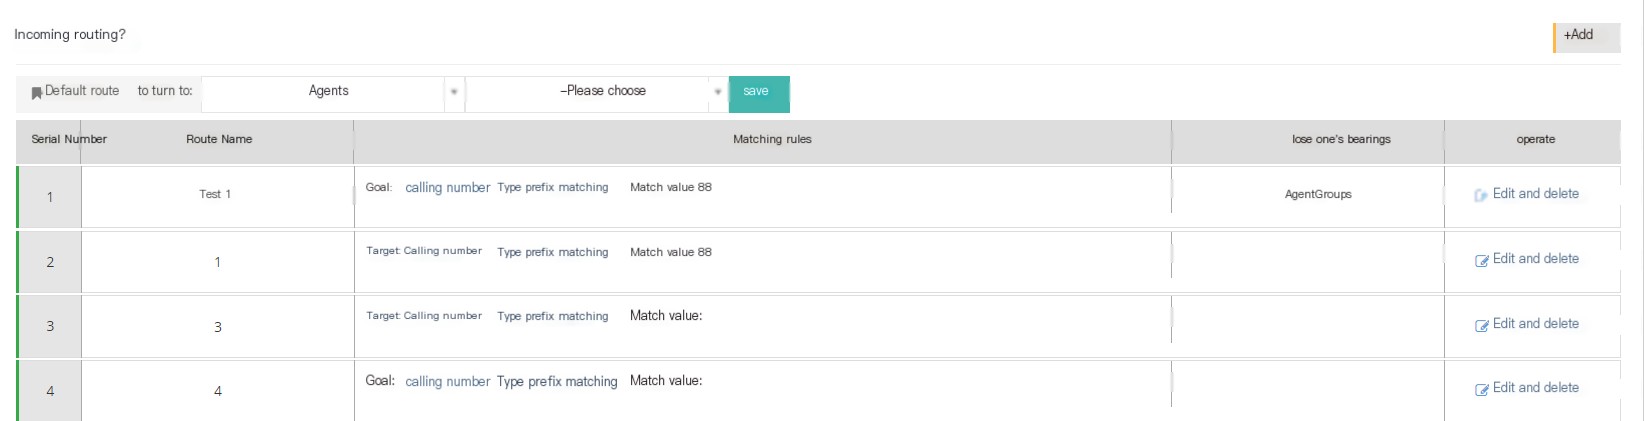
[Default Routing] If there is no steering setting in DID and no new route setting is created, the default route will be selected for steering in the call.
【Add】Add a new incoming route.
[Edit] Edit the newly created incoming route.
[Delete] Delete the route.
2 Add a new route
① Click Add to enter the general settings page for adding/editing incoming routes:
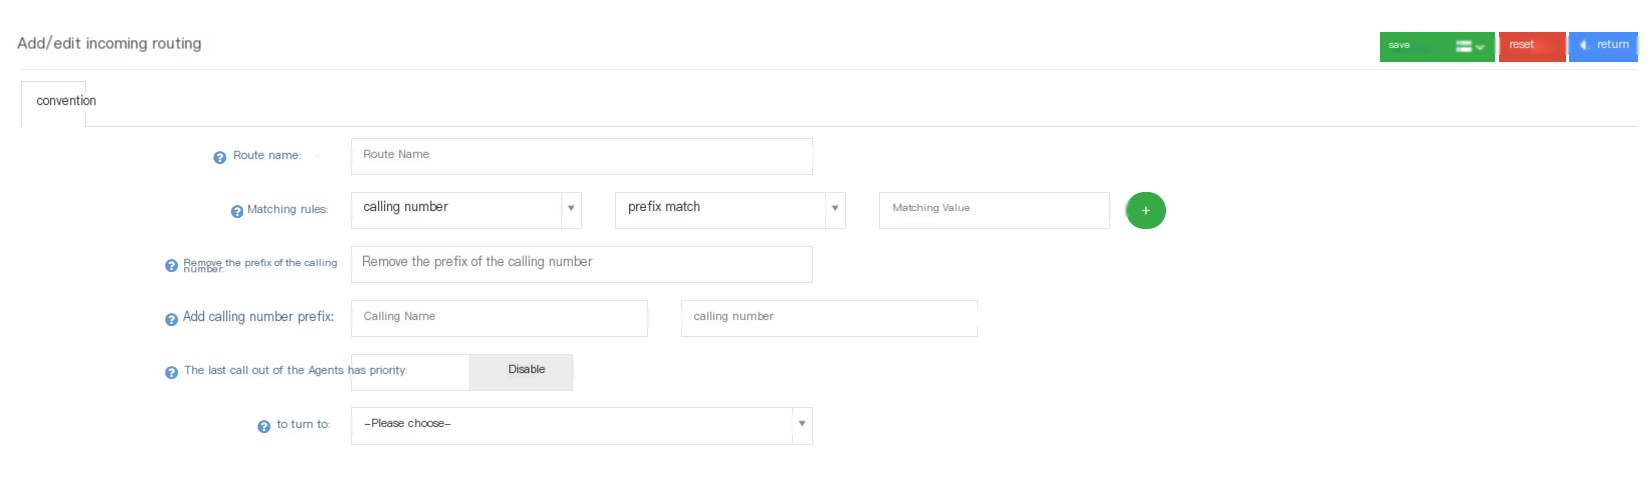
Route Name: Name this incoming route.
Match Rule: Set a matching rule, and calls that comply with this rule will specify the rules for the incoming call route.
一类是以主叫号码为主,设置主叫号码的规则形式:
前缀匹配 -通过主叫号码前缀进行匹配,若did号码中使用了其他前缀号码,则可能会导致通过该规则路由的号码无法正常显示区域信息。
地区匹配 -在匹配值中填写需要匹配的地区,系统通过地区信息来匹配。
正则匹配 -选择该匹配,用户只需要在匹配值中填写一个模糊号码只要主叫号码包含该模糊号码,则都会通过该规则进行匹配。一类是以DID号码为主,设置DID号码的规则形式:
前缀匹配 -用过该主叫号码的前缀进行匹配。
地区匹配 -在匹配值中填写需要匹配的地区,系统通过地区信息来匹配。
正则匹配 -选择该匹配,用户只需要在匹配值中填写一个正则表达式,正则表达式与前面主叫号码匹配,则都会通过该规则进行正则匹配。
分组匹配 -根据分组进行匹配,该分组在DID设置中进行建立分配。If the matching value is not set, the default is that all the rules are directly in line with the rules.
Remove the calling number prefix: The system will remove the prefix set by the calling number in the DID.
Add call number prefix: Add a prefix. If a prefix is also set in the DID, the prefix should be displayed in front of the prefix set by the DID.
Last call out the seat priority: After turning on this item, the seat that will last call with the caller will be called first.
Turning: If the matching rule is met, the call will be sent to the target selected in the item.
*Example about prefix issues: *
Suppose the called number is 881016, if the caller number is filled in and removed, the caller number prefix 32 will need to dial 32881016
If 88 is filled in at the addition call prefix, then 1016 is required to dial out of the call
If you want to replace the number, you need to fill in another complete number that meets the matching rules, for example, 881005
If you fill in three places together, they will eventually be replaced with replacement numbers
*Summary: The removal of the called number is added and replaced. The number dialed by the agent is changed, not the number of the customer.
3.6.2 IVR Voice Menu
1 Page introduction
IVR voice menu, also known as computer traffic, provides users with the ability to interact through the telephone keyboard and voice. The purpose is to enable internal dialing between the telephone connected to the system and the telephone directly connected to the switch, and external incoming calls can be made to the telephone connected to the system.
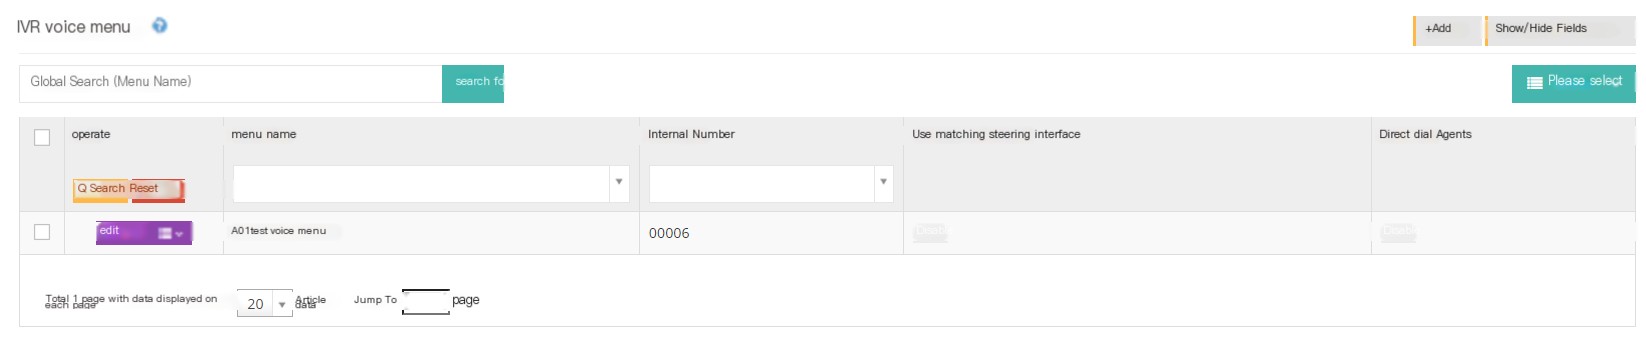
【Search】Global search supports searching menu names.
【Add】Add a new voice menu.
【Show/Hide Field】Select the fields that this page needs to be displayed or hidden.
[Please select] Delete according to the conditions.
[Edit] Edit the established voice menu.
[Drop-down menu] Delete this voice menu.
2 Add an ivr menu
① Click to add/edit the regular page of the IVR voice menu:
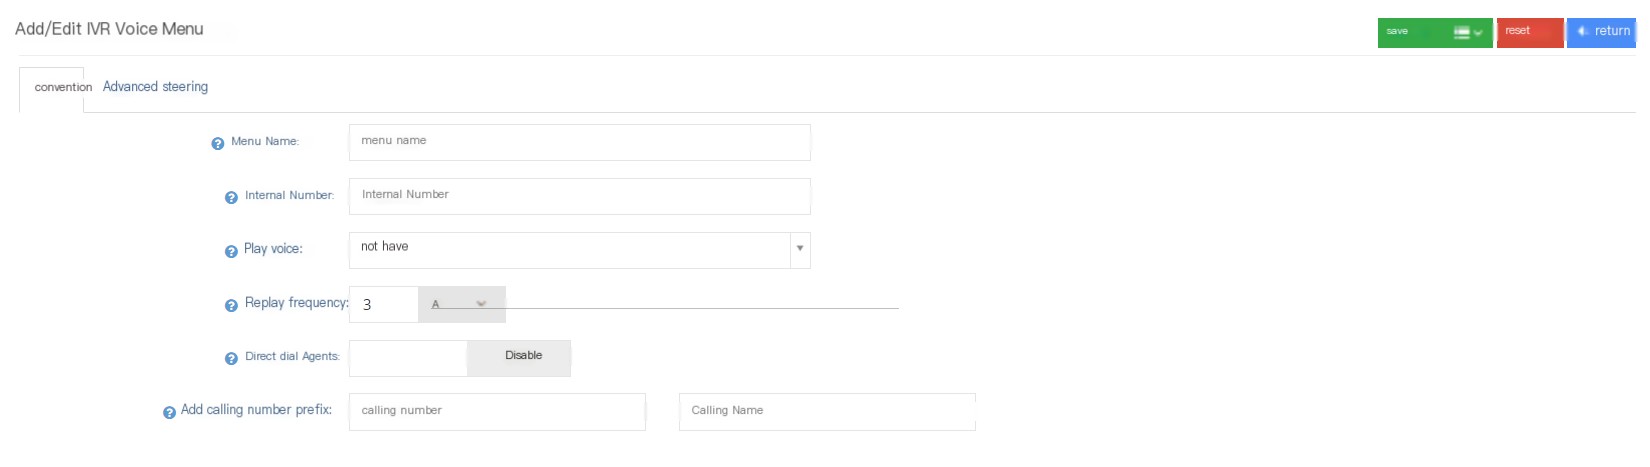
Menu Name: Name this IVR.
内线号码:定义这个IVR的内线号码,从内线sip分机上拨打该内线号码均可达到此IVR。
Play voice: The administrator can select the voice file as the voice played by the IVR voice menu. After the voice, you can add an interval time. After the interval time, the next set voice will be played.
Replay times: If the customer does not have any input, the system will repeat the IVR voice, 0 means that it will only be played once.
Input timeout timeout: The duration of waiting for the customer to enter after the IVR voice playback is completed.
Direct dial seat: Whether customers are allowed to dial the work number (ext number) of the seat directly during IVR playback. If you choose not to allow direct dial seat, if you want to continue to do other steering settings, please set it in the Advanced Settings of the IVR Voice Menu.
Add to call number prefix: When a customer call reaches the IVR, the system will add the call number prefix to the call. At this time, the status after adding the prefix when the call reaches the agent.
②Click Advanced to enter the advanced page of the Add/Edit IVR Voice Menu:
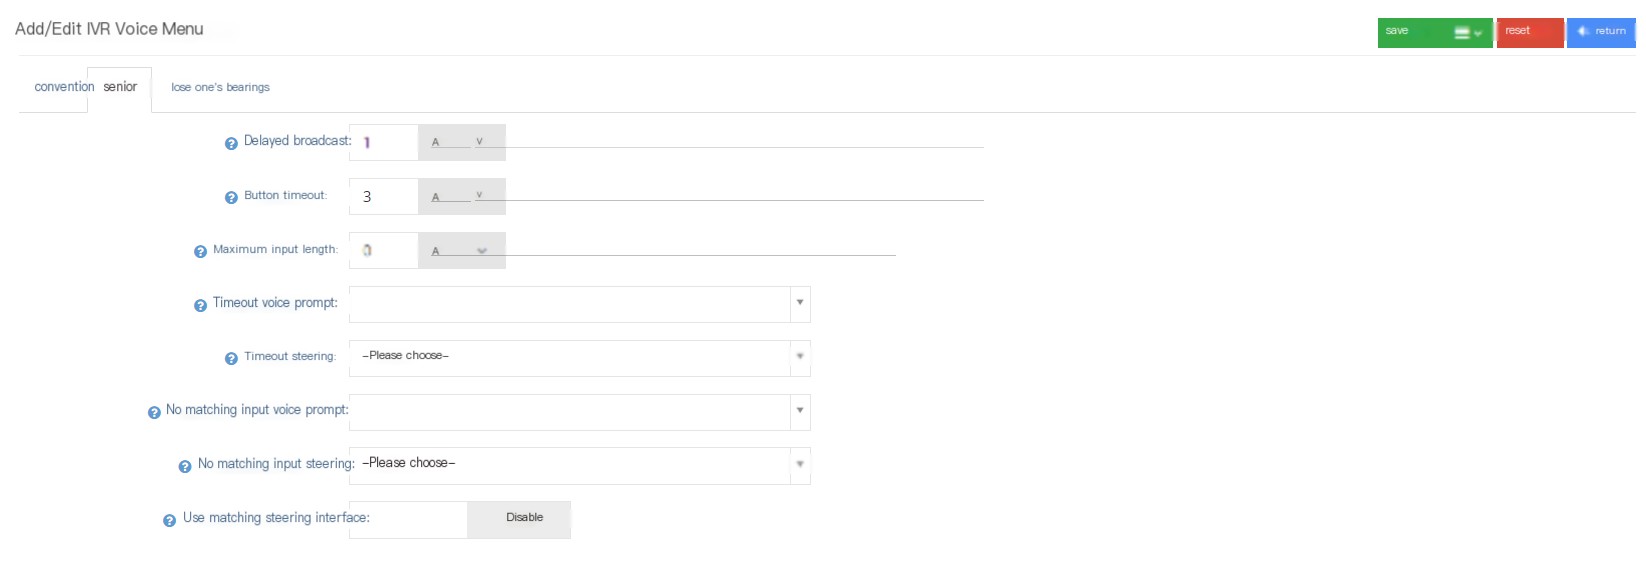
Delayed broadcast: When the user first arrives at the IVR, the system waits before playing the voice.
Key timeout: The time (unit in seconds) of the timeout of the customer input interval. If no other settings after the timeout are set, the call will be hung up when the key timeout timeout is exceeded.
Maximum input length: Limit the customer’s input. Once the customer input length reaches the maximum input length, the IVR will stop accepting customer input.
Timeout voice reminder: The timeout prompt appears before the next action after waiting for the client to input to time out.
Timeout Steering: If the IVR has finished playing the last time and does not receive the customer’s input instructions during the timeout time, the IVR will forward the call to the steering set here. In the absence of other settings, if the timeout Steering is not set, the call will be hung up directly after the timeout timeout.
No matched input voice prompt: When the customer input does not match any steering, the IVR will play this voice.
No matching input steering: When the system finds that the customer input does not match any steering, the system will forward the call to the steering set here.
Use matching steering interface: Plugin used to process user input, such as using external lines based on input query to play custom customer data, if you want to enable this function, please contact the administrator.
③ Click the steering to enter the steering page of the Add/Edit IVR voice menu. Users can set the digital key steering:
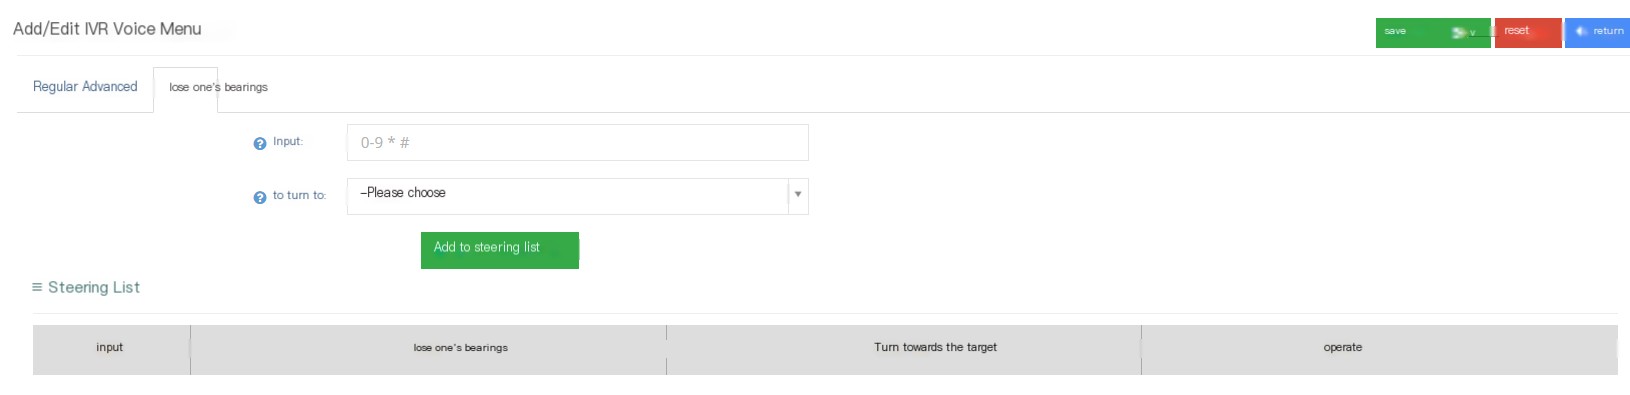
Input: Define customer input that IVR can accept, including the numbers 0-9 keys, * keys and # keys.
Turning: After the customer enters a key value matching, the IVR call will turn to that target.
④ Click Save to add a successful new IVR voice menu
Show/Hide Fields
Menu name: The name of this voice menu.
Inside number: Inside number of this voice menu.
Number of replays: Number of voice replays when there is no customer input.
Use the matching steering interface: steering plug-in.
Delayed broadcast: The waiting time of the system before playing the voice.
Key timeout: The time (unit in seconds) of the timeout interval for the customer input. If no other settings after the timeout are set, the call will be hung up when the key timeout timeout is exceeded.
Maximum input length: The maximum input length when the user can enter according to the voice prompt.
Direct dial seat: Whether the IVR allows customers to dial the extension number of the seat directly.
Add caller number prefix: Add caller number prefix.
Calling number: added number prefix.
Calling name: The name of the added caller number prefix.
Created date: The creation time of the IVR voice menu.
Last updated: The last time the IVR voice menu was saved.
3.6.3 Voice broadcast
1 Page Introduction
Voice broadcast can contain one or more voice messages. When a call is incoming the voice broadcast, the system will broadcast it one by one.
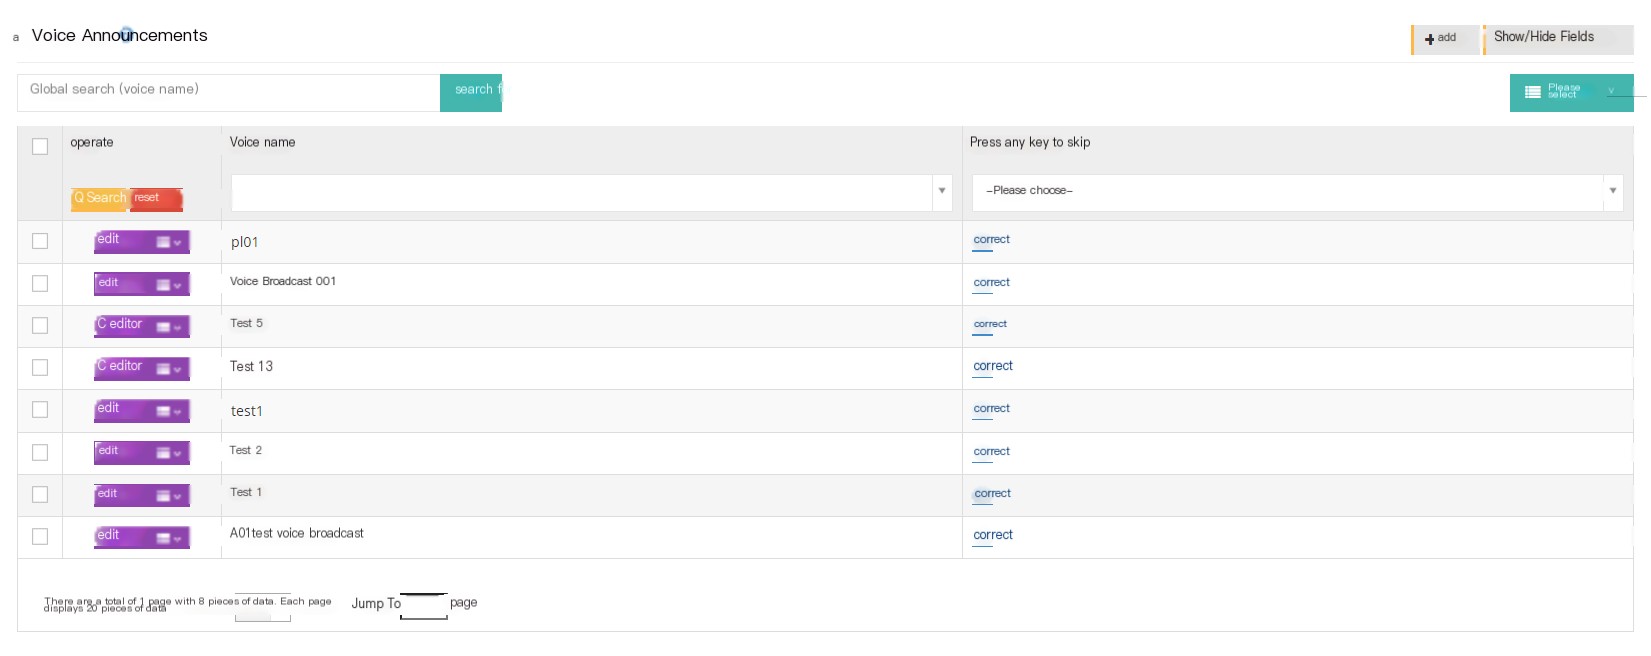
【Search】Global search allows users to search with voice names.
【Add】Add a new voice broadcast.
【Show/Hide Field】Select the fields you want to display or hide on this page.
[Please select] Delete according to the conditions.
[Edit] Edit the established voice broadcast.
[Drop-down menu] You can delete this voice broadcast.
2 Show/Hide fields
Voice Name: The name of the voice broadcast.
Press any key to skip: Whether to skip the voice broadcast.
Created date: The creation date of the voice broadcast.
Last updated: The next update date for the voice broadcast.
3 Add a new voice broadcast
① Click Add to enter the general page of adding/editing playlist:
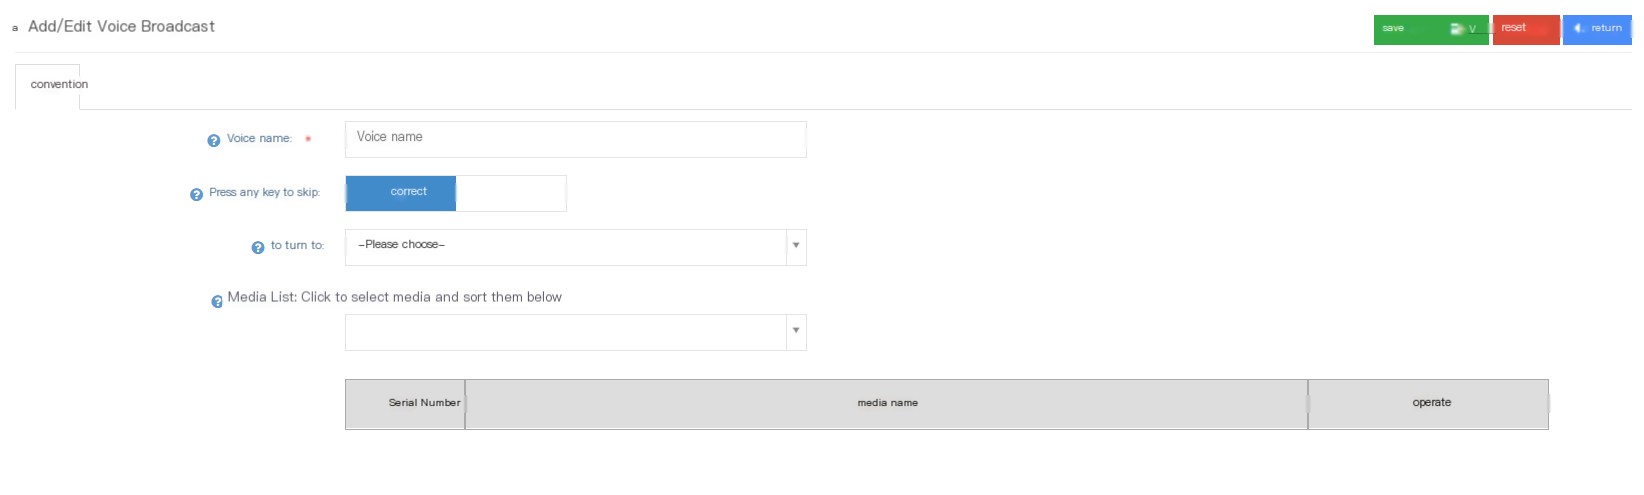
Phonetic Name: Name this voice broadcast.
Media List: The files in this list will be played sequentially.
Press any key to skip: Whether customers are allowed to press any key on the keyboard to skip the currently played voice.
Turning: When the voice broadcast is over or skipped, the customer will be turned to the direction you specified (there is a drop-down menu to choose).
Media List: The files in this list will be played sequentially.
② Click Save to add successfully.
3.7.4 Ringing Group
1 Page Introduction
Ring group A set of extensions is used to handle customer incoming calls separately. Unlike the agent group, the ringing group does not have the function of checking in or performing statistics separately.
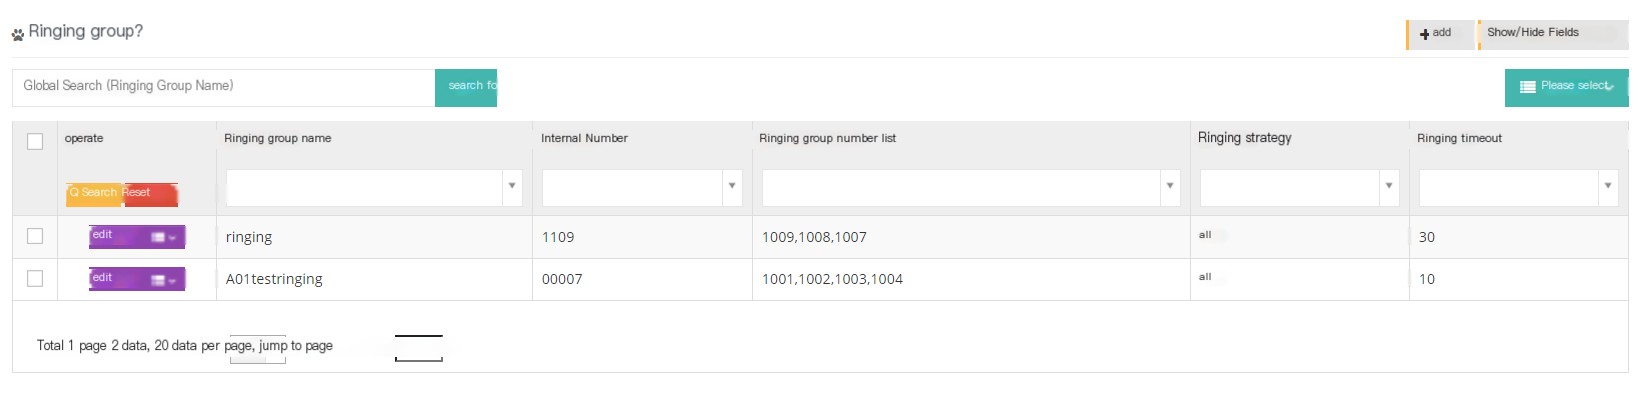
[Search] Global search supports searching with the name of the ringing group.
【Add】Add a new ring group.
【Show/Hide Field】Select the fields that this page needs to display or hide.
[Please select] Delete according to the conditions.
[Edit] Edit the created ring group.
[Drop-down menu] Delete the ringing group.
2 Show/Hide fields
Ring group name: The name of the ring group.
Inside number: ringing group inside number.
Ring group number list: List of numbers in the ring group.
Calling name: added prefix name.
Calling number: added prefix number.
Ringing Policy: Rule assigned to the agent after the queue receives a call request.
Ring timeout: The timeout timeout when all ringing groups are ringing.
Created date: The creation date of the ringing group.
Last updated: The last updated saved date of this ringing group.
3 Add a ringing group
Click Add to enter the Add Ring Group page:
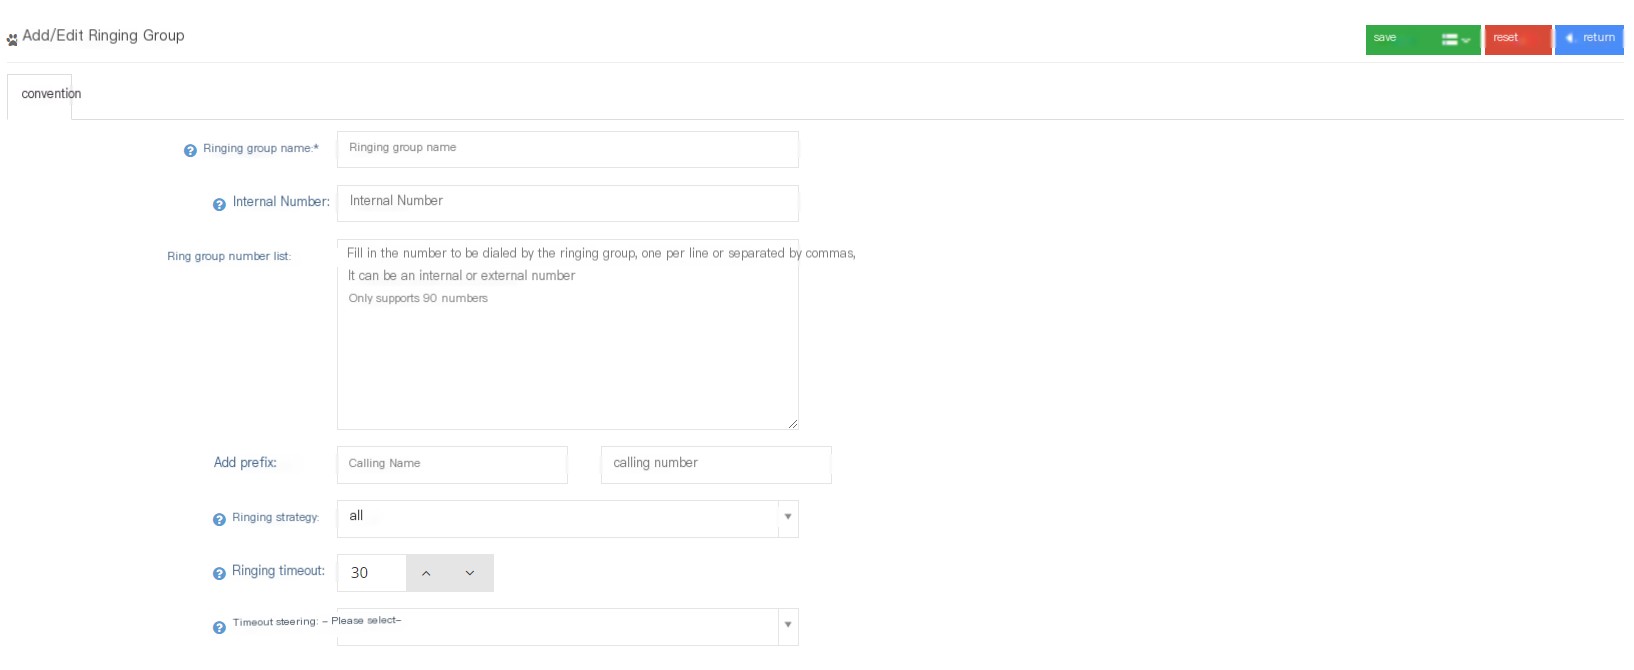
Ring group name: Name this ring group.
Inside Number: You can define an inside number for this ringing group, but the used inside number is not available.
Ring group number list: Fill in the number to be called in the ring group, fill in one for each line or separate it with English commas.
Add prefix: The user can add the prefix of the calling number to the calls from the ringing group.
Ringing Policy: The ringing policy is a rule assigned to the agent after the queue receives a call request.
All-After incoming calls, all extensions ring at the same time.
Polling-After incoming calls, the extension numbers in the group ring one by one.
Random-After incoming calls, randomly select the extension to ring.
Memory Polling-After incoming calls, ringing one by one in the order of the selected extension until the answer is answered. When the call incoming again, the last last extension will be remembered, and then ringing one by one in the order of the start of the next extension of the last extension.
Sequential polling-Ring one by one in the order of the selected extension until the answer is answered. When the call is re-incoming, the extension rings are re-instantly in order.
Ring timeout: When the ringing policy is all ringing, this value is the timeout timeout of the ringing group, and in other cases the timeout timeout of each number being called.
Timeout Steering: When the ringing time exceeds the timeout time, the user can set a steering for the call.
②Click Save to add a successful new ring group.
3.7.5 Blacklist
1 Page Introduction
When a number added to the blacklist is called to the system, the system will recognize the call. The user can choose to set the blacklist number to be hung up directly, play a ring, a voice, or wait for music.
Users can add blacklist numbers on the blacklist page, and add blacklist numbers at the client level can take effect directly without review.
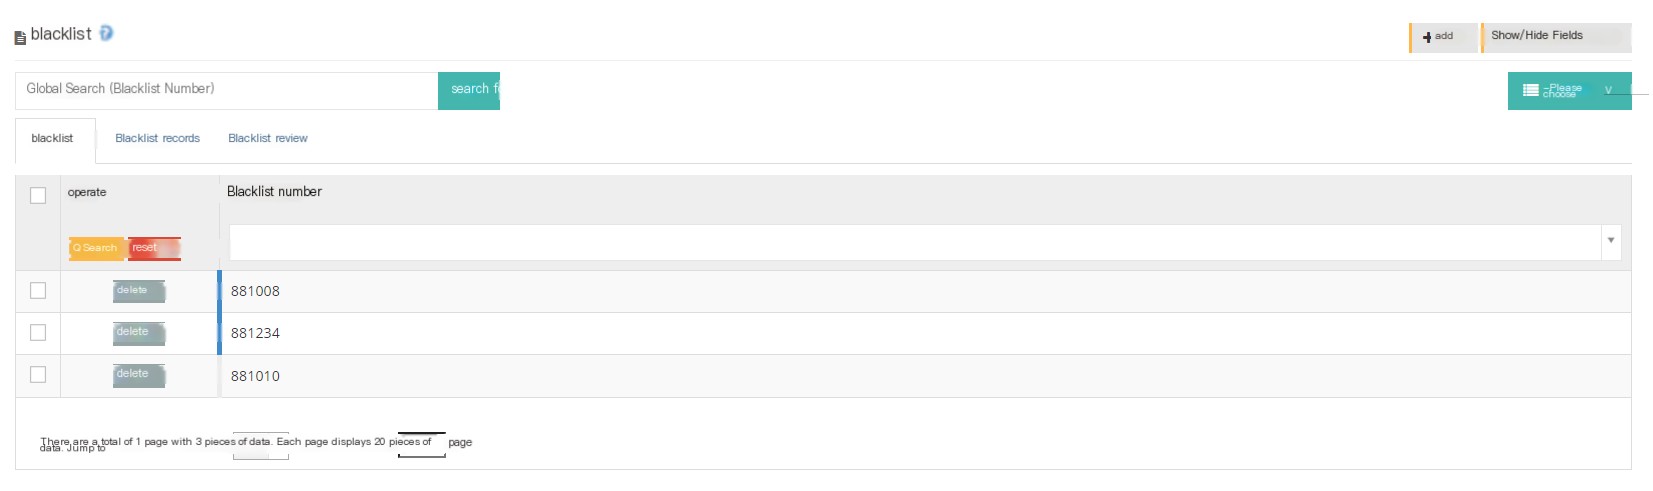
【Search】Global search only supports searching for blacklist numbers.
[New] Added a new blacklist number.
【Show/Hide Field】Select the fields that this page needs to display or hide.
[Blacklist] List of phone calls added to the blacklist.
[Blacklist Record] All records that have been added to the blacklist.
[Blacklist Review] Blacklist Numbers that need to be reviewed
The client can also select other directions of incoming calls from that number in the system preference blacklist.
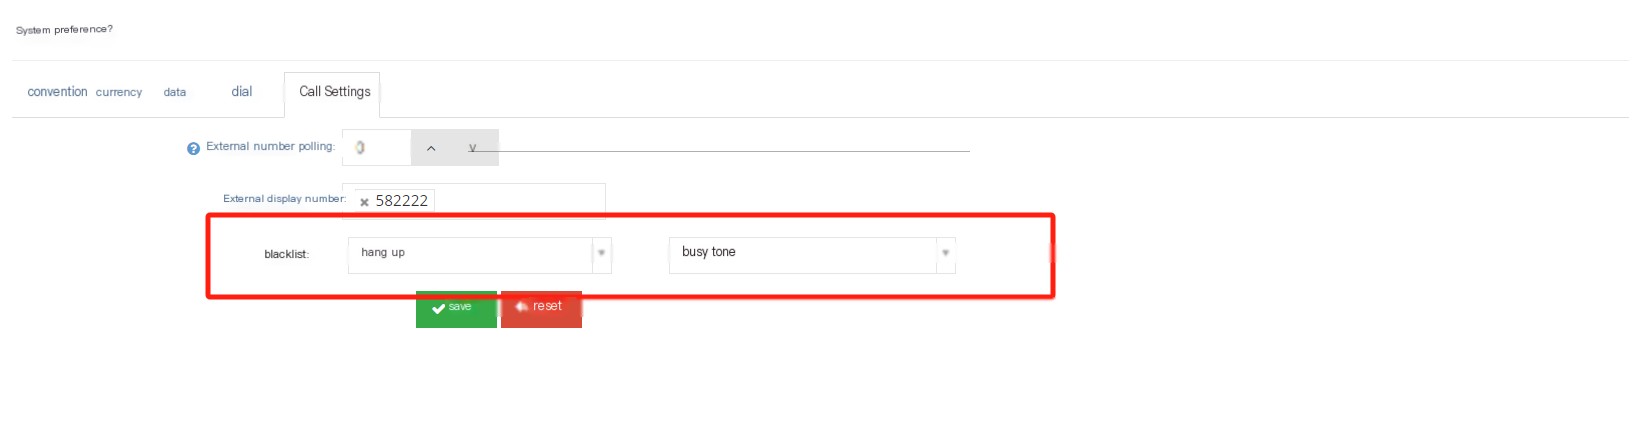
2 Show/Hide fields
Blacklist number: The number added to the blacklist.
Created by: The person who blacklisted the number.
Created date: When the number was blacklisted.
3 Add a blacklist number
3.1 Client user adds blacklist number
① Click Add to enter the general page of the Add/Edit Blacklist:
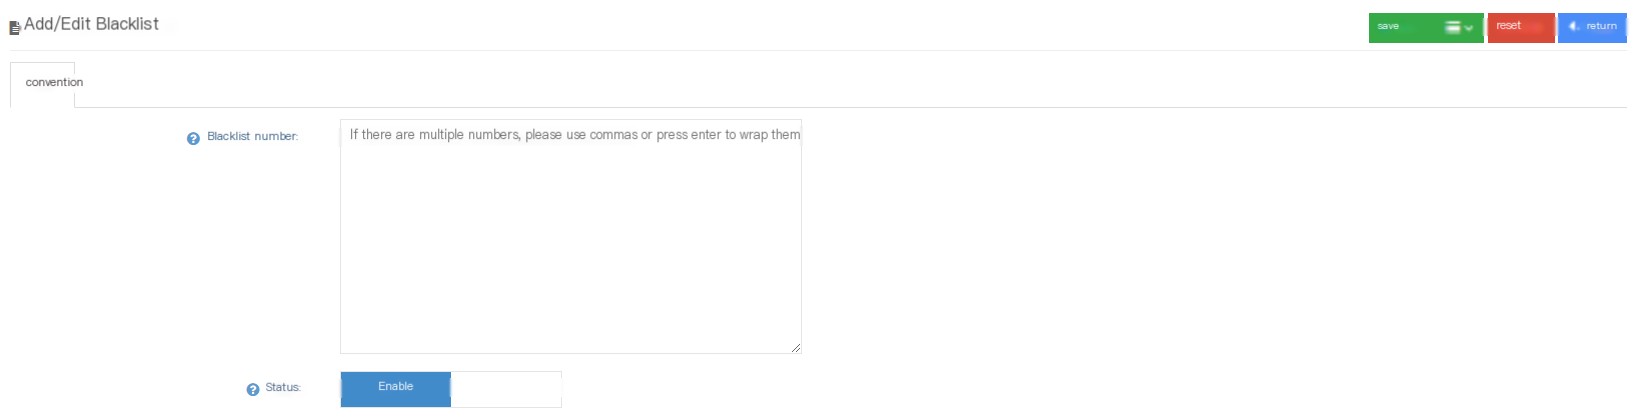
Blacklist number: Enter the blacklist number, please use English comma or enter when entering batches.
Status: The user can turn on or disable the status of these blacklist numbers.
②Click Save to add a successful new blacklist number.
3.2 Add a blacklist number to the agent
In addition to setting the blacklist number directly at the client level, the agent can also blacklist the data when opening its own customer data.
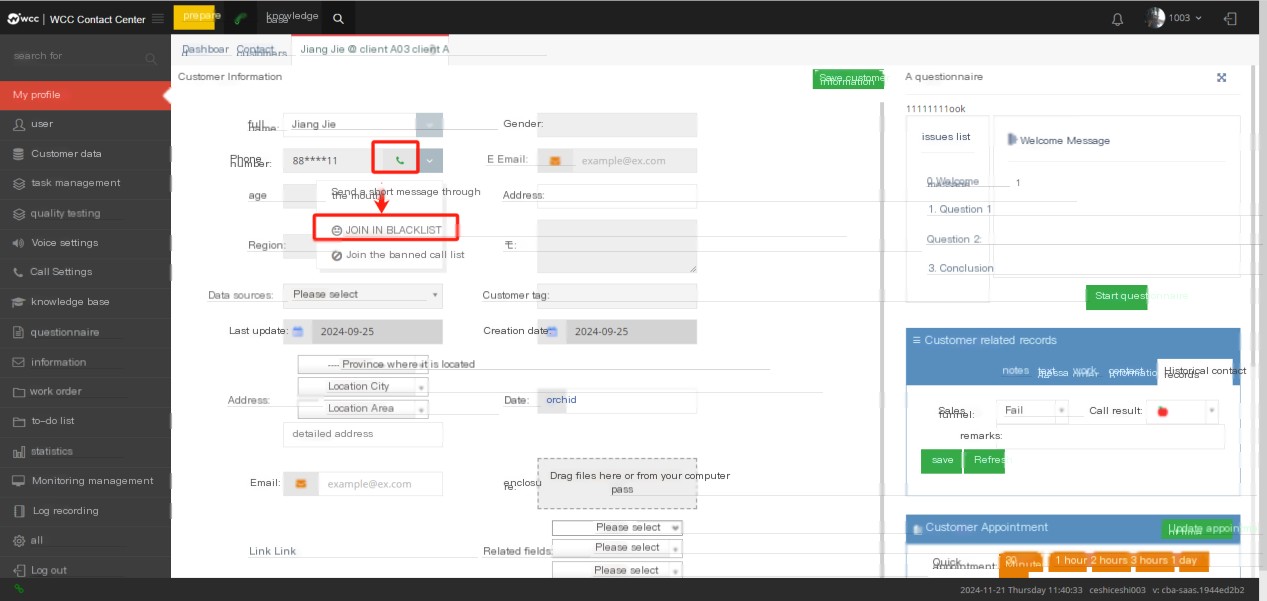
After clicking Add Blacklist, the agent needs to enter the reason for adding this call to the blacklist.
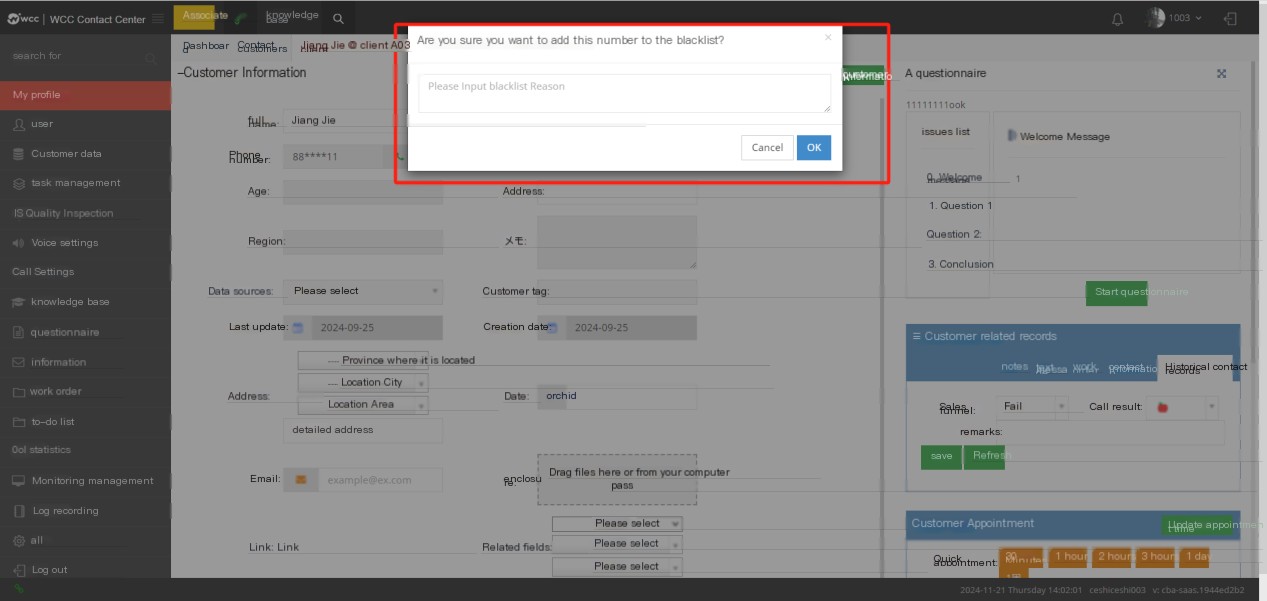
When you join the blacklist as an agent, it cannot be effective immediately. The blacklist request will be reviewed at the client level (if the agent has the audit authority, you can also review the identity of the agent). It will take effect only if the audit is passed.
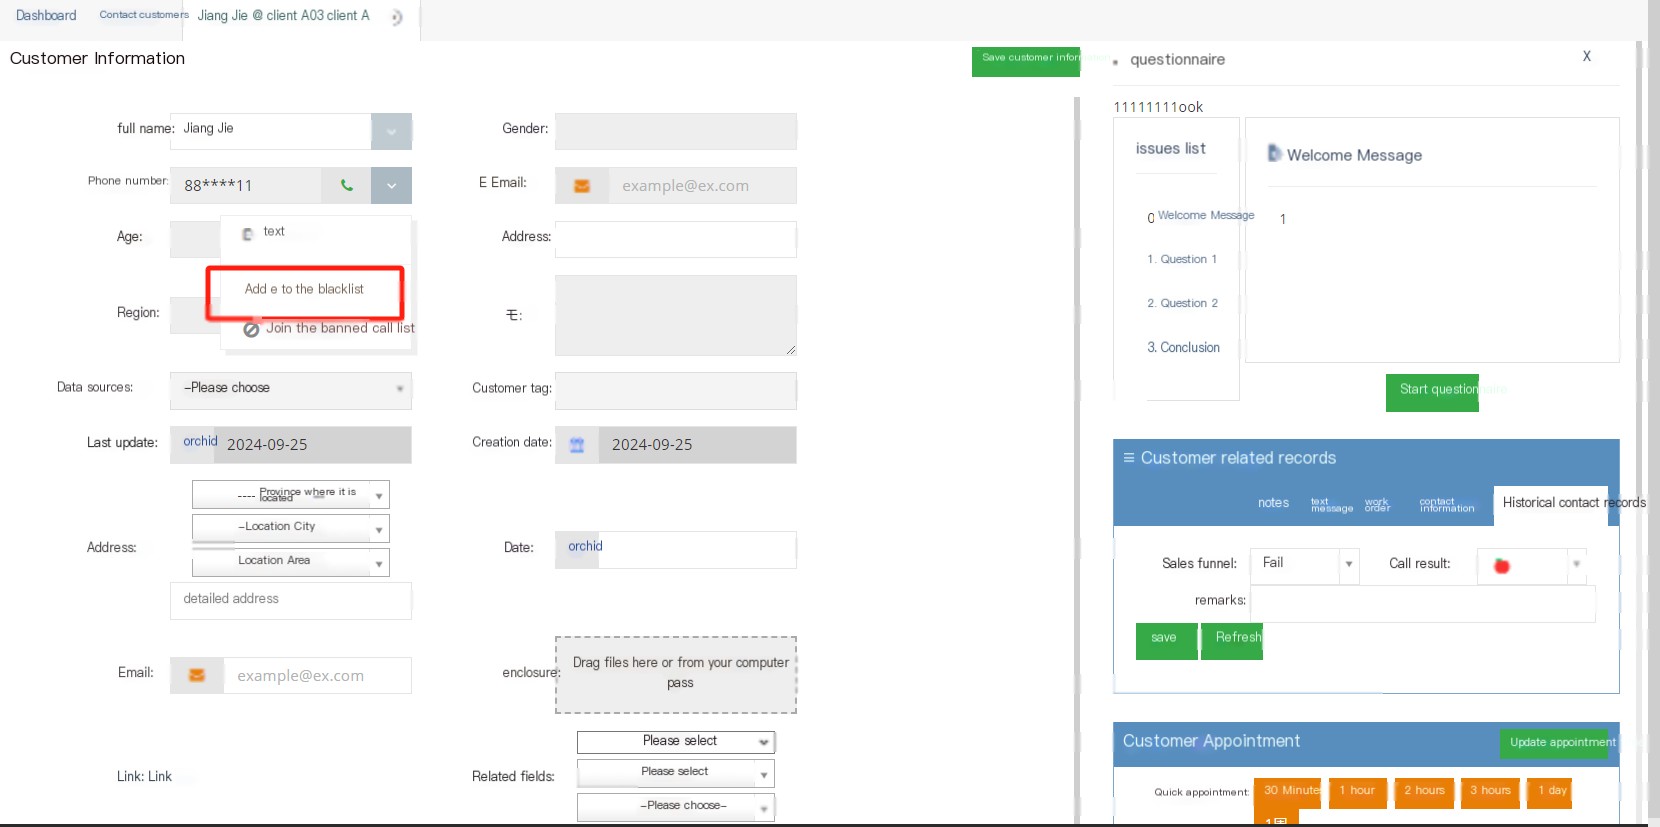
①In the customer’s drop-down menu, the user can click to add the number to the blacklist.
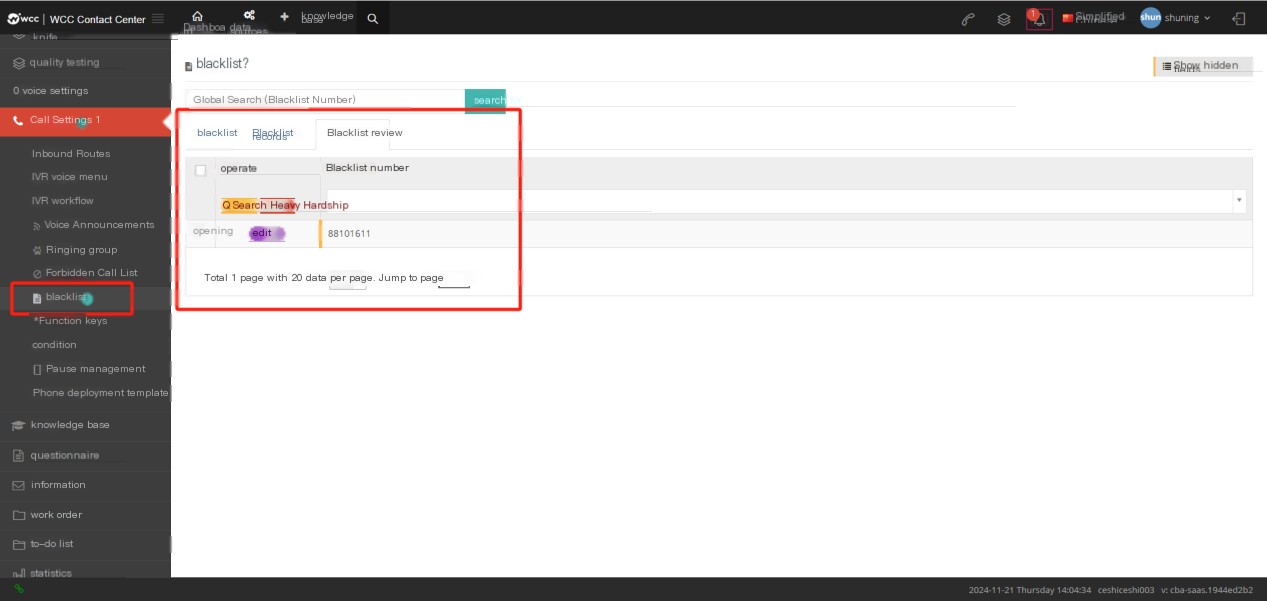
②Click Edit to enter the blacklist review page:
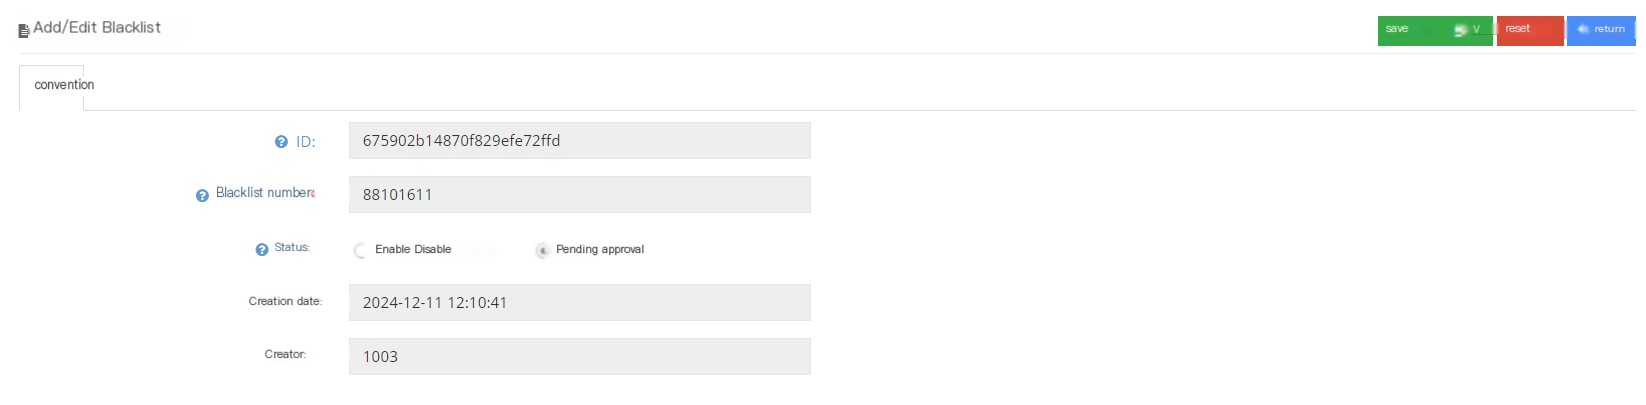
ID: Data unique ID.
Blacklist Number: The blacklist number for review.
Status: Users can review the blacklist and select the usage status of the blacklist.
Create Date: The date when the number was added to the blacklist.
Creator: Create the number as the seat number of the blacklist number.
③ Set the status to enable, click Save, and the blacklist takes effect.
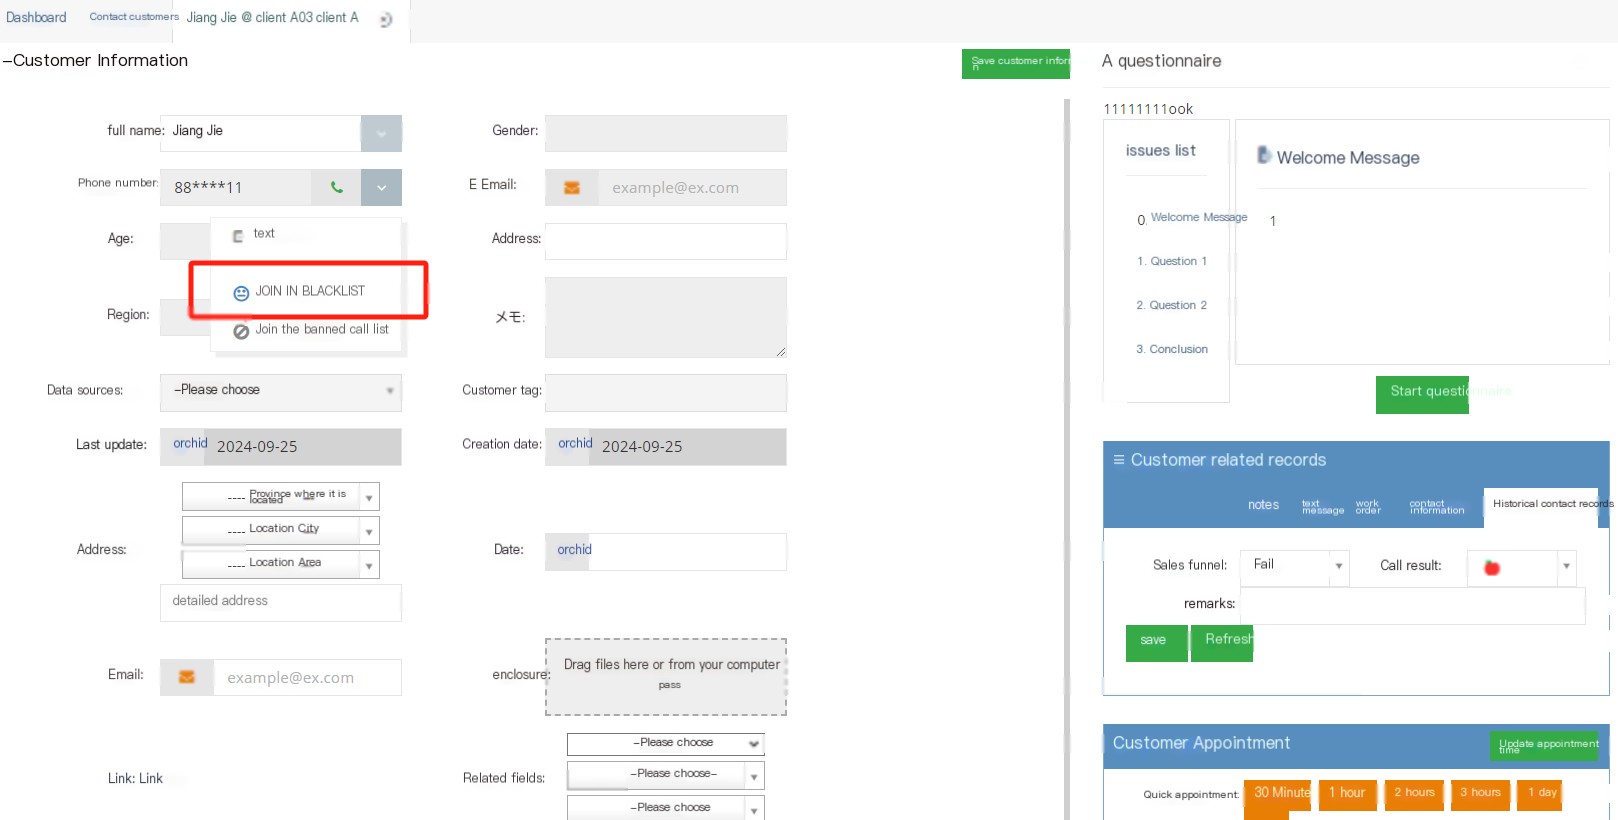
3.7.6 DNCs
1 Introduction to the prohibited call list page
TelNo call list is a list of phones prohibited by agents. After the number in the prohibit call list is called by agents, the system can be set to hang up directly or transfer to other functions.
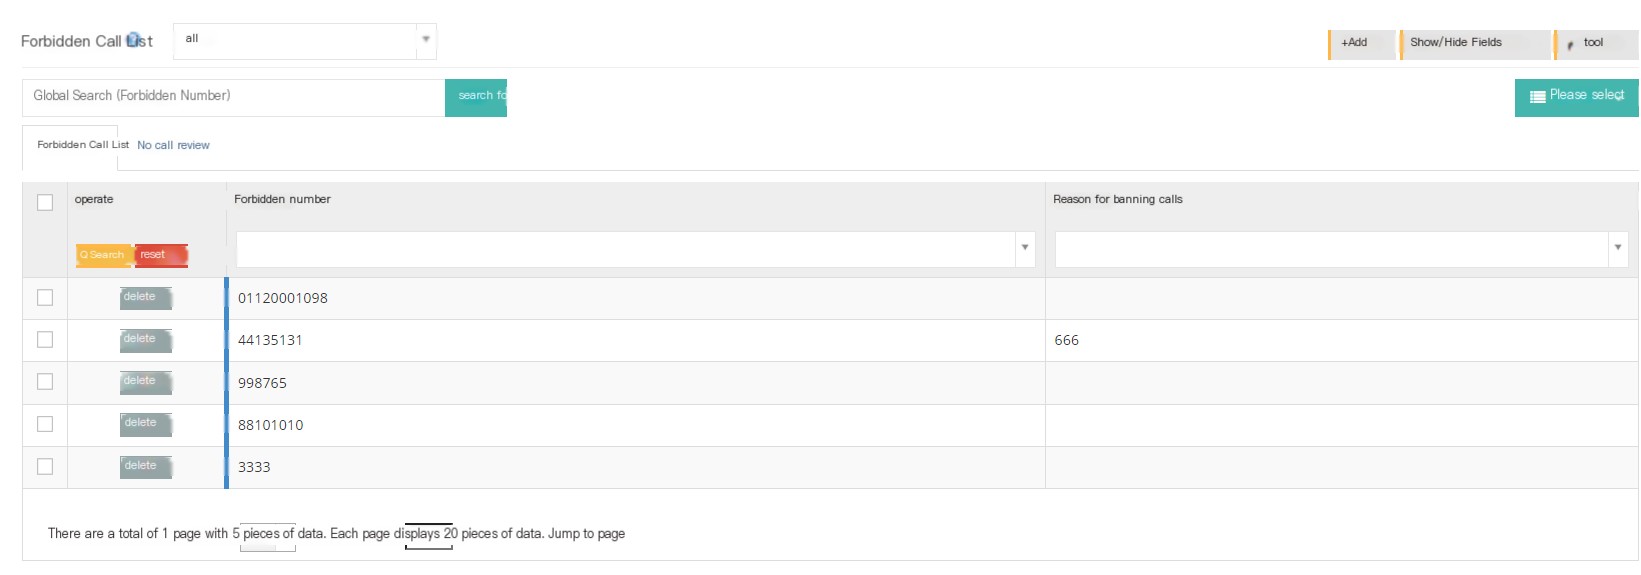
【All】You can search for the banned call list by customer package.
【Search】Global search supports searching using prohibited calls.
【Add】Add a number to the banned call list.
【Show/Hide Field】Select the fields that you want to display or hide on this page.
【工具】导入数据。
[Please select] Delete according to the conditions.
[No Call List] List of all banned call numbers.
[No Call Review] The agent submits a no call number that needs to be reviewed.
2 Show/Hide fields
Customer Package: Select the client package to view the prohibited call number.
No call number: the number that is banned.
Reason forbidden call: The reason why this number is banned.
Creator: The creator of the banned call number.
Created date: The creation date of the prohibited call number.
3 Add a banned call number
3.1 client Add a banned call number
① Click Add to enter the regular page of the Add/Edit No Call List
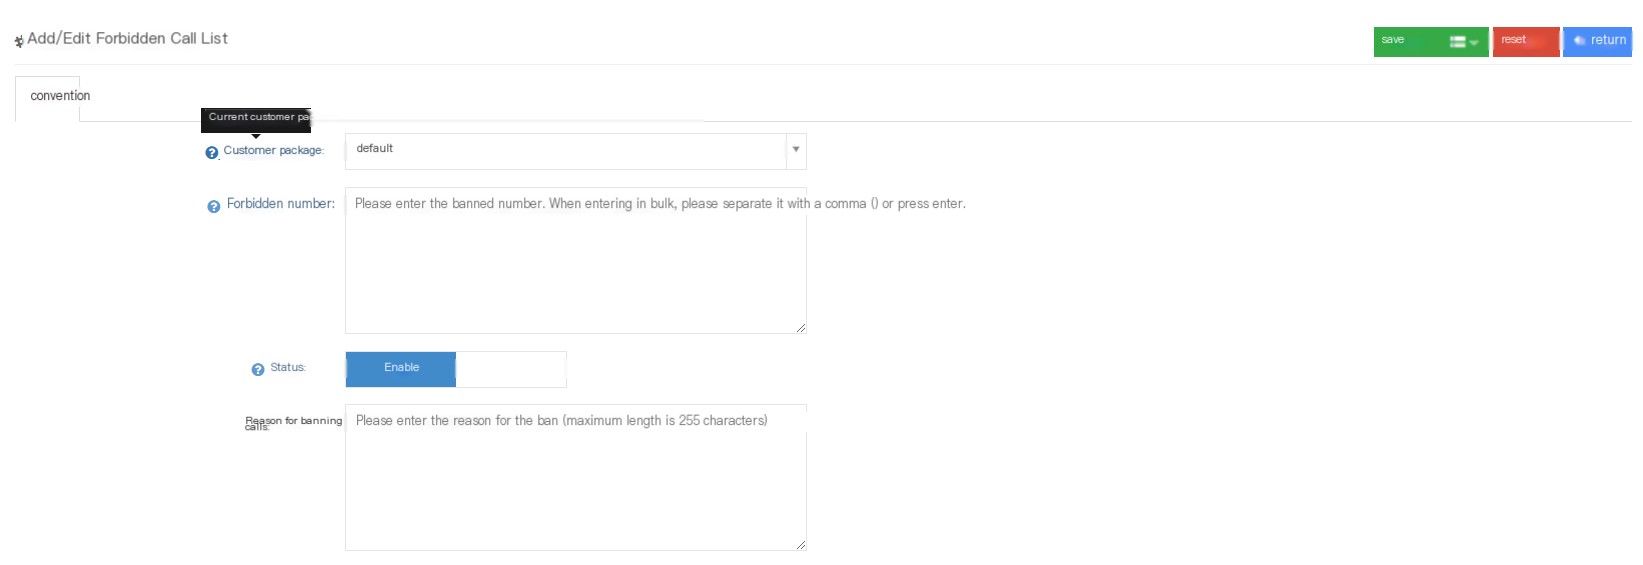
Customer package: Select the customer package where the banned call number is located. The same number in different customer packages will not be affected.
No call number: Please enter the no call number. Please use English comma or enter when importing in batches.
Status: The user can choose whether to enable or disable these banned call numbers.
Reason forbidden call: Please enter the reason forbidden call.
②Click to save to add a successful new ban call list.
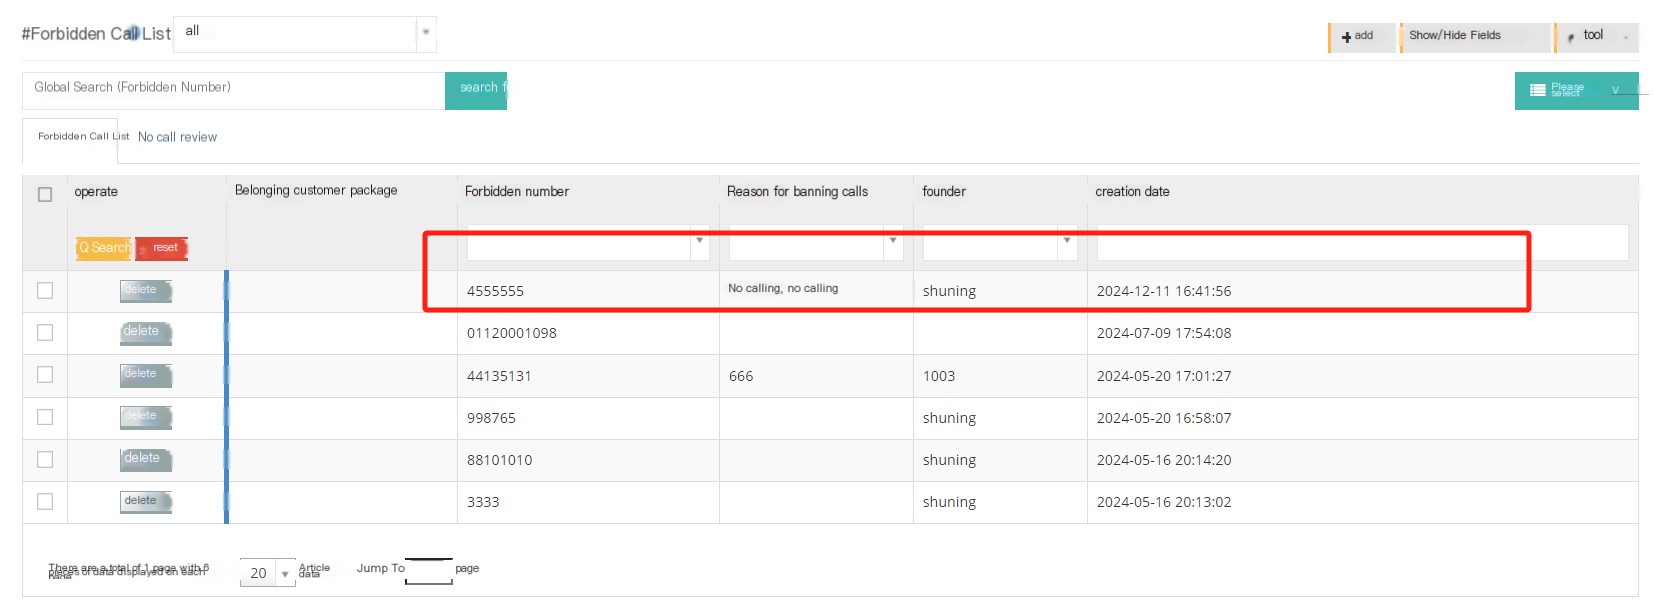
3.2 Add call prohibition in the seat
In addition to setting a call-ban number directly at the client level, the agent can also set a call-ban on the data when opening its own customer data.
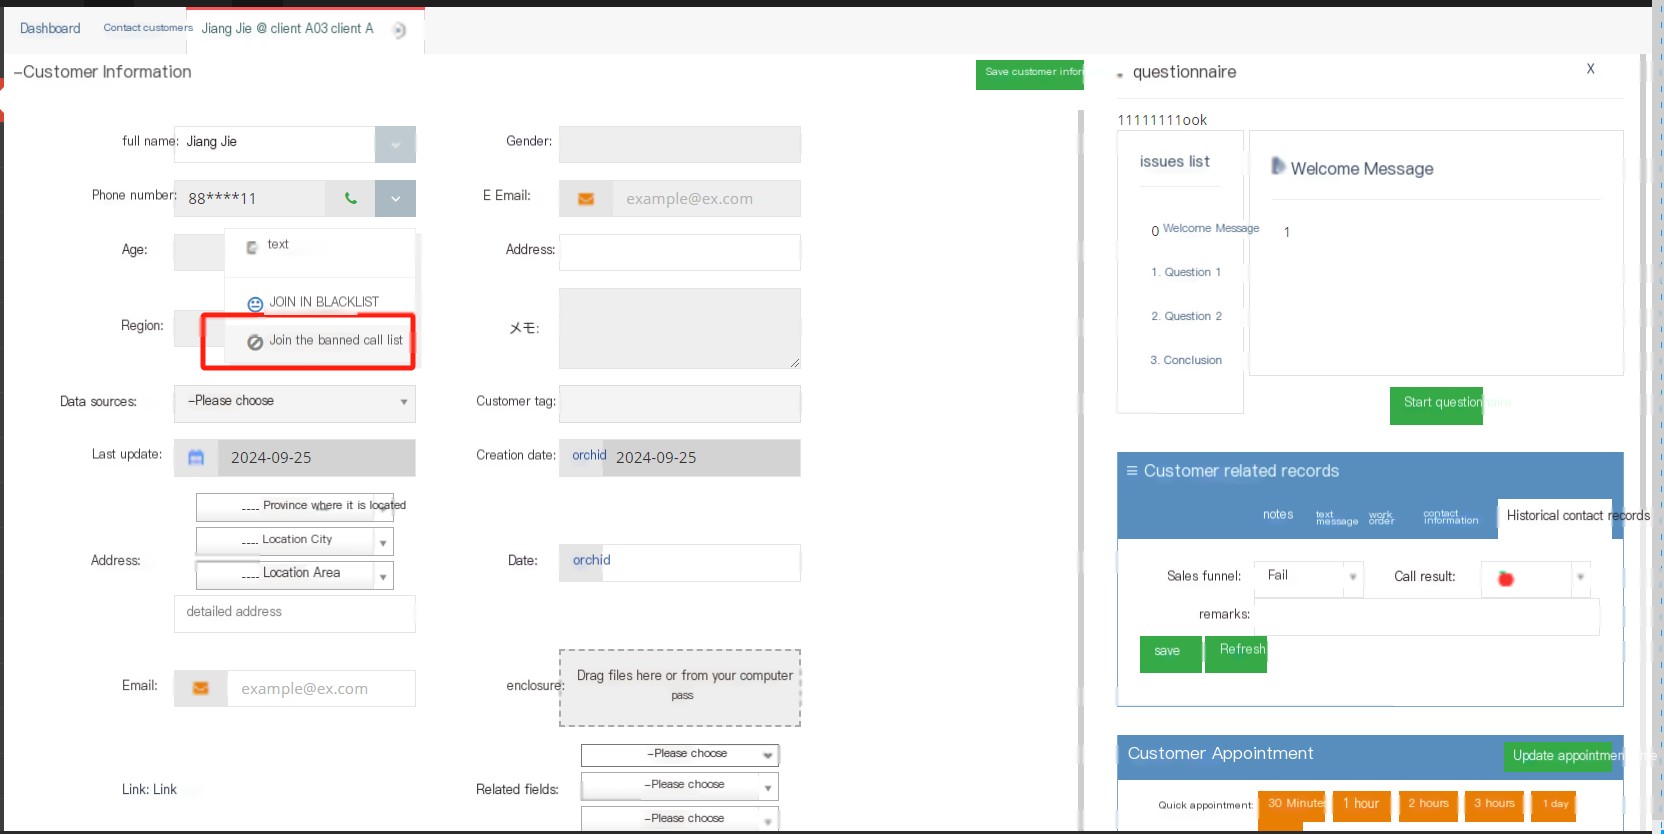
①In the drop-down menu in the customer profile, the user can click to add the number to the banned call list.

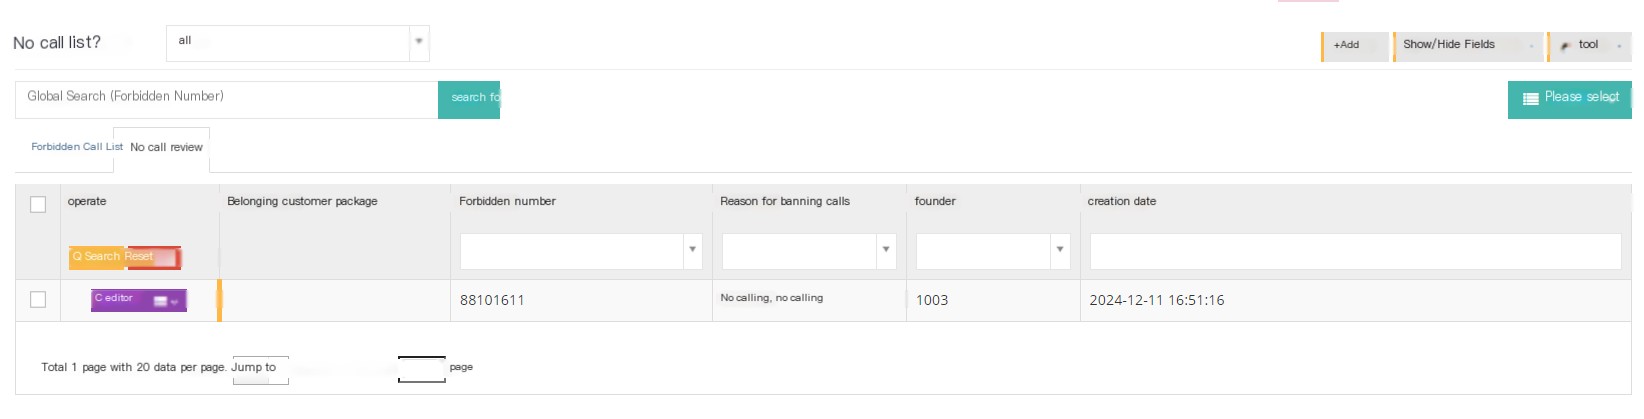
②Click Edit to enter the general page of the Add/Edit No Call List:
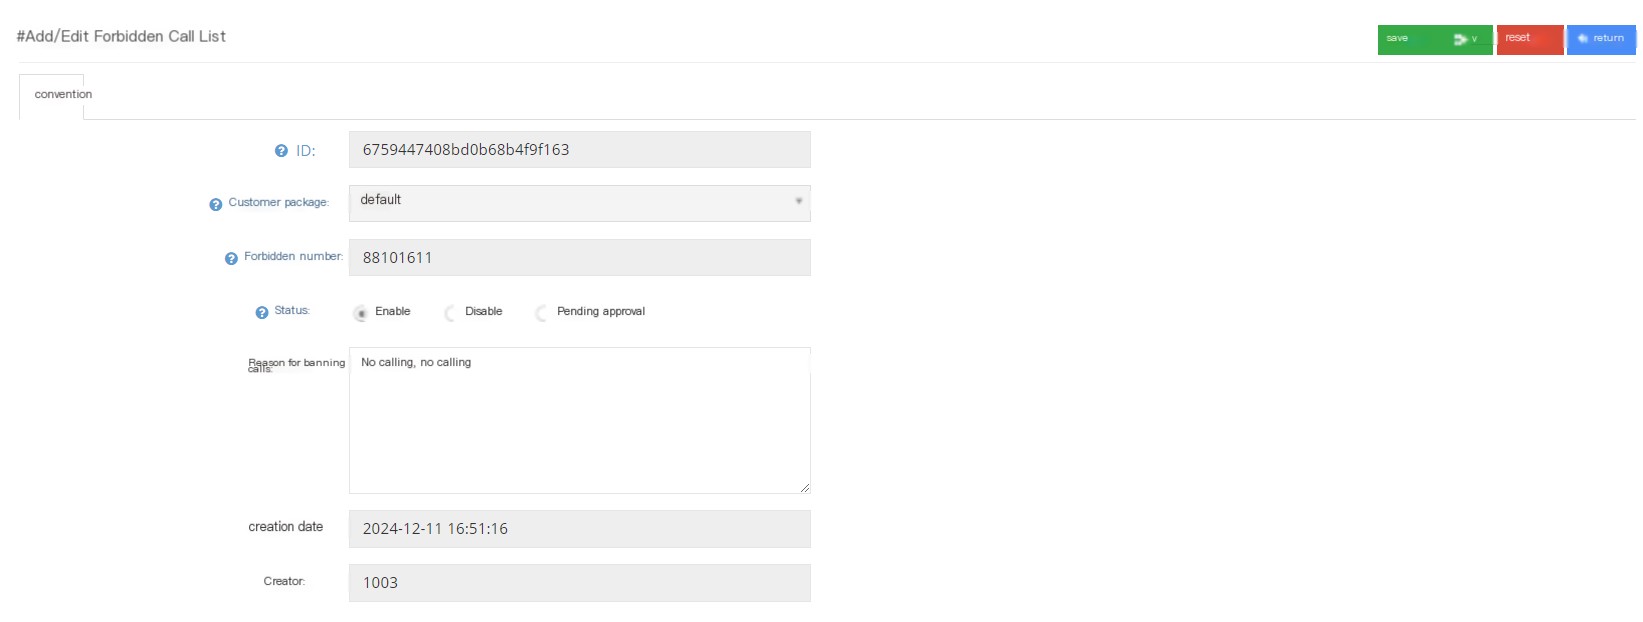
ID: The unique ID that represents the identity automatically generated after creating a ban call number.
Customer package: Customer package to which the call number is prohibited.
No Call Number: The no Call Number submitted by the agent.
Status: Users can review the banned call number and select the usage status of the blacklist.
Reason forbidden call: The reason forbidden call you filled in can be modified.
Creation date: The creation date of the prohibited call number.
Creator: Create a seat with no call.
③Select Enable Click Add to add the banned call list.
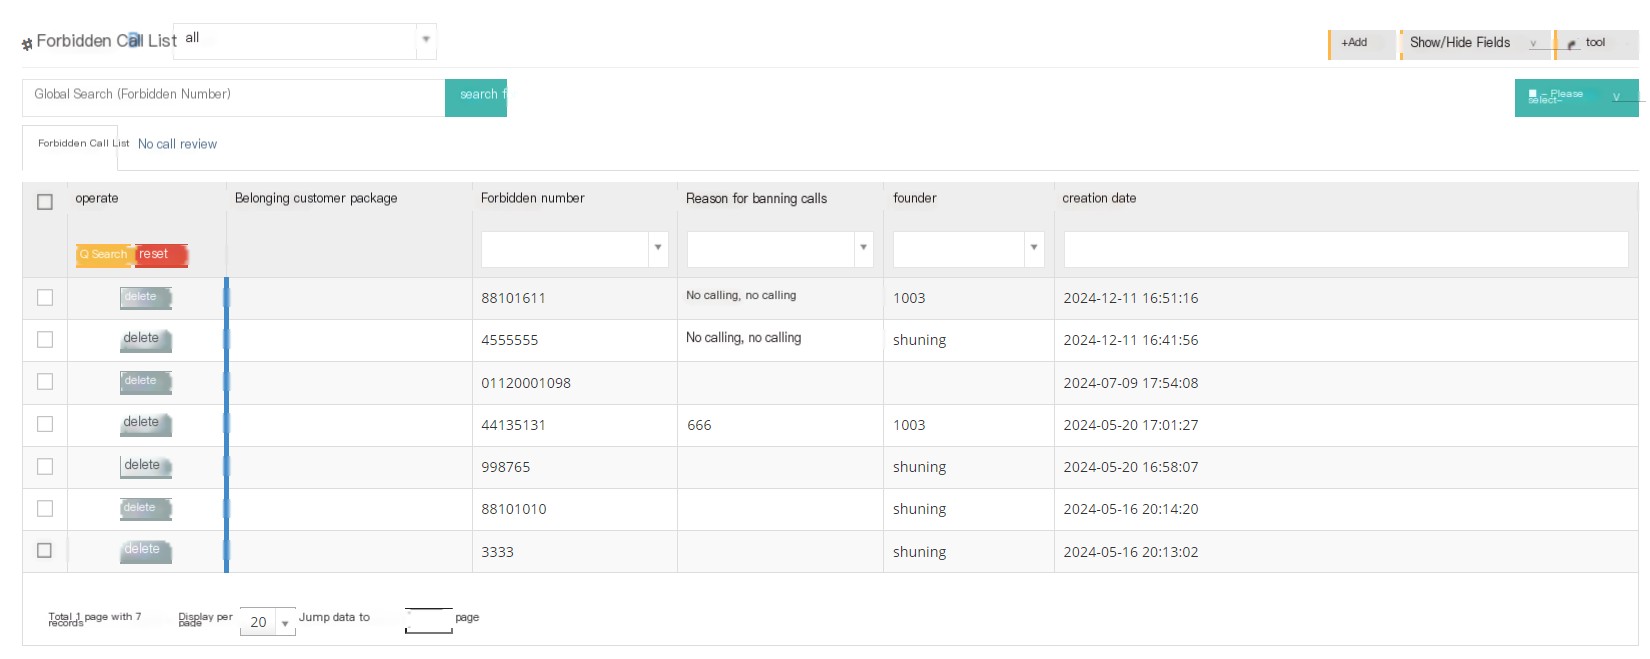
3.7.7 Function keys
Function key Mainly acts on the extension telephone used by the agent. The following are some function descriptions for telephone operation:
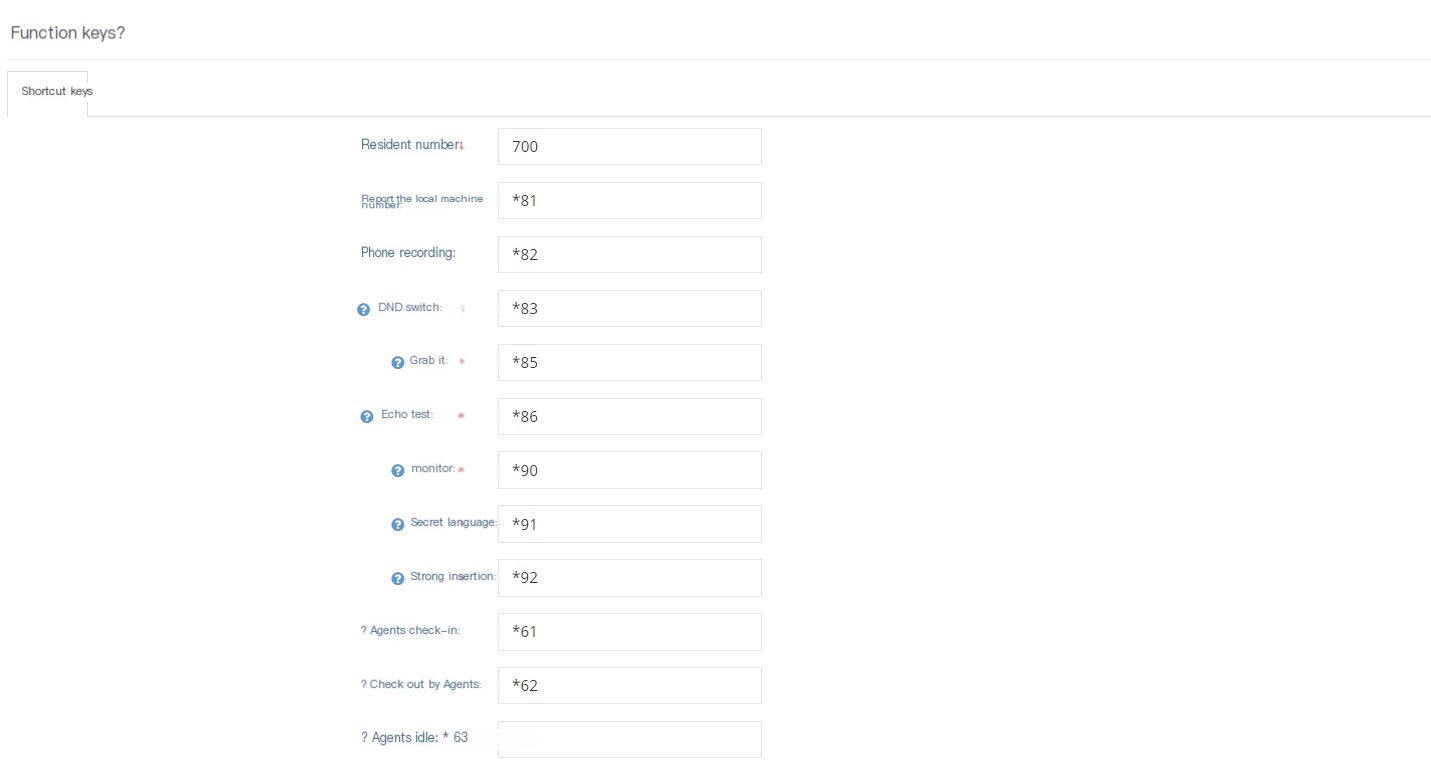
Residence Number: This number is the call resident number, and 20 numbers are extended backwards as the resident location number (such as: 701-720. If there is a duplication with other extension numbers in this number segment, it will be priority to detect whether there is a resident call when dialing) Method of use: Keep the current call on the phone and initiate a new call to this resident number, the current call will be assigned a resident location number and reside. You can use any extension to dial the assigned resident location number to retrieve the call.
Report the local number: Use the extension to dial this number, and the system will report the current extension number.
Telect phone recording: Use the extension to dial this number, and you can record voice files according to the prompts. The recorded files can be viewed on the ‘Voice Settings/Media Files’ page.
DND switch: Use the extension to dial this number, which can activate/cancel the current extension’s no-disturbance mode. When the no-disturbance is activated, the extension will not be called.
Snap to pick up: When the adjacent seat of the same department is not in the seat when the phone rings for various reasons, any other seat can press this key to pick up the incoming call.
Echo Test: When the extension dials this number, the system will play back the input voice or DTMF to test the media situation.
Supervisor: Dial this number + the staff number to monitor the call between the designated seat and the customer.
Secret Words: Dial this number + the staff number of the seat to communicate with the seat during the seat call. At this time, the customer cannot hear the dialer’s voice, only the seat can hear it.
Strong insertion: Dial this number + the staff number of the seat to forcefully intervene in the call during the seat. At this time, both the customer and the seat can listen to your voice, which has the same effect as the three-party call.
Agent check-in: Agent check-in a queue means that the agent is ready to receive calls from the queue.
Agent check-in: Agent check-in means that the agent is ready to receive calls from the queue.
Agent idle seat: The idle seat means that the agent can receive calls at any time.
Agent pause: The agent cannot receive calls in this state, and the reason for the pause will be displayed when monitoring on the large screen.
Note: In the monitoring page of the web page, the functions of monitoring, forced insertion, and secret words can be realized when the agent is not talking. After the call of monitoring, forced insertion, and secret words can still be maintained.
3.7.8 Conditions
1 Page Introduction
Condition is to determine the direction of the call based on the set time conditions, the direction specified for the time that meets the time, and the direction specified for the time that does not meet the time.
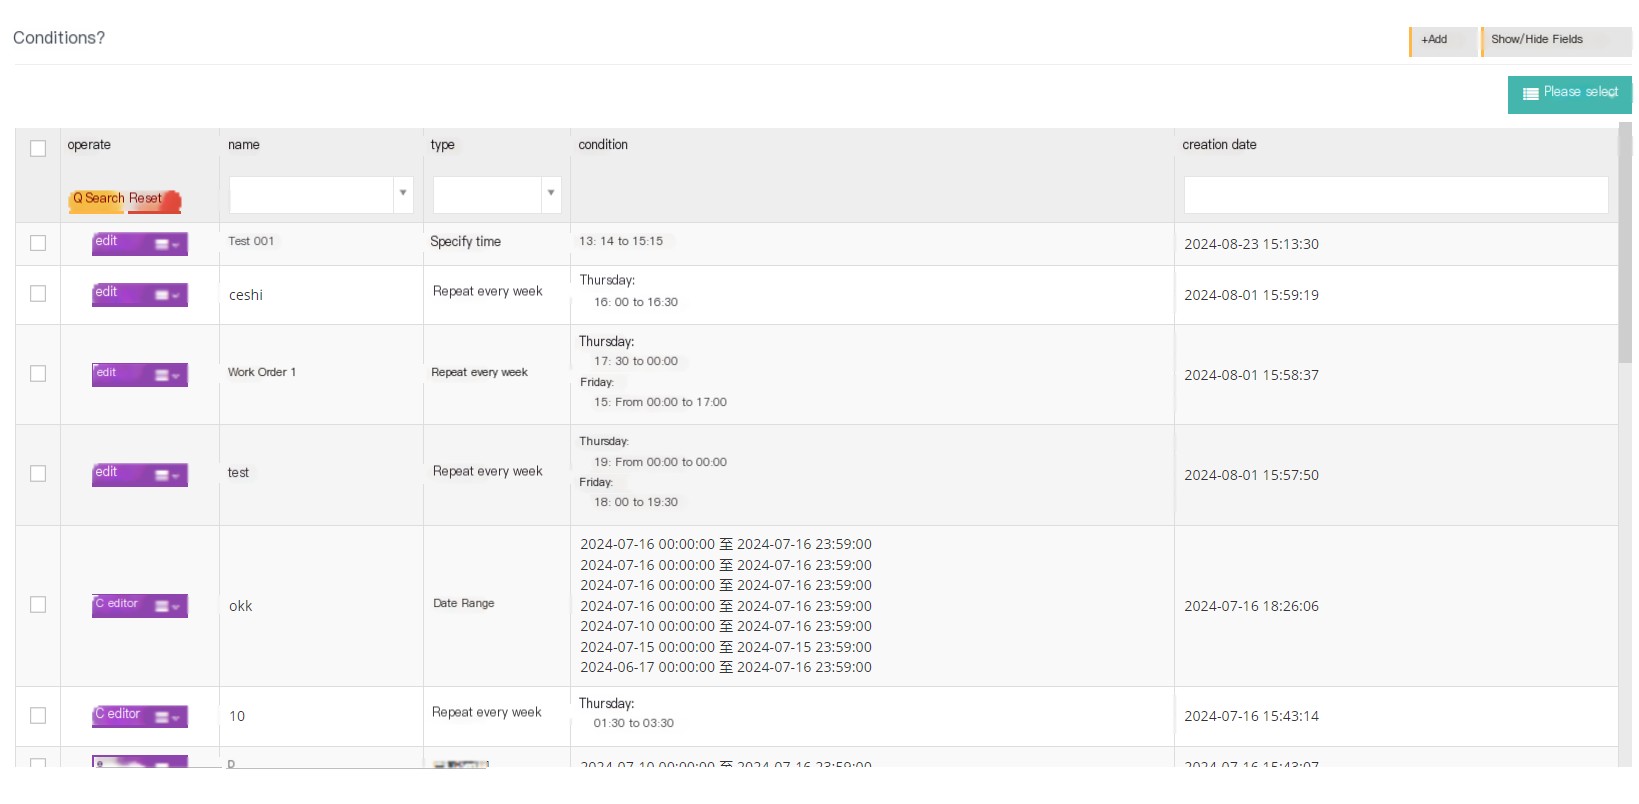
【Add】Add a new condition.
【Show/Hide Fields】Select the fields that you want to display or hide on this page.
[Please select] Delete according to the conditions.
【Edit】Edit the added conditions.
[Drop-down menu] Delete this condition.
2 Show/Hide fields
Name: The name of the condition.
Type: The type to which this condition belongs.
Condition: The time constrained by the condition.
Meet steering: Steering that meets this condition.
Not meeting steering: Not meeting the conditions.
Created date: The date of creation of this condition.
Last updated: The last updated date for this condition.
3 Add a new condition
① Click Add to enter the general page of the Add/Edit Number Conditions:
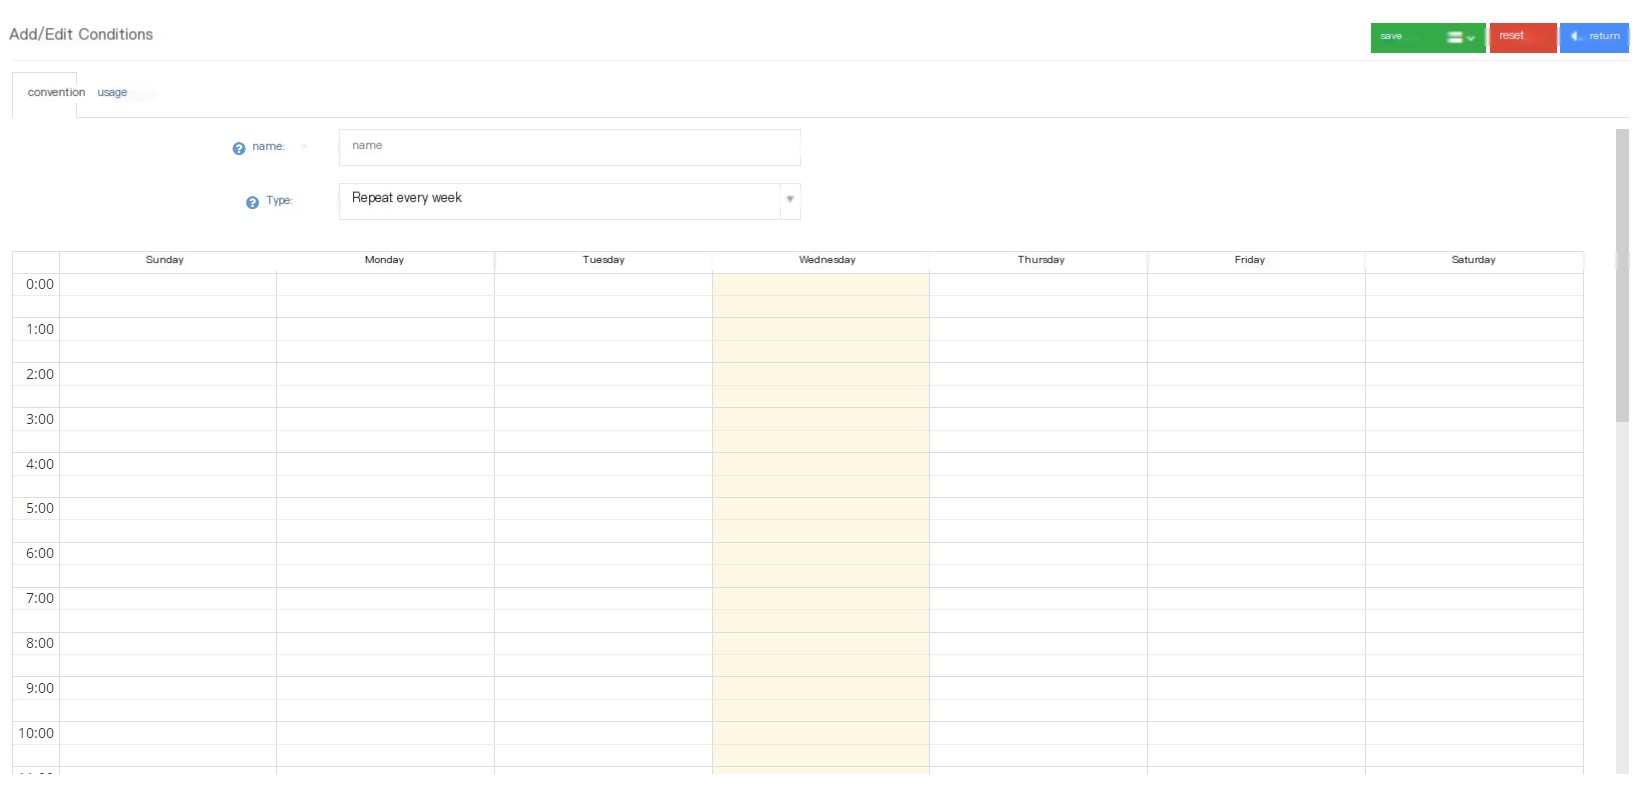
Name: Name this condition.
Type: Select a pre-dial type for this condition.
*** Weekly Repeat***-Select the time period for each week to use this condition, and the user clicks on the event or clicks on Edit Editing Time in the form.
Specify time-Specify the time range generated by a condition. For example, if the set condition takes effect from the specified range 00:00:00-12:00:00, the system will determine that the condition does not meet the condition when a call is incoming at 12:00:01.
Specify date-Specify a date generated by a condition.
Date range-Specify a date range to meet the conditions within this date range. It should be noted that the specified time when the date specified here is the minutes where the time is located. For example, the date range is 02.08 12:00-02.09 11:00, and the incoming phone calls at 02.09 11:01 here meets this condition.
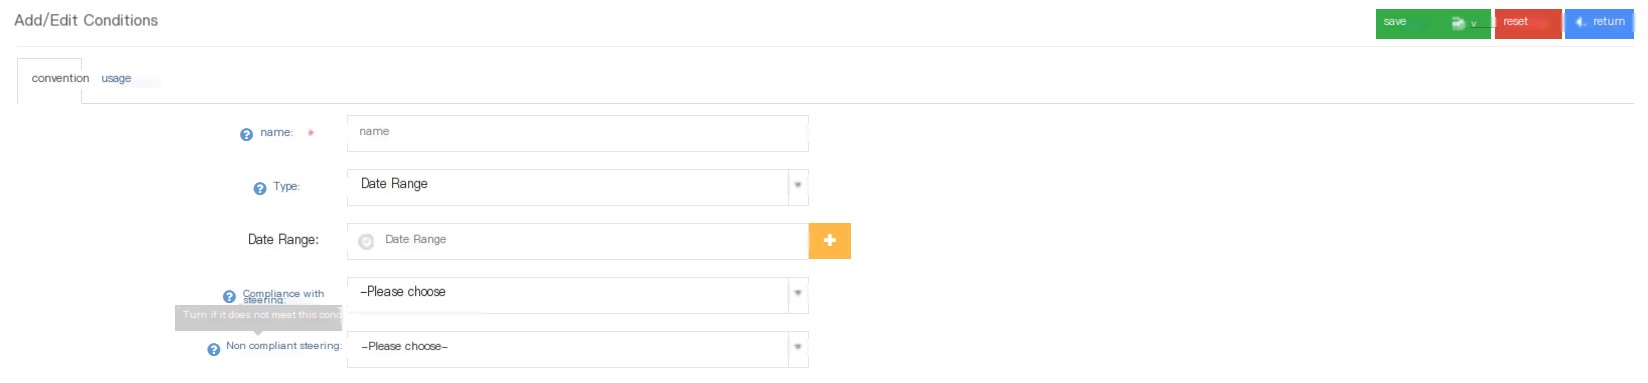
Compare steering: Choose a steering that meets this time condition.
Not-compliant steering: Choose a steering that does not meet this time condition.
Introduce the different selection statuses of the specified date
① Weekly repetition: Select the time of repetition every week (can be edited or deleted), and then select the steering that meets the conditions and the steering that does not meet the conditions of this time to save.
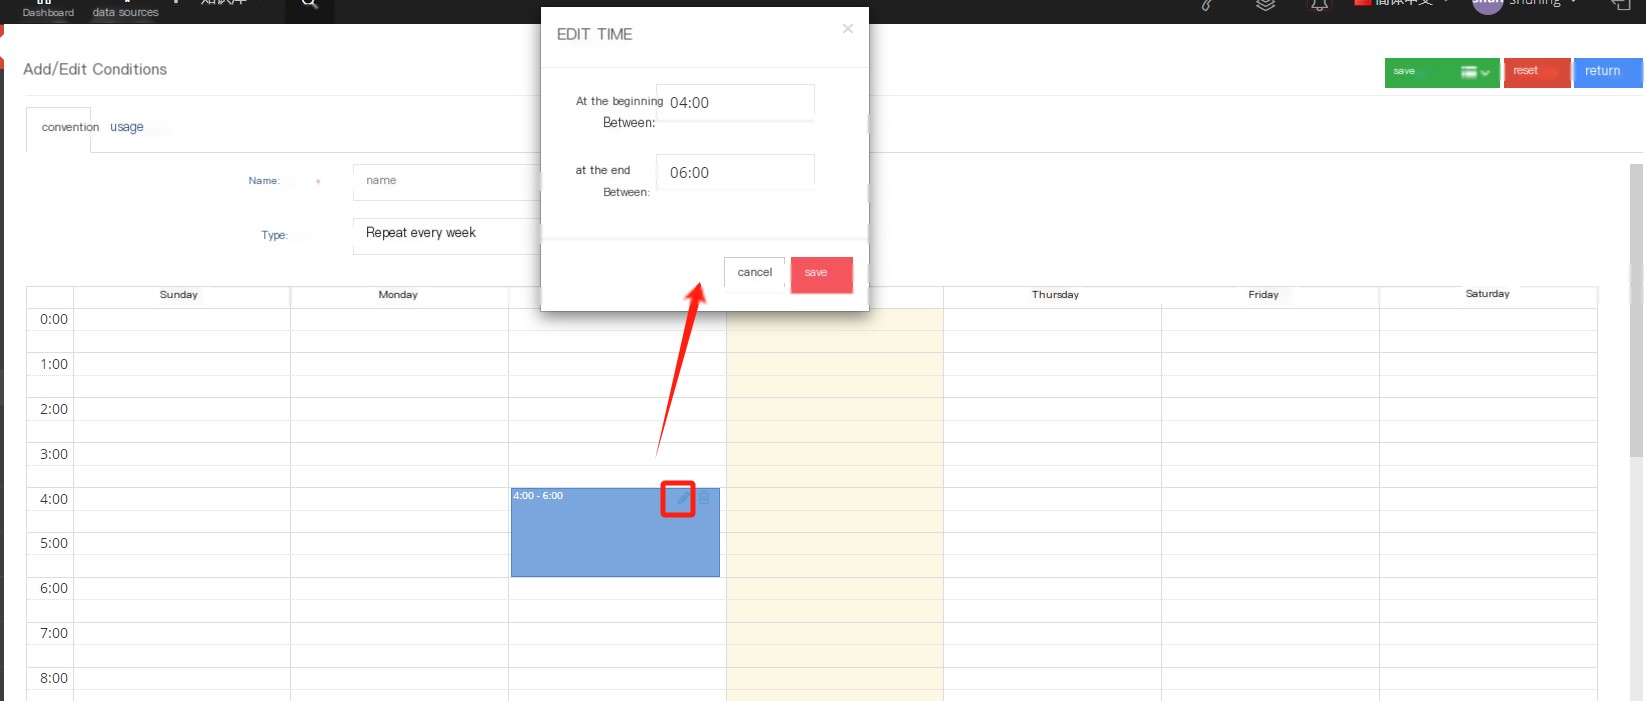

②Specify time: Select the range of the specified time, then select the steering that meets the conditions and the steering that does not meet the conditions of this time to save it. You can add multiple specified times.
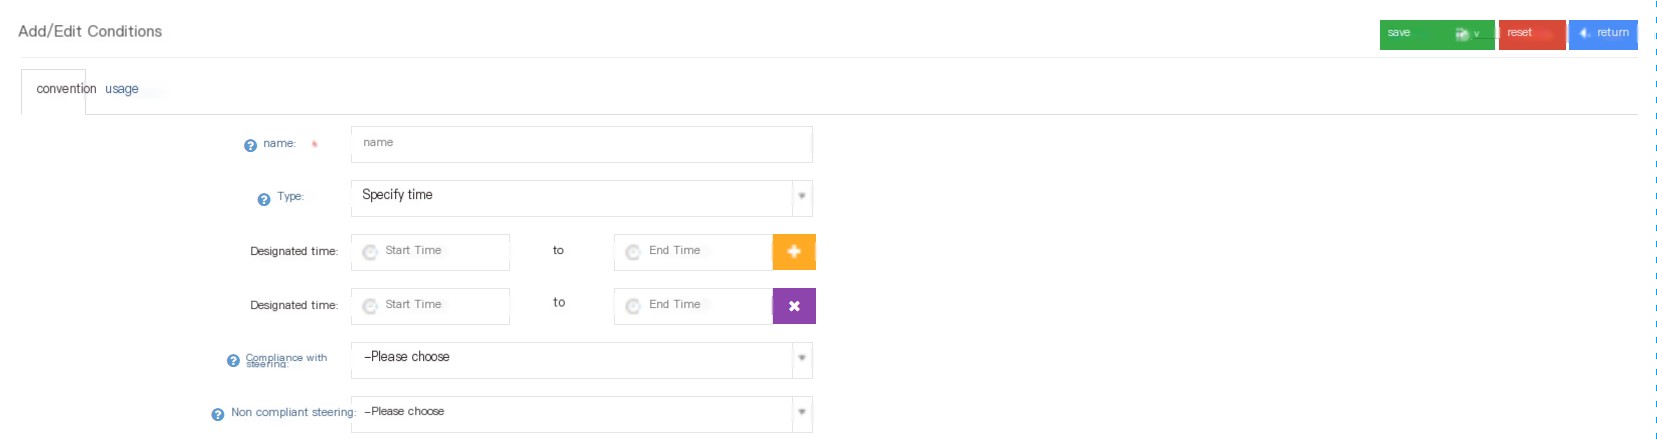
③Specify date: Select the specified date, then select the steering that meets the conditions and the steering that does not meet the conditions of this time to save it. You can add multiple specified dates.
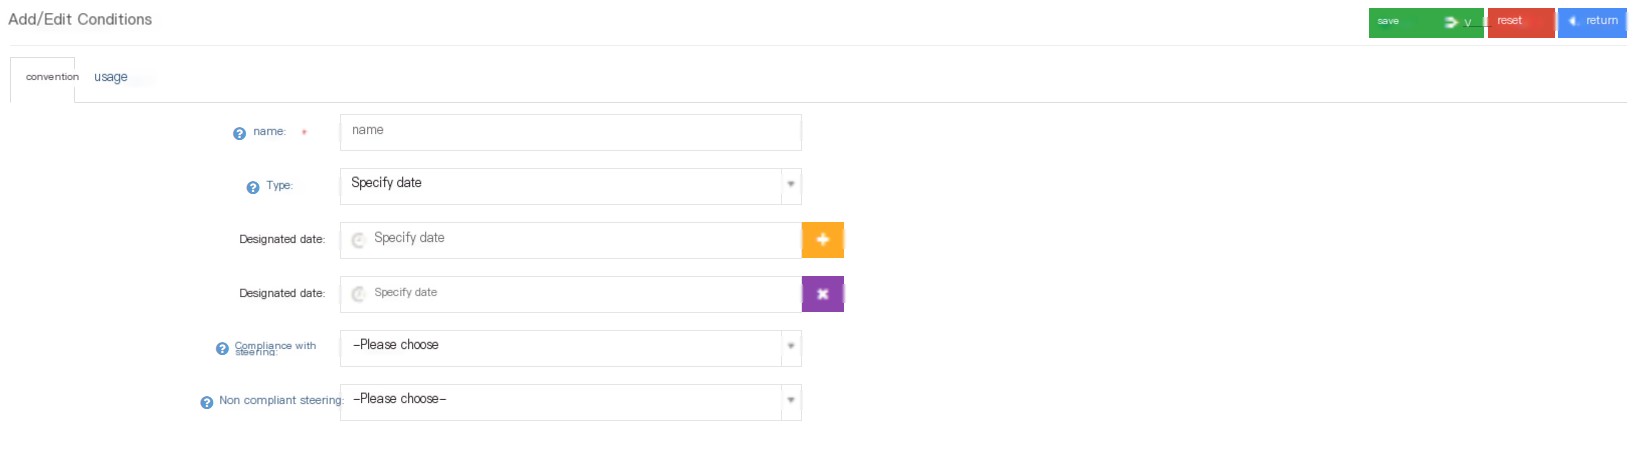
④Date range: Select the date range generated by a condition, and then select the steering that meets the conditions and the steering that does not meet the time conditions to save. You can add multiple date ranges.
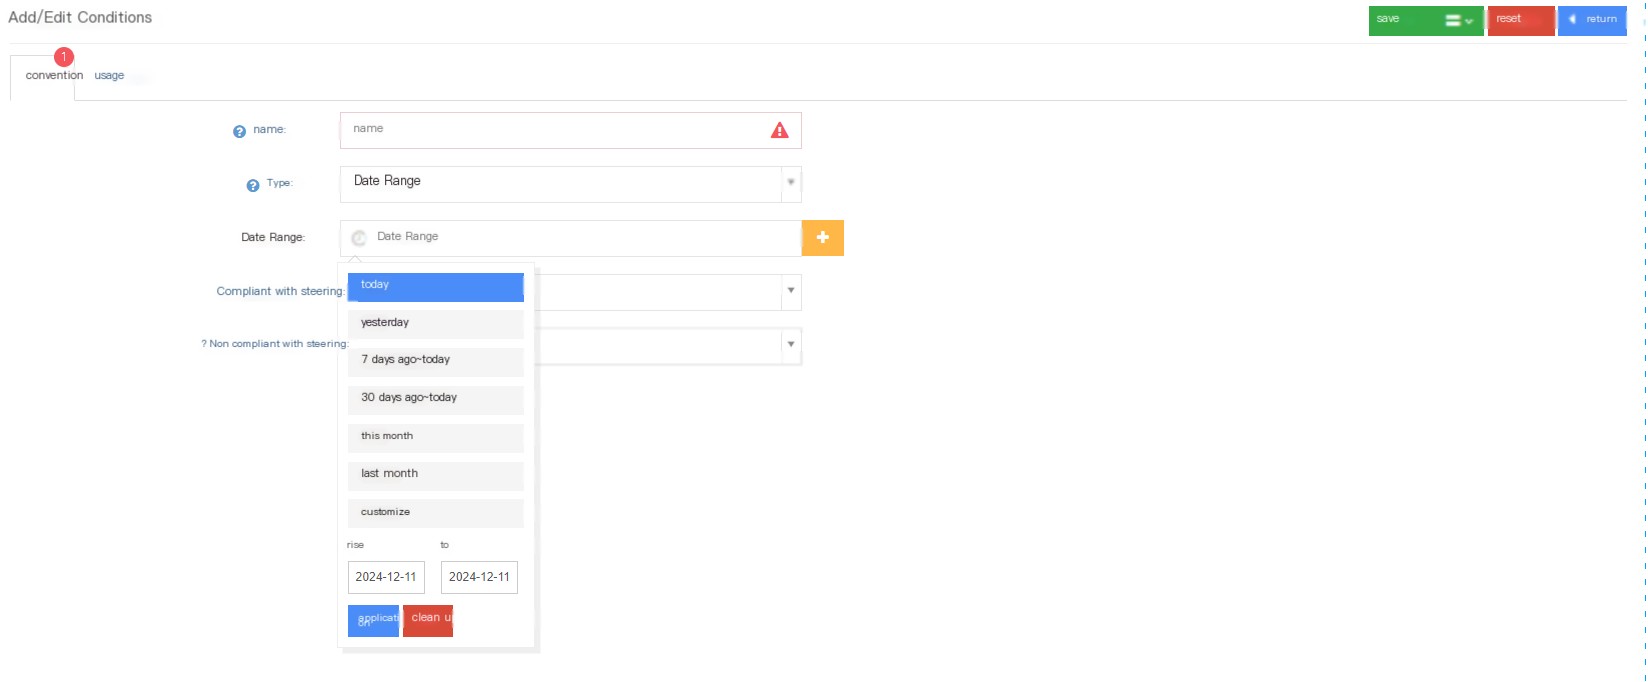
②Click Usage to enter the usage page of Add/Edit Conditions:
You can see all tasks using this condition on the Usage page.

③Click Save to add new successful conditions.
3.7.9 Suspend management
1 Page Introduction
Pause Management is a reason for pause when the agent is busy. On the pause reason page, the system user can add/view/edit/delete the pause reason.
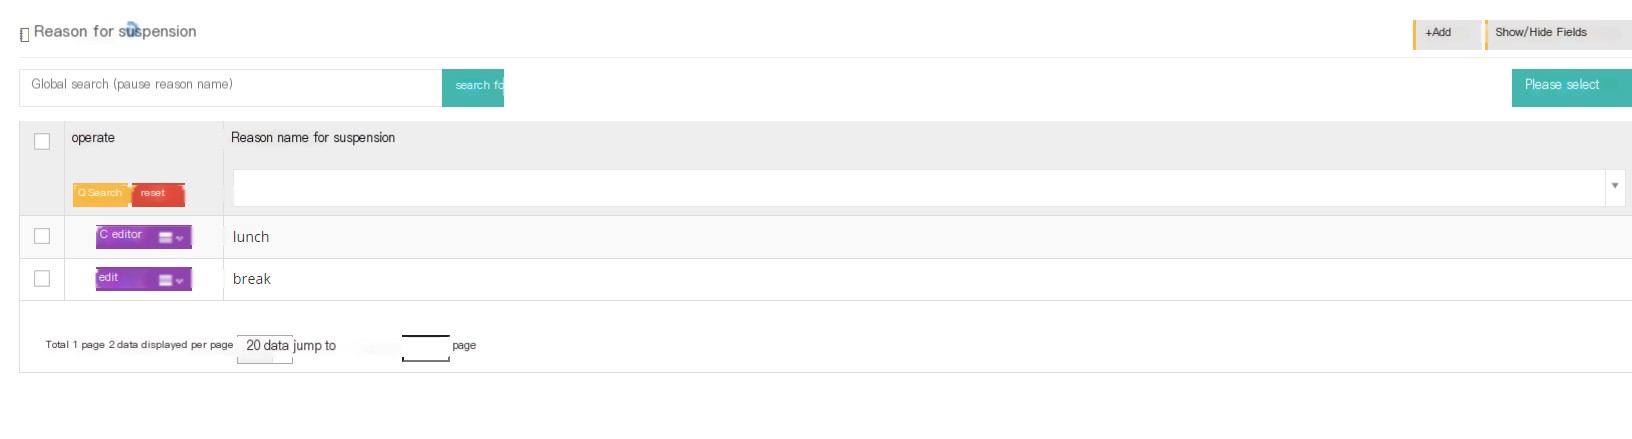
【Search】Only global searches are supported with the name of the pause reason.
【Add】Add a new pause reason.
【Show/Hide Field】Select the fields that you want to display or hide on this page.
[Please select] Delete according to the conditions.
[Edit] Edit the established pause reason.
[Drop-down menu] Delete the reason for this pause.
2 Add a non-cause and usage process
① Click Add to enter the general page for the reason for the addition/editing pause:

②Click Save to add a new reason for successful pause.
When the seat is busy, you can select Pause in the drop-down menu in the upper right corner. At this time, the seat is busy and cannot start working.
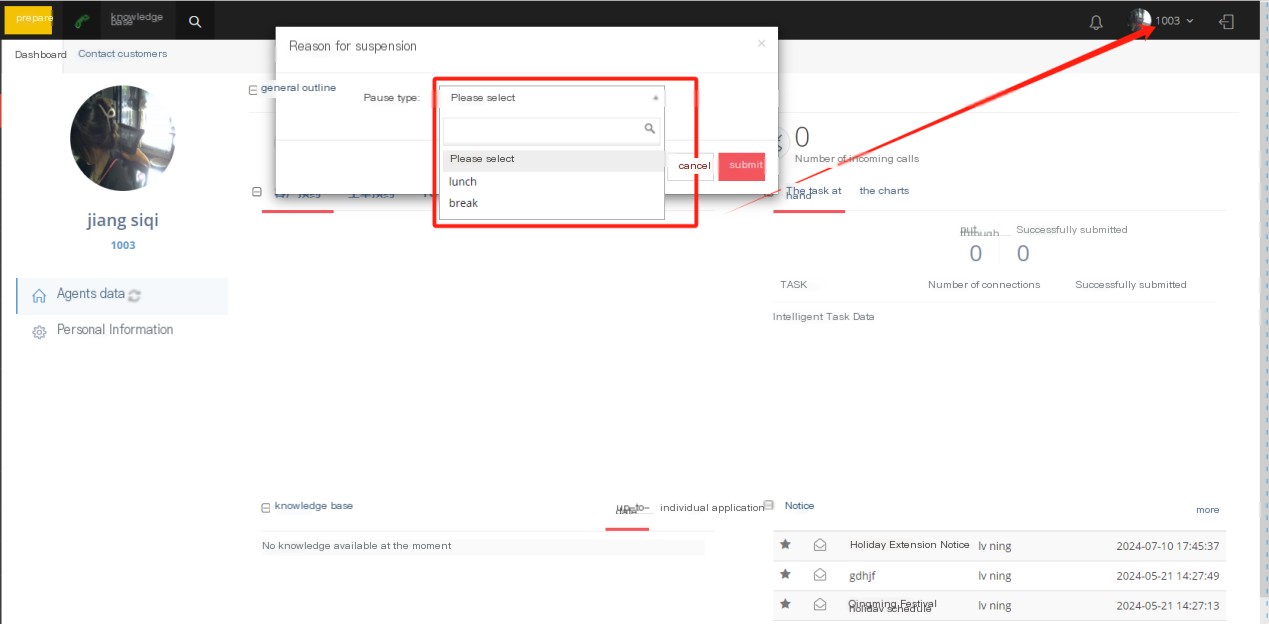
2.7.10 Telephone deployment template
1 Page Introduction
Telephone deployment template You can directly configure the phone or even configure the template contents independently and the default configuration can be automatically added, saving more time when using multiple phones.
The phone template is set at a high level, and the low level cannot be edited and can only be copied.
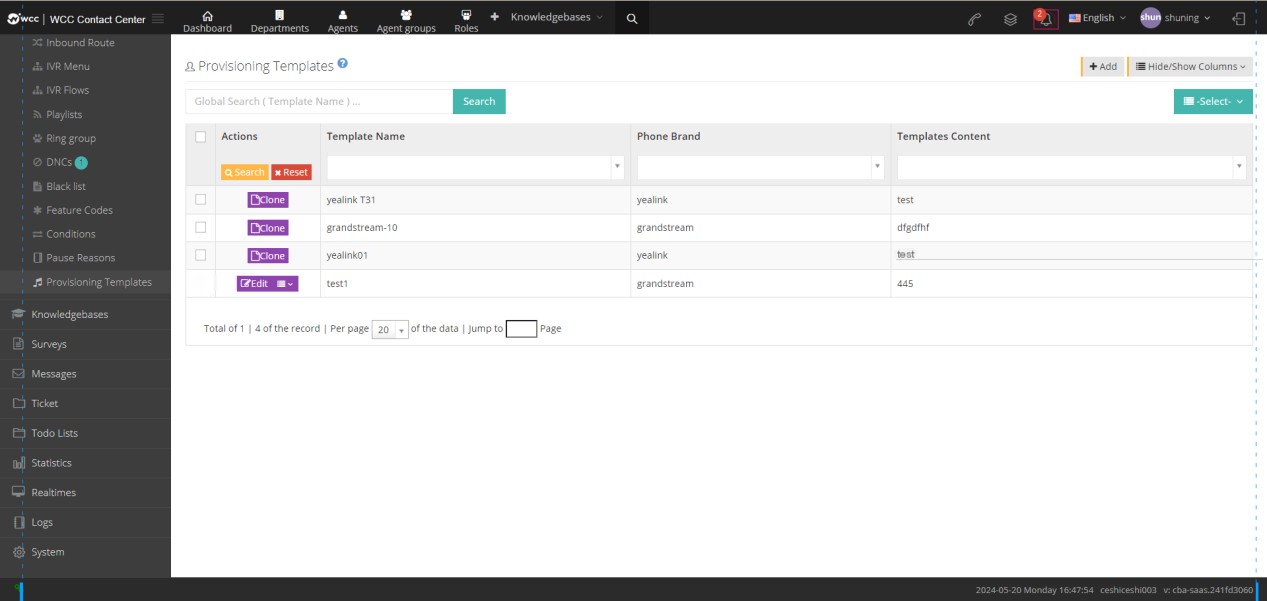
【Search】Global search supports searching with the name of the phone deployment template.
【Add】Add a new phone deployment template.
【Show/Hide Field】Select the fields that this page needs to display or hide.
[Please select] Delete according to the conditions.
[Clone] The deployment template for the phone is set at the previous level and can only be copied but not edited in the client.
[Edit] The established phone deployment template can be edited to the phone brand.
[Drop-down menu] You can delete the deployment template or copy the phone deployment template.
2 Show/Hide fields
Template name: The name of the template.
Path: The path address of the phone deployment template.
Telephone brand: This telephone deployment template Telephone brand.
Template content: The content of the deploy template.
3 Add a new phone deployment template
① Click Add to enter the general page of Add/Edit Telephone Deployment Template:
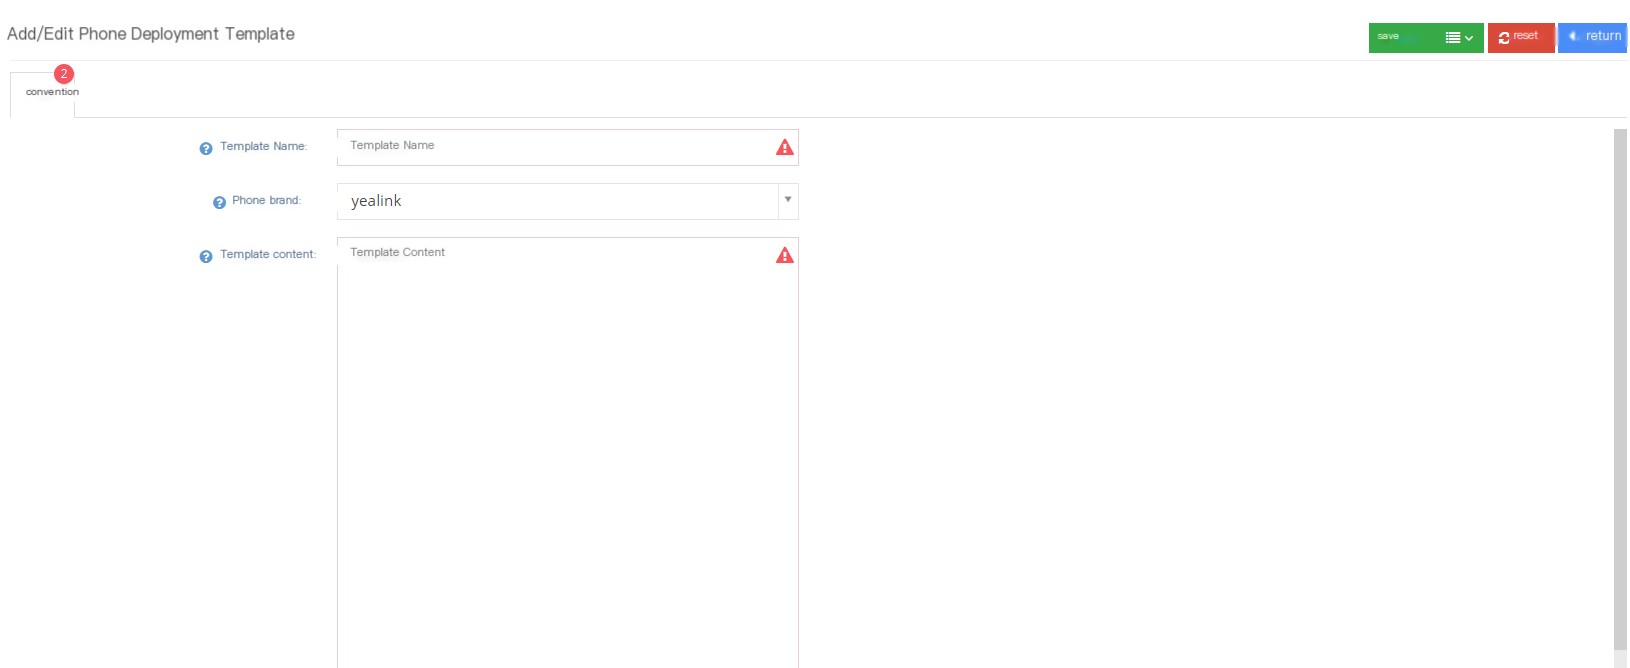
Template name: Please write out the name of the template.
Telephone brand: Fill in the brand of the phone.
Template content: Fill in the template content that needs to be configured.
②Click Save to add a successful new phone deployment template.
3.7 Knowledge Base
3.7.1 Knowledge Base
1 Page Introduction
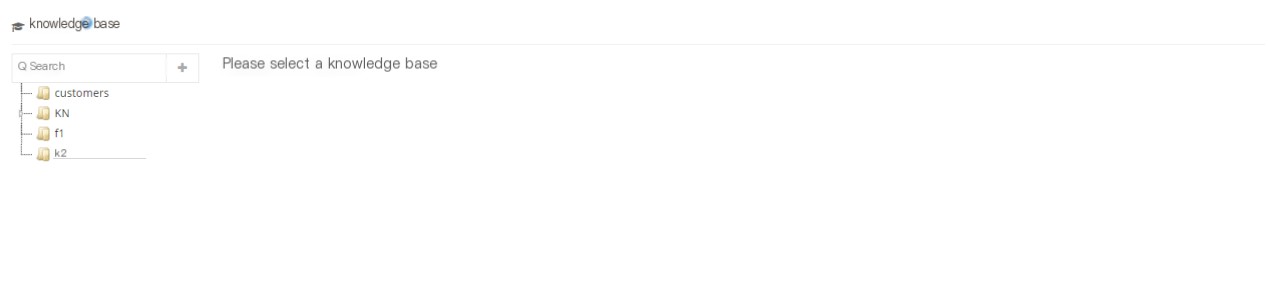
[Search] Search for files in the knowledge base.
【+】Click the plus sign next to the search to add a new knowledge base file
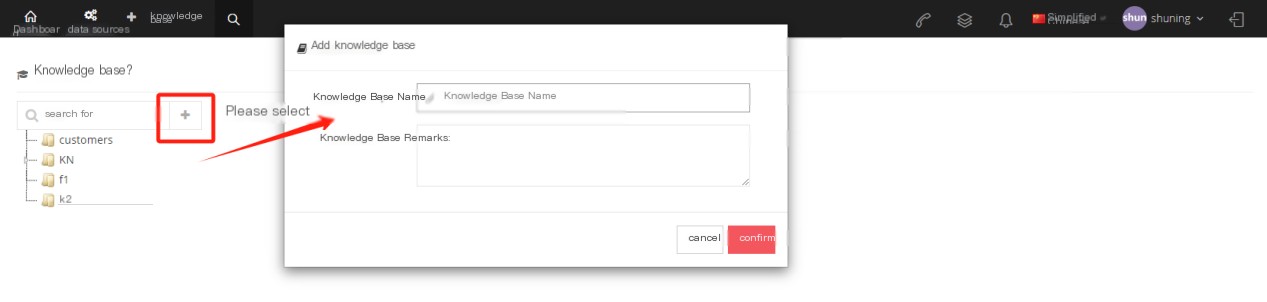
Knowledge Base Name: Name this knowledge base.
Knowledge Base Notes: Fill in the notes for this knowledge base.
Users can also add a knowledge base branch to the established knowledge base. They can directly click on the knowledge base and then click [+] to add a knowledge base branch. They can also use the Delete Edit button to modify the knowledge base.
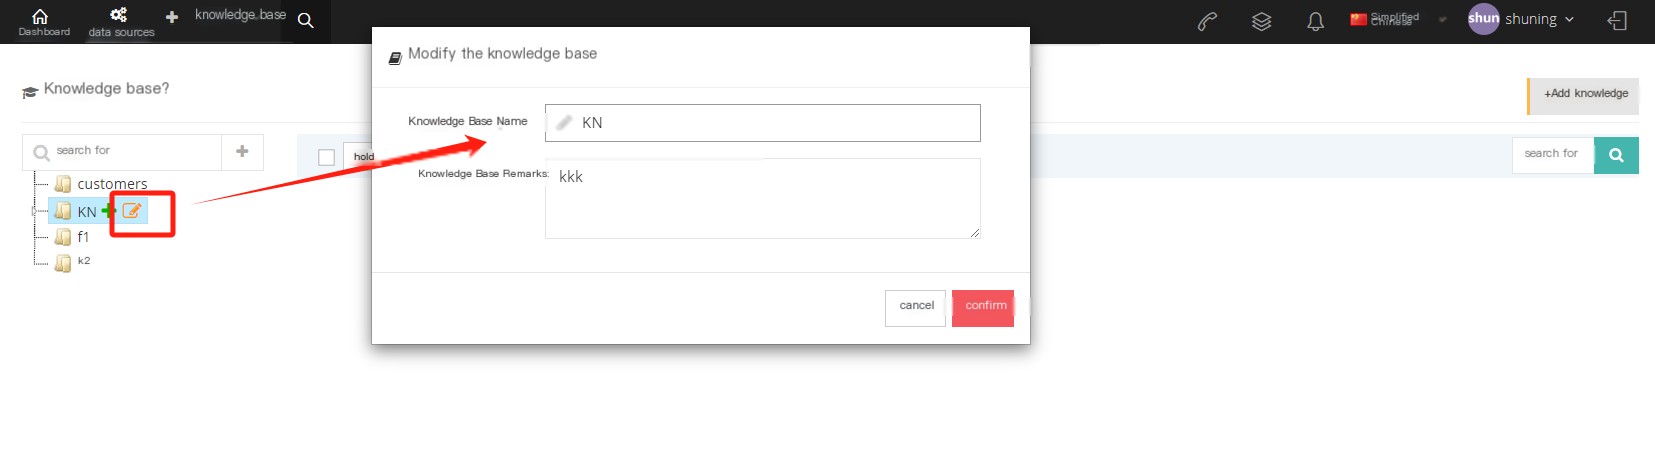
After the addition is completed, click the collapse logo to view the added knowledge base branches, or you can add, delete and edit it. The knowledge base that already has knowledge base branches cannot be deleted. You need to delete the knowledge base branches before you can delete it.

2 Add knowledge
Click the Knowledge Base file, and then click Add Knowledge to add knowledge to the file.
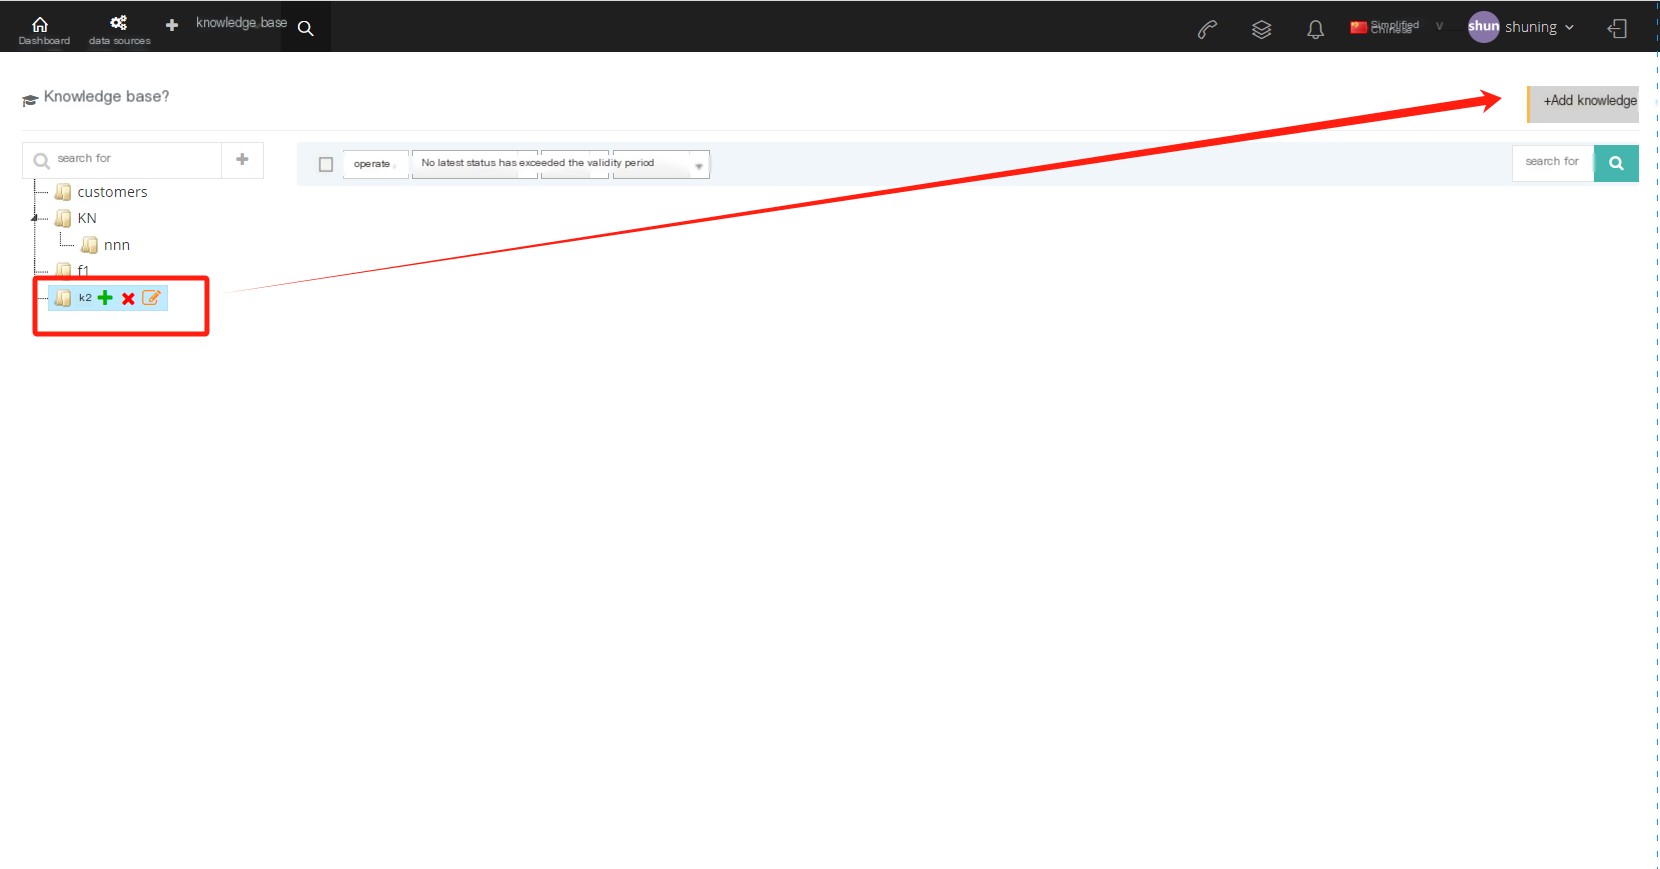
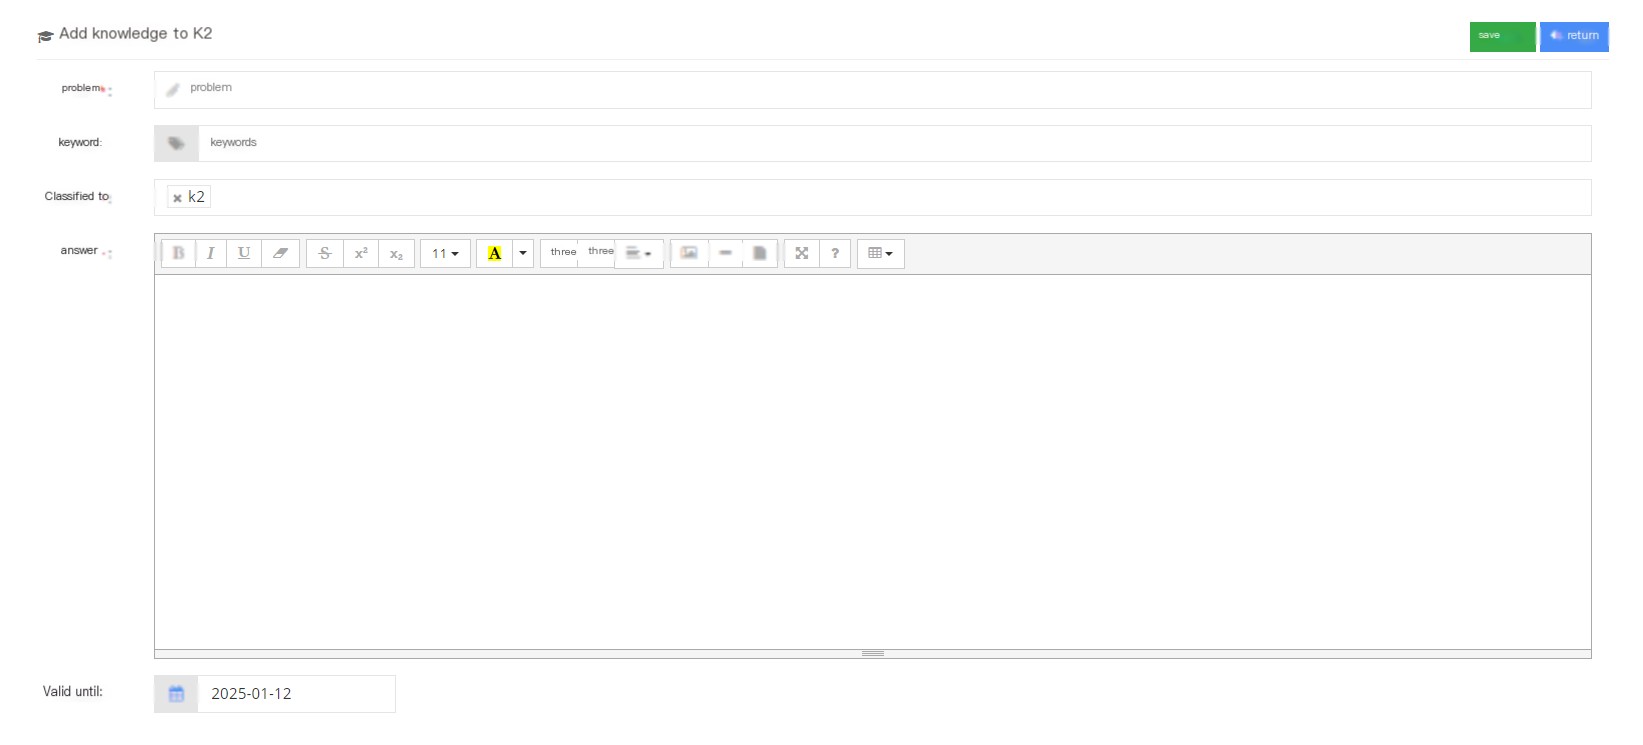
Question: Enter the content of the question you need to answer.
Keyword: Users can enter keywords to help agents search when using the knowledge base, and can add multiple inputs, enter.
Classification to: Users can classify this knowledge base information into multiple knowledge bases.
Answer: The answer to this question.
**Validity period to **: The creator can define the validity period of the knowledge base, and the knowledge will not be searched after the validity period.
3 Other operations
【Batch operation】
On the knowledge base page, users can choose batch audits, and users can choose to select data that needs to be approved or failed in batch audits.
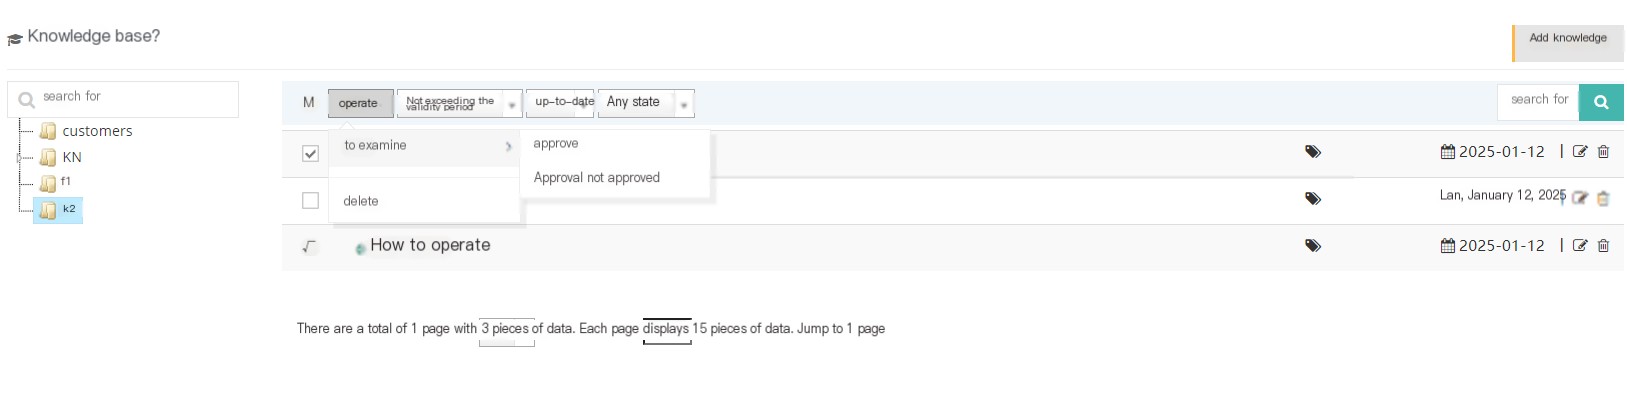
[Validity Period] Users can choose to view knowledge base knowledge about the validity period.
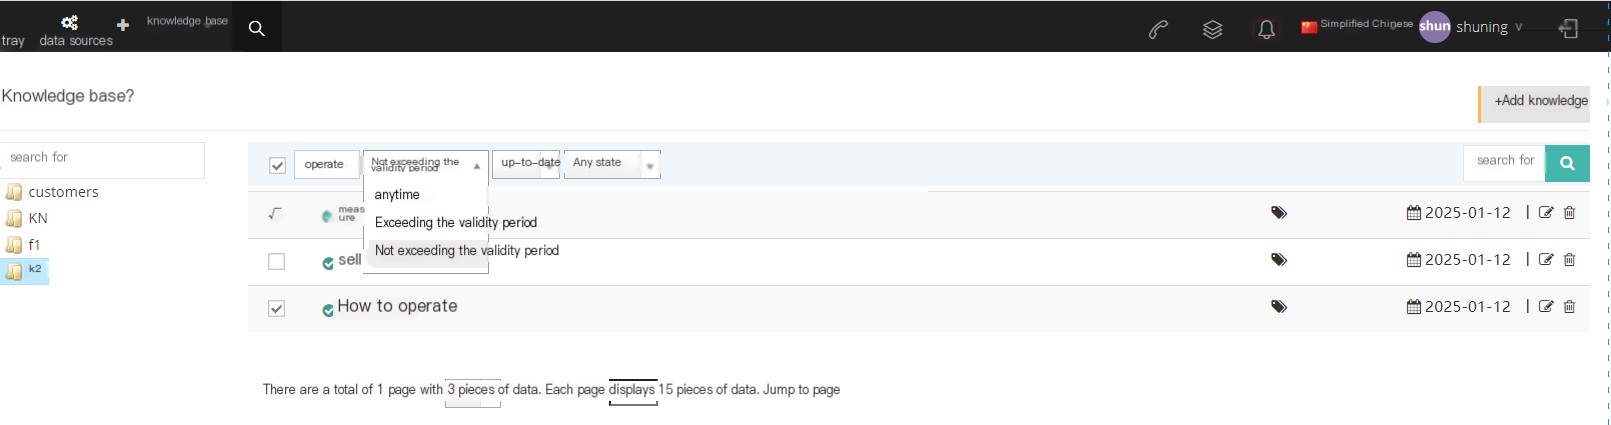
【up to date】
Users can arrange knowledge according to the initial or latest arrangement.
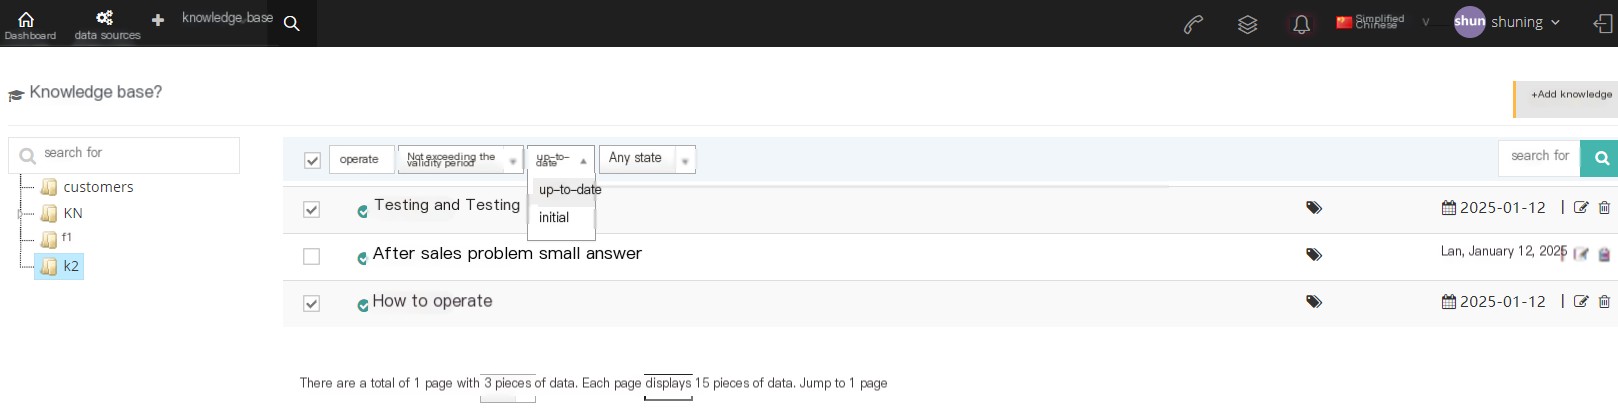
【state】
Users can view knowledge based on the review status of knowledge.
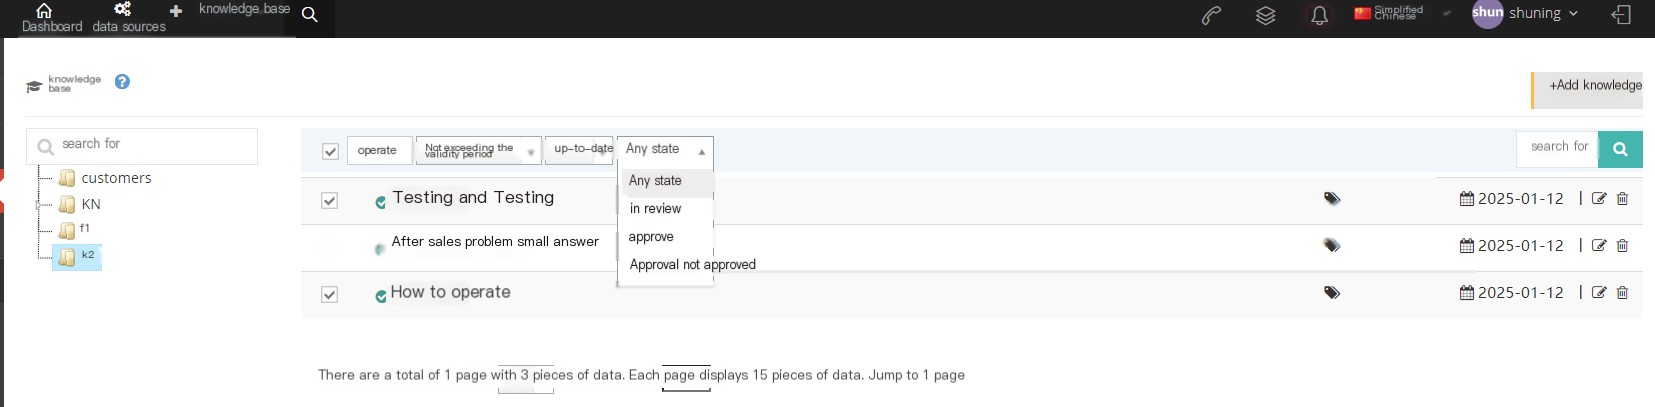
【Sitting knowledge】
When the agent’s role contains permissions to the agent’s knowledge base, the agent’s dashboard page will display the knowledge base.
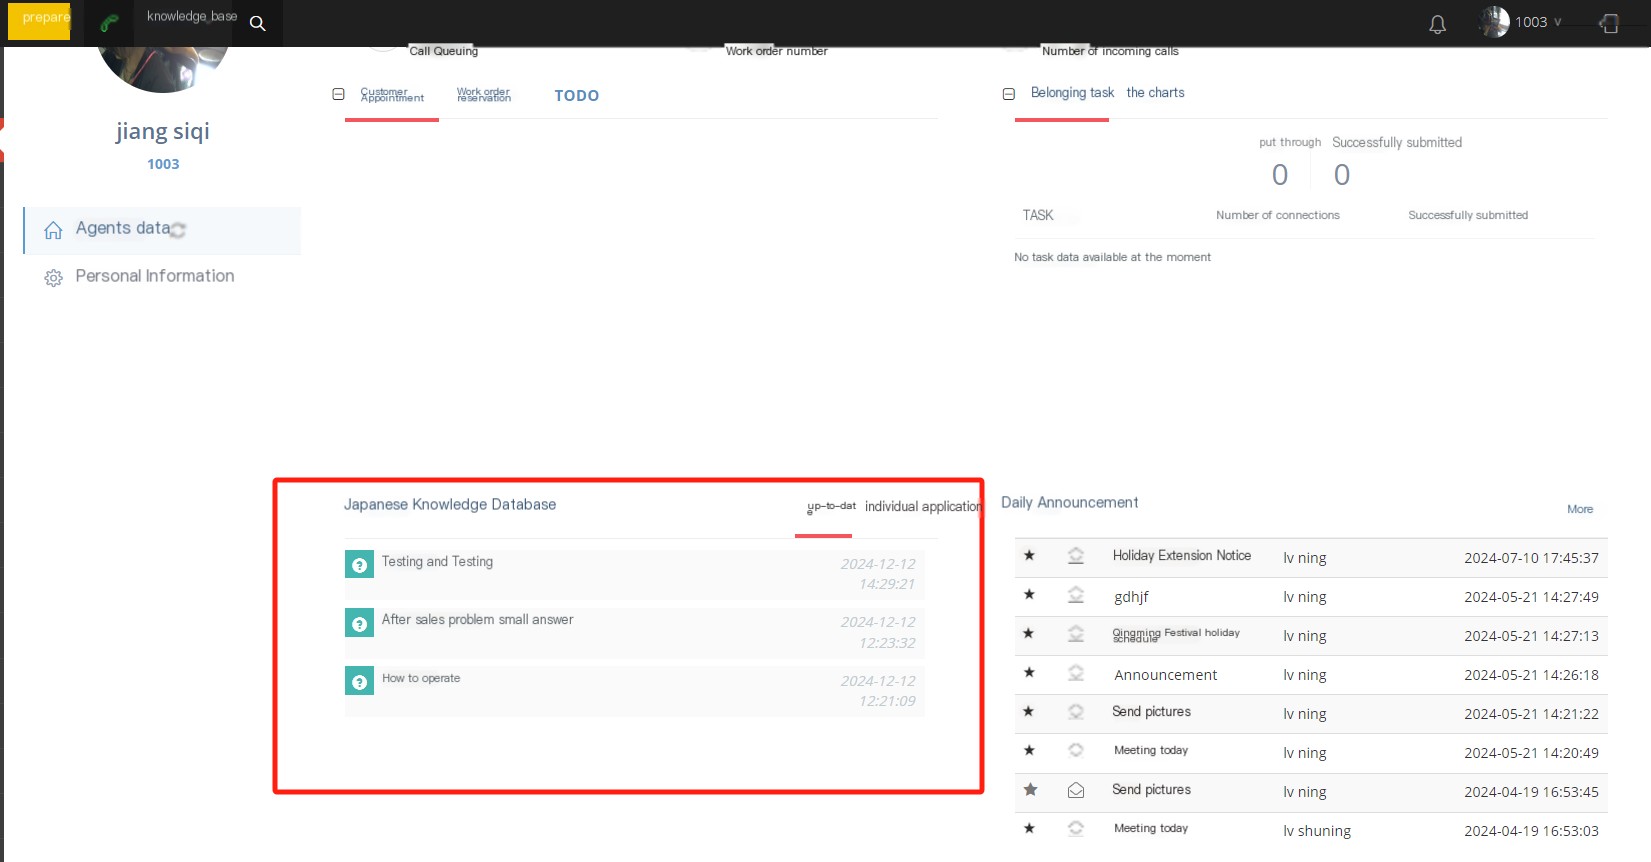
Click [My Submit] to enter the agent’s knowledge base page, click [Add Knowledge] to add new knowledge

Click [Knowledge List] to view reviewed and submitted but not reviewed knowledge.
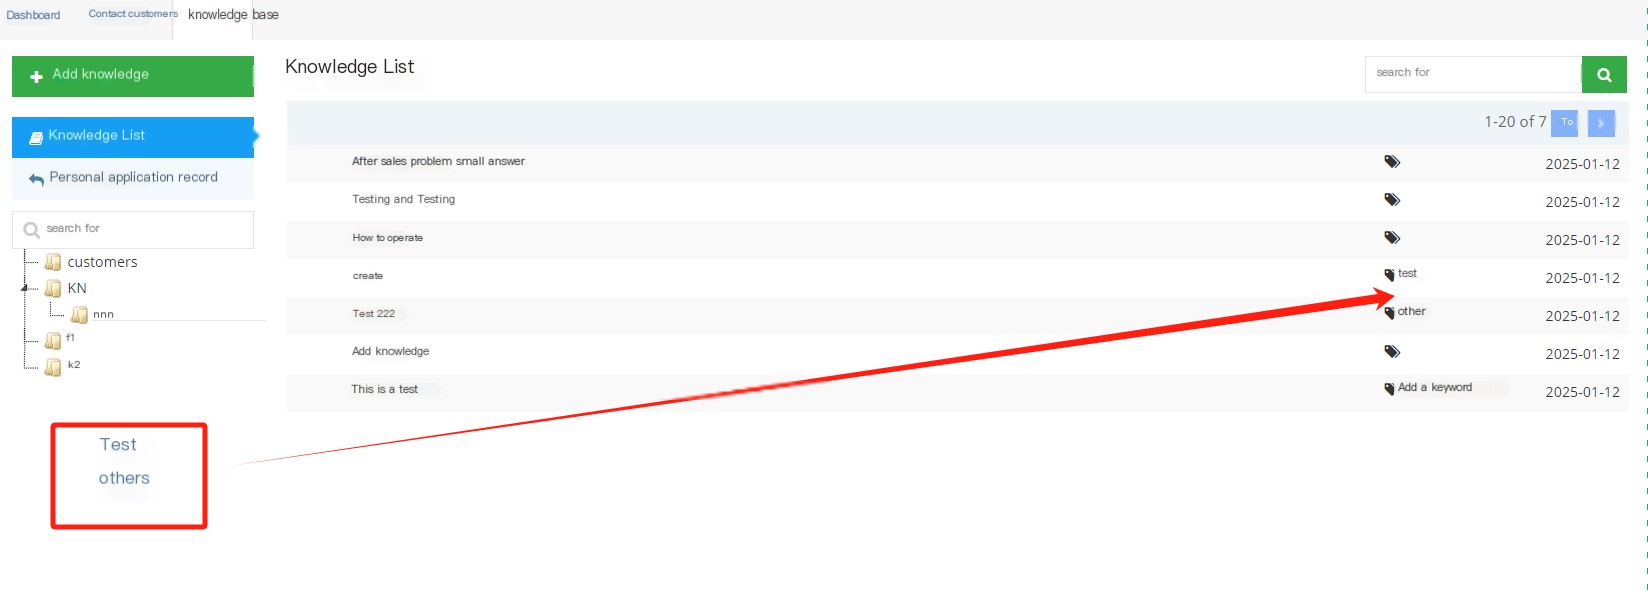
Click [My Submit] to view the knowledge submitted by the staff themselves.
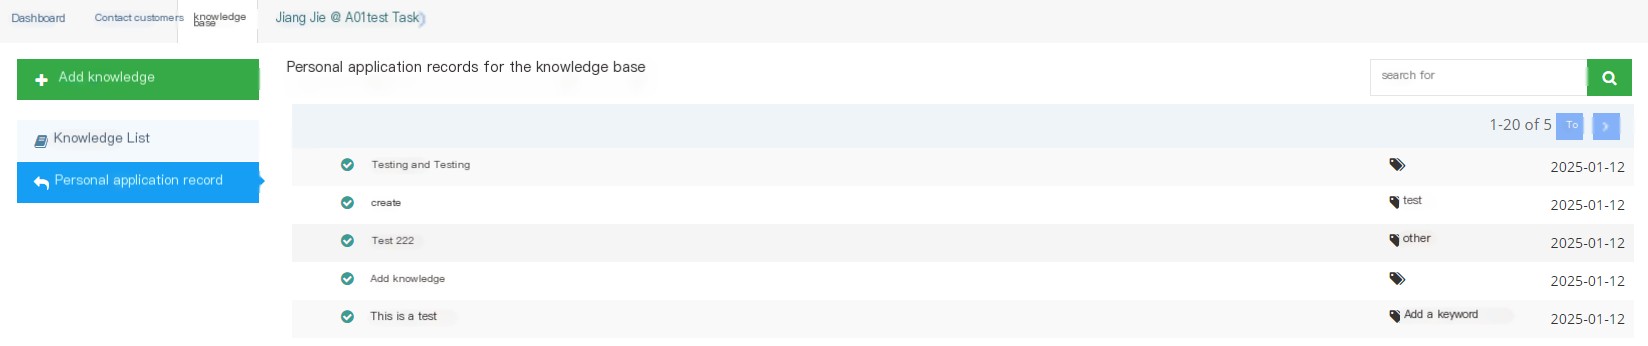
After the agent submits knowledge, the prompt will appear on the client knowledge base page.
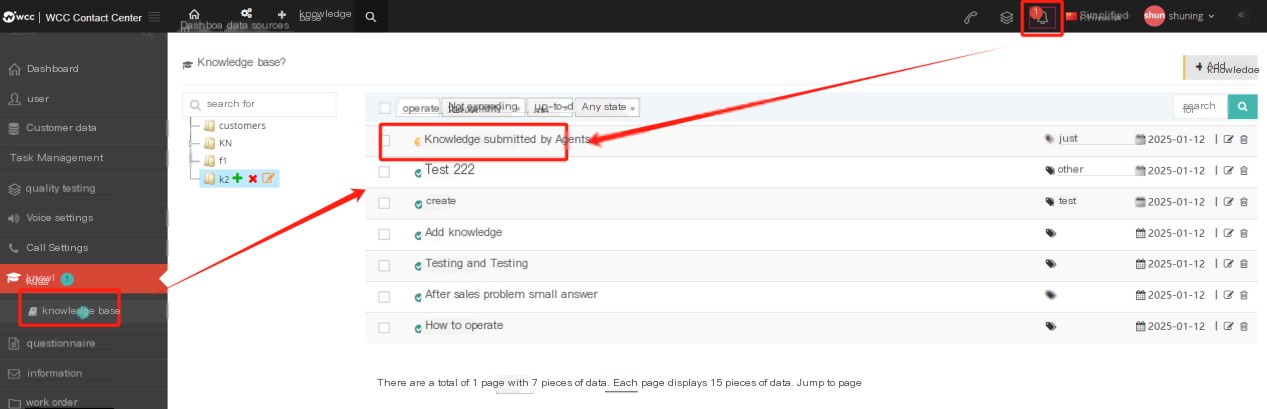
You can review the knowledge on the page.

3.8 Questionnaire
3.8.1 Questionnaire
1 Questionnaire Introduction
Query is a questionnaire that the agent and the customer are questionnaire when the agent and the customer are talking to each other. The user can export the answers to the questionnaire in the questionnaire answers.

【Search】Global search supports search by questionnaire name.
【Add】Add a new questionnaire.
[Show/Hide Field] Select the fields that this page needs to display or hide.
[Please select] Delete according to the conditions.
[Edit] Edit the established questionnaire.
【Drop-down menu】
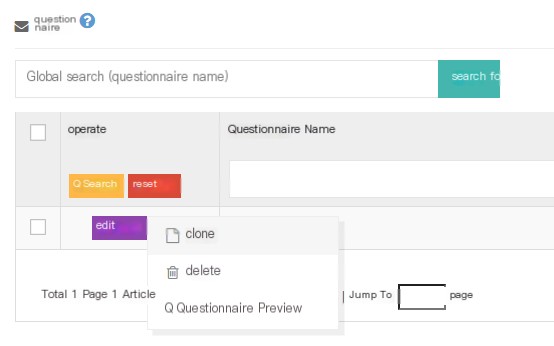
Delete-Delete this questionnaire.
Clone-Copy this questionnaire.
*** Questionnaire Preview***-Preview this questionnaire.
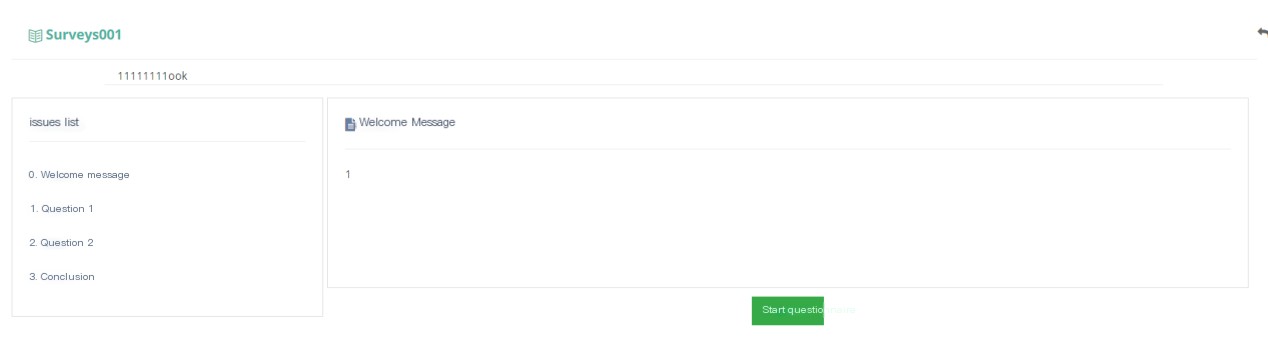
2 Show/Hide fields
Questionnaire name: The name of the questionnaire.
Questionnaire type: The type of this questionnaire.
Creation Date: The date of creation of the questionnaire.
Last update: The last update of the questionnaire is saved.
3 Add a new questionnaire
①点击添加进入添加/编辑问卷常规页面:

Question Name: Name the questionnaire.
Query Type: Select the type of questionnaire
文本问卷将此调查应用于任务后,任务中的客户可以根据调查中设置的问题进行填写和选择。
语音问卷将调查问卷应用于任务后,通过预拨号呼出的客户将听到以语音格式播放的调查问题(需要配置TTS 引擎且暂时不可用)。
②Click Advanced to enter the Advanced Page of Add/Edit Questionnaire:
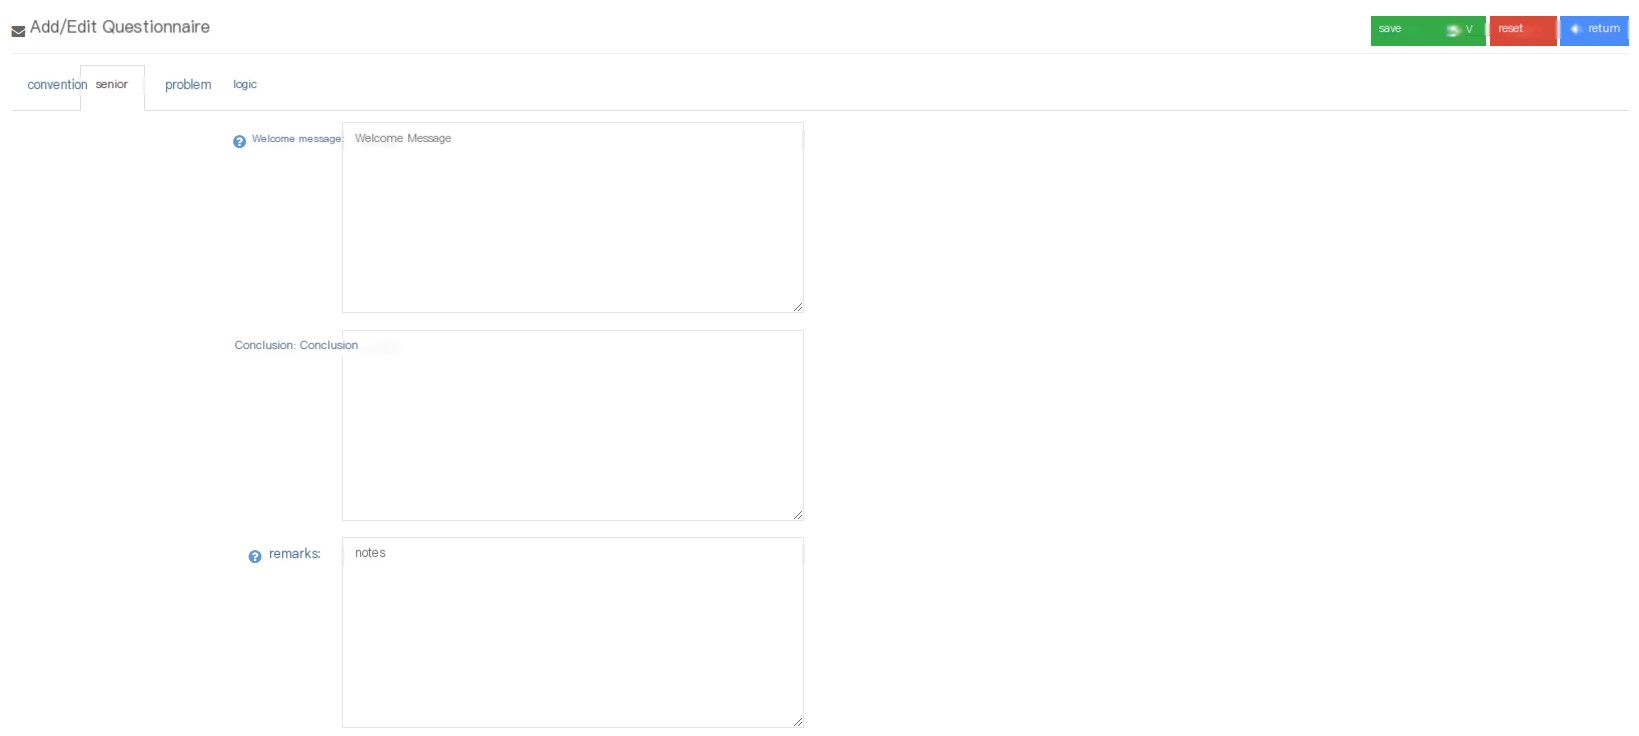
Welcome: Welcome to the home page of the questionnaire.
Conclusion: The conclusion that appears at the end of the questionnaire.
Note: Notes will appear below the questionnaire title.
③ Click the question to enter the Add/Edit Questionnaire Question interface:
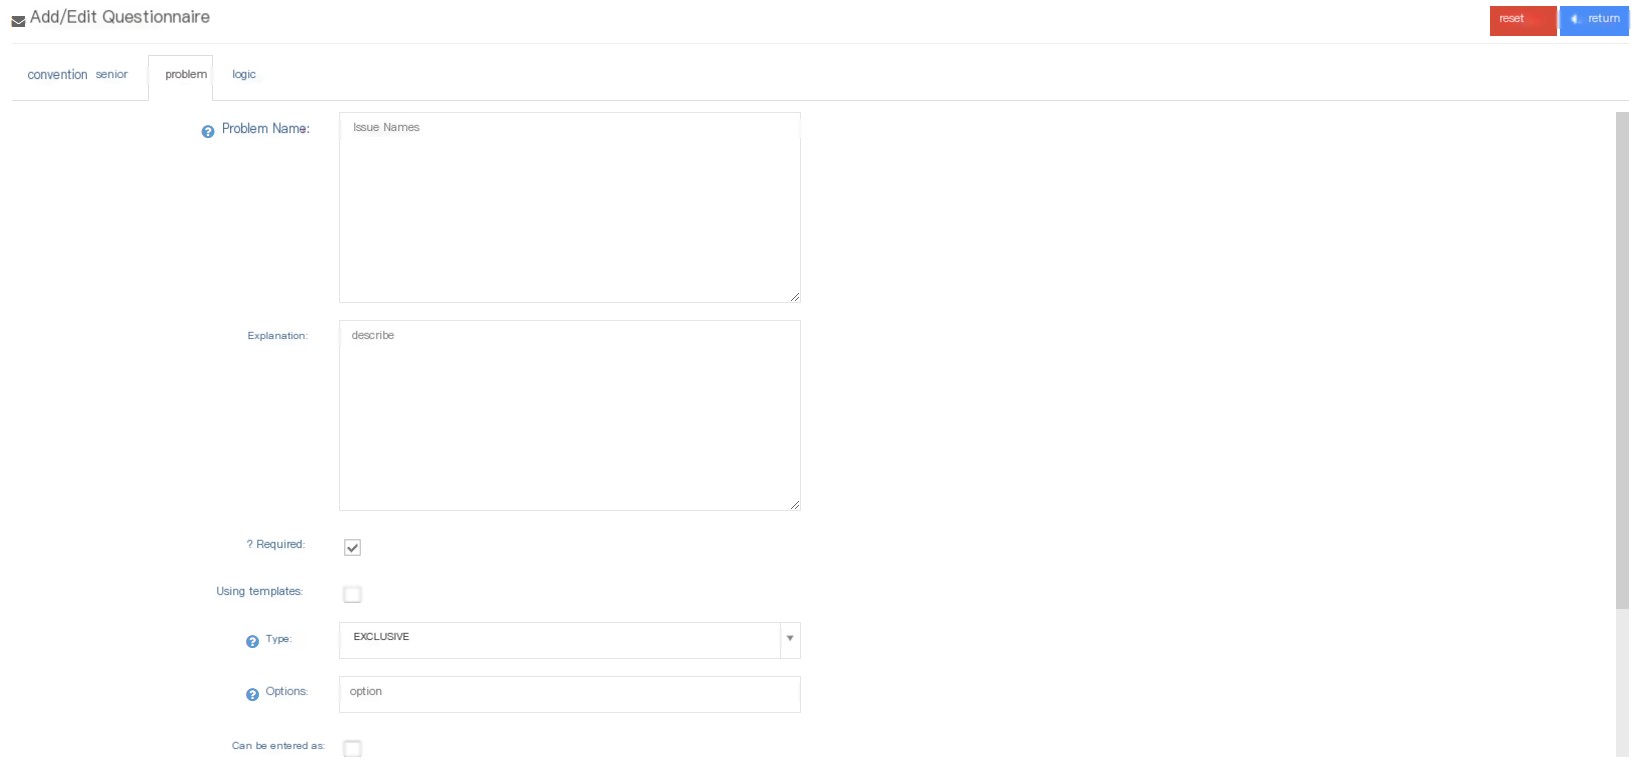
Question Name: A questionnaire is composed of multiple questions, where users can name one of the questions.
Instructions: Add a description to this question, and the instructions will be displayed under the questionnaire question name.
Required: Whether this question is a required question? If you start the required question, you must fill in this question and cannot be skipped directly.
Using Template: Do you want to use Settings Survey Template?
Option template: After enabling the option template, you can add options to this issue based on the added option template.
Type: Question type:
Single choice- There is only one option for this question.
Multiple Choice- This question can have multiple options.
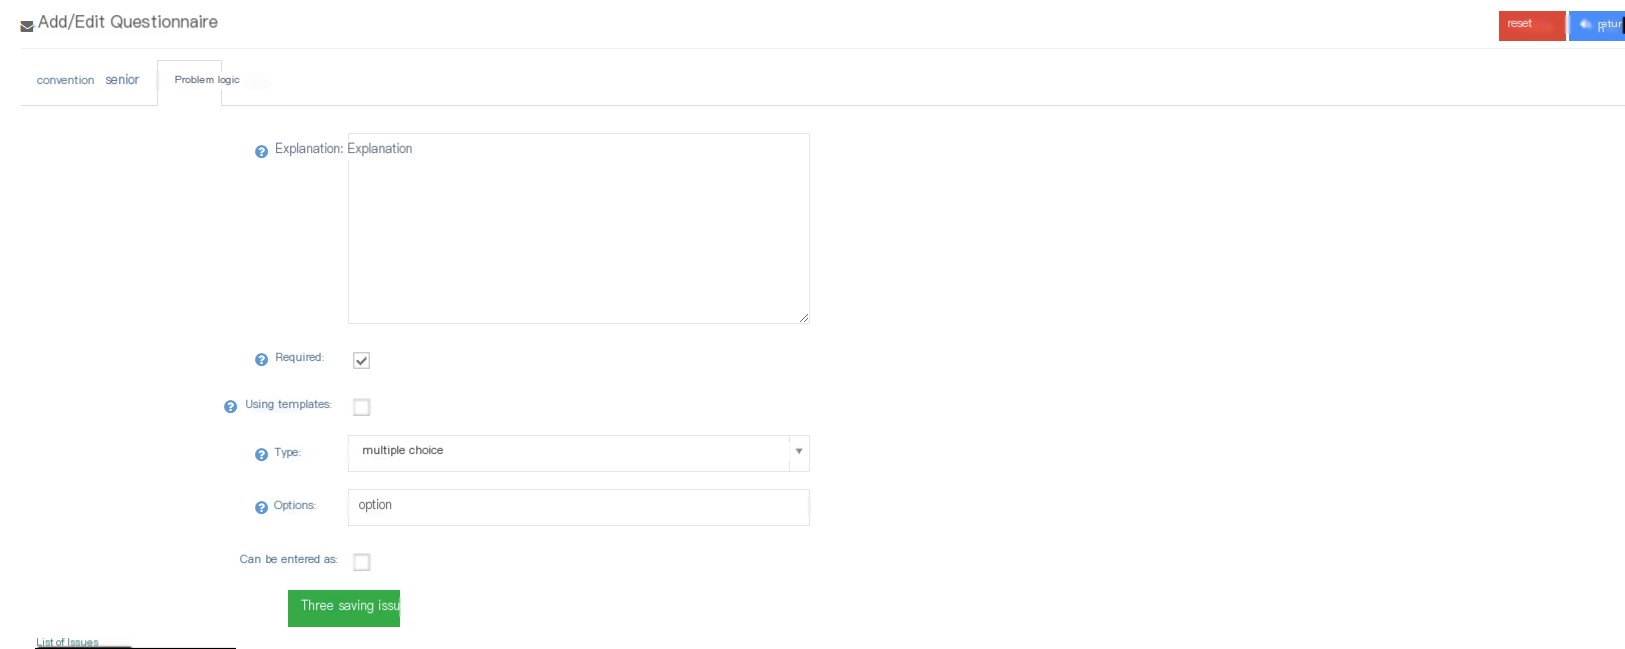
Text- There is no option for this question, you need to directly enter text to answer.
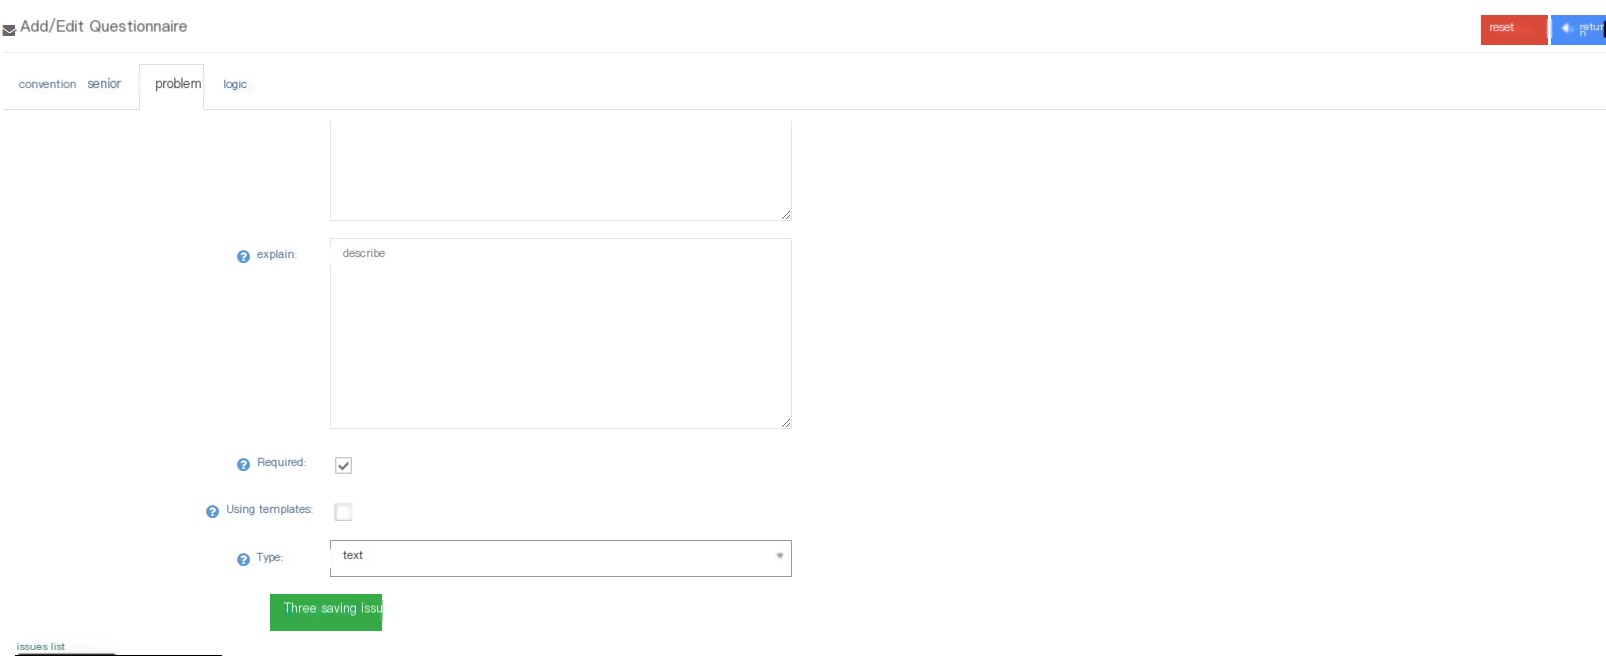
Enterable: Whether to enable input can be enabled, if enabled, you can make notes after selecting the answer.
At the end, there will be a list of input questions, and the user can perform subsequent problem logic based on the list.
④ Click the logic to enter the Add/Edit Questionnaire Logical Page (if it is done in the order of the question number, you can skip the page settings):

Question: According to the required questions that only select the questionnaire, perform questions and answers to logical questions.
Logic: Logical relationships are redirected to surveys based on customer’s answers and logical relationships.
Logic Options: The option under this logic problem is yes or no.
Logic Action: Logical actions include jumps, hidden problems and hidden options (hide problem options in logical targets).
Logic Objective: The logical goal selected by the logical action is the result of the questionnaire after the logical action.
Note: Text issues do not allow setting logical actions and logical targets, and even if the logic is saved, it will not take effect.
⑤ After saving the questionnaire, return to the questionnaire page. In the edited drop-down menu, the user can delete and copy the questionnaire.
3.8.2 Questionnaire Option Template
1 Page Introduction
Query Option Template is an option for common questions. In the Add Questionnaire Questions, you can choose the questionnaire option template to quickly add the option.
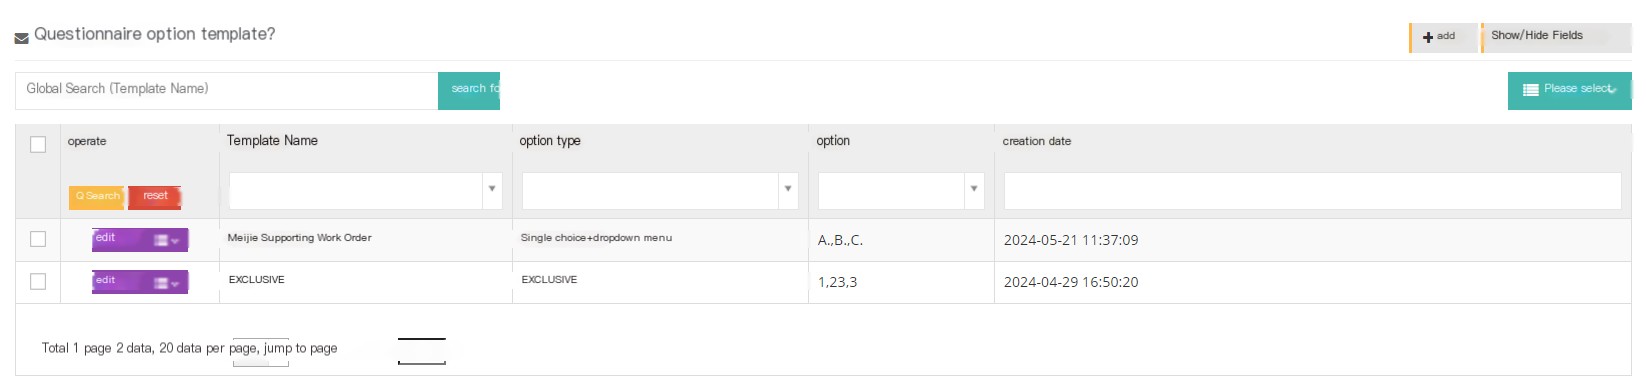
【Search】Global search supports searching with template names.
【Add】Add a new questionnaire template.
【Show/Hide Field】Select the fields that you want to display or hide on this page.
[Please select] Delete according to the conditions.
[Edit] Edit the established questionnaire option template.
[Drop-down menu] Delete this questionnaire option template.
2 Show/Hide fields
Template name: The name of this template.
Option type: The option type of this template.
Options: The options content of the template.
Created date: The creation date of the template.
Last updated: The template was last updated on the saved date.
3 Add a new questionnaire option template
① Click Add to enter the general interface of the Add/Edit Questionnaire Options Template:

Template name: Name this template.
选项类型:
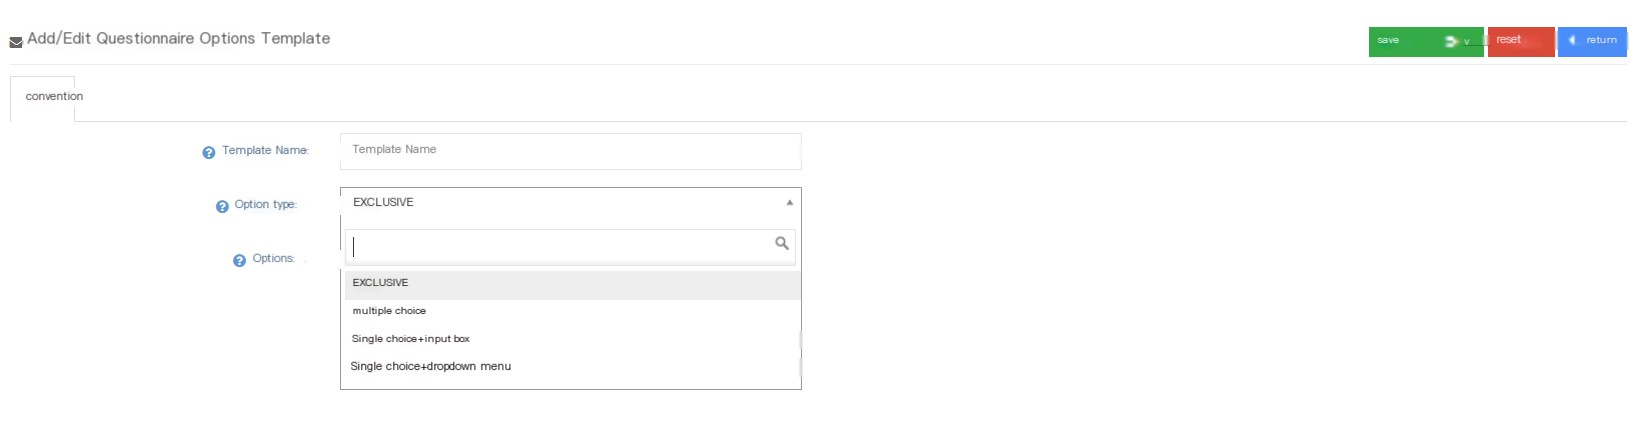
单选-此问题只能选择一个选项。
Multiple Select - This question can choose multiple options.
Single choice + text box - This question can be entered after each single choice.
单选+下拉框此问题每个单选后面都可以下拉添加选项.
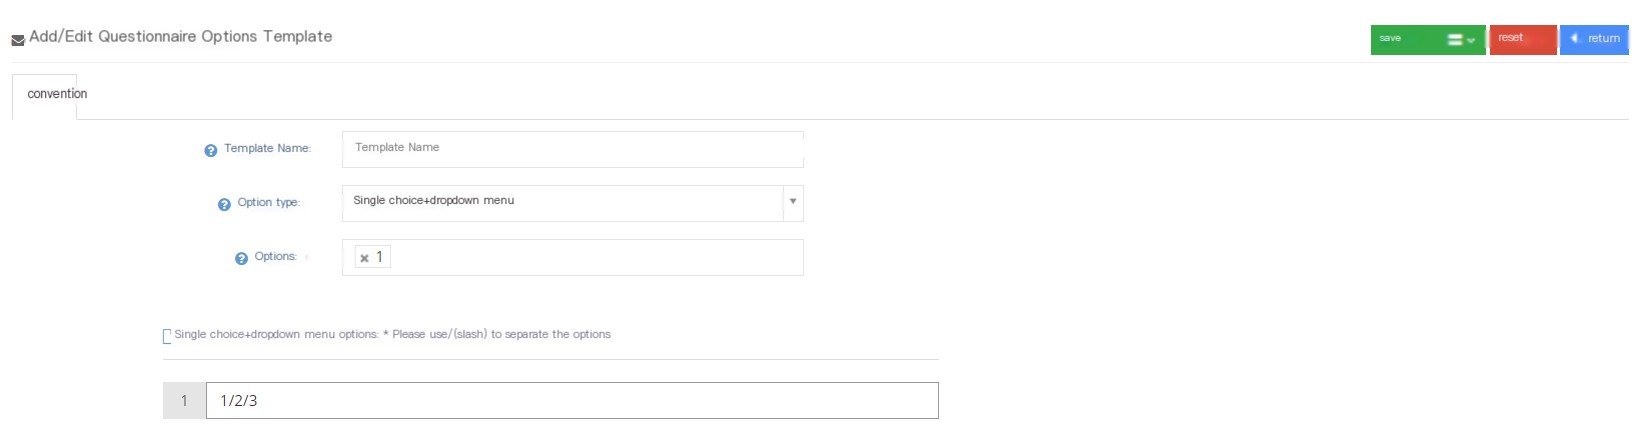
Options: Commonly used options as options for this template. Enter options and enter key to add multiple options.
②Click to save to add a successful new questionnaire option template.
3.8.3 Questionnaire answers
1 Page Introduction
On the Query Answers page, users can view the results of the customer survey.
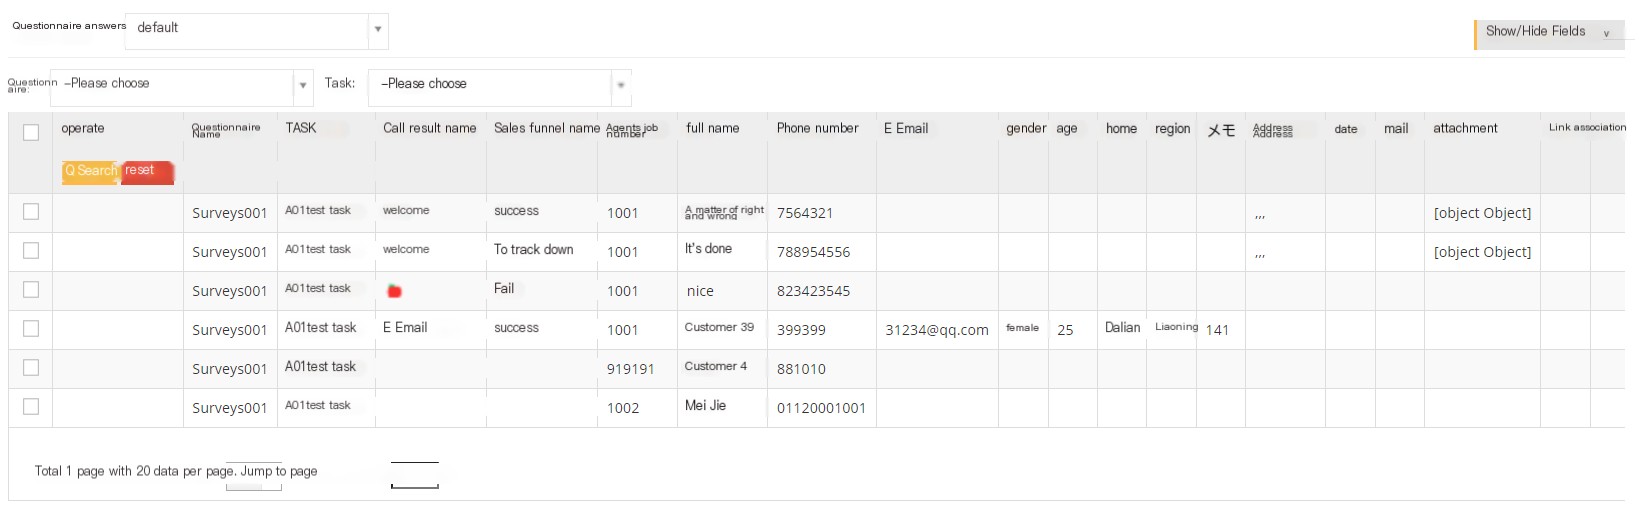
The [default] in the picture above is to view the questionnaire answers based on the customer package.
[Questionary] Select a questionnaire to view the answers under the questionnaire.
【Task】Select a task to view the questionnaire answers under the task.
【Show/Hide Field】Select the fields that you want to display or hide on this page.
【Tools】Export CSV file.
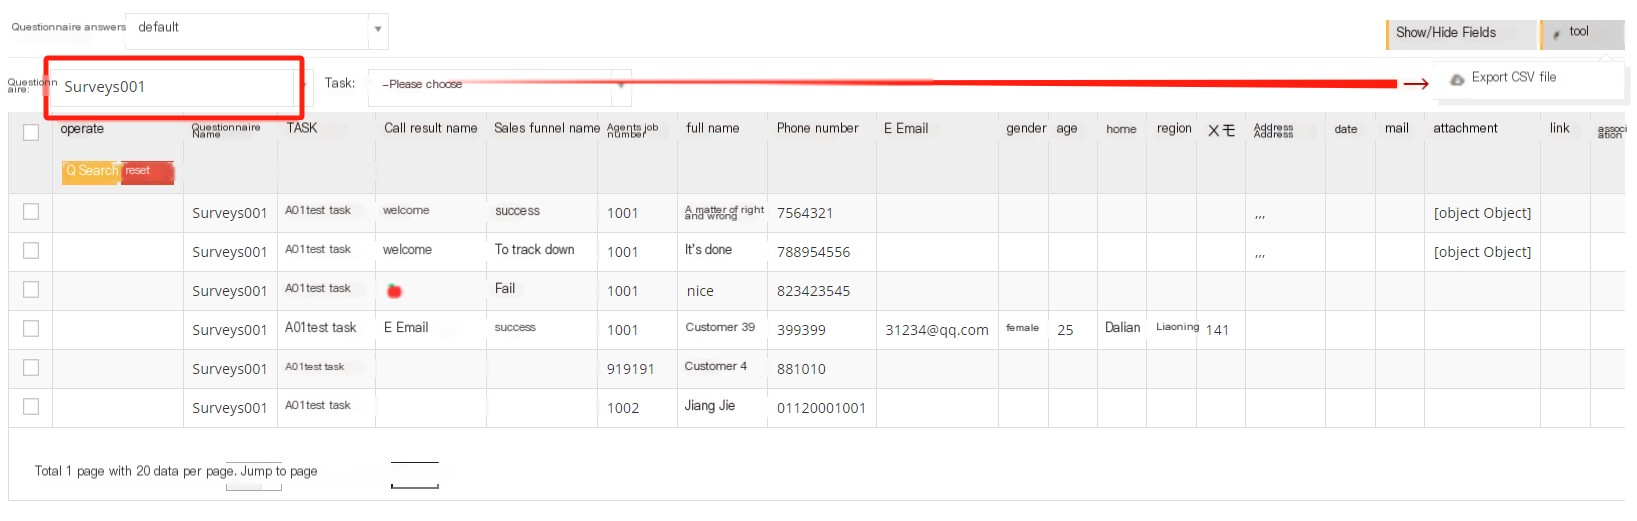
2 Show/Hide fields
Questionnaire name: The name of this questionnaire.
Task name: The task name applied to this questionnaire
Call result name: The call result of the client to which this questionnaire belongs.
Sales funnel name: sales funnel of the customer to which this questionnaire belongs
Seat Work Number: The work number of the seat that holds the questionnaire.
Answer time: The answer time of the questionnaire.
Name: The name of the client to which the questionnaire belongs.
电话号码:该问卷所属客户的号码。
电子邮件:该问卷所属客户的电子邮件。
性别:该问卷所属客户的性别。
年龄:该问卷所属客户的年龄。
住所:该问卷所属客户的住址。
地域:该问卷所属客户的地区。
备注:该问卷所属客户的备注。
3.9 Information
3.9.1 Email Template
1 Page Introduction
Email Template is designed to add email templates in one click when sending emails to customers, thereby saving work time.
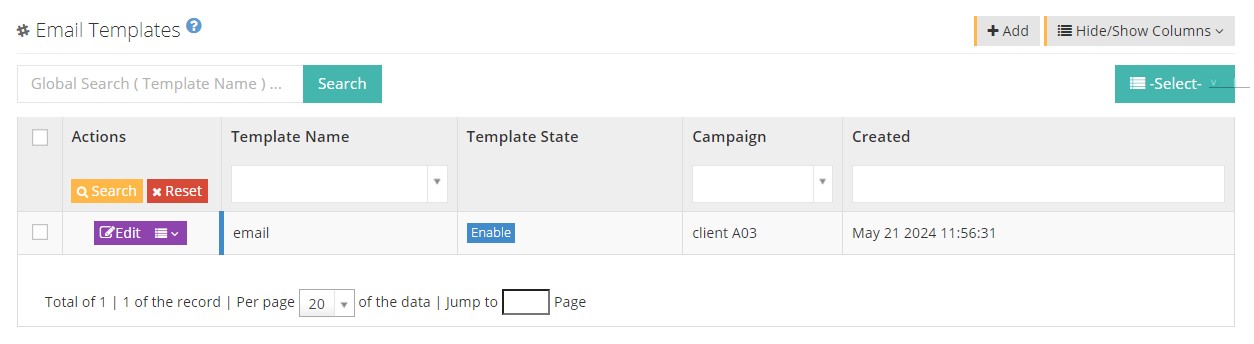
【Search】Only global searches are supported with the name of the email template.
【Add】Add a new email template.
【Show/Hide Field】Show or hide the fields of this page.
[Please select] Delete according to the conditions.
[Edit] Edit the created email template.
[Drop-down menu] Delete this email template.
2 Show/Hide fields
Template name: The name of the mail template.
Template Status: The enabled or disabled status of this mail template.
Task: The task to which this email template belongs.
Email Title: The title of this email template,
Template comment: Comments to this email template.
Created date: The creation date of the email template.
Last updated: The last update time of this email template.
3 Add a new email template
①C Click [Add] to enter the [General] interface of adding/editing email template:
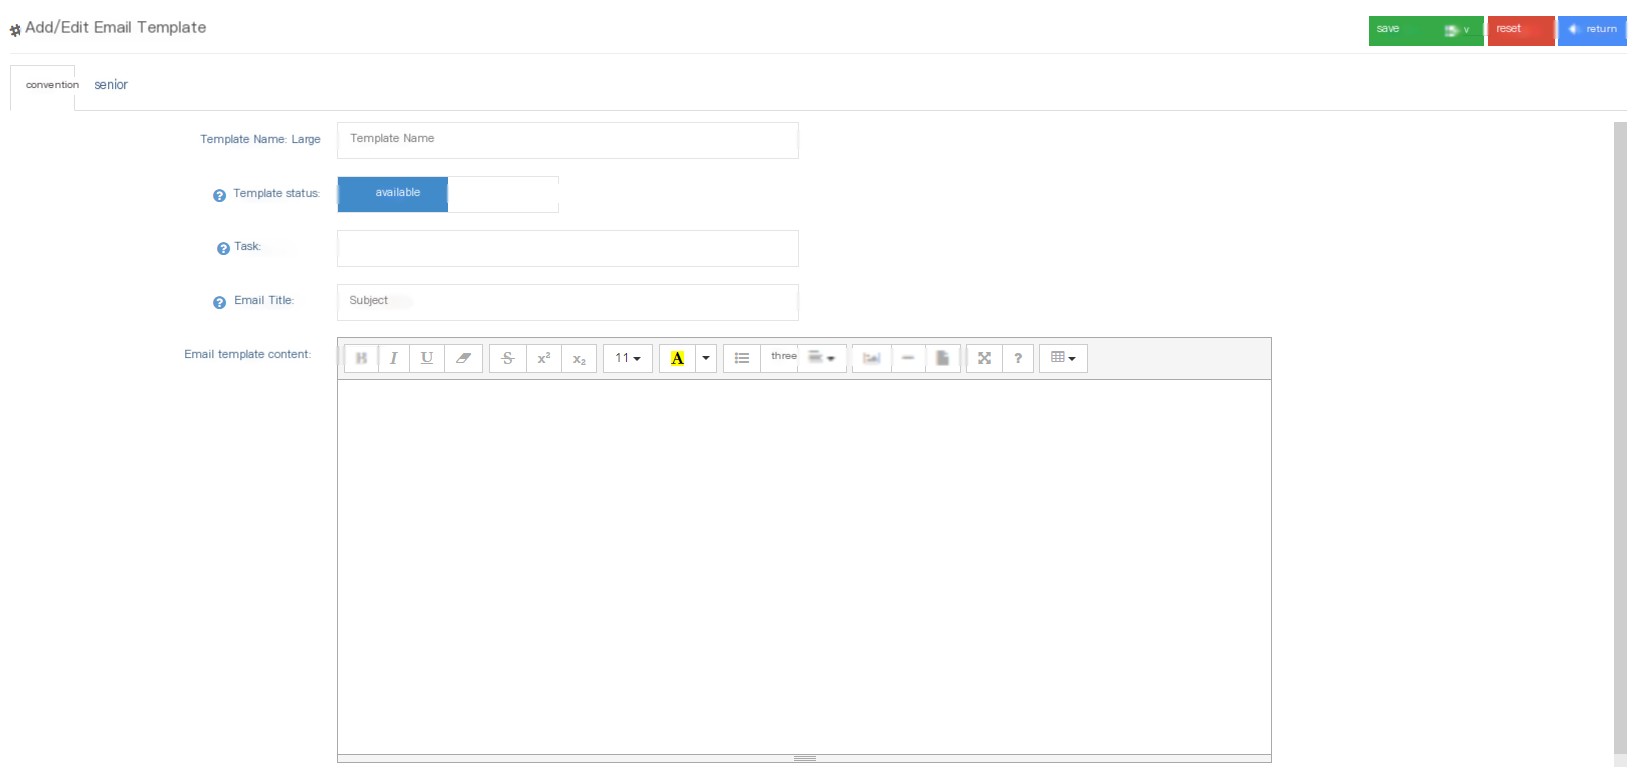
Template name: Please name this email template.
Template Status: The template is enabled or disabled. If you want to turn off this template, you can set the disabled status.
Owned Task: You can select a belonging task for this template, and then use the email template under this task.
Mail Title: You can set the title of this email.
Email template content: You can fill in the template content as you need, and you can set different styles.
Special reminder: No matter if you want to match any information in the customer data, you can use ## variable information## to mark it in the template. When using the template to send mass messages, you can match the variable information you want to add according to the customer data table. ##name## in the email template content above is a variable that can fill in the customer’s name. For details, please refer to the Batch Message operation steps below.
②Click [Advanced] to enter the advanced interface of adding/editing email templates:
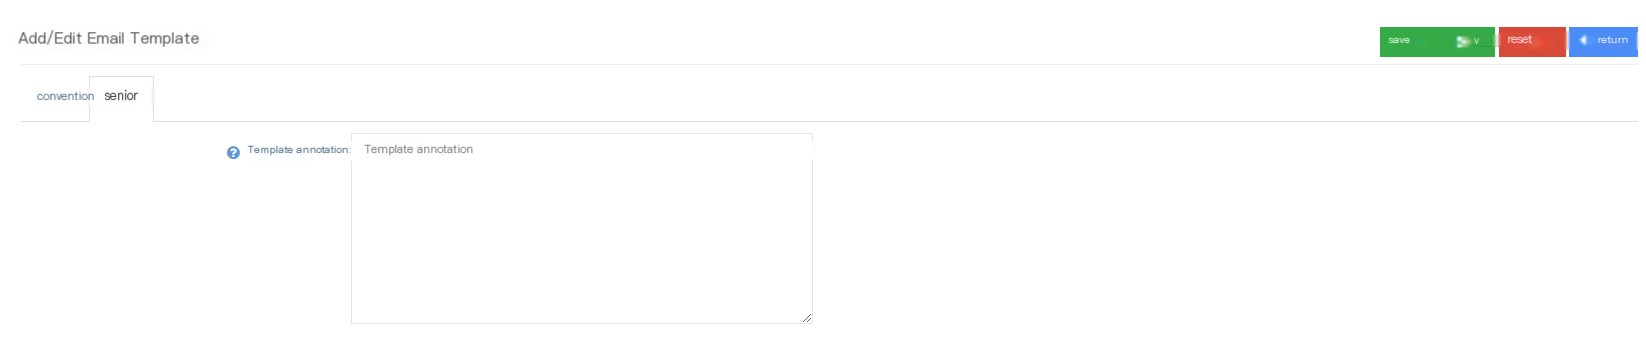
Template comments: You can fill in the comment instructions for the email template.
③ Click Save to view the saved email template in the email template list. You can also re-edit the saved email template by clicking [Edit] and clicking [Drop down] to delete the saved email template.
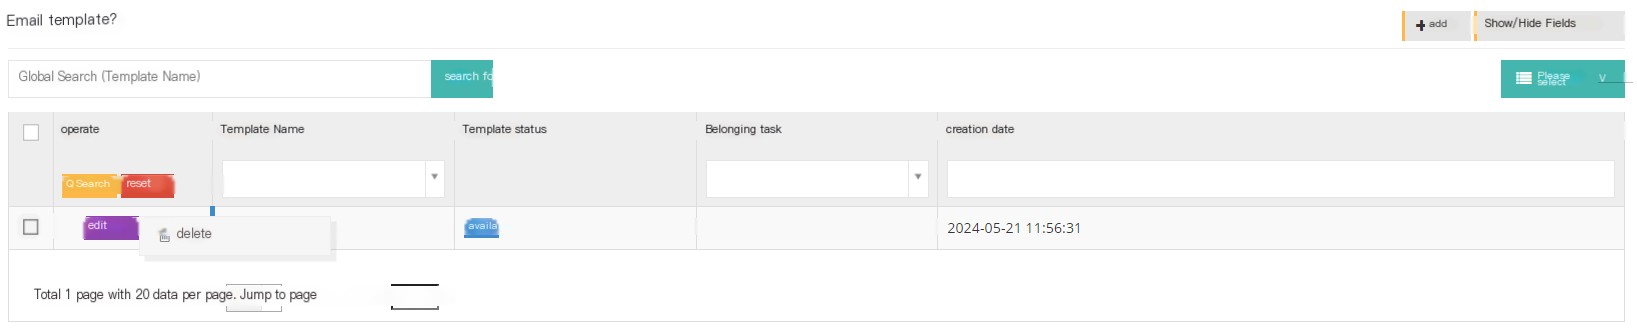
3.9.2 SMS template
1 Page Introduction
SMS templates are designed to add them with one click when sending text messages to customers, thereby saving work time.
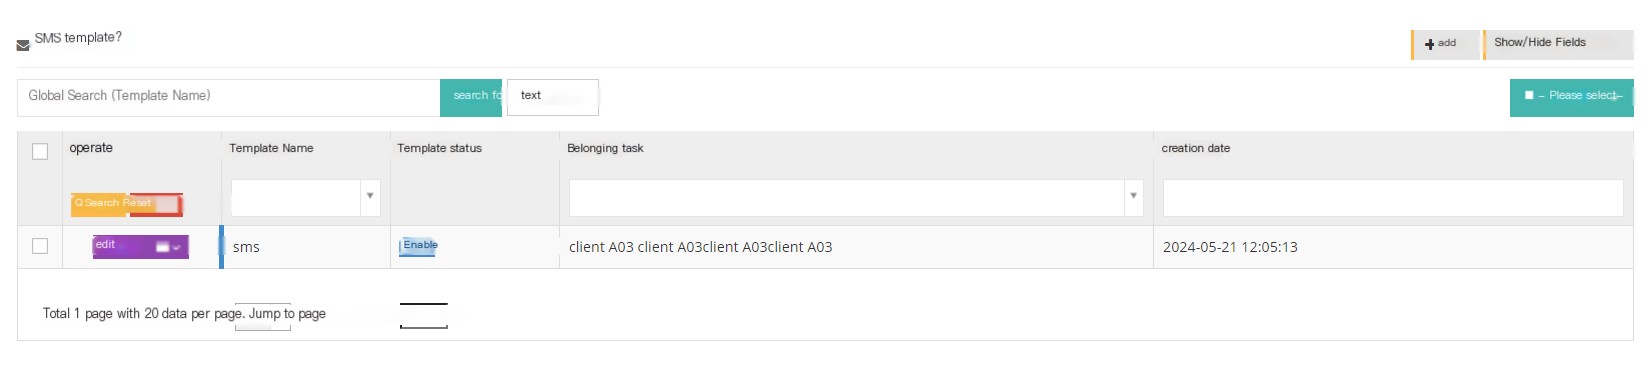
【Search】Only global searches are supported with SMS template names.
【Add】Add a new SMS template.
【Show/Hide Field】Show or hide the fields of this page.
[Please select] Delete according to the conditions.
[Edit] Edit the created SMS template.
【下拉菜单】删除这个短信模板及发送模板内容。
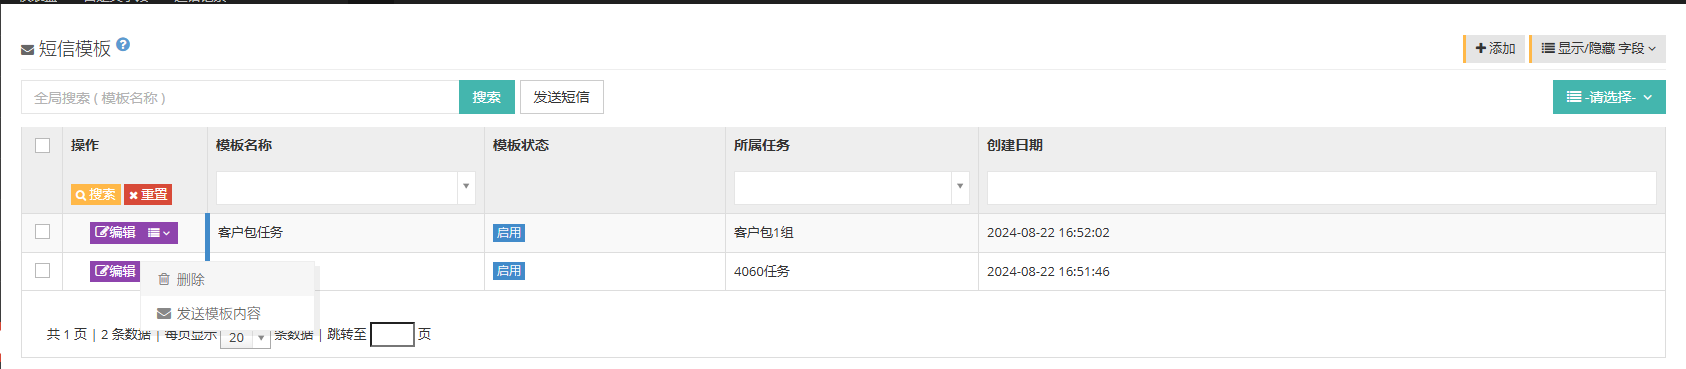
2 Show/Hide fields
Template name: The name of the SMS template.
Template Status: The enabled or disabled status of this SMS template.
Task: The task to which this text message template belongs.
Created date: The creation date of the text message template.
Last updated: The last update time of this text message template.
3 Add a new SMS template
① Click [Add] to enter the general interface for adding/editing text message templates:
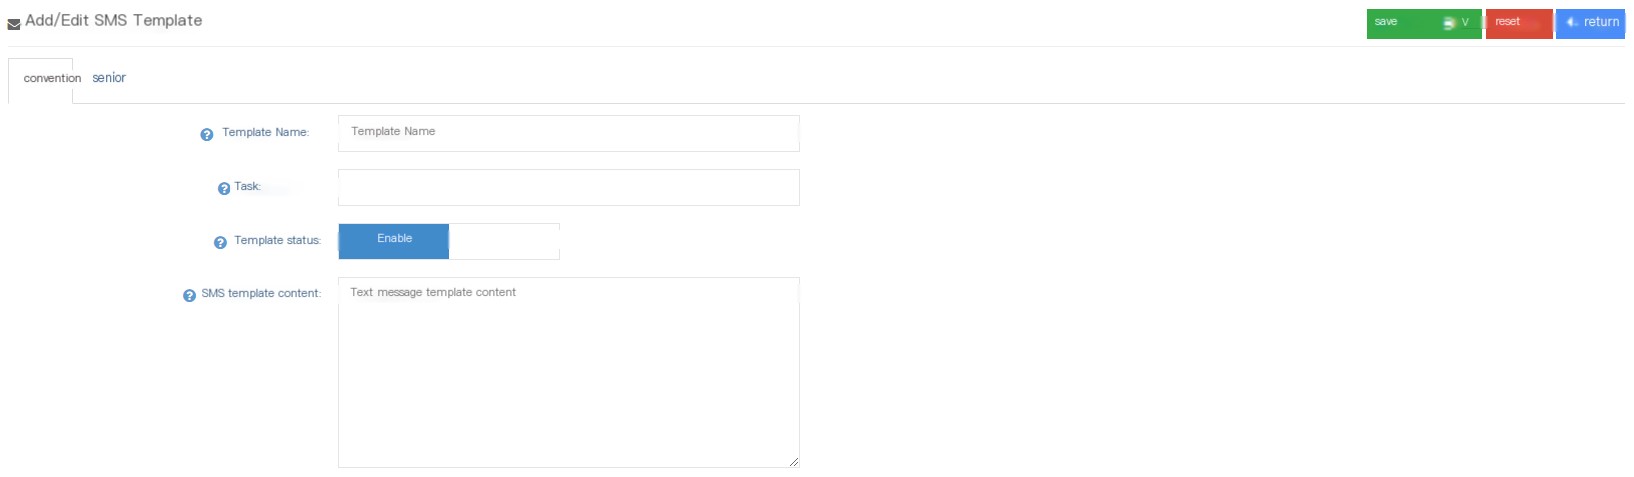
Template name: Please name this text message template.
Official Task: You can select a belonging task for this template, and then use the SMS template under this task.
Template Status: The template is enabled or disabled. If you want to turn off this template, you can set the disabled status.
SMS template content: You can fill in the template content as you need, and you can set different styles.
Special reminder: No matter what information you want to match in customer data, you can use ## variable information## in the template to mark it. When using the template to send mass messages, you can match the variable information you want to add according to the customer data table. The ##name## in the text message template content above is a variable that can fill in the customer name. For details, please refer to the Batch message operation steps below.
②Click [Advanced] to enter the [Advanced] interface of adding/editing text message templates:
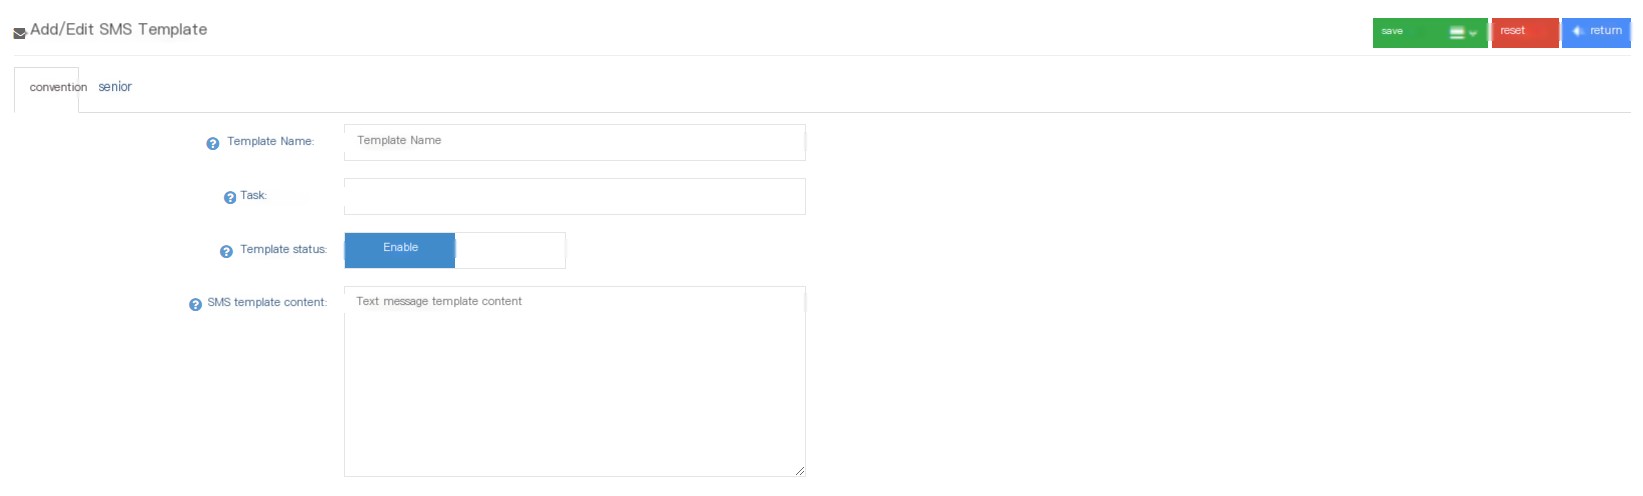
Allow modification: You can set whether this text message template is allowed to be modified.
Template Comments: Here you can fill in the comment instructions for the template.
③ Click Save to view the saved SMS template in the SMS template list. You can also re-edit the saved SMS template by clicking [Edit] and clicking [Drop down menu] to delete the saved SMS template.
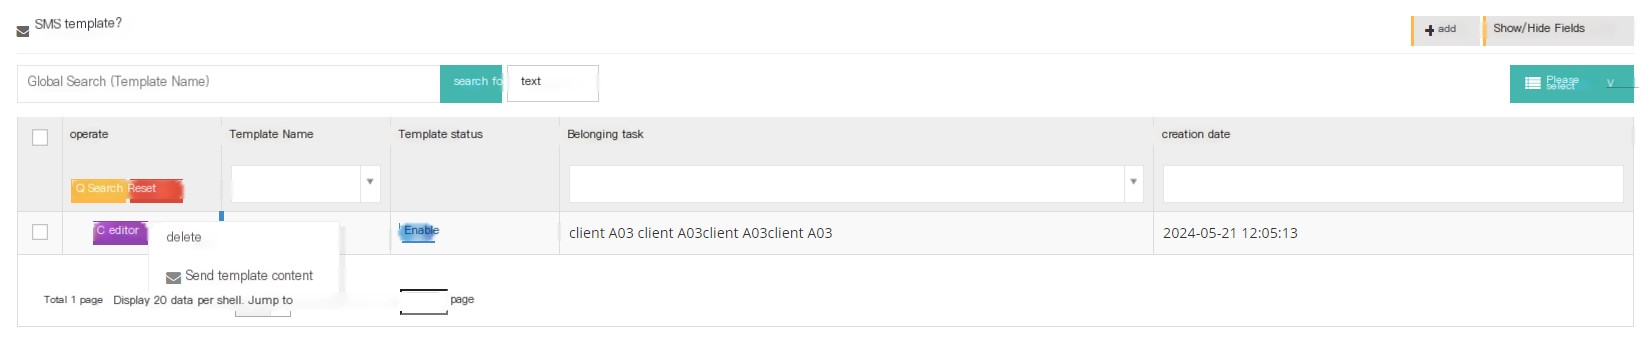
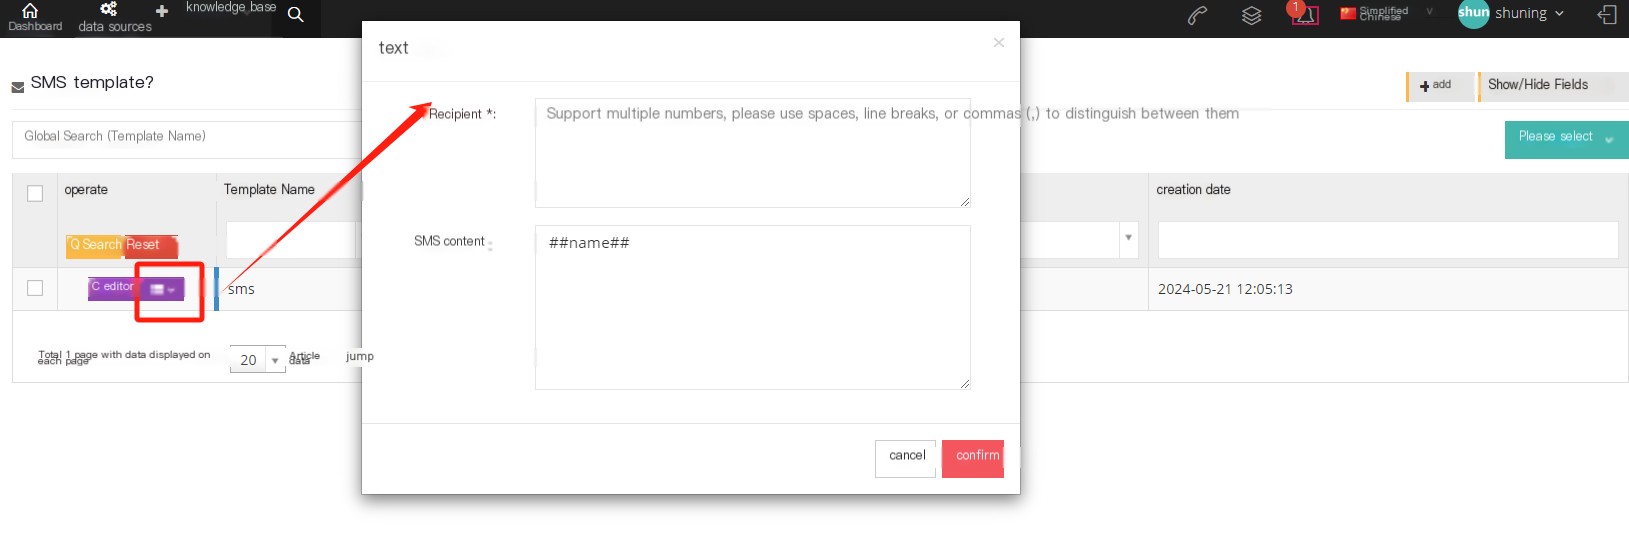
3.9.3 Mass message
Users can choose to send emails or messages in a mass manner. There are 4 steps in total as follows:
①Step 1: Select the information type and target
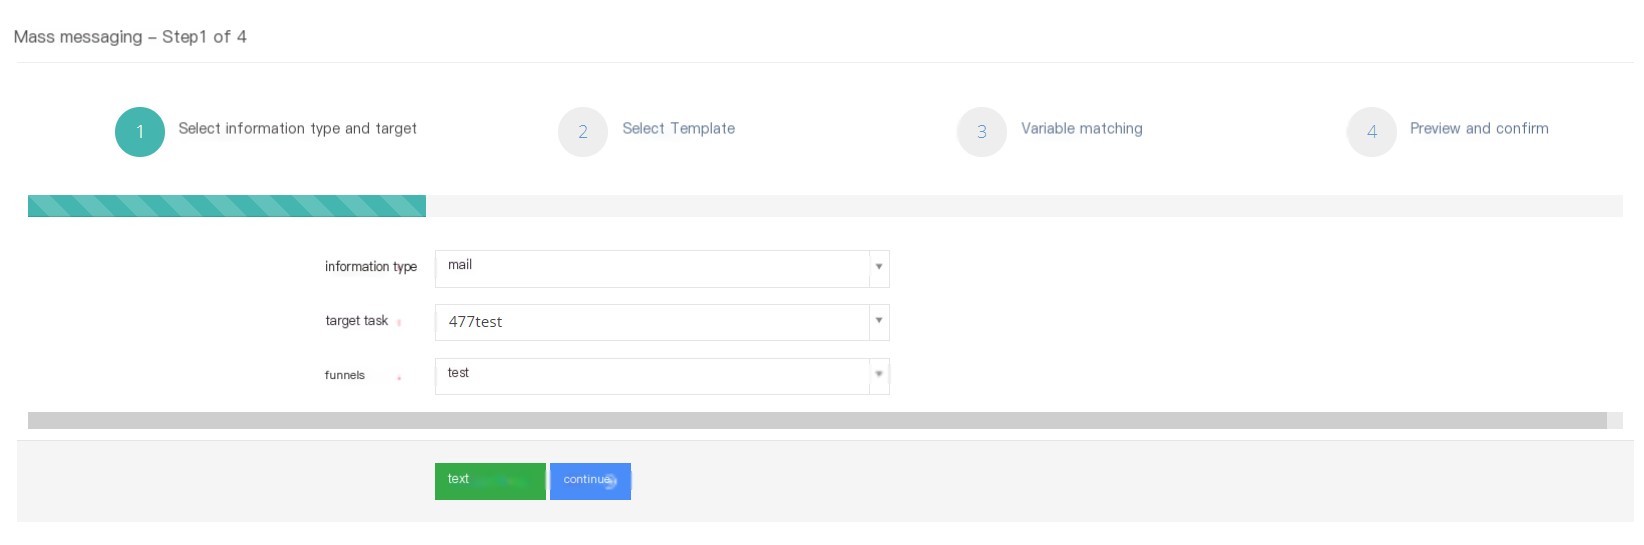
Message Type: Users can choose the type of mass messages, and can choose email, flash messages, and text messages.
Target Task: Select the task to be sent in a mass manner.
Sales funnel: Select the customer information that meets the sales funnel under this task and send it to mass.
On the step 1 page, you can choose to send a text message directly, click Send a text message to fill in the customer number sent in the mass, and edit the text message content, but you cannot select the template, click Send.
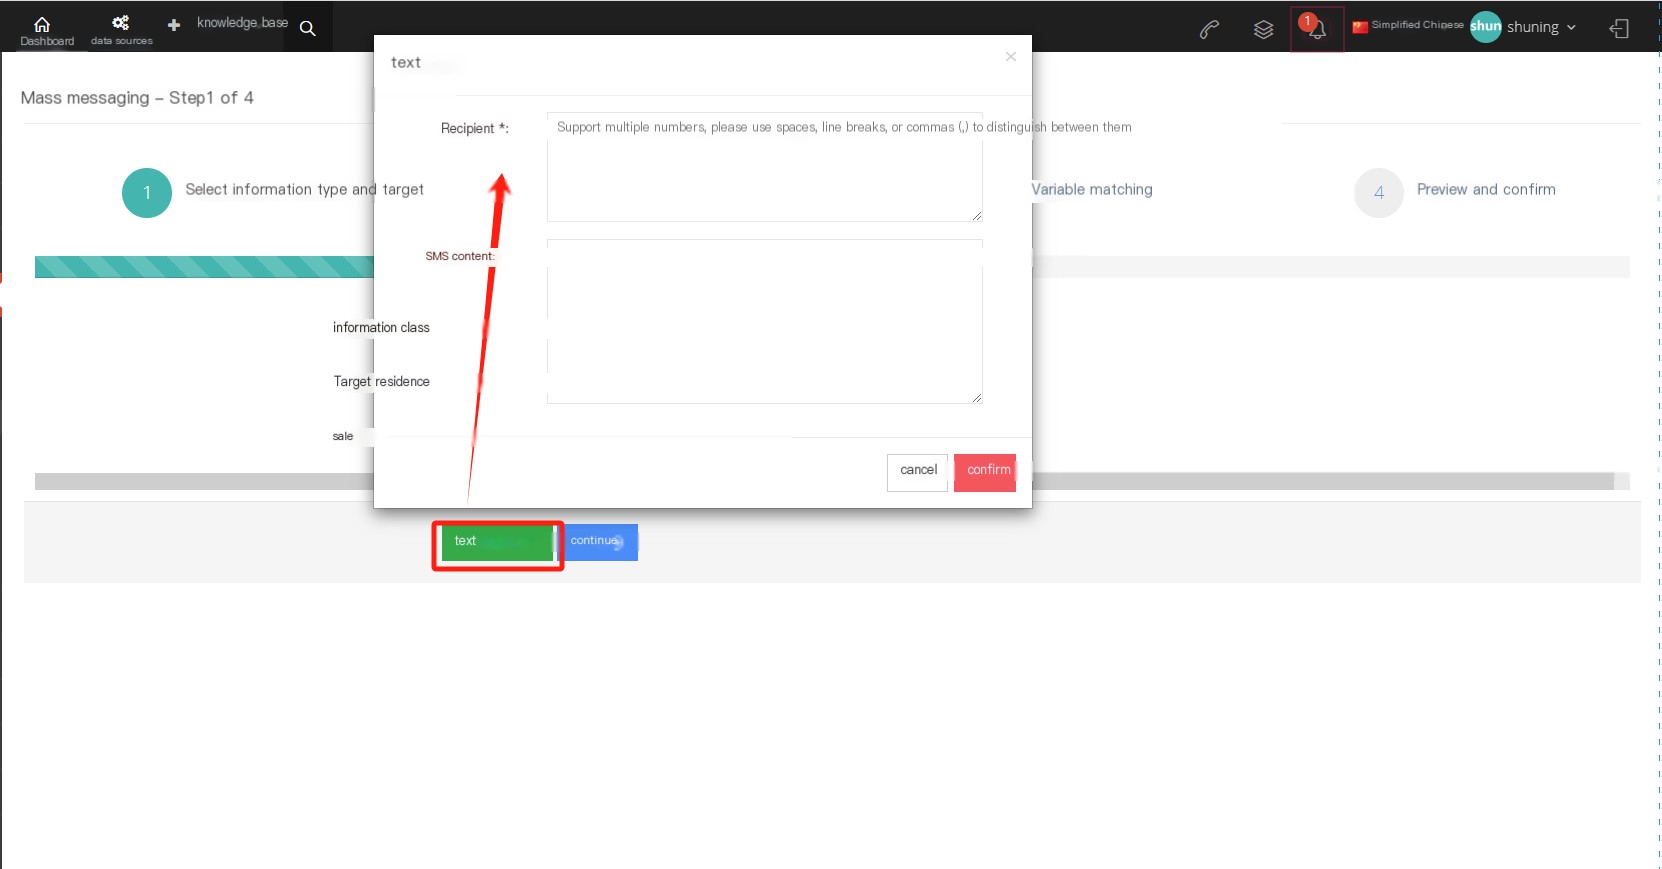
②Step 2: After setting customer data conditions in step 1, click [Continue] to select the template to make more personalized settings
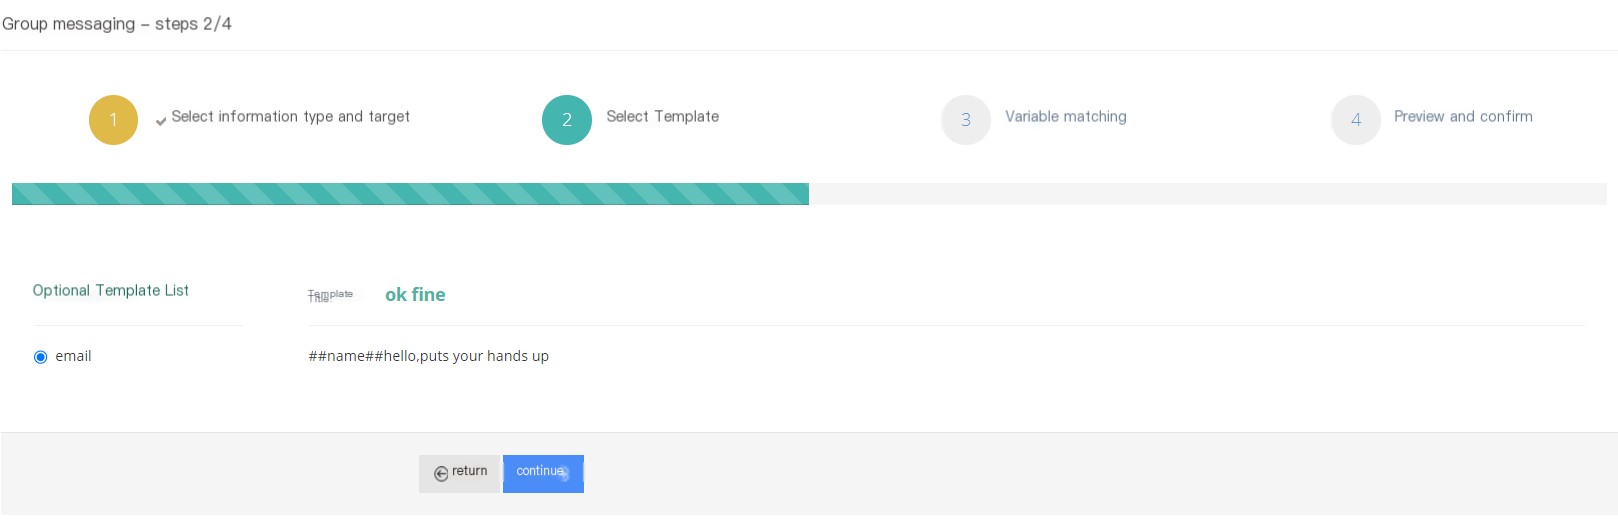
③Step 3: Variable matching, Select the variable information that needs to be matched. The variable information is the information that appears in the ## variable## format in the email information, and the variable information in the middle of the double# number is the information that can be selected to replace.
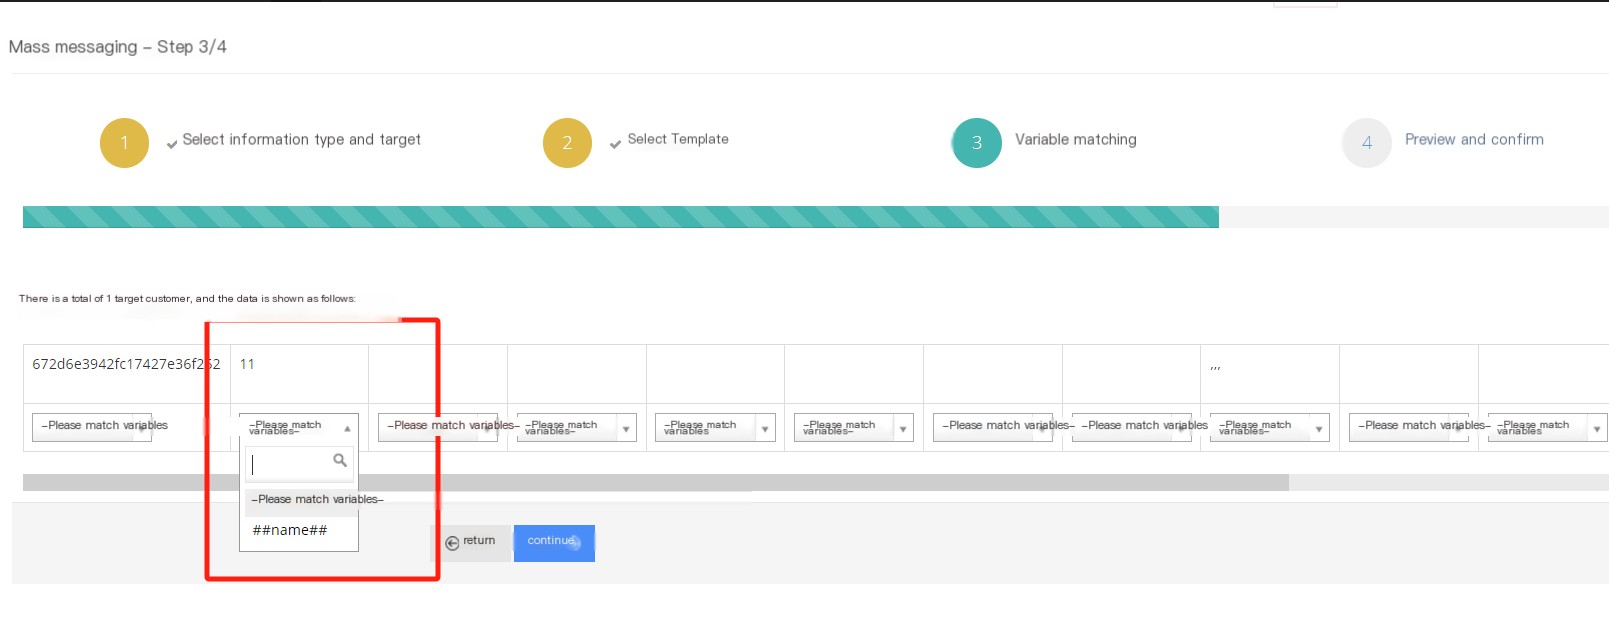
④ Step 4: Preview and confirm the content of the email mass sending. Please confirm whether the matching variable set in step 3 is correct. If the check is correct, click Submit.
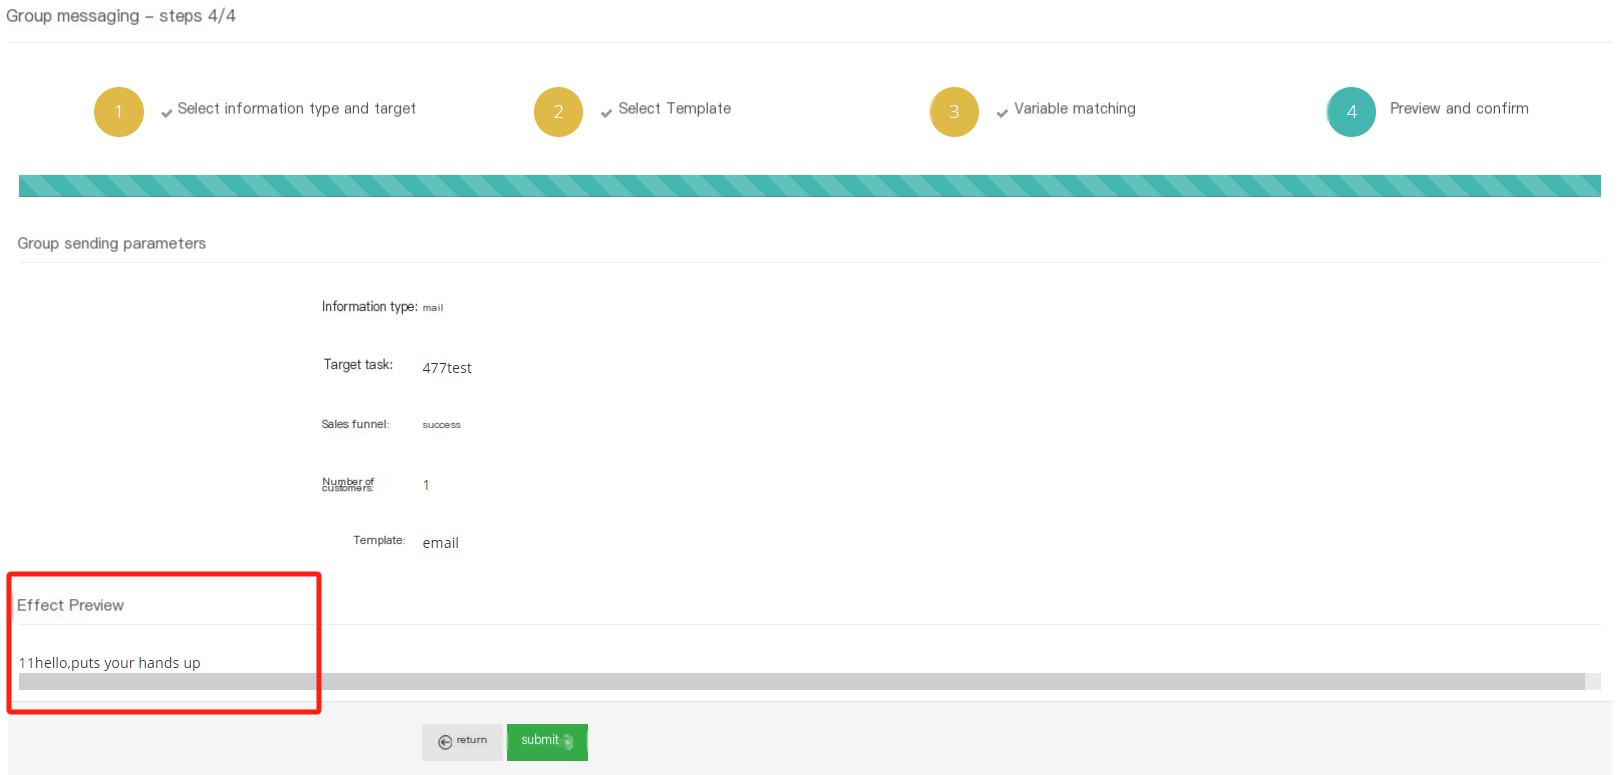
Special reminder: successful submission does not mean successful sending.
3.9.4 SMS sending record
All SMS records sent by the agent or client user to the customer can be viewed here, including SMS records that failed to send.

[Search] Supports global search for sending numbers, receiving numbers, and SMS content.
【Show/Hide Field】Show or hide the fields of this page.
[Please select] Please delete according to the conditions.
[Drop-down menu] Delete this SMS record.
[View] Click to view to see the specific content of this short message.
3.9.5 Email sending record
All email records sent by the agent or client user to the customer can be viewed here, including email records that failed to send.
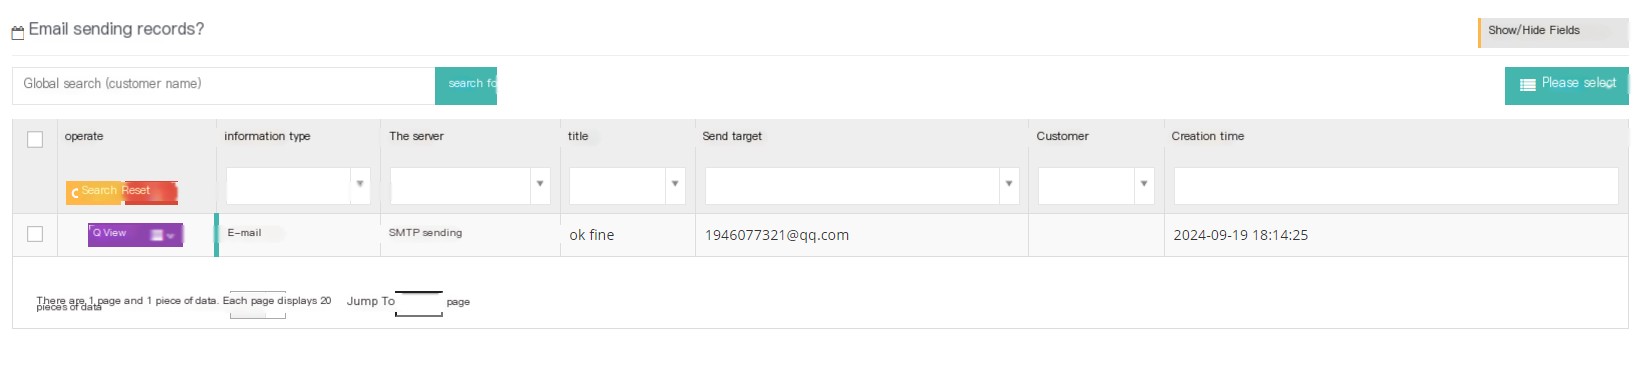
[Search] Supports global search for sending numbers, receiving numbers, and SMS content.
【Show/Hide Field】Show or hide the fields of this page.
[Please select] Please delete according to the conditions.
[Drop-down menu] Delete this SMS record.
[View] Click to view to see the specific content of this short message.
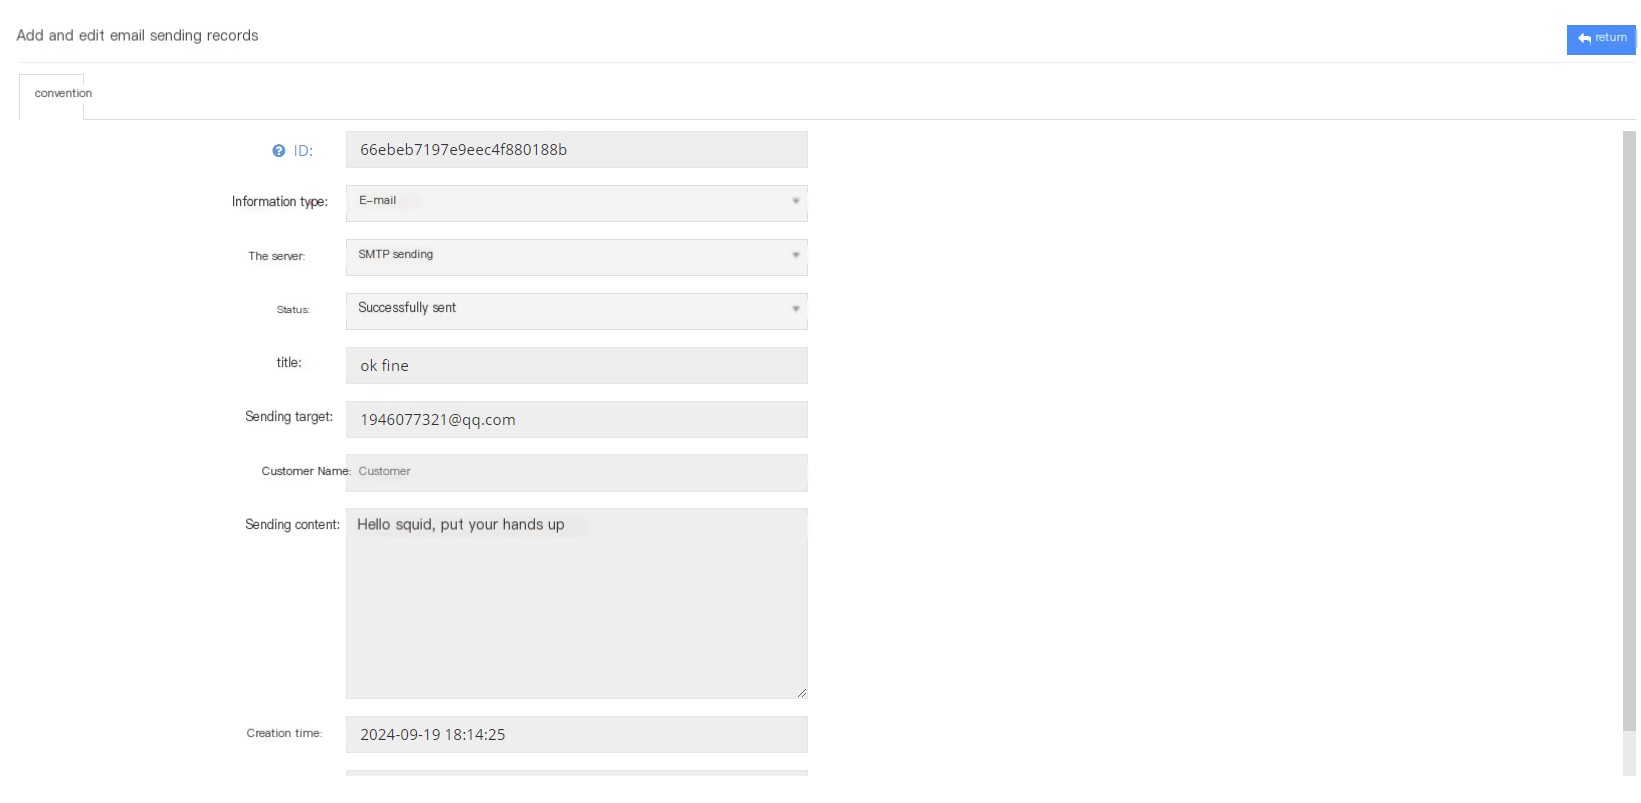
3.9.6 Announcement Management
1 Page Introduction
The client can send an announcement to the agent or account users on the Announcement page.

[Send Announcement] Send a new announcement.
【Show/Hide Field】Select the fields that this page needs to display or hide.
【View】View this announcement.
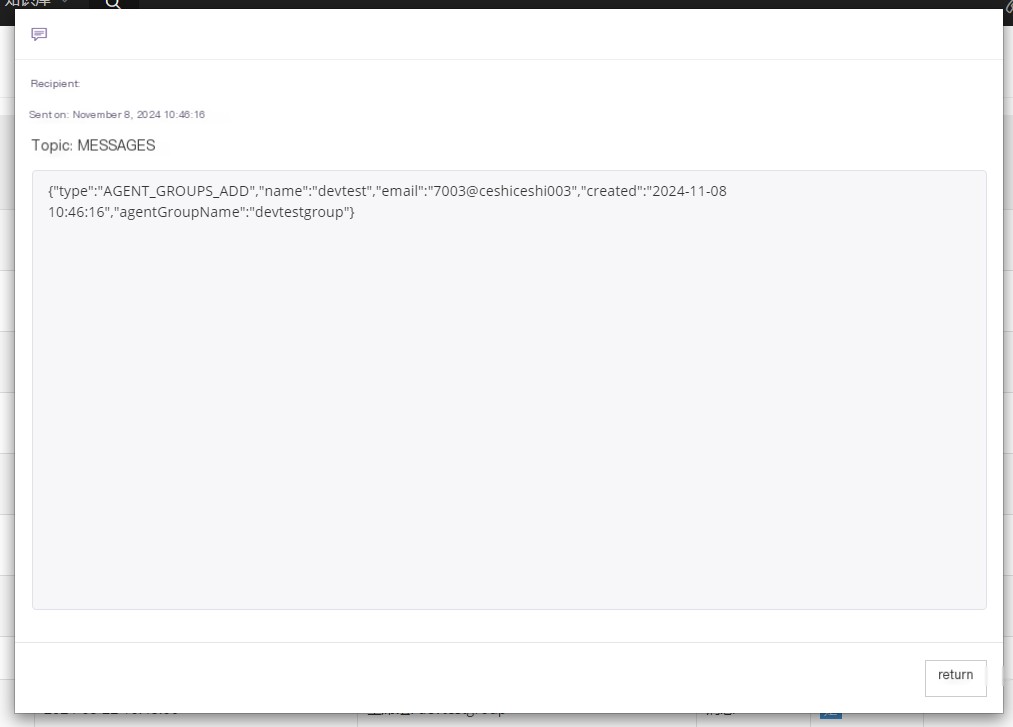
When adding or removing agents from the agent group, the system will send a default announcement as shown in the following figure
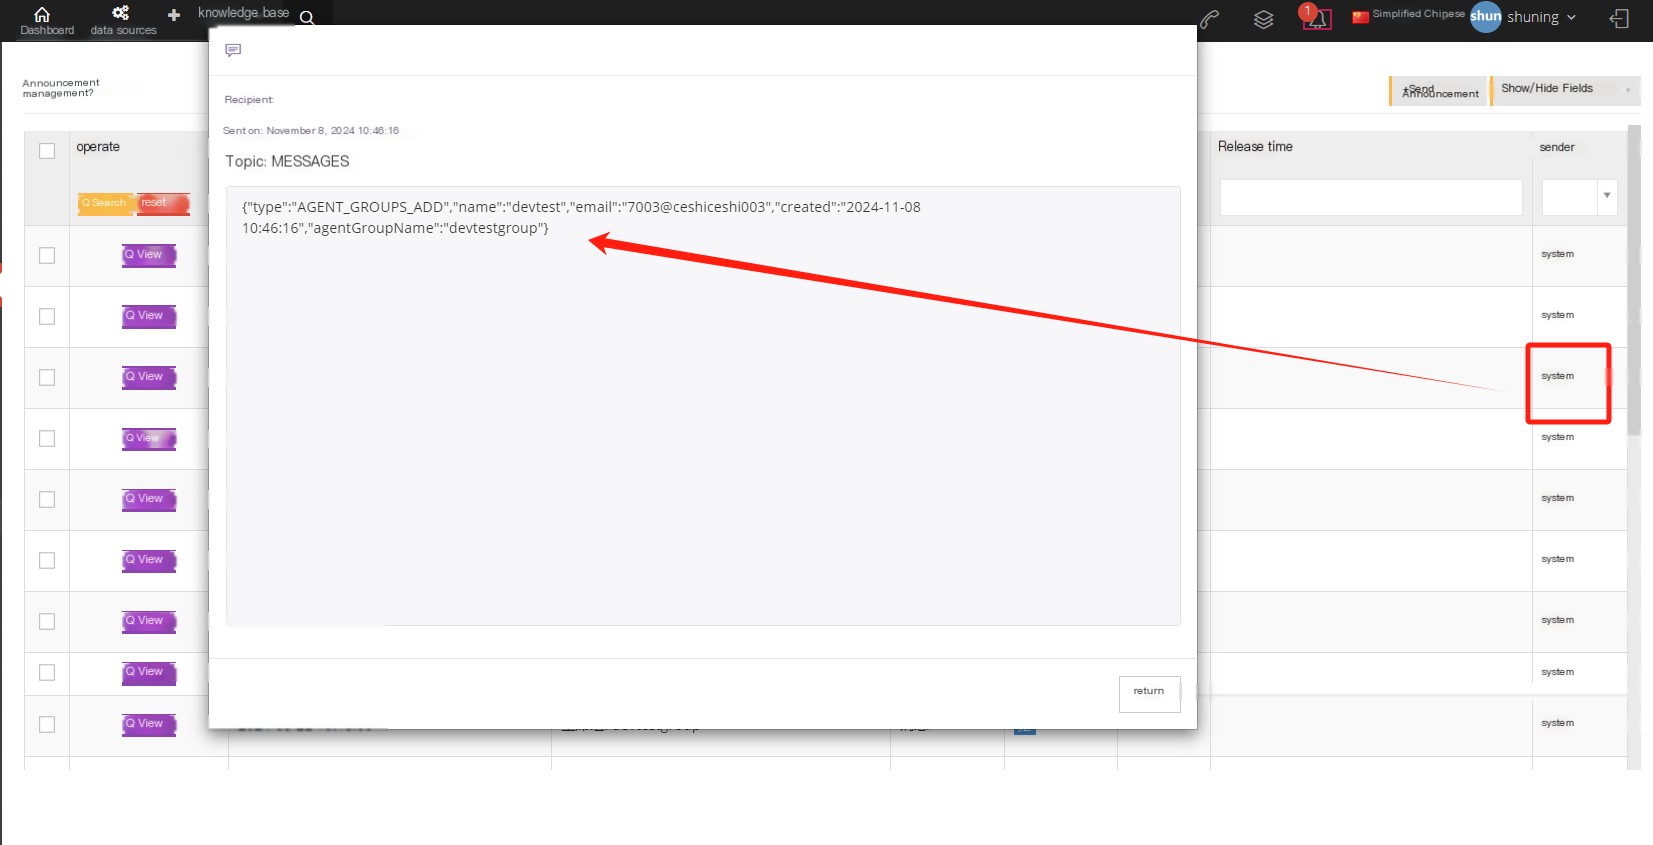
2 Send a new announcement
① Click [Send Announcement] to enter the general page of adding/editing announcement management:
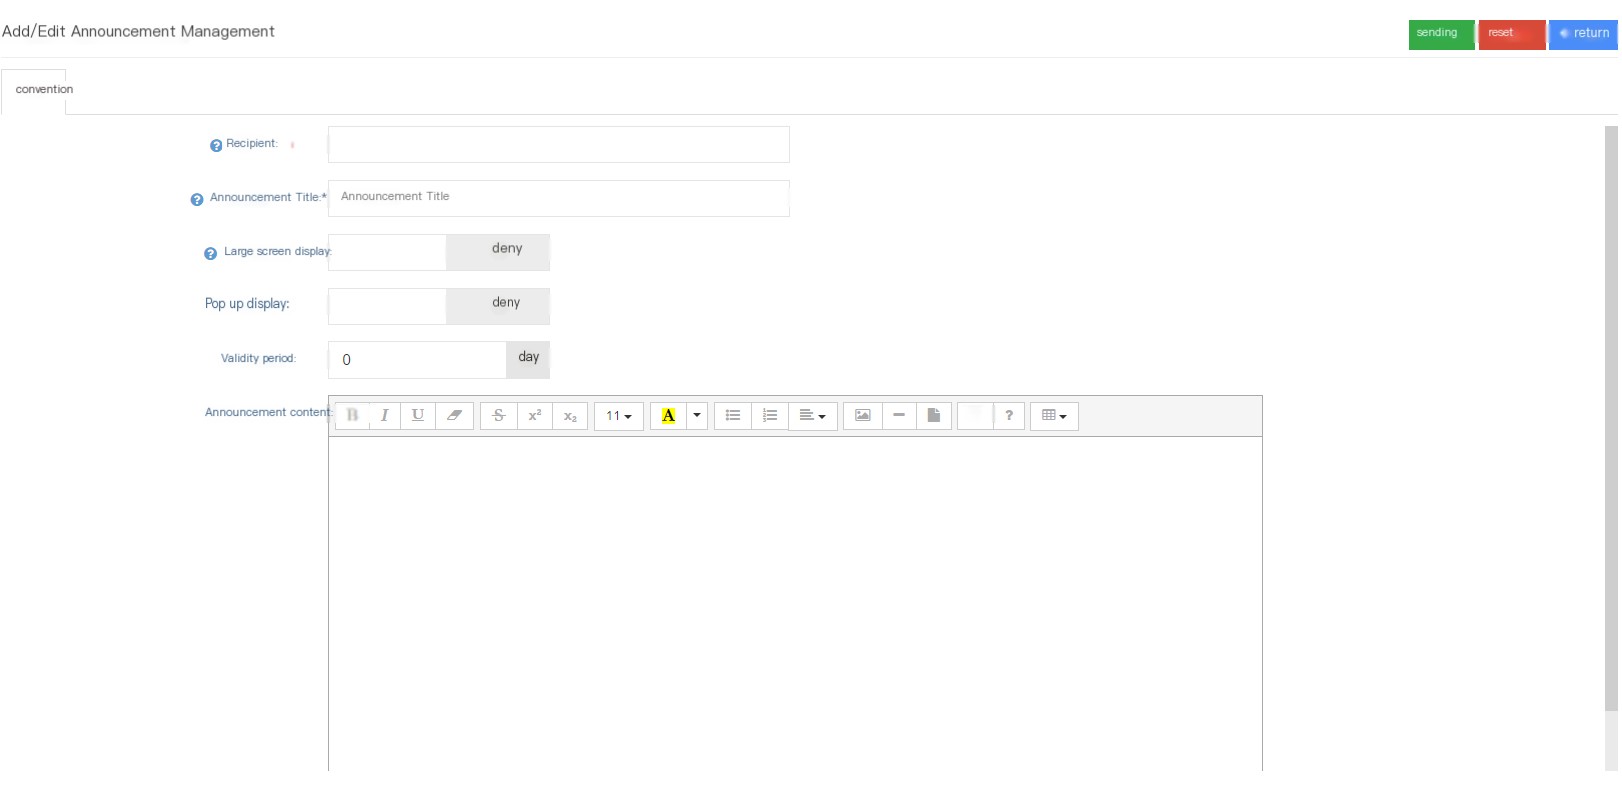
Recipient: The recipient of the announcement.
Announcement Title: The title of this announcement, the name of the announcement displayed on the dashboard page.
Large screen display: This function requires the user to open the large-screen monitoring page. When the large-screen monitoring page is turned on, the announcement will be sent, and the announcement will be displayed on the large-screen display.
Popular screen display: When selecting pop-up screen display, the announcement will automatically pop up when the recipient logs into the account.
Validity period: Select the validity period of this announcement. Announcement exceeding this period will no longer be displayed. The limited period is 0. It means that it is always valid.
Announcement Content: Fill in the content of this announcement.
3.9.7 Notification
1 Page Introduction
Notification is the information sent by the agent group leader to the agent group members in the group dialogue in the sidebar. There are two types of information and fixed information. The temporary information is invalid for 30 seconds.

[Search] Global search supports searching based on the sender’s name and content.
[Show hidden fields] Select the fields that this page needs to display or hide.
【View】View this notification.
2 Show/Hide fields
Type: The type of this notification.
Content: The content of this notice.
Agent Group Number: The number of the agent group receiving this notification.
Additional parameters: Is this notification temporary or fixed?
Sender: The sender of this notification.
Creation Date: The creation date of this notification.
3 Add a new notification
Notification is operated by the agent team leader, and the client only has the viewing permission, so the content is explained on the agent operation page.
3.10 Work order status
To create a ticket, you need to create the ticket status, ticket category, and ticket results first, so let’s start with the ticket status.
3.10.1 Work order status
1 Page Introduction
Complete status of the work order.
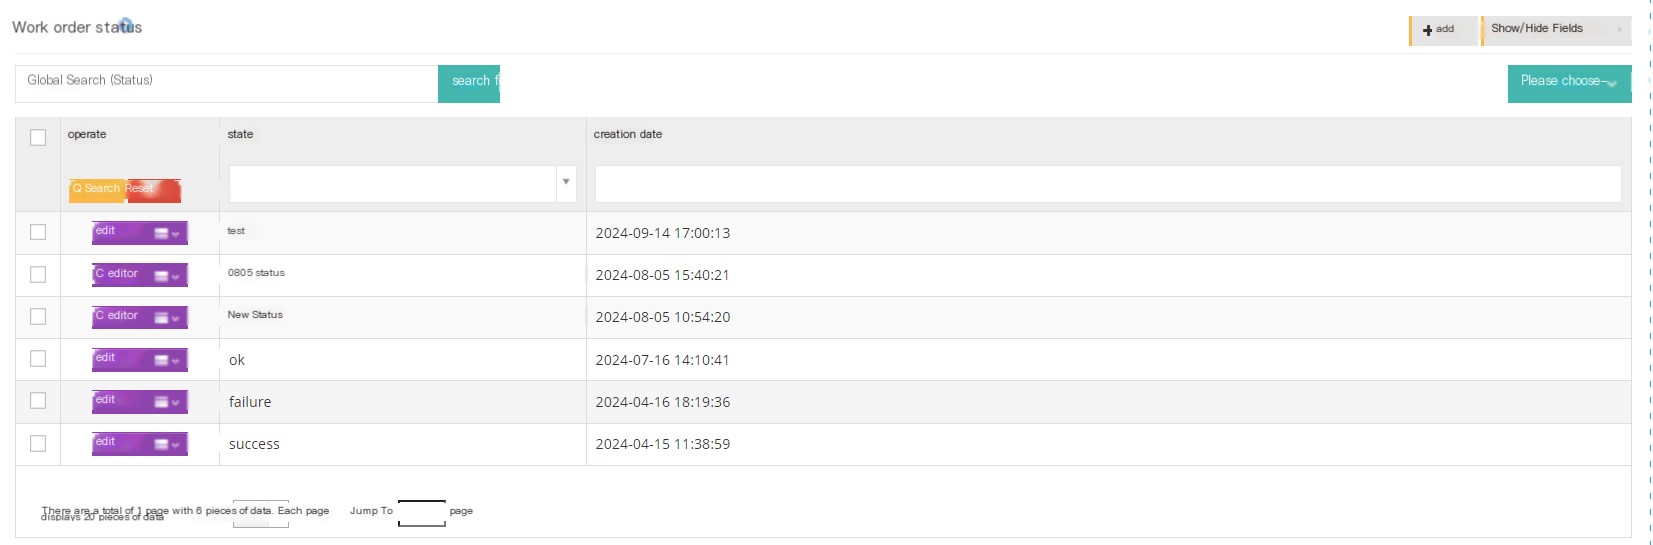
【Search】Global search supports searching in the work order status.
【Add】Add a new ticket status.
【Show/Hide Field】Select the fields that this page needs to be displayed or hidden.
[Please select] Delete according to the conditions.
[Edit] Edit this ticket status.
[Drop-down menu] Delete the ticket status.
2Show/Hide fields
状态:工单状态的名称。
创建时间:工单状态的创建时间。
最后更新:该工单状态最后的更新时间。
3 Add a status
① Click [Add] to enter the general page of adding/editing work order status:
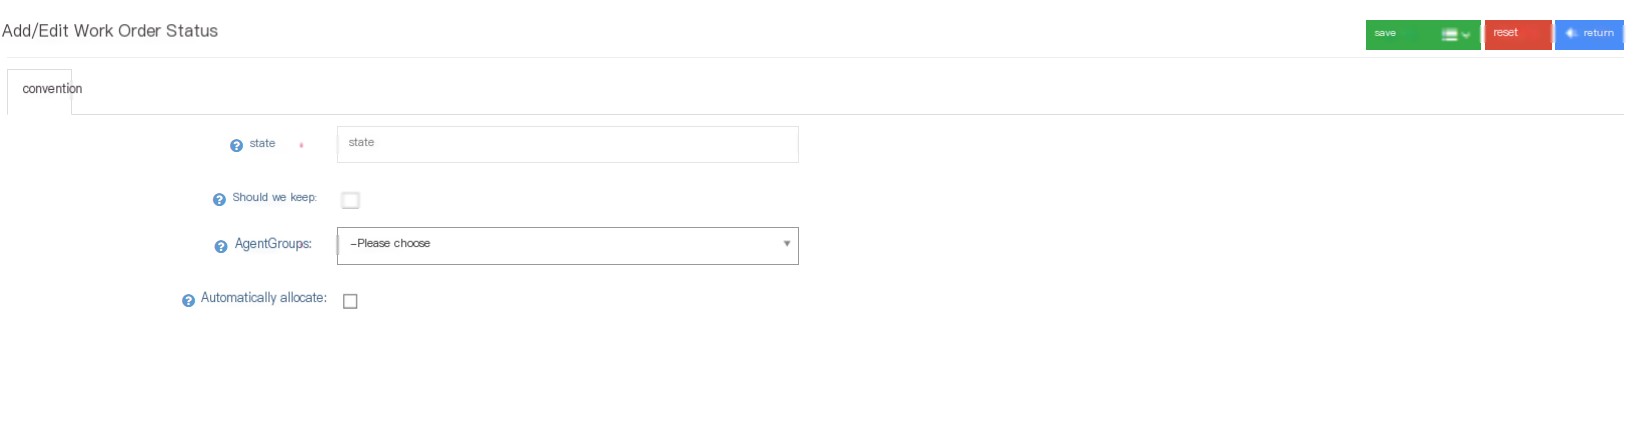
Status: The name of the ticket status.
Retention: When setting this status for a work order, whether to retain the current seat of the work order.
Agent Group: When setting this status for a work order, the work order will be transferred to this work order.
Whether it is automatically allocated: When setting this state for a work order, will the work order automatically be assigned to the online seat after entering the corresponding seat group? If there is no online seat in the current group, the automatic allocation will be skipped; if the reserved seat is set, the automatic allocation will also be skipped.
3.10.2 Work order category
1 Page Introduction
The work order category is mainly used to mark the classification of work orders and set up work orders.
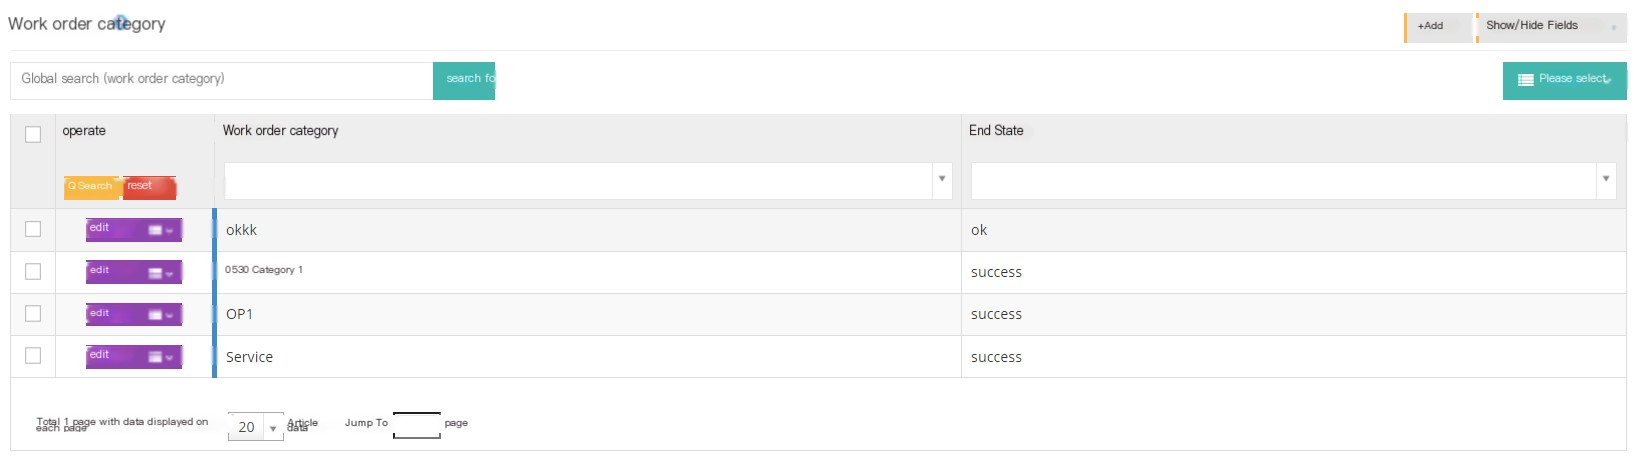
【Search】Global search supports searching in the work order category.
【Add】Add a ticket category.
【Show/Hide Field】Select the fields that this page needs to be displayed or hidden.
[Please select] Delete according to the conditions.
【Edit】The user can edit the established work order category.
【Drop-down menu】
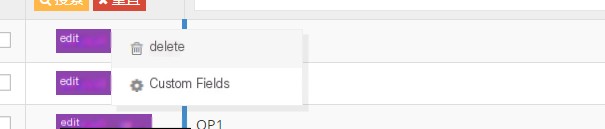
Delete-Delete this ticket category.
Custom Field - Add a required custom field. The field types include text box, input box, date, link, email, associated fields, customization.
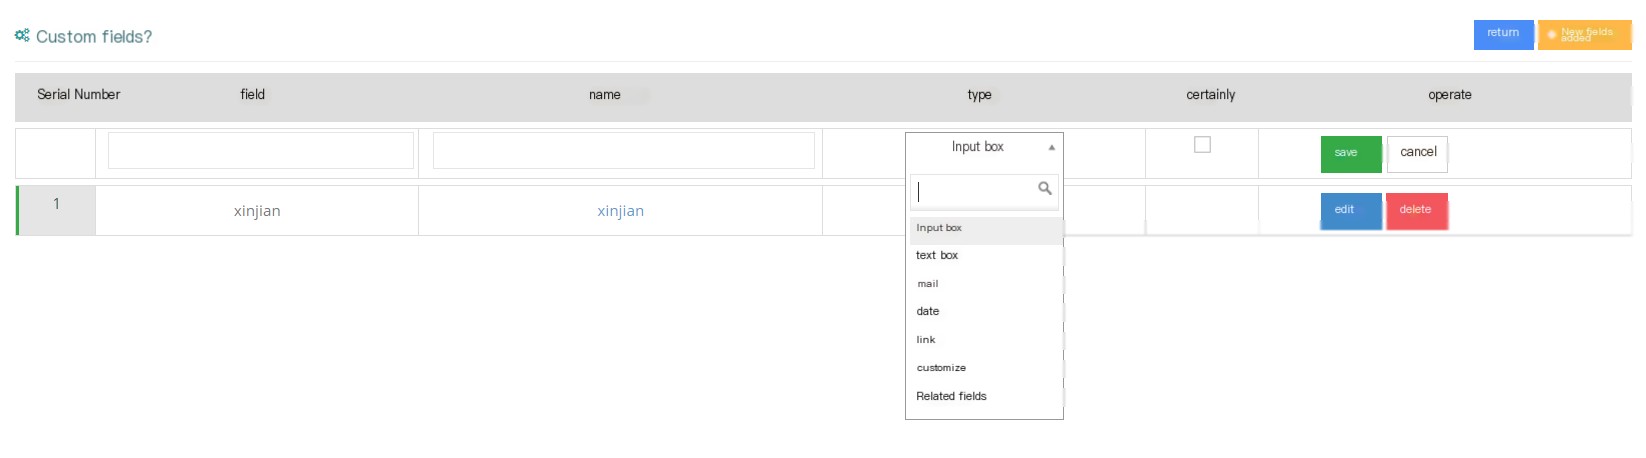
Custom fields are displayed on the agent page.
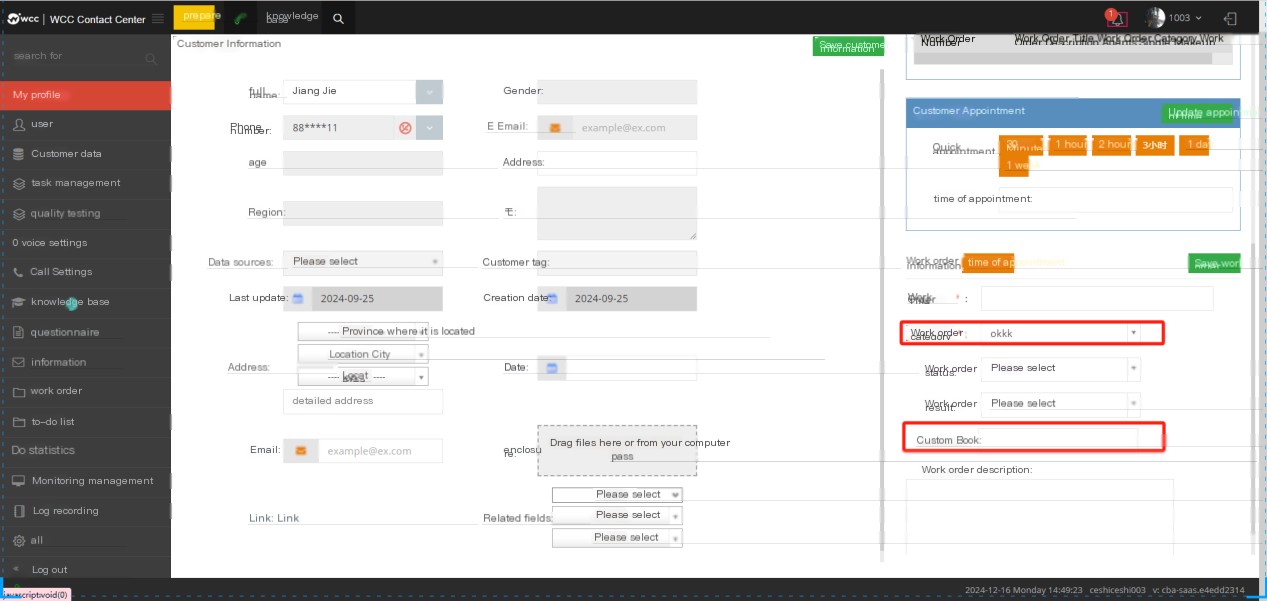
2 Show/Hide fields
Ticket Category: The name of the ticket category.
End status: The status that should be selected at the end of the ticket in this category.
3 Add a ticket category
① Click [Add] to enter the general settings page for adding/editing work order categories:
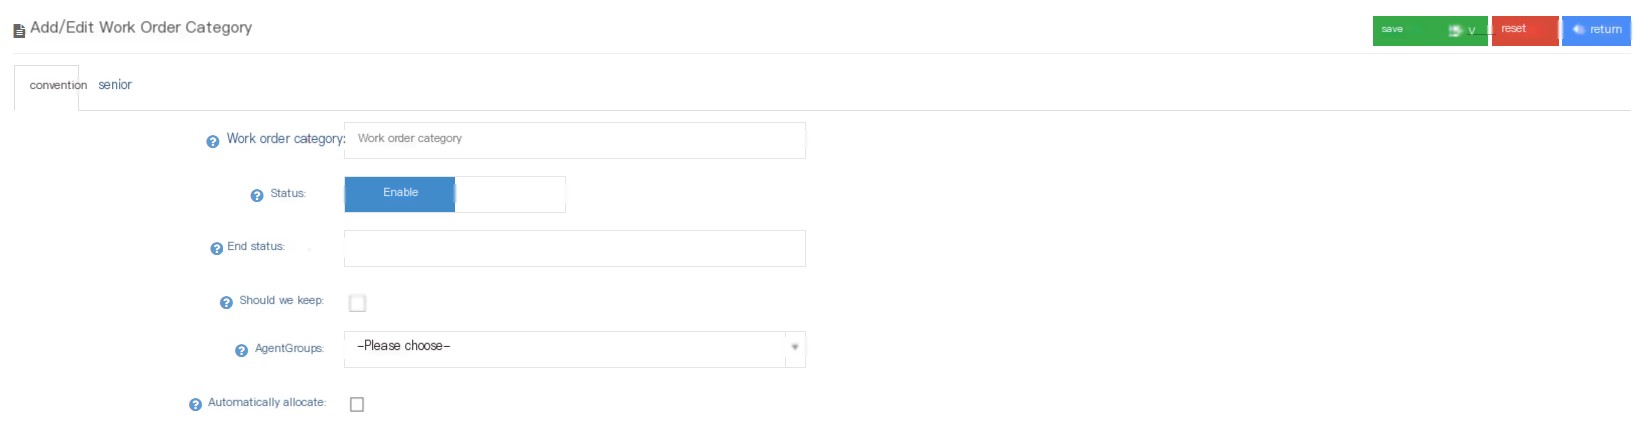
Ticket Category: Name the category of this work ticket.
Status: Select Yes to enable the tickets of this category.
End Status: When the ticket status within this setting range is selected, the ticket will be turned off.
**Remain whether to keep **: Whether to keep the current seat as the ticket owner when creating a ticket.
Agent Group: Assign this work order to complete one seat group.
Whether to automatically allocate: When creating a work order, the work order will automatically be assigned to the online seat after entering the corresponding seat group. If there is no online seat in this group at present, automatic allocation will be skipped.
On the Advanced Settings page of the work order, users can add notes to the work order. Changing the notes is a record of the role of the administrator in the work order category.
②Click Save to add a successful new work order category.
3.10.3 Processing results
1 Page Introduction
The result of the entire processing of the work order, and determine whether the work order is completed from the results.
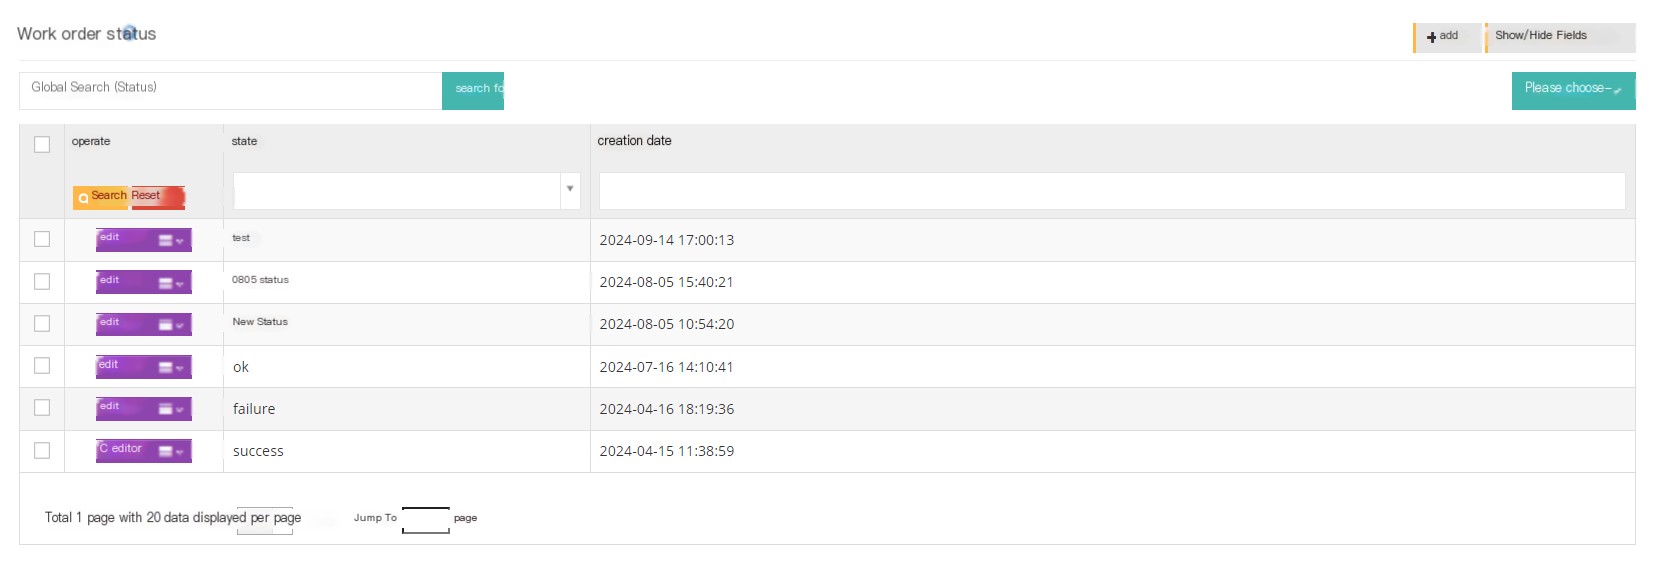
【Search】Global search supports searching with the result name.
【Add】Add a new result.
【Show/Hide Field】Select the fields that this page needs to display or hide.
[Please select] Delete according to the conditions.
[Edit] Edit the processing results.
[Drop-down menu] Delete this processing result.
2 Show/Hide fields
Results: The name of the processed result.
Created date: The creation date of this processing result.
3 Add a new processing result
① Click Add to enter the general page of the addition/editing of the processing results:

Results: The name of the processed result.
② Click Save to add a successful new processing result.
3.10.4 Work order
1 Page Introduction
Work order is a work record based on work needs. Work orders can be established by the client or directly by the agent.
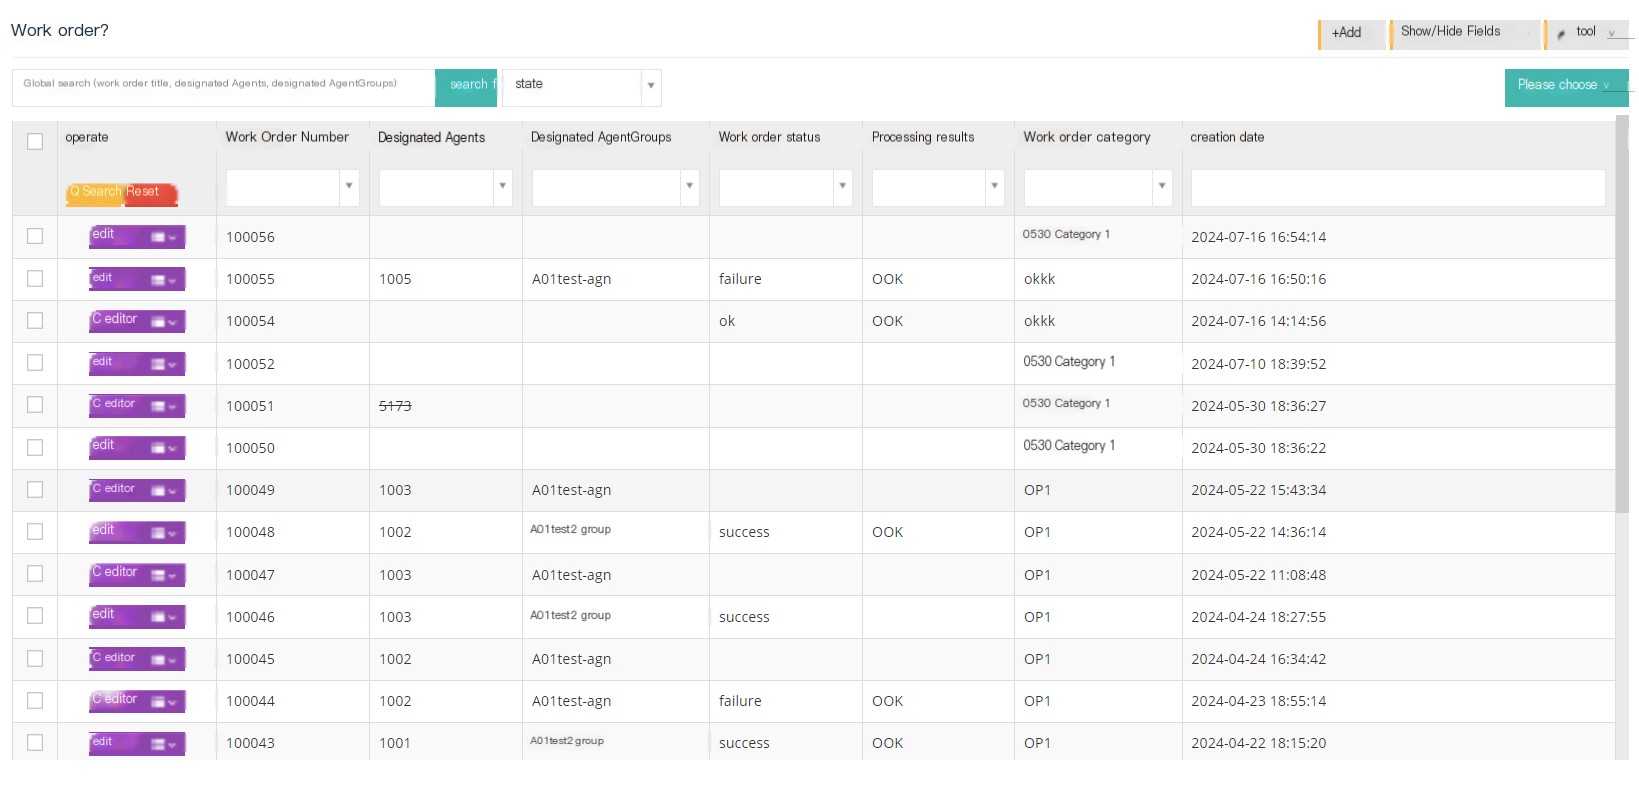
[Search] Global search supports searching with work order title, designated seat, and designated seat group.
[Status] The status of this work order.
【Add】Add a work order.
【Show/Hide Field】Select the fields that this page needs to display or hide.
[Tools] Users can use tools to export work orders.
[Please select] Delete according to the conditions.
[Edit] Edit this work order.
[Drop-down menu] Delete this work order.
2 Show/Hide fields
Ticket Title: The title of this ticket.
Ticket number: The automatic generation number of this ticket.
Work order publisher: The publisher of this work order.
Description: A description of the work order.
Created date: The creation date of the ticket.
Last updated: The last update date of the ticket.
3 Add a new ticket
①Click Add to enter the Add/Edit to enter the general settings page of the work order:
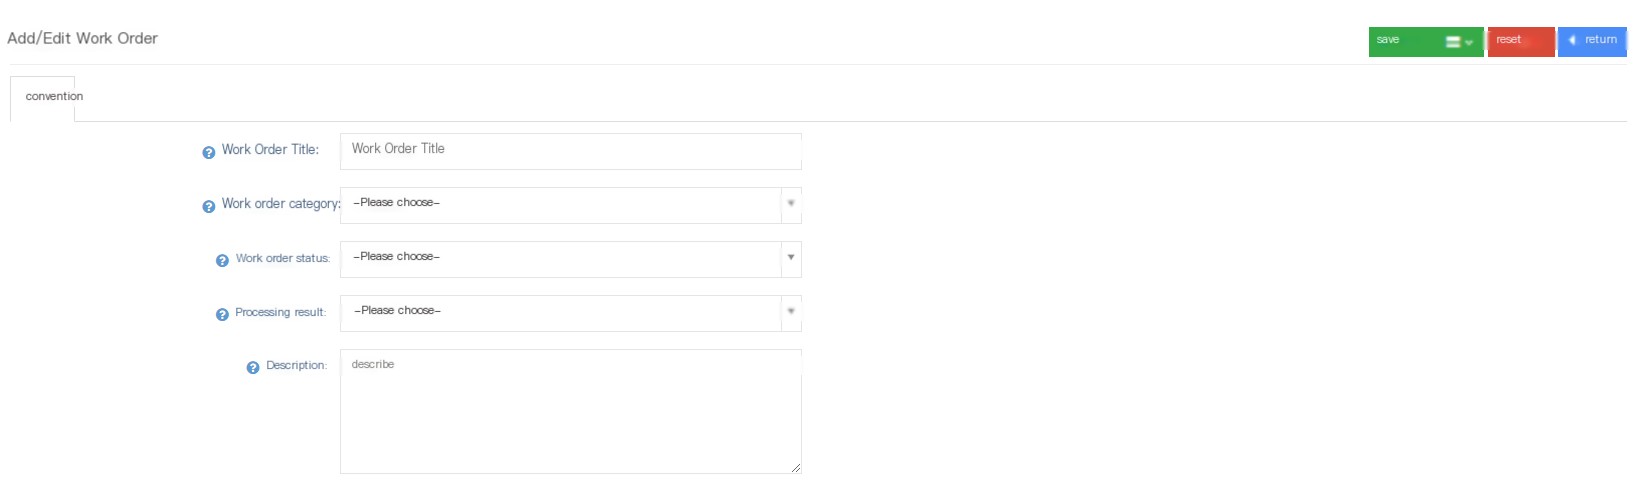
Title Title: Add a title to this ticket.
Ticket Category: Choose a category for this ticket.
Work order status: Select a processing status for this work order. It is not required. You can fill it in by the handling seat after the work order is assigned to the seat.
Processing result: Select a processing result for this work order. It is not required. You can fill it in by the handling seat after the work order is assigned to the seat.
Description: Add a description to this work order.
Select Edit on the work order page to enter the edit page. In addition to the settings when adding a new work order, you can also see the following settings:
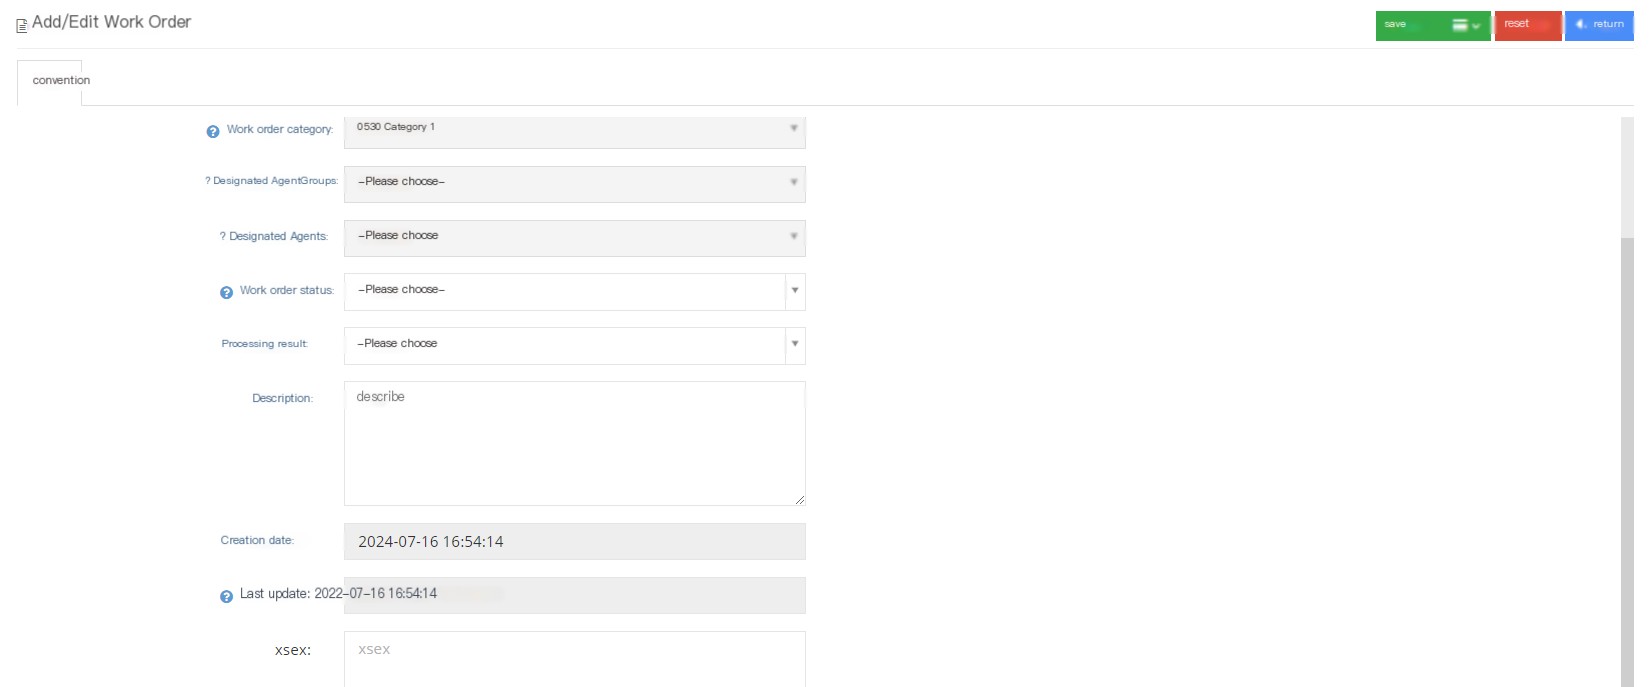
ID: Data unique ID.
Telection number: When the work order is successfully established, a work order number will be automatically generated, and the number will not be changed automatically.
Designate the seat group: Assign the work order to the seat group to complete. If not specified, the work order will not be visible to the seat group.
Specified seat: Whether the work order has a seat specified. If it is not specified, it will only be displayed in the work order of the team leader of the seat group after the work order is completed.
Creation date: The creation date of the ticket.
Last update date: The time of the last change to the work order.
②Click Save to add a successful new work order.
Agents can view unfinished work orders in the dashboard –> View unfinished work orders in the middle
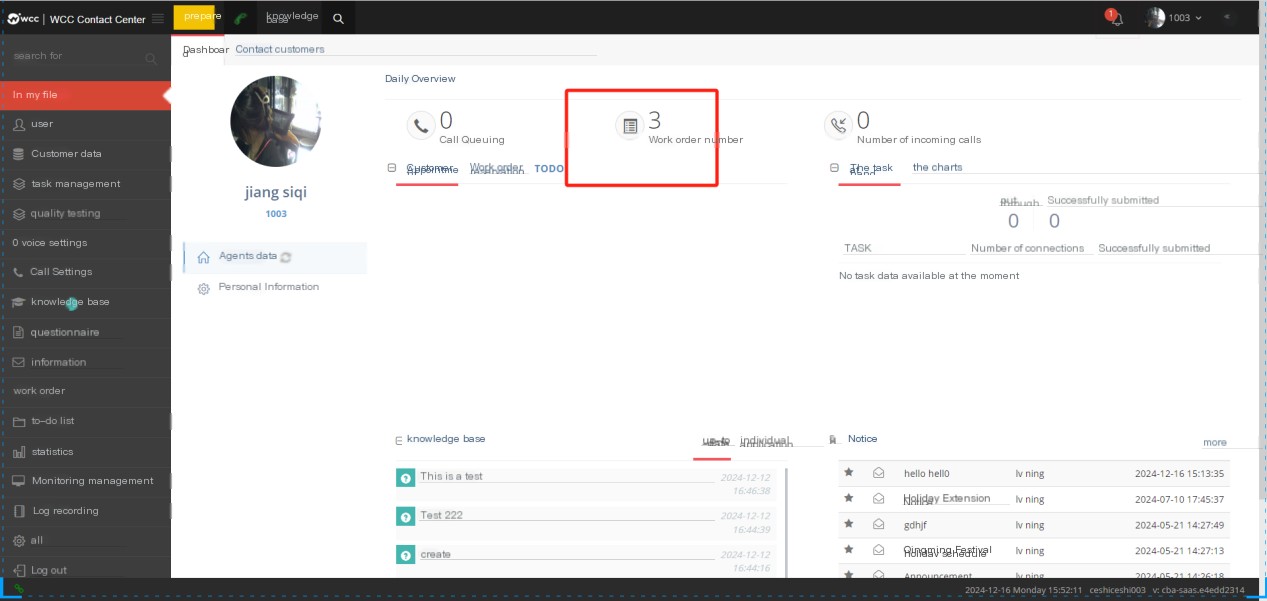
Agents can view unfinished work orders assigned to them, work orders of different statuses, and if they are the team leader, they can also see work orders within the group.
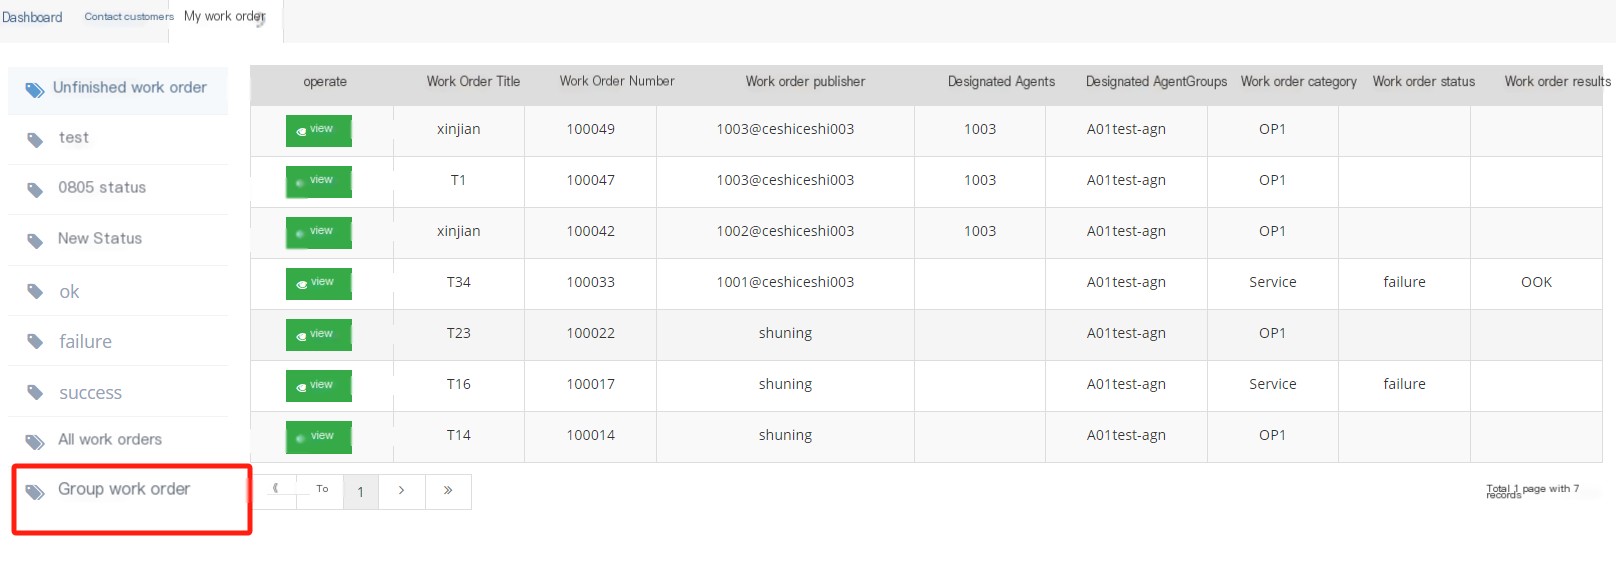
When the automatic assignment function is enabled at the same time as the ticket status and ticket category,
If the ticket status and ticket category are bound to the same seat group, creating a ticket will be assigned to the online seat group
If the work order status and work order category are not bound to the seat group, creating a work order will be assigned to the online seat in the status bound seat group
If the ticket created does not have a specified state, it is assigned to the online seats in the category binding seat group.
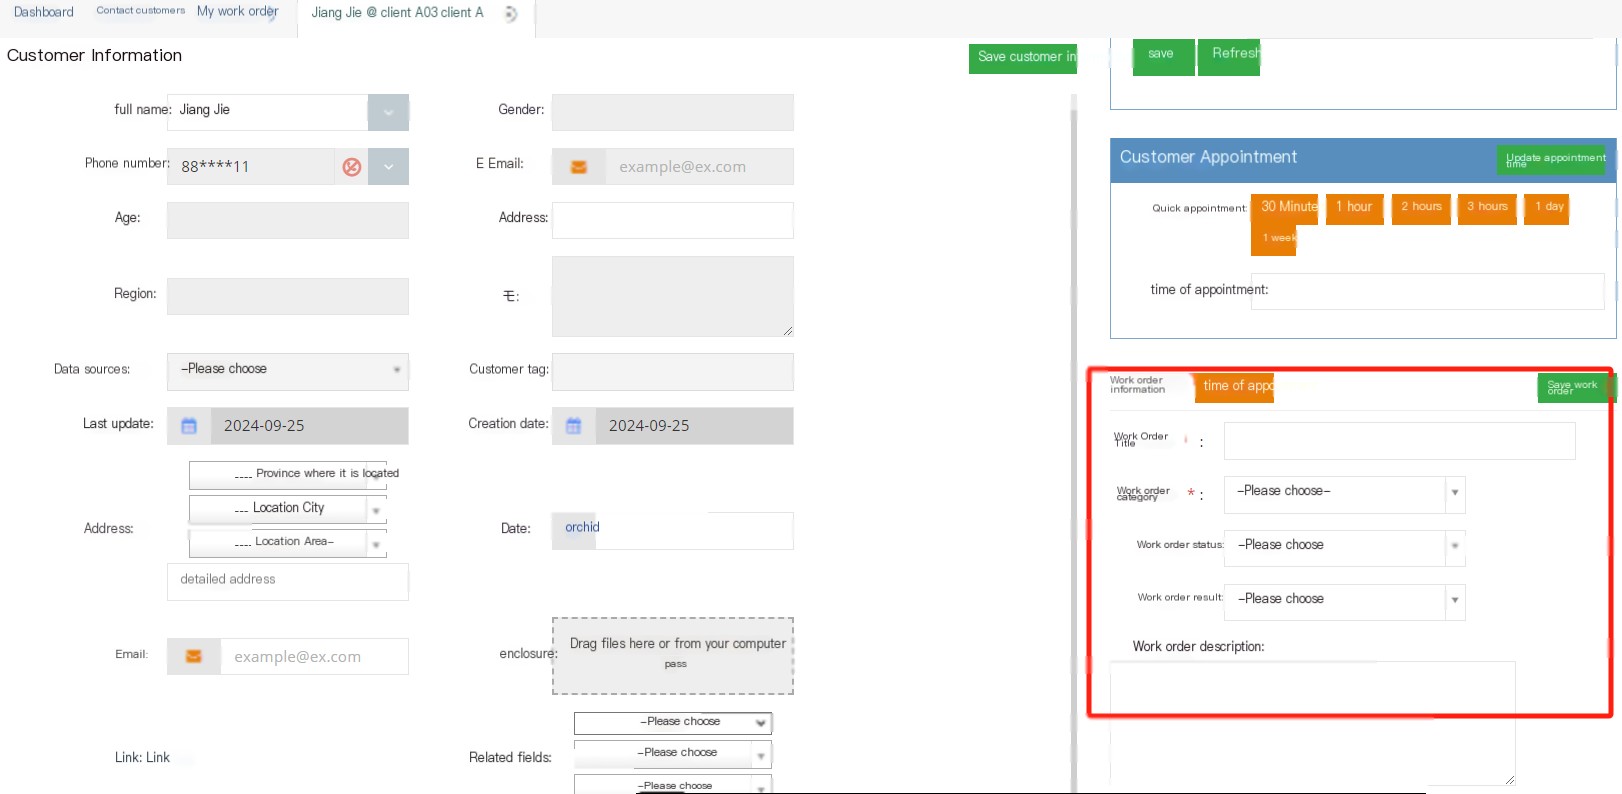
3.11 To-do Items
3.11.1 The seat is to be handled
1 Page Introduction
Agent to do Matters set by the client that need to be handled by the agent can be published. This matter can only be edited by the client. After the agent is processed, it can be marked on the agent page. The final completion status needs to be carried out by the client.
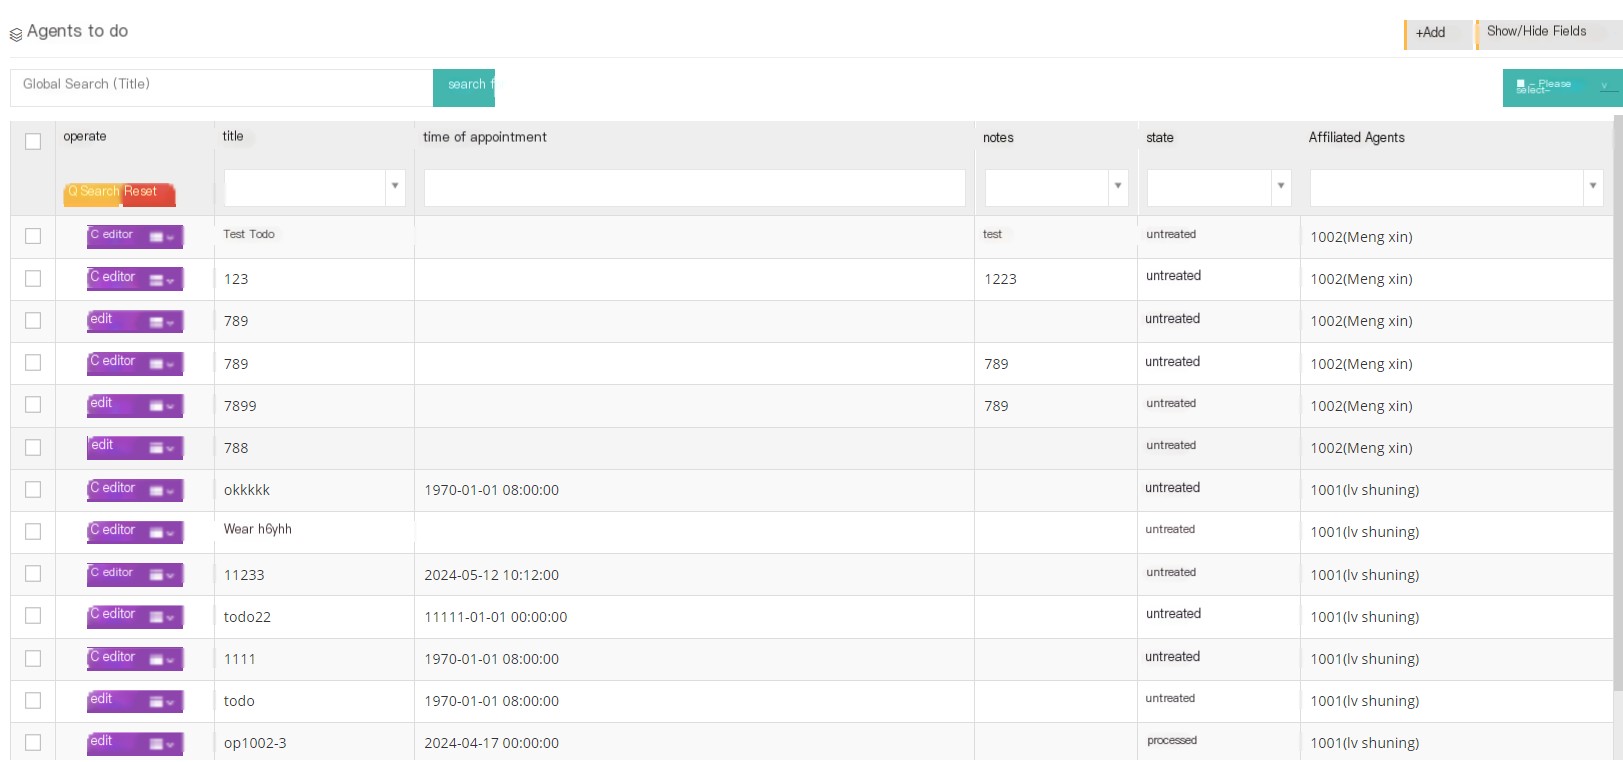
[Search] Global search supports searching with the to-do title of the seat.
【Add】Add a new seat to do.
【Show/Hide Field】Select the fields that this page needs to display or hide.
[Edit] Edit the established seat to do.
【Drop-down menu】Delete this seat for processing
2 Show/Hide fields
Title: Title for the seat to do.
Appointment time: The appointment time for the seat to be handled.
Note: Remarks for the seat to be done.
Status: The processing status of this seat to be handled.
所属坐席:创立这个坐席待办的人.
3 Add a new seat to do
① Click Add to enter the regular page of adding/editing agent to do:
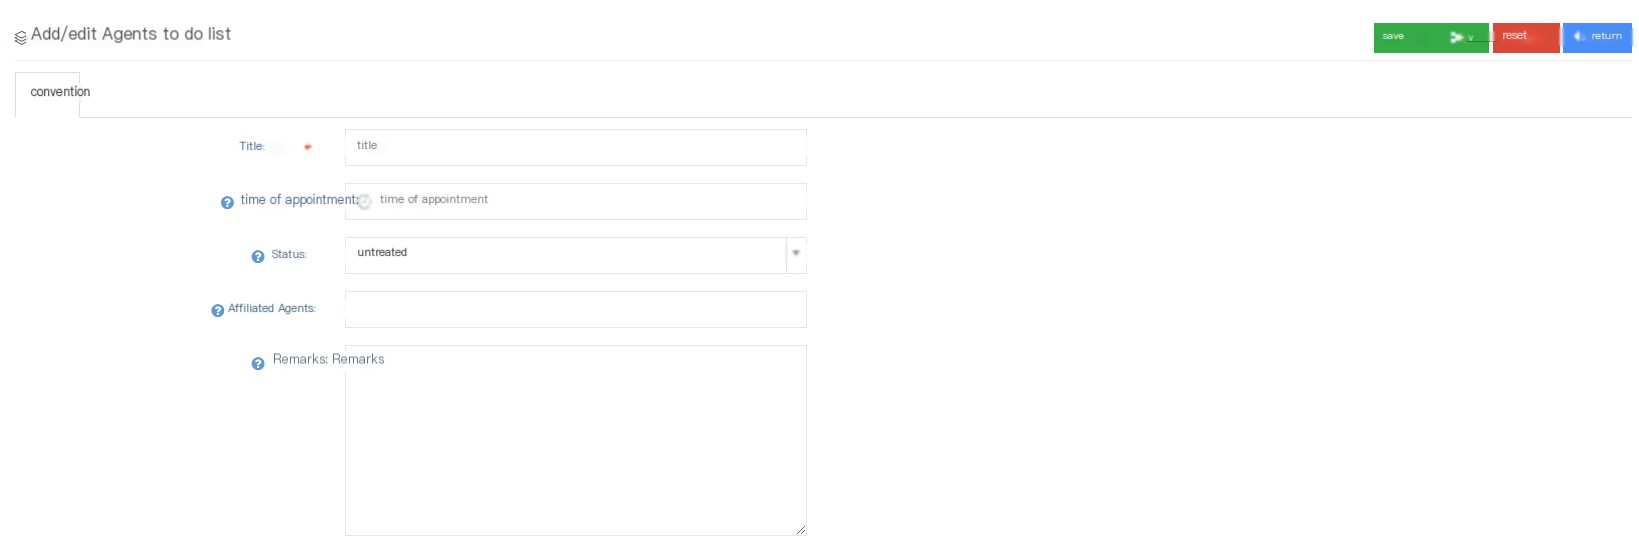
Title: Agent to-do title.
Appointment time: This to-do reservation time will be displayed on the dashboard page of the seat.
Status: The user can change the status of the to-do item. If the to-do created by the agent is marked as completed by the agent, the status in the client page will also change accordingly.
Assignment: The seat to which the to-do items belong.
Remarks: Notes that require special attention or explanation when the seat is to be handled
②Click Save to add a successful new seat to do.
3.12 Statistics
In the seat report, users can view statistical reports including seat reports, seat summary, seat group details, seat group summary, and department reports. After the user selects the seat, they can click to search to search for the report of the seat.
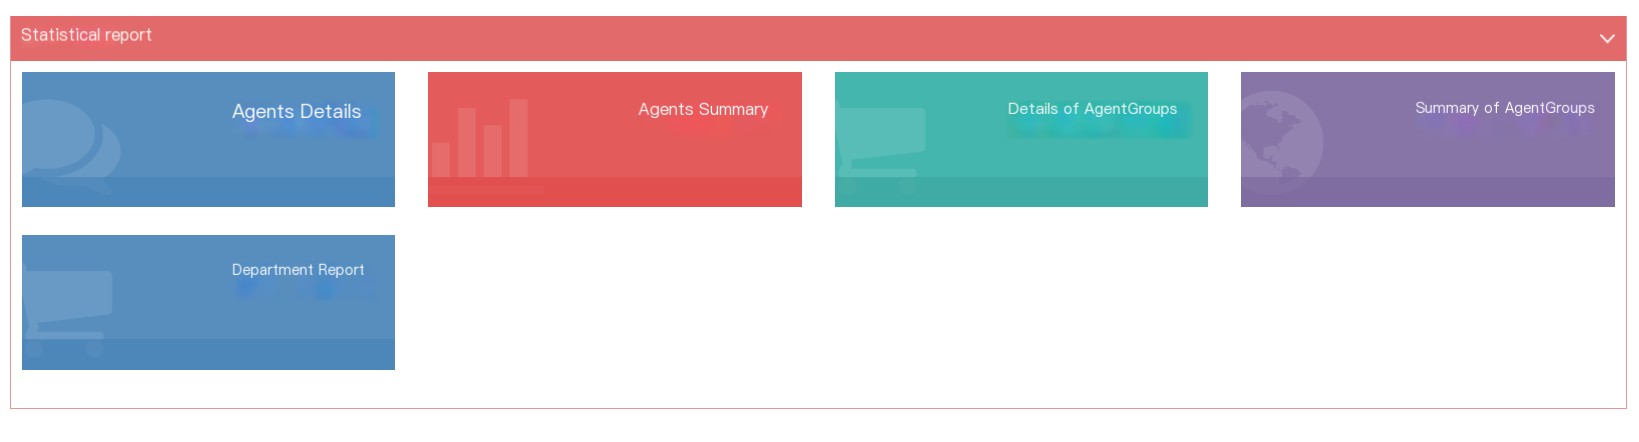
3.12.1 Statistical Report
Statistical Report is divided into five items: seat details, seat summary, seat group details, seat group summary and department reports, and statistics summary and download of data models.
1Sitting details
The agent details mainly count the data generated by the agent in the task for statistics. Users can select an agent without selecting a task to view the statistical data of the agent in all tasks, or they can select an agent to view the statistical data of the agent in the selected task.
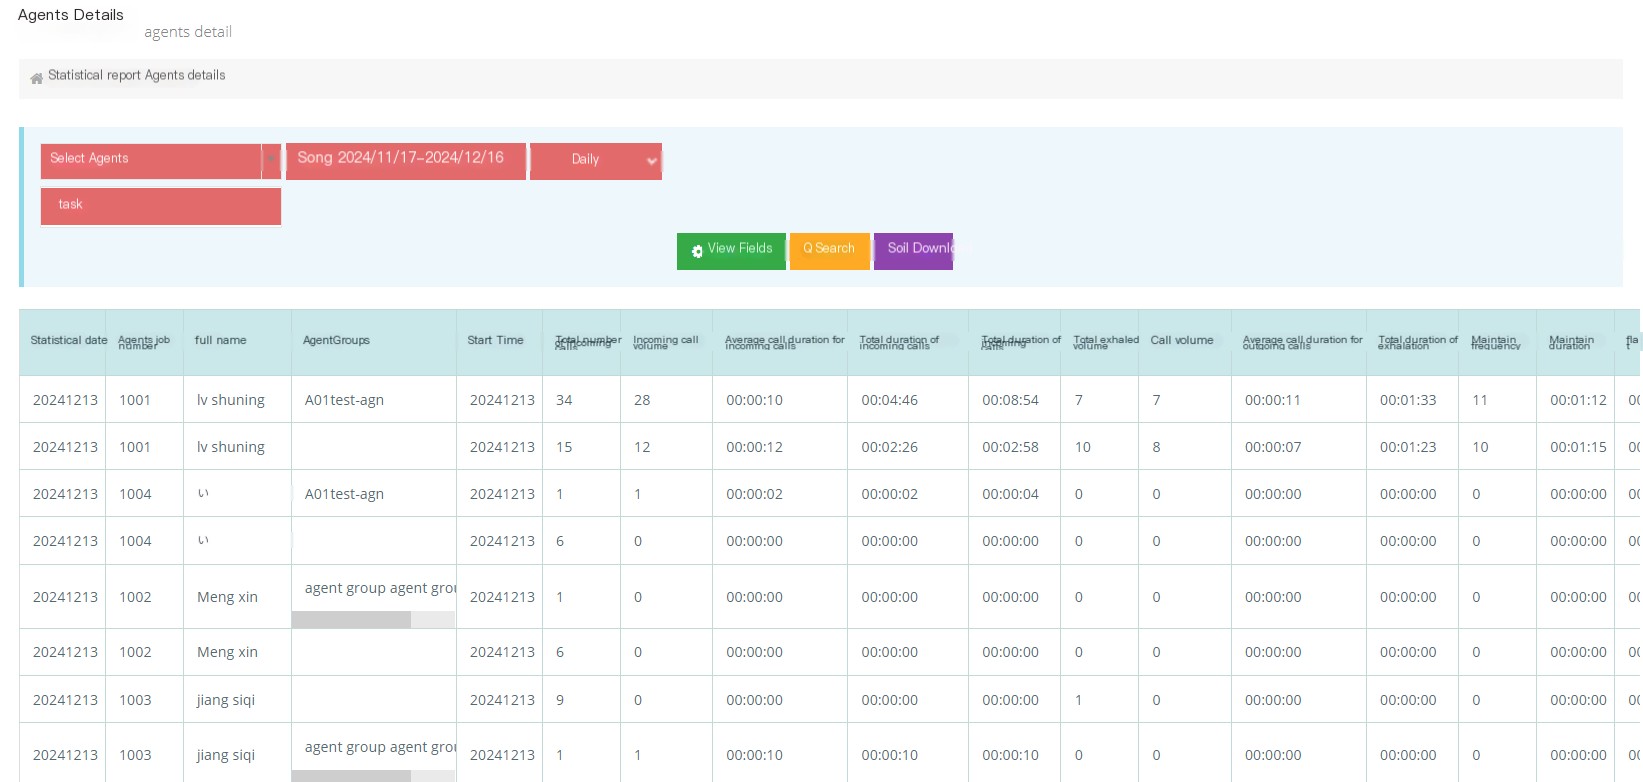
[Select a seat] Select the seat to view.
[Task] Select to view the statistics details of the agent in the selected task.
[Date] Select the date or time or range to view the statistical details of the seat.
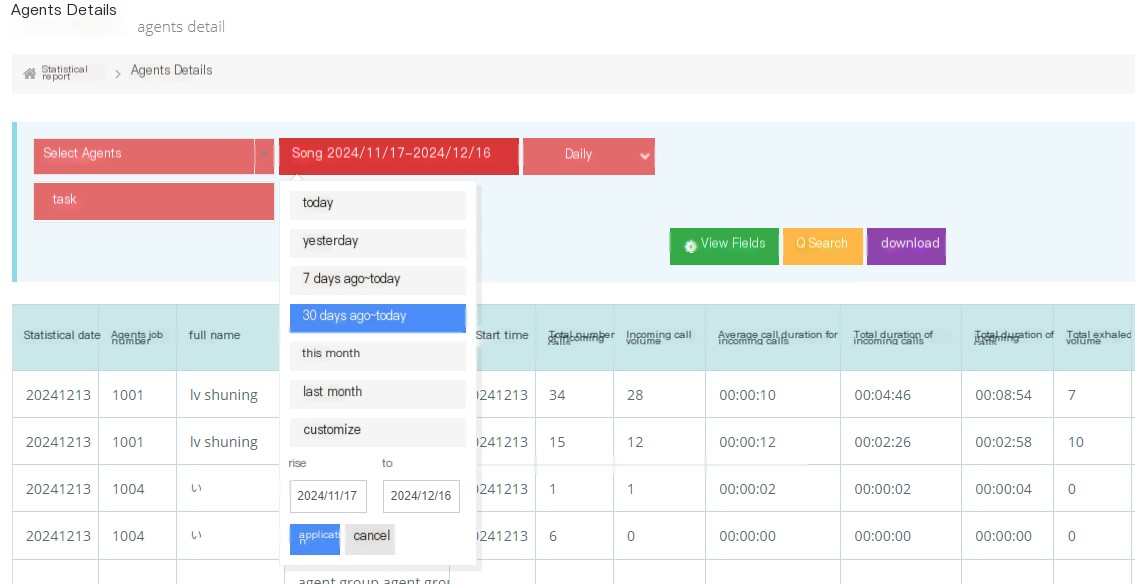
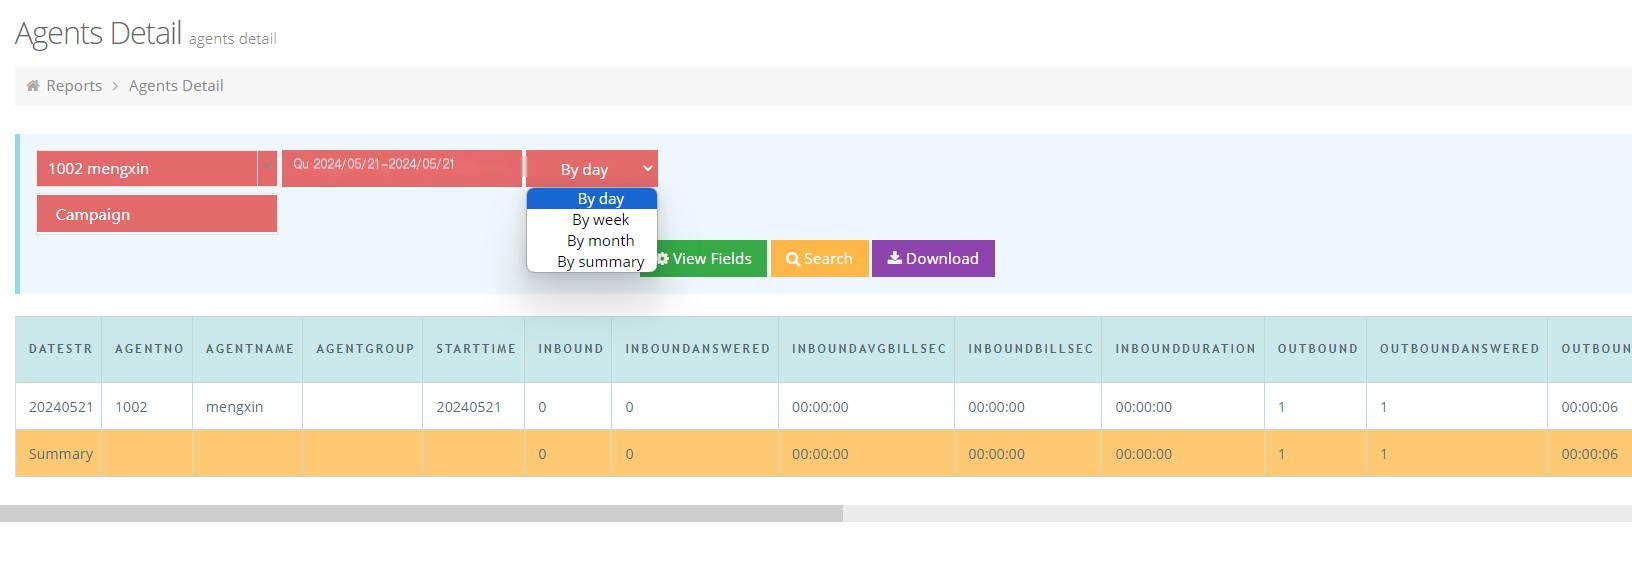
[View Field] Select the field data displayed by query.
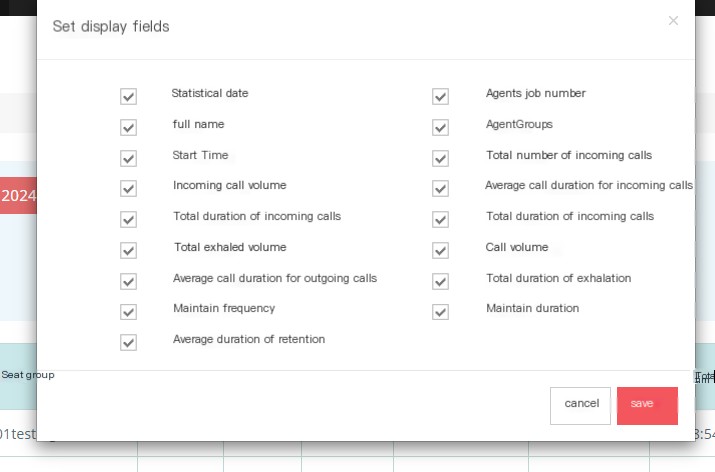
Statistics Date: The date on which the statistics belongs.
Cabin number: The work number of this cabin.
Name: The name of the seat to which this statistics belongs.
Seat group: The seat group to which the seat belongs.
Start time: The date when this statistics starts.
Total incoming calls: The total incoming calls received by the agent.
Average call duration: The average call duration of the agent when receiving an incoming call.
Total incoming call duration: The total call duration of the agent when receiving an incoming call.
Total incoming time: the total number of incoming calls.
Total outgoing calls: The total number of outgoing calls for the agent (excluding pre-dial).
Outgoing call volume: The number of outgoing calls received (not including pre-dial).
Average call duration for outgoing calls: The average call duration for the seat when outgoing calls.
Total call duration: The total call duration when the seat calls out.
Hold times: The total number of holding times during the call of the seat.
Hold time: The total holding time during the call of the seat.
Average holding time: The average holding time during the call of the seat.
[Search] After completing the above conditions according to the needs, search for the statistical details of the seat.
[Download] Download the statistical details of the seat after completing the above conditions according to the needs.
2 seat summary
Agent Summary The main statistics of the data of the agents in the group are summarized. Users can view the data based on the agent group and tasks on the agent summary page.
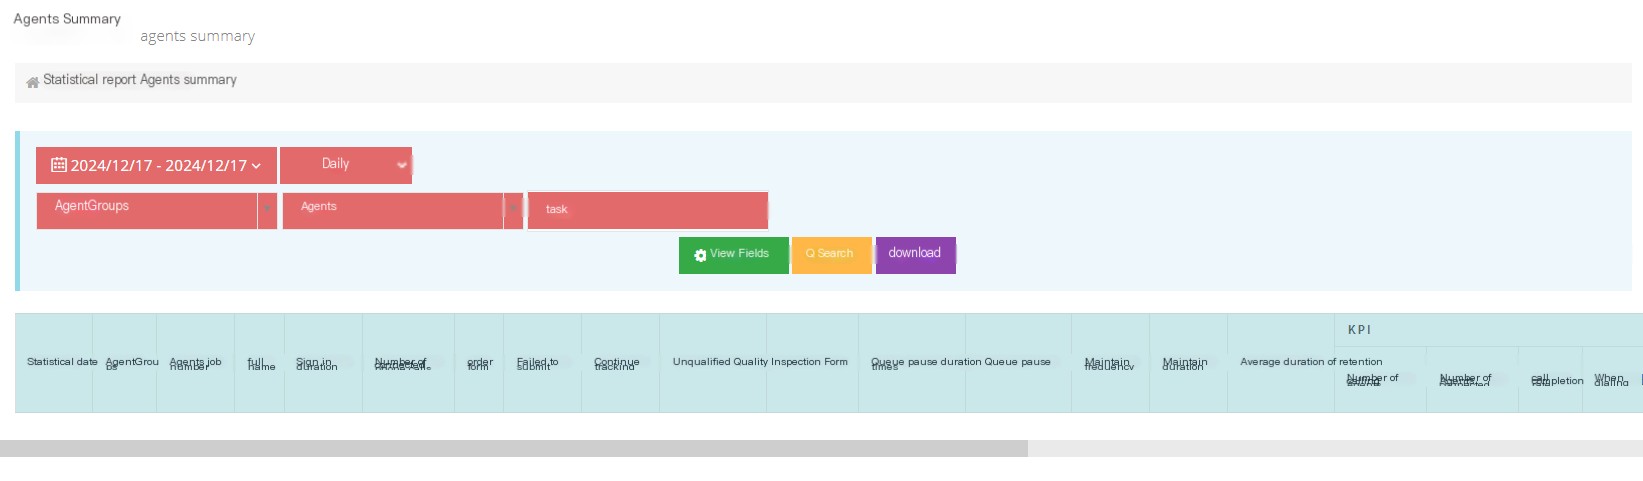
[Date] Select the date or time range to view the summary of the seats.
[Seat Group] Select the seat group to view the seat.
[Sitting] Select the seat to view.
【Task】Select to view the agent’s summary in the selected task.
[View Field] Select the field displayed by the query.
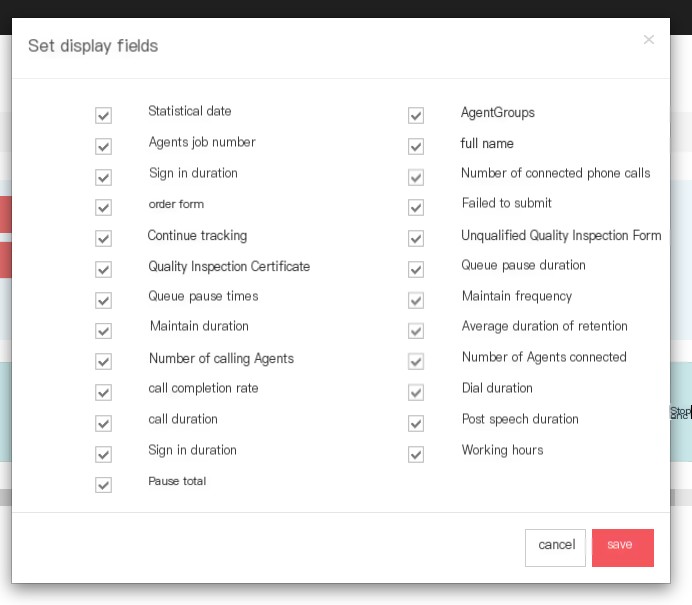
Statistical date: Statistical date of the seat.
Seat group: The seat group to which the seat belongs.
Cabin number: Statistics of the cabin number.
Name: The name of the seat.
Check-in duration: The check-in duration of the seat that should be counted.
Number of calls to be connected: The number of calls to be received by the agent.
Complete order: The sales funnel score saved by this seat is greater than zero.
Failed Submission: The agent saves sales funnel score less than zero.
Continue tracking: The agent saves sales funnel score equals zero.
Quality inspection failure list: List of the unqualified quality inspection of the seat in the task.
Quality inspection qualification list: The list of quality inspection qualifications for the agent in the task,
Queue pause duration: The duration of the agent pause in the queue.
Queue Pauses: The number of times the agent is paused in the queue.
Number of holds: The number of calls held by the seat.
Hold time: The duration of the call of the seat being kept in place.
Average duration of retention: The average duration of the call on the seat remained.
Number of pick-ups: Number of pick-ups for the seat.
Number of call seats: The number of times the seat has been called.
Number of agents connected: The number of agents connected after being called.
Connection rate: The connection rate of the seat.
Dialing duration: The dialing duration of the seat rings + the time to call.
Call duration: All call times for the seat.
Duration after conversation: The duration after the seat enters the conversation.
Check-in time: Check-in time for the seat.
Working duration: the sum of call and post-talk processing time.
Total pauses: The total pause time for the seat.
[Search] After completing the above conditions according to the needs, Search Agent summary.
[Download] After completing the above conditions according to requirements, Download Agent summary.
3 Seat group details
Agent group details is to facilitate users to view the statistics of each agent group and the tasks within the group. After the user selects the agent group, he can view the statistics of the agent group under all tasks. The user can also directly select the agent group and task that he wants to view and view the statistics of the agent group under the task.
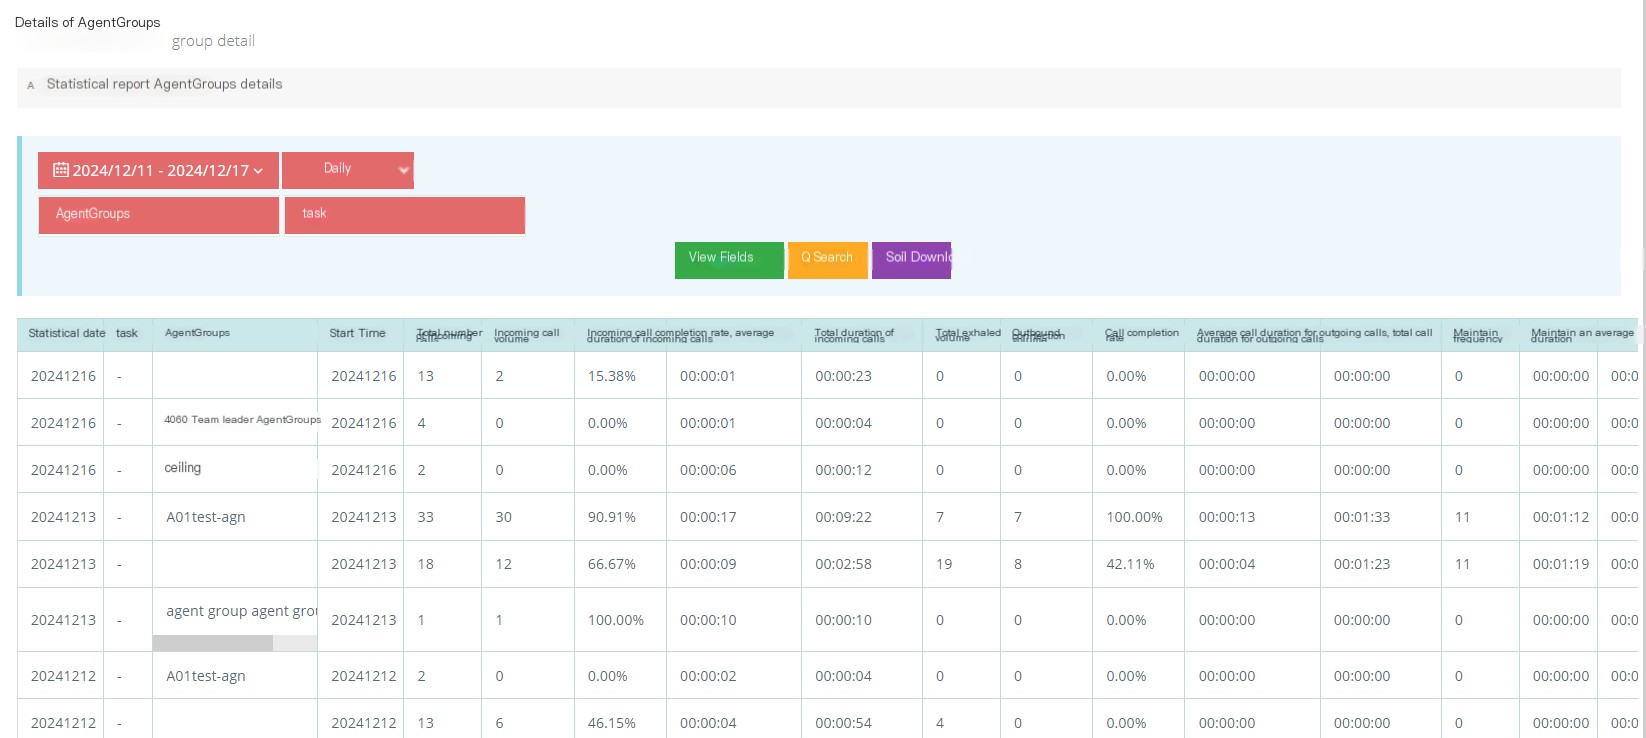
[Date] Select the date or time range to view the details of the seat group.
[Agent Group] Select the seat group to view, and you can select one or more seat groups.
[Task] Select to view the details of the agent group in the selected tasks, and you can select one or more tasks.
[View Field] Select the field displayed by the query.

Statistics Date: The statistics date the user needs to view.
Task: The name of the task where this statistics resides.
Seat group: The seat group to which this statistics belongs.
Start time: The time when the seat starts counting.
Total incoming calls: The total incoming calls for the seat group counted.
Incoming call access: The total incoming call access of the agent group is counted.
Incoming call access rate: The connection rate of the seat group counted.
Average call duration: The average call duration of the seat group counted.
Total incoming call duration: Total duration of calls to the seat group.
Total exhalation: The total exhalation volume of the seat group counted.
Exit call flow: The counted call flow of the seat group.
Outgoing call connection rate: The counted attendance rate of the seat group.
Average ringing time for outgoing customers: The average ringing time for outgoing customers.
Average call duration for outgoing calls: The average call duration for outgoing calls for outgoing groups in the seat group.
Total length of outgoing calls: The total length of outgoing calls for the seat group counted.
Number of holds: The total number of calls held by the seat group counted.
Maintenance duration: The total number of calls held by the seat group counted.
Average holding time: The average holding time for calls in the seat group counted.
[Search] After completing the above conditions according to the needs, Search Statistical details of the seat group.
[Download] After completing the above conditions according to requirements, Download Statistical details of the seat group.
4 Seat Group Summary
The agent group summary mainly statistical data summary of the agent group. Users can view the data based on the date, that is, the date range, on the agent group summary page.
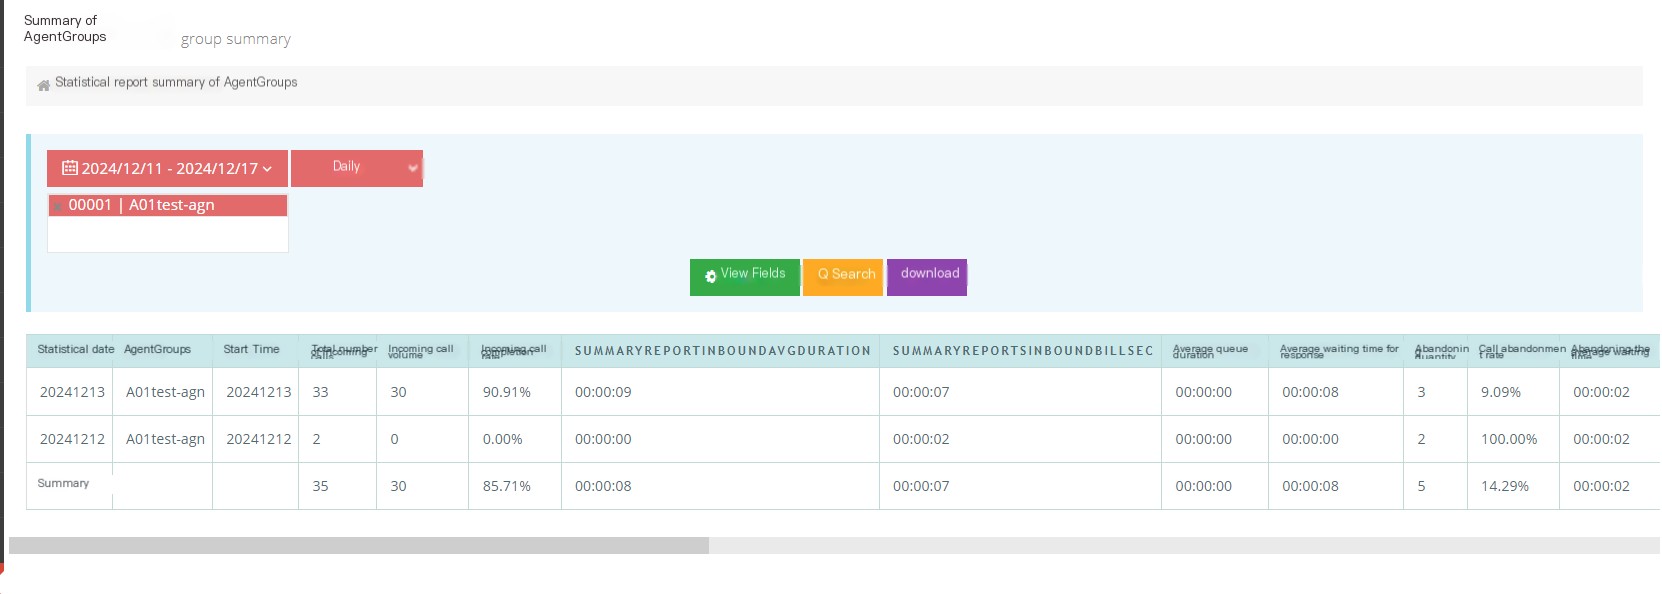
[Date] Select the date or time range to view the details of the seat group.
[Agent Group] Select the seat group to view, and you can select one or more seat groups.
[View Field] Select the field displayed by the query.
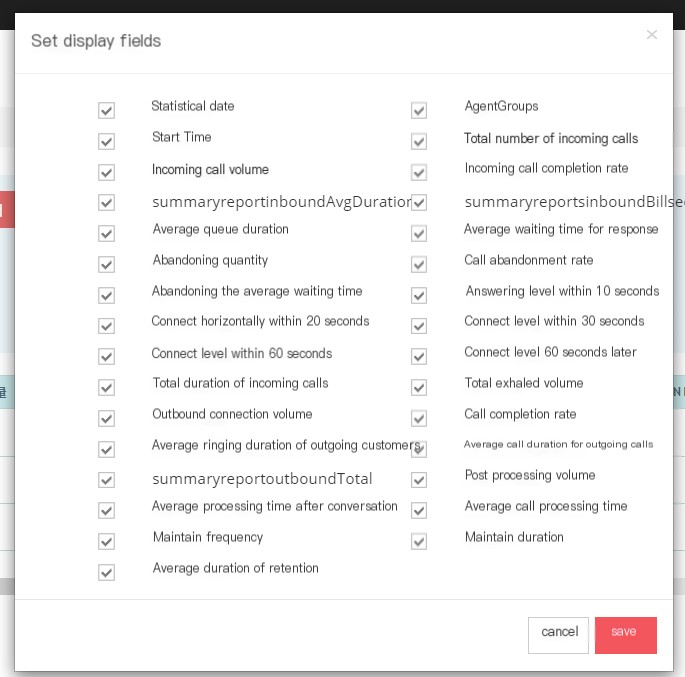
Statistical date: The statistical date of the data of the seat group.
Seat group: The seat group that is counted.
Start time: The start time of the seat group being counted.
Total incoming calls: The total number of incoming calls received by the agent group.
Incoming call throughput: The total number of incoming calls connected by the agent group.
Incoming call access rate: Incoming call access rate of the agent group.
Average call duration: The average call duration of the agent when the incoming call is connected.
Average ringing time for incoming seats: The average ringing time for the incoming seats of the seat group before the incoming call is connected.
Average queue time: The average queue time for a customer to call into the system.
Average waiting time for answering: The average waiting time for customers who respond to calls in this seat group.
Abandonment: The number of unanswered answers to the incoming call in the seat group.
Answering level within 10 seconds: The number of calls in the seat group answered within 10 seconds.
Connection level within 20 seconds: the number of seats in this seat group answers calls within 20 seconds.
Connection level within 30 seconds: the number of calls received in this seat group within 30 seconds.
Connection level within 60 seconds: the number of calls in the seat group answered within 60 seconds.
60-second external call level: The number of seats in this seat group receives external calls in 60 seconds.
Total incoming call duration: Total duration of calls to the seat group.
Total exhalation: The total exhalation volume of the seat group.
Outgoing call: The number of outgoing calls of the agent group.
Outgoing call rate: The call rate of outgoing call of the agent group.
Average ringing time for outgoing customers: The average ringing time for the client to answer after the call is out of the seat group.
Average call duration for outgoing calls: The average call duration for outgoing calls for the seat group.
Total call duration: The total call duration of the seat group.
Post-talk processing volume: the number of post-talk status of the seat group.
Average processing time after the conversation: the average duration of the seat group after the conversation.
Average traffic processing time: The average traffic processing time of the seats of the seat group.
Number of hold times: The number of calls to the seat group of seats are maintained.
Hold time: The total duration of the call of the seat group.
Average holding time: The average holding time for the seat group to talk to the seat.
Number of pick-ups: Number of pick-ups for the seats of the seat group.
[Search] After completing the above conditions according to the needs, Search Agent group summary.
[Download] After completing the above conditions according to requirements, Download Agent group summary.
5 Department Reports
On the department report page, users can select a date range, select the department you want to view, and click Search to view. In addition, users can also select the agent data that the department wants to view or the department’s call duration to view the report content.
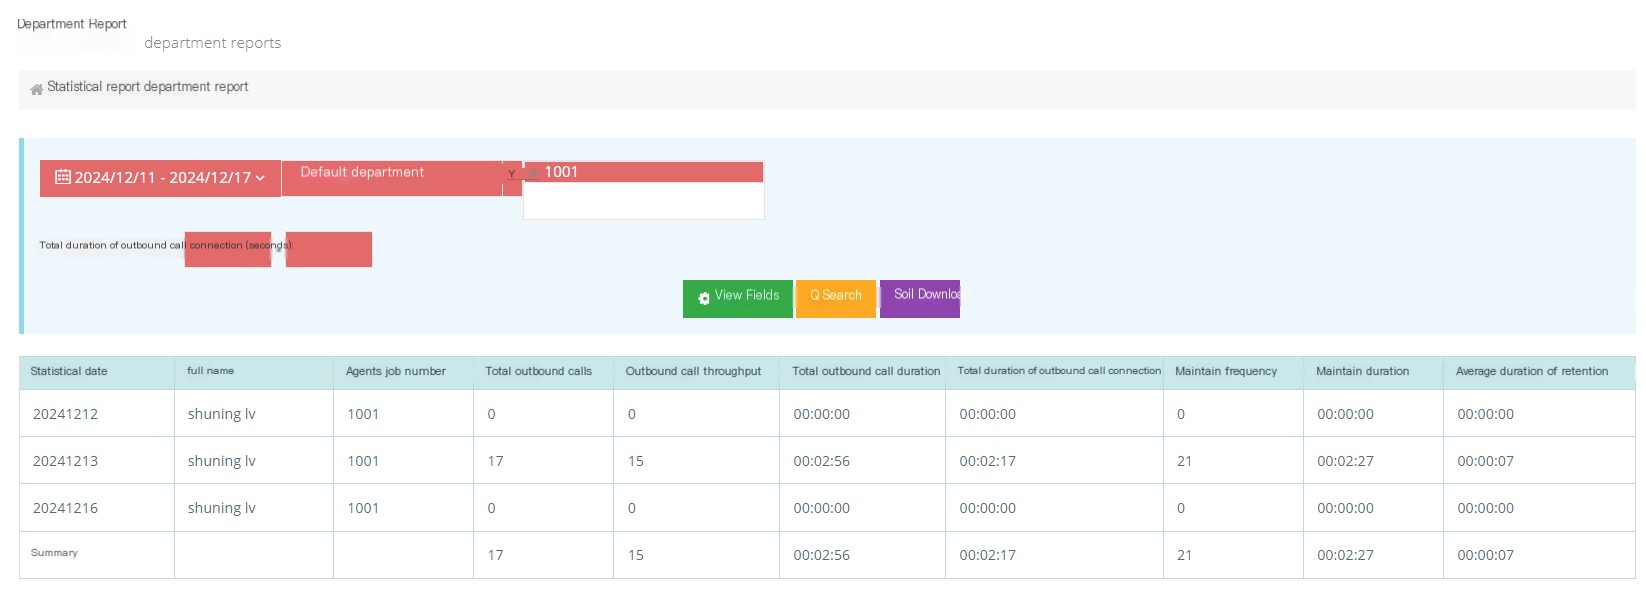
[Date] Select the date or time range to view department reports.
【Department】Select the department to view
[Agent] Select the seat under this department.
[Total duration of outbound call connection] Select the total duration of outbound call connection in the department you are viewing.
[View Field] Select the field displayed by the query.
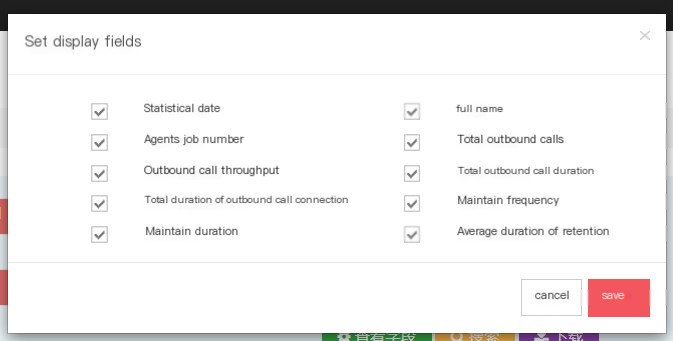
Statistical date: Statistical date of the department’s report.
Name: The name of the seat for the department’s report statistics.
Casual work number: Casual work number of the department’s report statistics.
Total number of outgoing calls: The total number of outgoing calls in this department.
Outbound call connection: The number of call connections for outbound calls counted by the department’s report.
Total duration of outbound call: The total duration of call out of the seat counted in the department’s report,
Total outbound call connection: The total number of outbound call connections counted by the department’s report.
Number of holding times: The number of holding times counted in the department’s report.
Holding duration: The holding duration of the seat counted in the department’s report.
Average maintenance duration: The average maintenance duration of the seats counted in the department’s reports.
[Search] After completing the above conditions according to requirements, Search Department report.
[Download] After completing the above conditions according to requirements, Download department report.
3.13 Monitoring and Management
3.13.1 Real-time monitoring
On the real-time monitoring page, users can see the real-time dynamics of seat groups and seats, seats or seat groups, as well as the percentage information involved.
1 Seat group seat
Users can see the real-time dynamics of the seat group and seats, seats or seat groups, as well as the percentage information involved on the real-time monitoring page.
Agent Group Agent: Entering this page, users can enter one or more agent groups they want to monitor for submission and view.
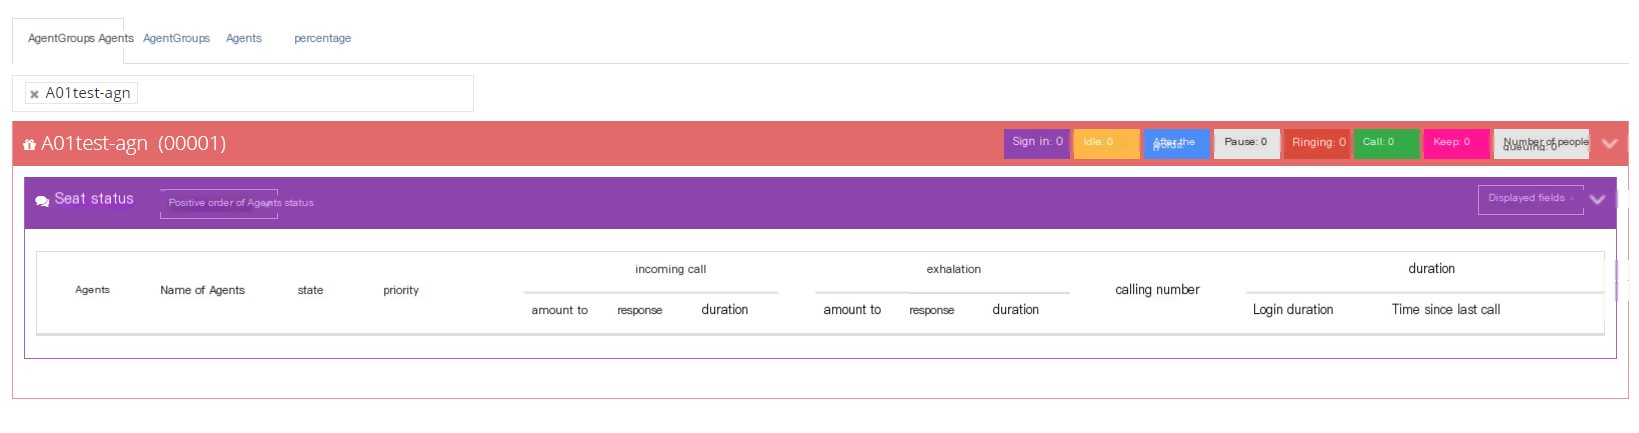
The status of all seats in this group is displayed in the red box.

Sign in: Displays the number of seats signed in in this seat group.
Idle: A seat with an idle state in this seat group.
After the conversation: The seat in this seat group is the seat after the conversation.
Pause: When the agent selects pause or sets automatic pause in the queue, the agent does not answer pause will display pause: Not answered.
Ring: When incoming or outgoing calls, ringing is displayed when the call is not connected.
Call: When the call is in and out of the seat group, the pre-dial call is called out, and when the contact customer page is connected, the real-time monitoring page will display the call.
Keep: Keep/non-queue calls will not be displayed during queue calls.
Number of queues: The number of people waiting for customers in this queue.
Asseat sort
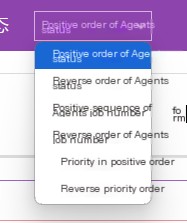
The seat status sequence: Post-talk status > Call status > Stay status > Pause > Idle > Ring
Reverse order of the seat status: Ring>Idle>Pause>Hold>Call>L>After call l>State after call
The order of the seat number: The seat number is sorted from small to large.
Reverse order of the seat number: The seat number is sorted from large to small.
Priority order: The priority of the seat is from small to large.
Reverse priority: The priority of the seat is from large to small.
Agent: Monitor the seats in real time, click the drop-down menu to perform the following operations on the seats;
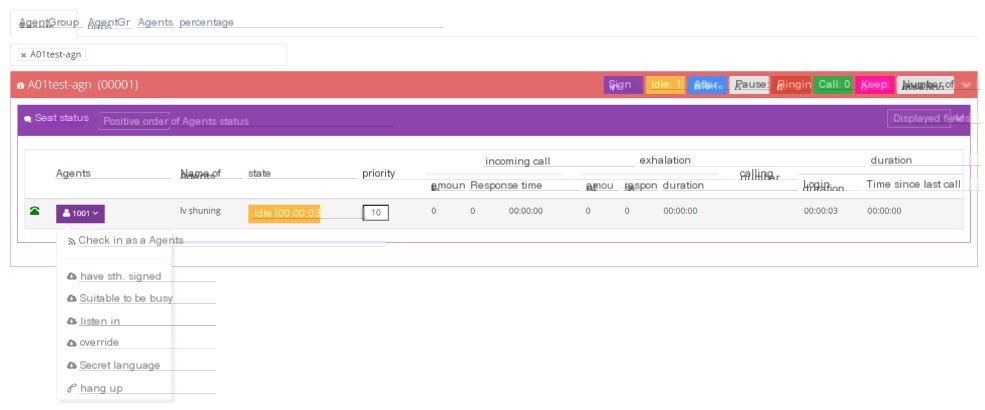
Login as this seat -Login to this seat.
Check out - Check out this seat from the seat group.
Busy - Change the status of this seat to Busy.
Listening - Monitor calls between designated seats and customers.
Forced insertion - During the agent’s call, if you forcefully interfere with the call, the customer and agent can hear your voice, which is the same as the three-party call.
Secret Words - During an agent’s call, the customer cannot hear the dialer’s voice while communicating with the agent, only the agent can hear it.
Hang up - End the call status of this seat.
Status: The current status of this seat.
Priority: The priority of this seat.
Call incoming: The total number of calls in this seat in this seat group.
Exhaust: The total number of calls out of this seat in the seat group.
Call number: Calling number for incoming or outgoing calls.
Duration:
Login time - The duration of the last time you checked in to the current seat group.
From last call time - From last call time to last call check-in.
The seat status displayed in the purple box can be adjusted by the user in the drop-down menu of the Display Field Button.
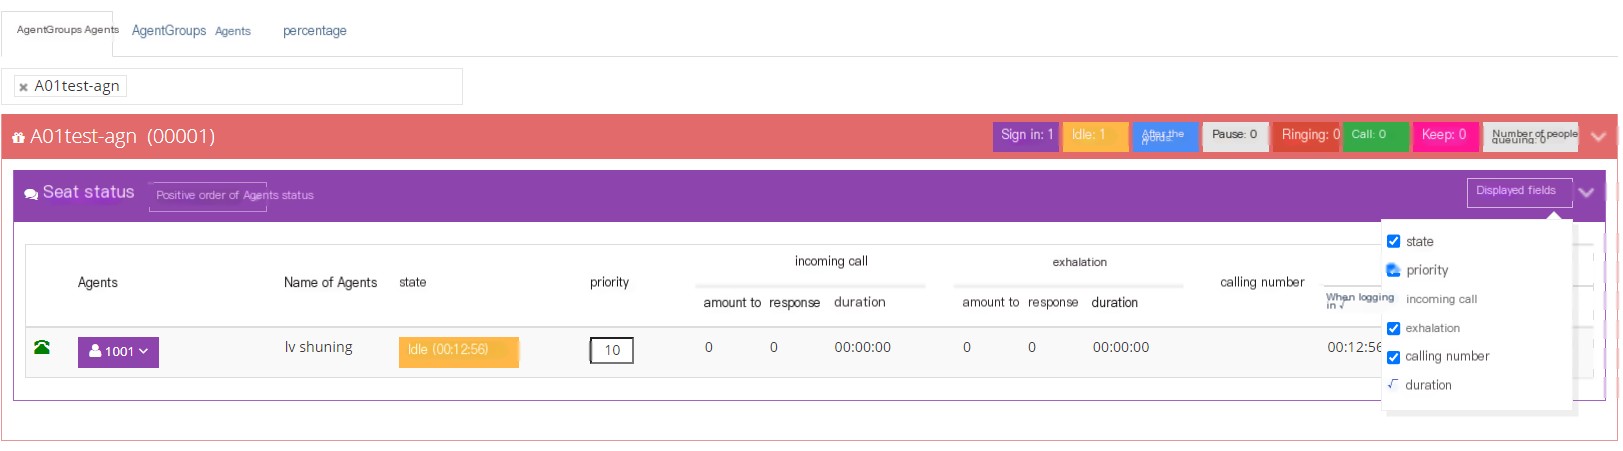
If there is an incoming call but no agent answers, the green call queue message box will pop up.
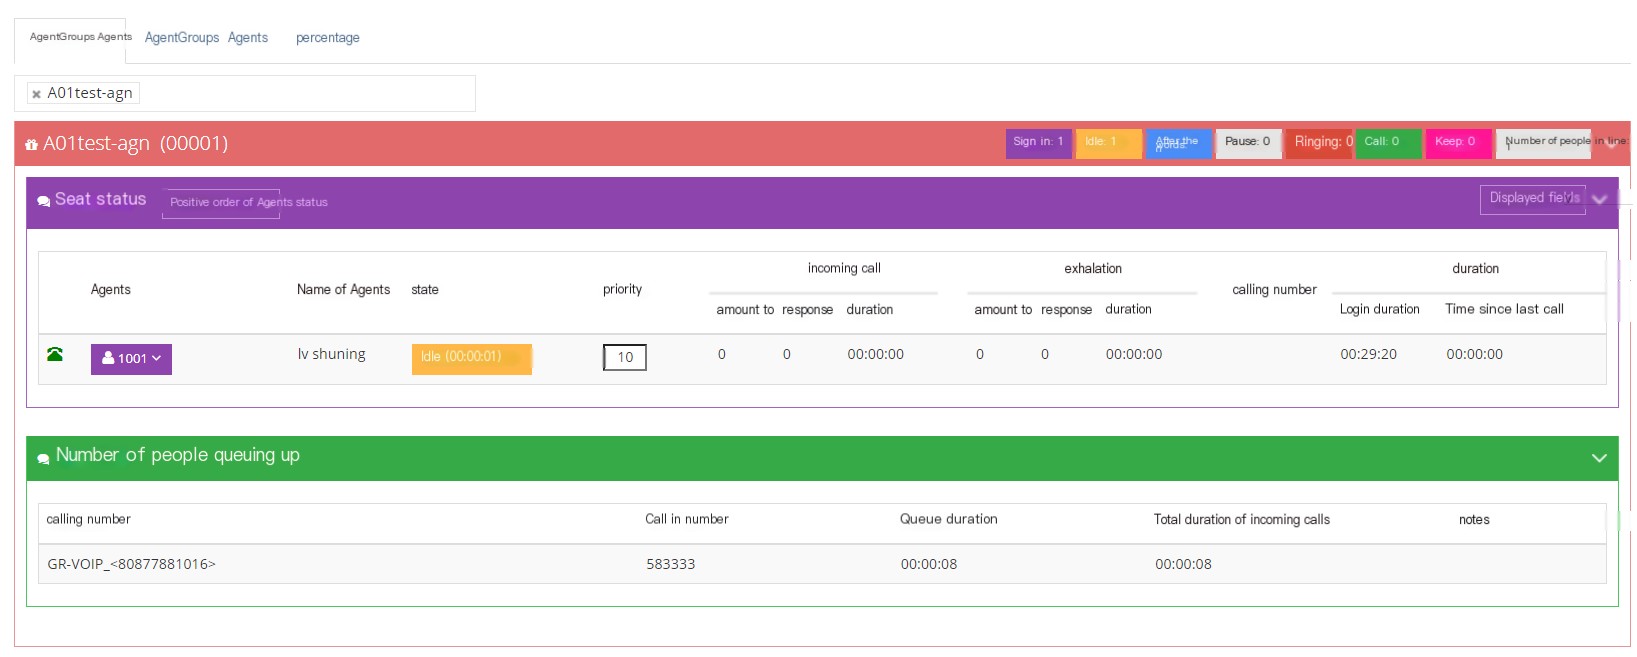
2 seat group
Click the seat group page to see the real-time information of the seat group
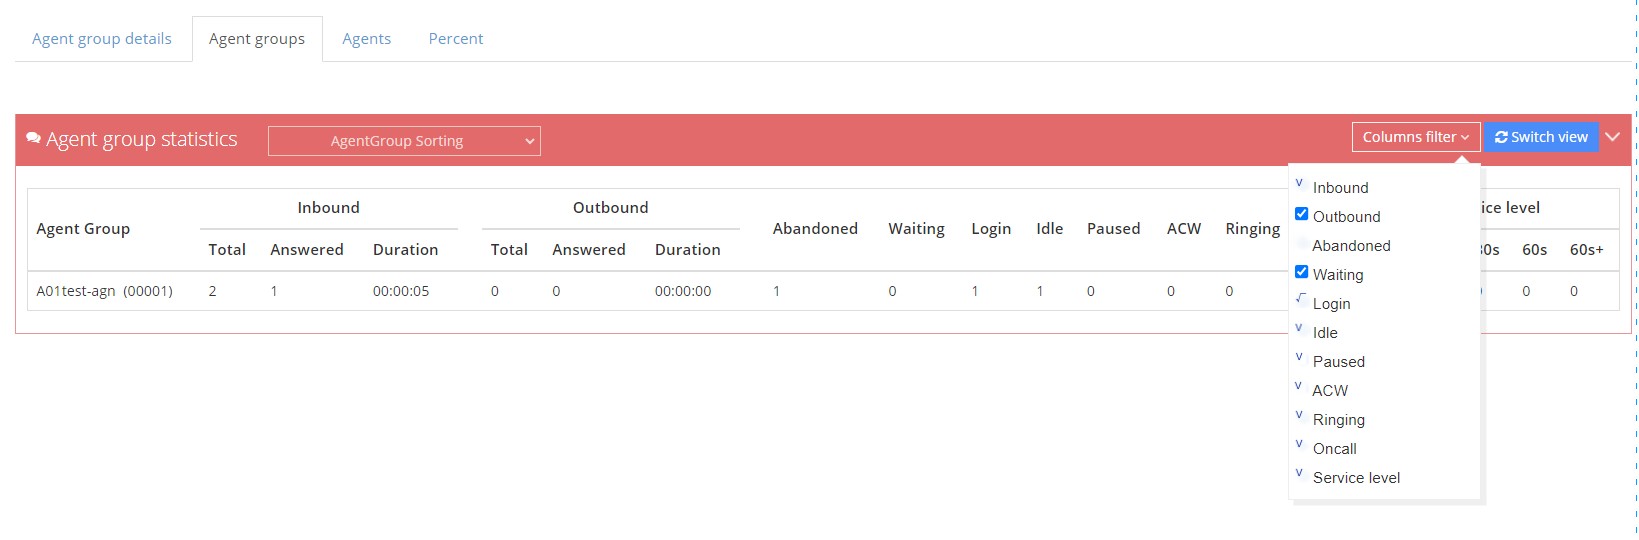
Call in
Total: Call in to this seat group, the seat rings or connects +1.
Reply: Call into this seat group, the seat answer +1.
Duration: The duration of the call to the seat group and the seat answers.
Call out
Total: Call out from this seat group, the seat rings or connects +1.
Answer: Call out from this seat group and the call is answered +1.
Duration: The duration of the call to be called out from this seat group and answered.
Give up: The number of calls to the queue that have not been connected.
Queue: The number of calls waiting in the queue.
Check-in: Displays the number of seats signed in in this seat group.
Idle: A seat with an idle state in this seat group.
Pause: Agents that are suspended in the status or queue paused in this agent group.
After talking: The seat in this seat group is the seat after talking.
Ring: When incoming or outgoing calls, ringing is displayed when the call is not connected.
Call: The seat that is on the call in the seat group.
Service level: How many seconds does the call to the queue be connected? ≤10S
Users can also switch views
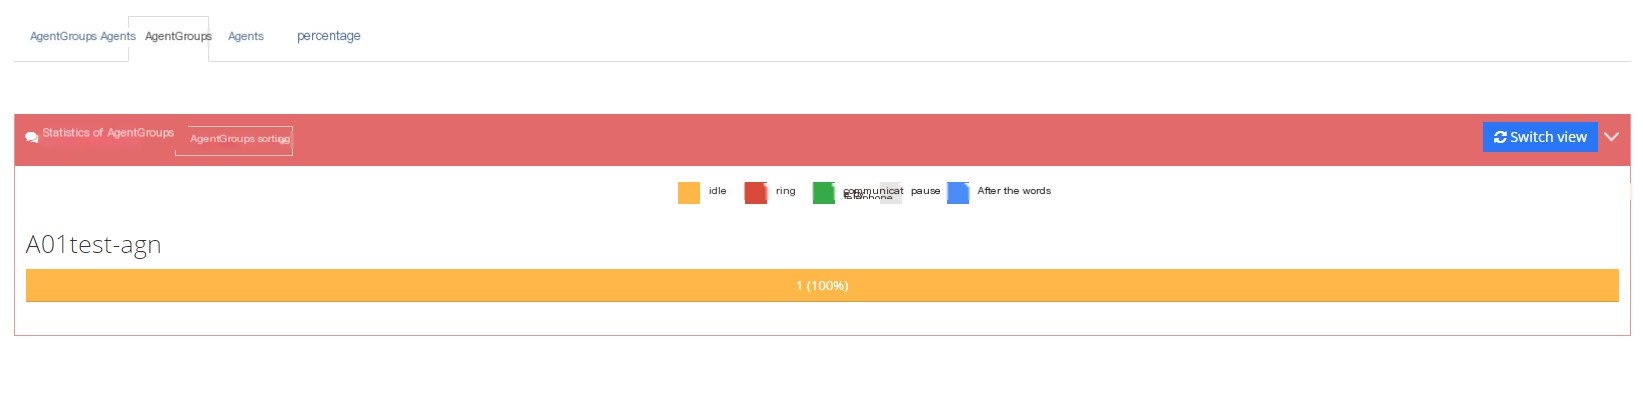
3 seats
Click the seat page to see the real-time information of the seat.
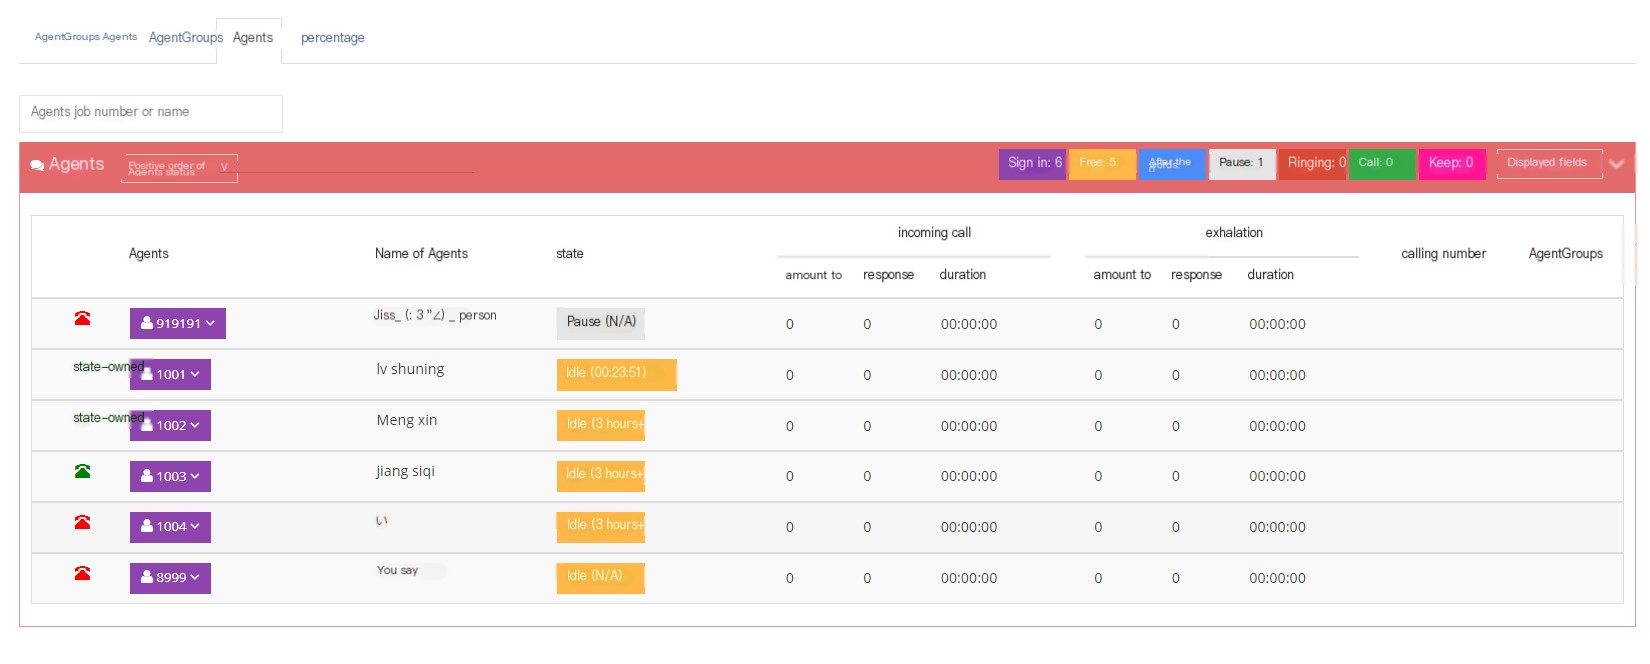
4 percentage
If the agent calls are large, you can directly switch to percentage mode (internal calls and forwarding calls are not displayed in percentage)
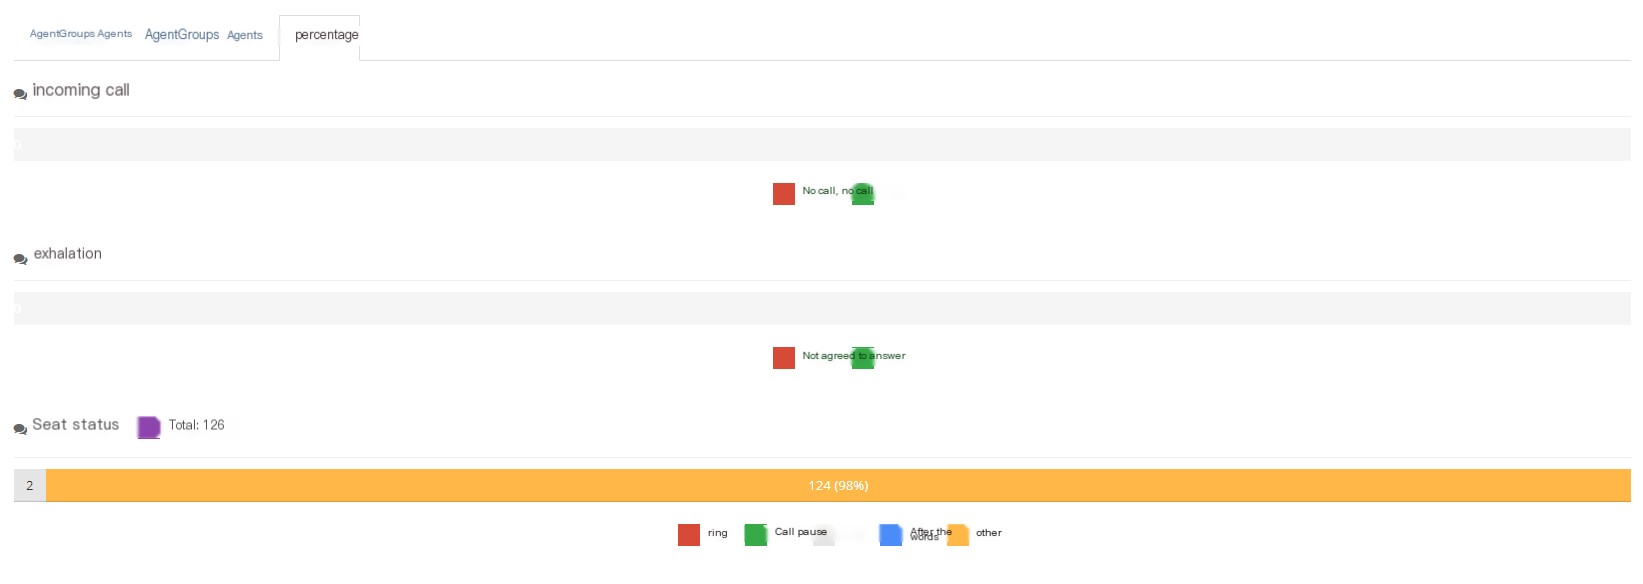
3.13.2 Large-screen monitoring
Large-screen monitoring can see the status of all seats flashing in real time, and users can choose to watch in full screen or simple mode.
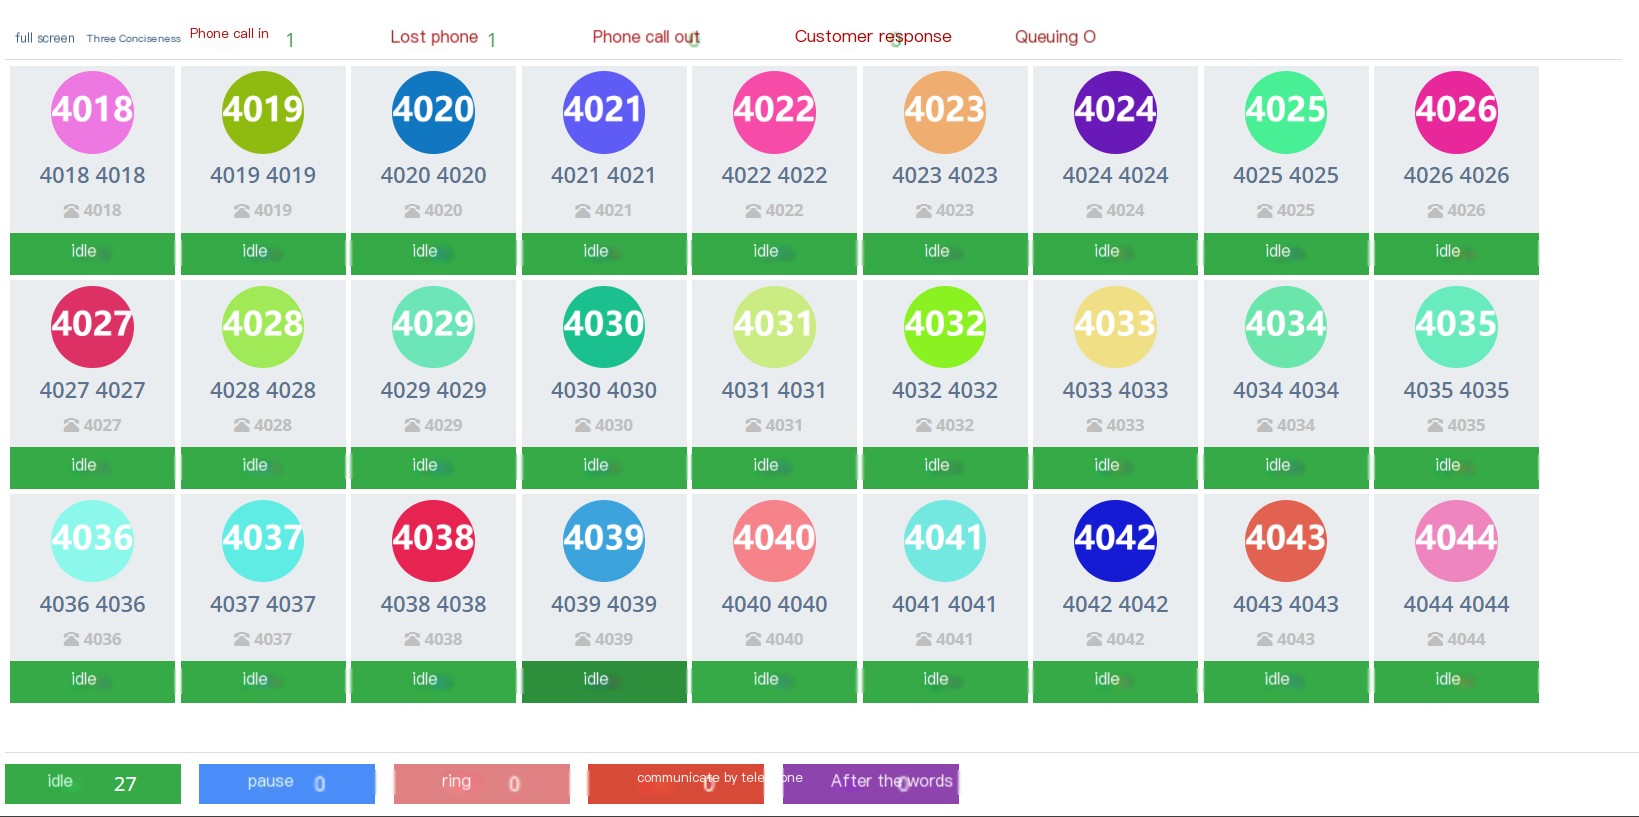
full screen:

concise:
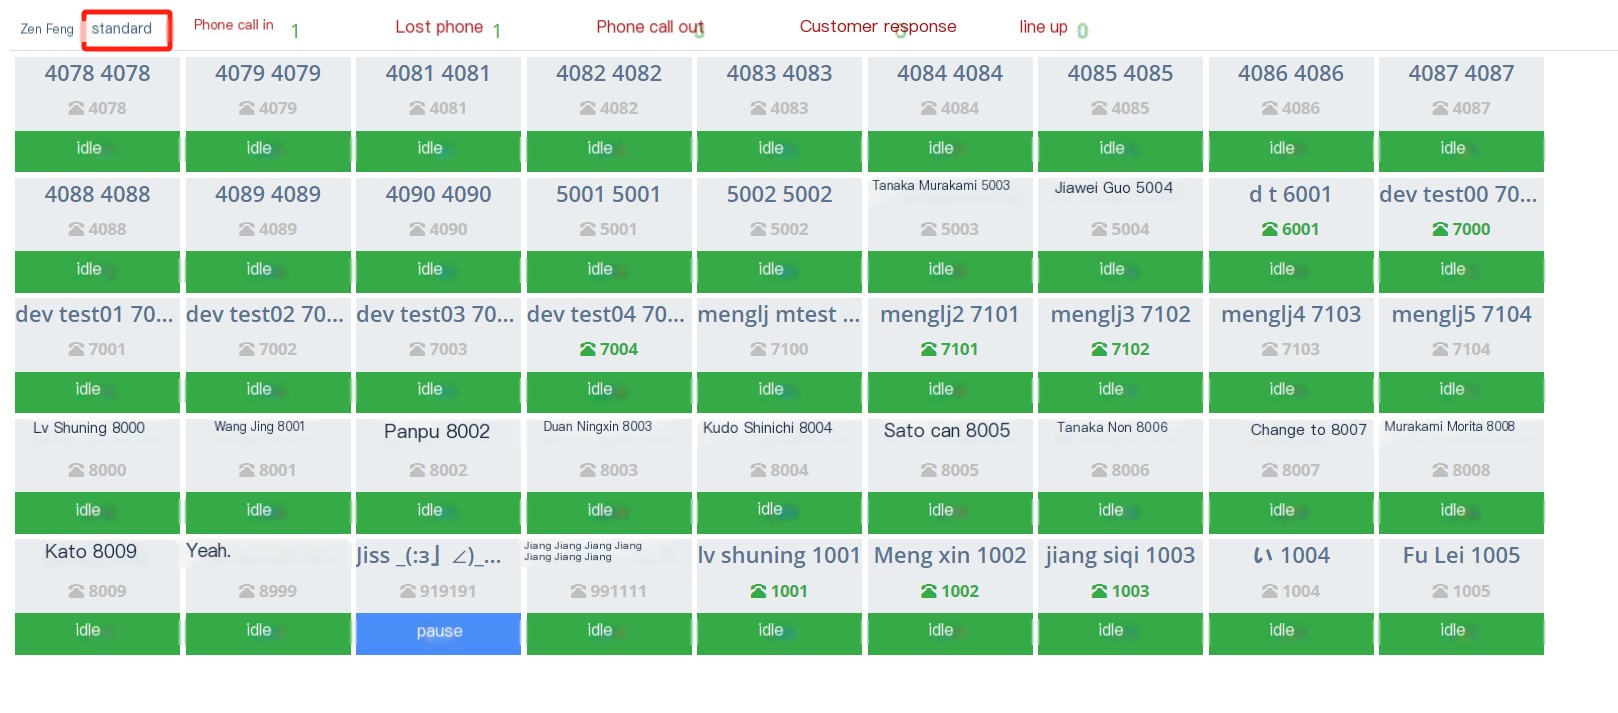
Click Idle to operate on the seat

3.14 Logging
3.14.1 Logging
1 Page Introduction
Record the system user behavior log, and the default retention period in the system is 30 days.
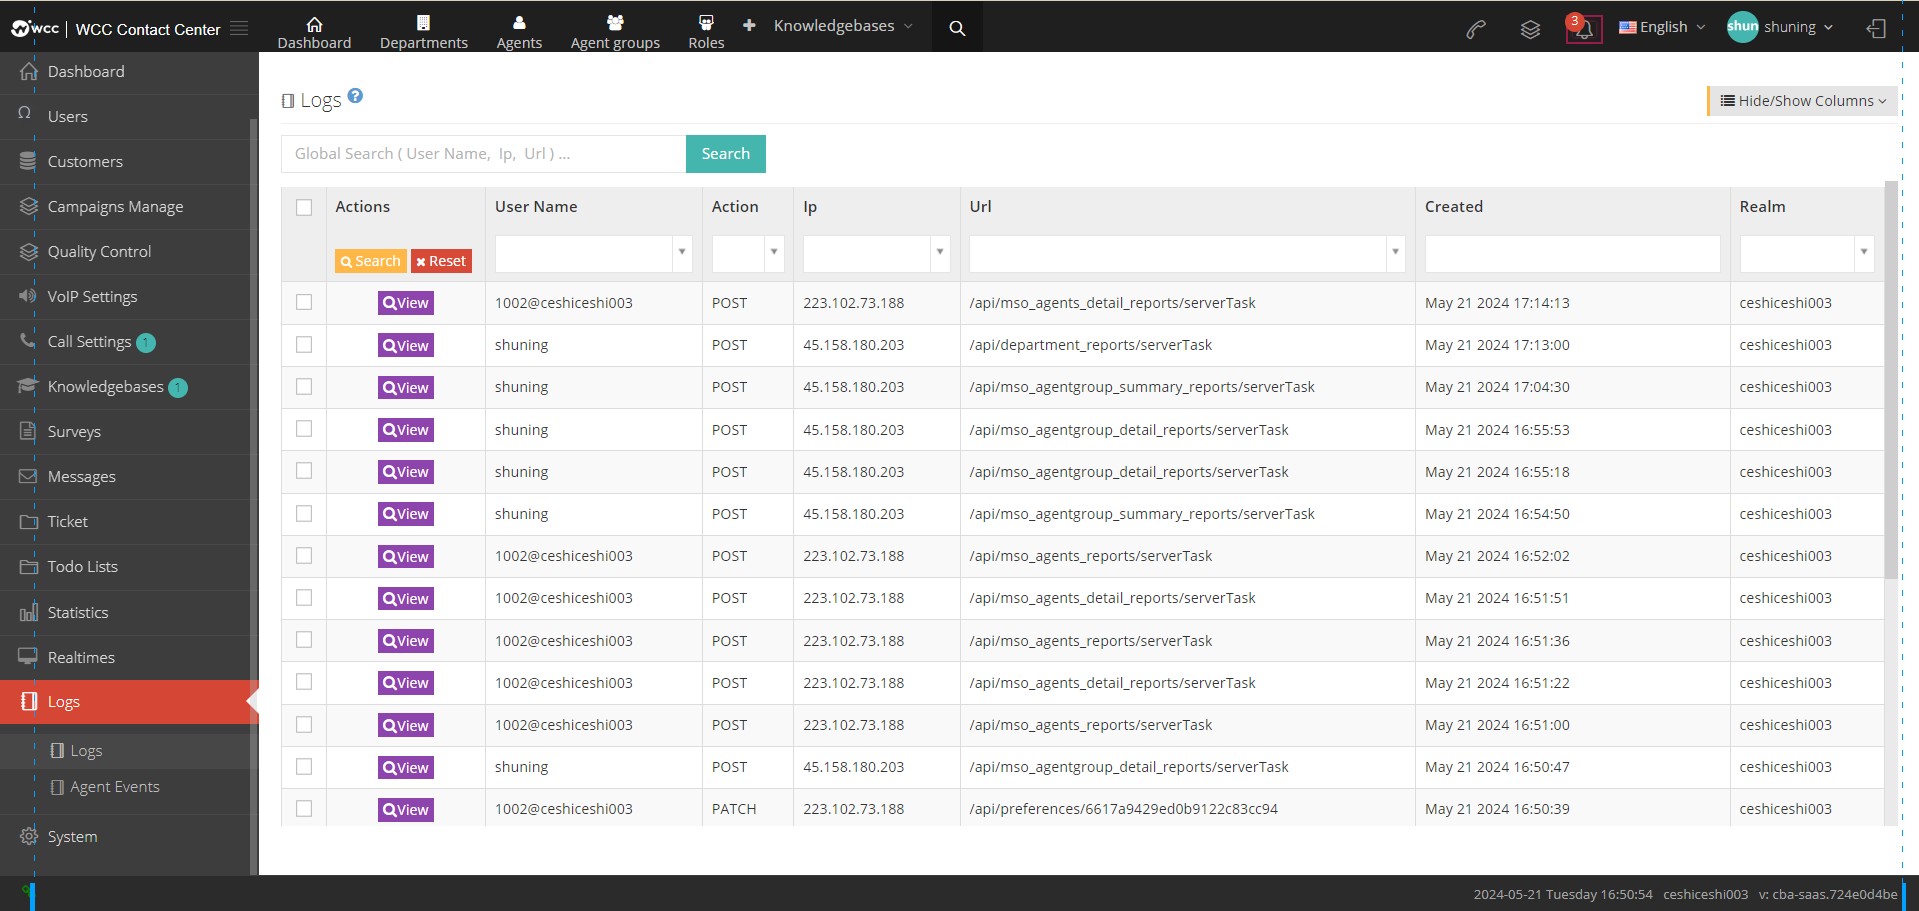
[Search] Logging supports search objects with username, IP address, and request address.
【Show/Hide Field】Select the fields that this page needs to display or hide.
【View】View details of this diary
Show/Hide Fields
Username: Current operation user name.
Action: The operation type of the current user.
IP address: The IP address where the current user is located.
Request address: The request address of the current user.
Request parameters: The request parameters for the current user operation.
Token:
Created date: The date of creation of the log.
3.14.2 Agent events
1 Page Introduction
Used to query the agent event log.
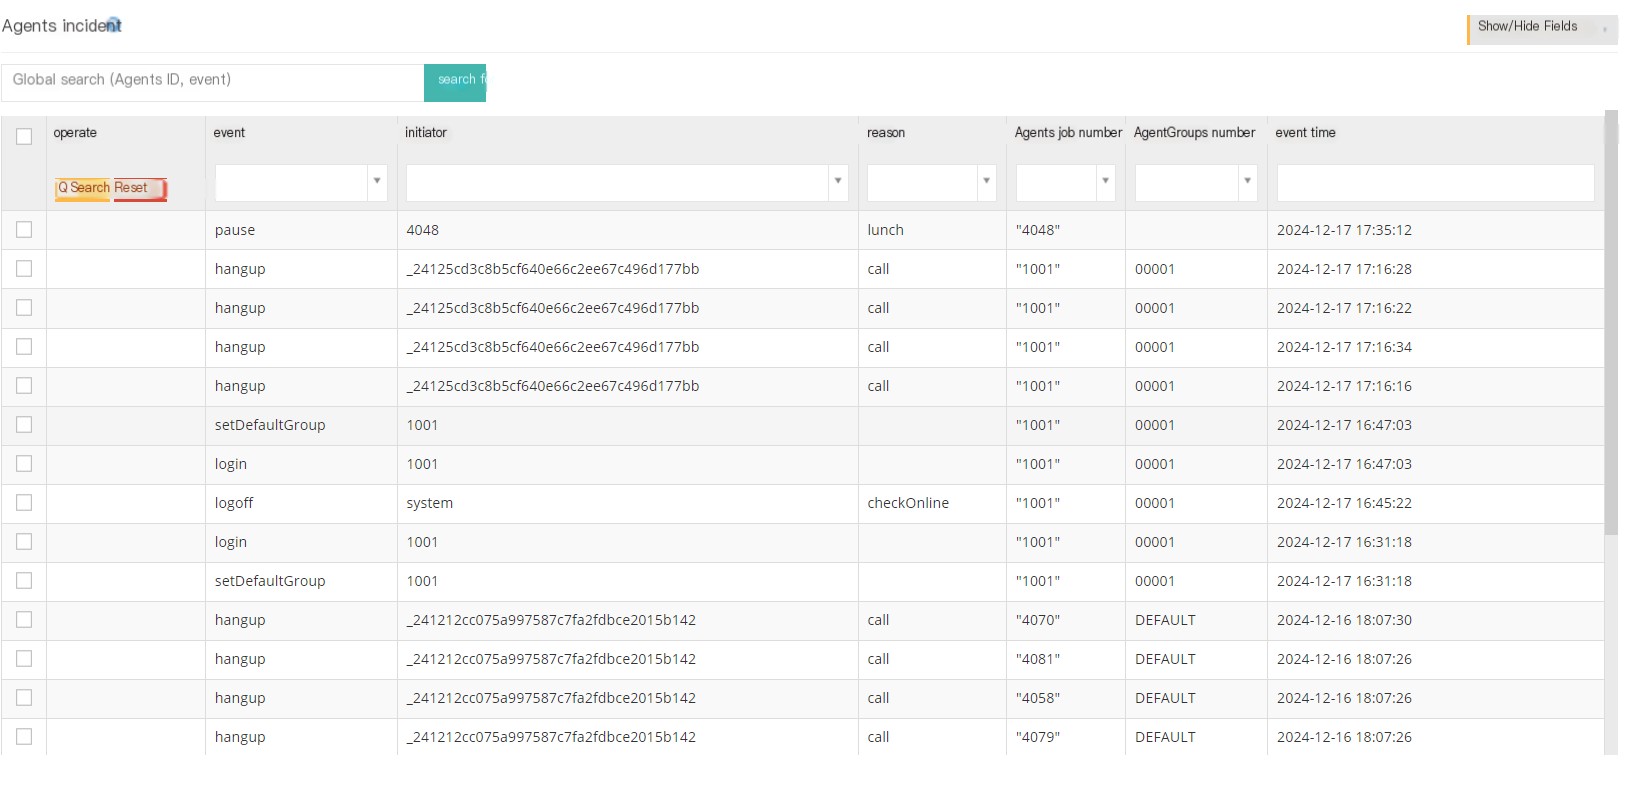
[Search] Supports searching objects with the seat number and event.
【Show/Hide Field】Select the fields that this page needs to display or hide.
2 Show/Hide fields
Event: The event that occurred in the seat.
Initiator: The initiator of the incident.
Cause: The cause of the event, such as dialing, displaying a call.
Casual Work Number: Casual Work Number where the incident occurred.
Agent Group Number: The agent group number to which the event occurred.
Event Time: The time when the event occurred.
3.15 System
3.15.1 System Preferences
1 General
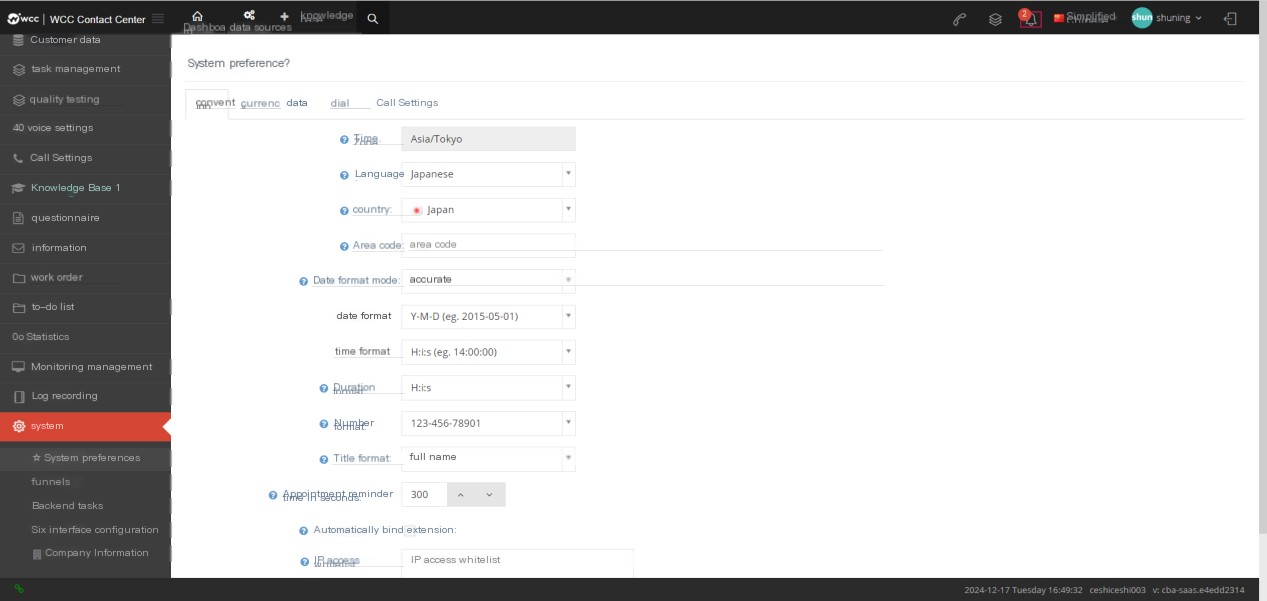
Time Zone: The time zone of this system.
Language: This language refers to the language played by phone, and currently supports Chinese, Japanese, and English.
Country: The country used by this system.
** Area Code**: The area code of this system.
Date format mode: Accurate - You can set the format of date and time.
Daily format: You can select time, minute and second or second to calculate the duration in seconds.
Number Format: Select the format of a number.
Title format: Choose the customary title format.
Appointment reminder time: The time range for advance notice of seat reservations and work order reservations.
Automatic binding extension: Automatically assign sips to agents.
After checking [Auto-bind extension], select [Default Phone Deployment Template]
IP access whitelist: Fill in the IP binding whitelist, only whitelist users have permission to access.
2 Currency
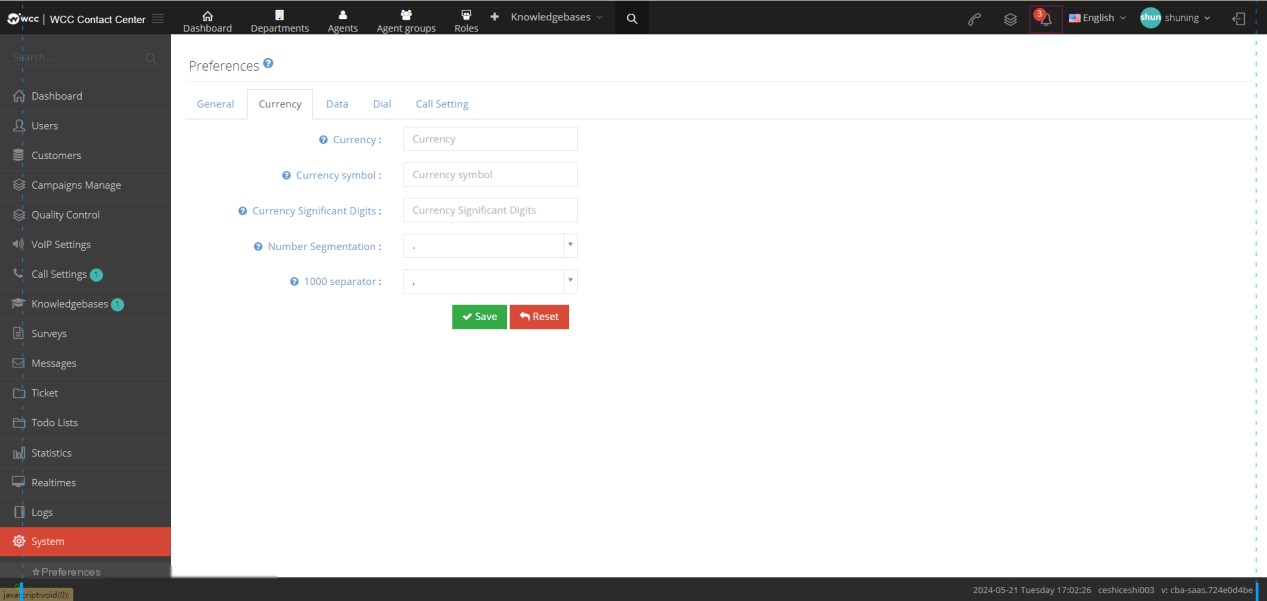
Currency: Make the currency type.
Currency Symbol: The symbol of currency.
Currency decimal point: The decimal point of the currency.
Number delimiter:Number delimiter.
Thousand Delimiter: Thousand Delimiter
3 Data
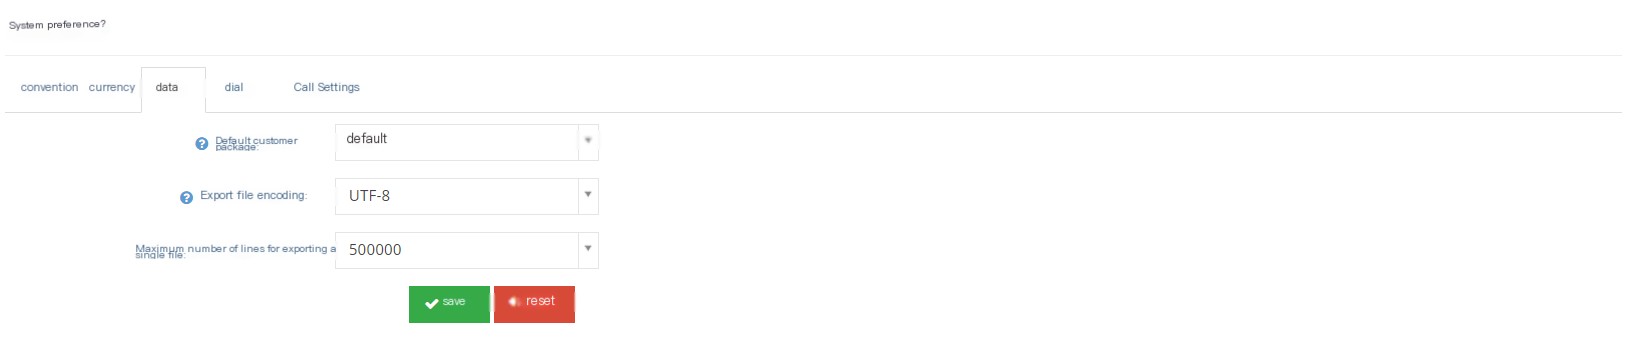
**Default customer package: **The customer package used when the system defaults to incoming and outgoing calls.
Export file encoding: Set the encoding of the export file.
Maximum number of lines for exporting a single file: The maximum number of lines for exporting a file.
4 Dial
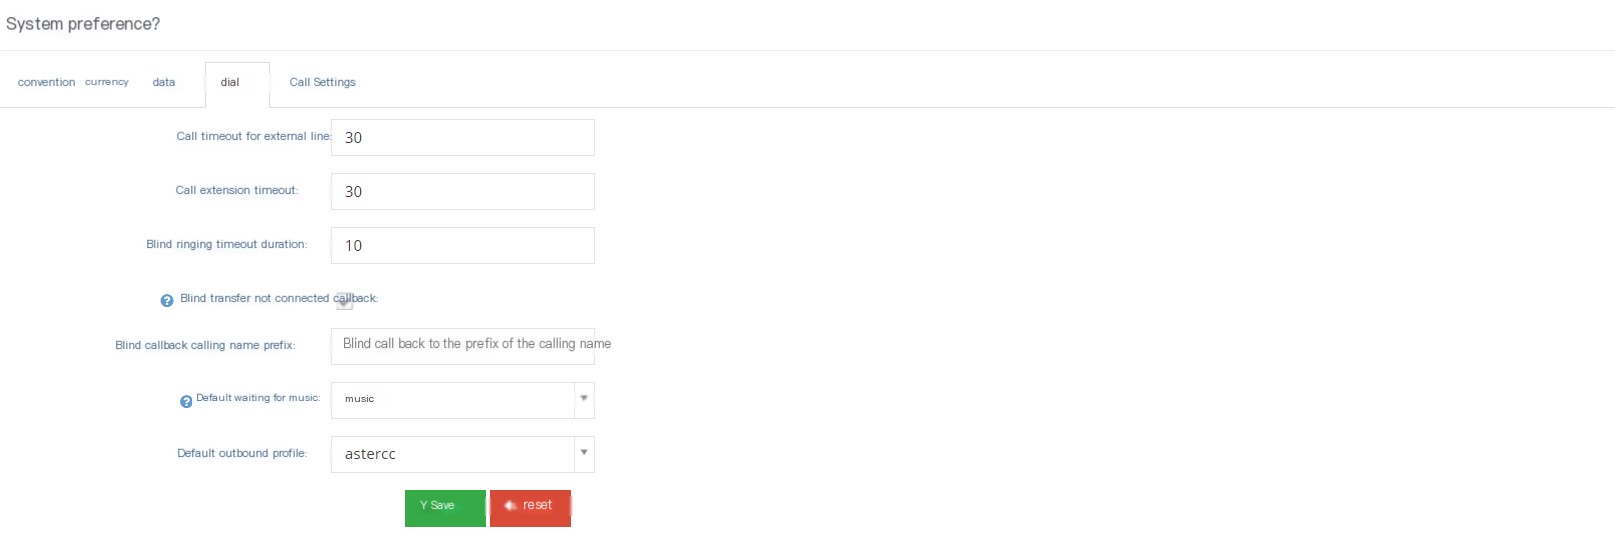
Dialing external timeout (seconds): The timeout timeout of the outgoing call ringing.
Dial extension timeout (seconds): The timeout timeout of ringing when dialing the extension.
Blind rotation ringing timeout timeout (seconds): The maximum timeout timeout for transferring the call to the seat without consulting other seats.
Blind transfer is not connected to the call back: After the call back to other seats, the call back to the seat before the blind transfer is not connected.
Blind rewind call name prefix: Set the call name prefix for blind rewind call.
Default waiting for music: By default, use the waiting music before connection.
Default outbound call file: When the agent does not specify outbound call file, the default outbound call file will be used when calling. If the outbound call file is not set, the system’s default outbound call file will be used.
5 Call Settings
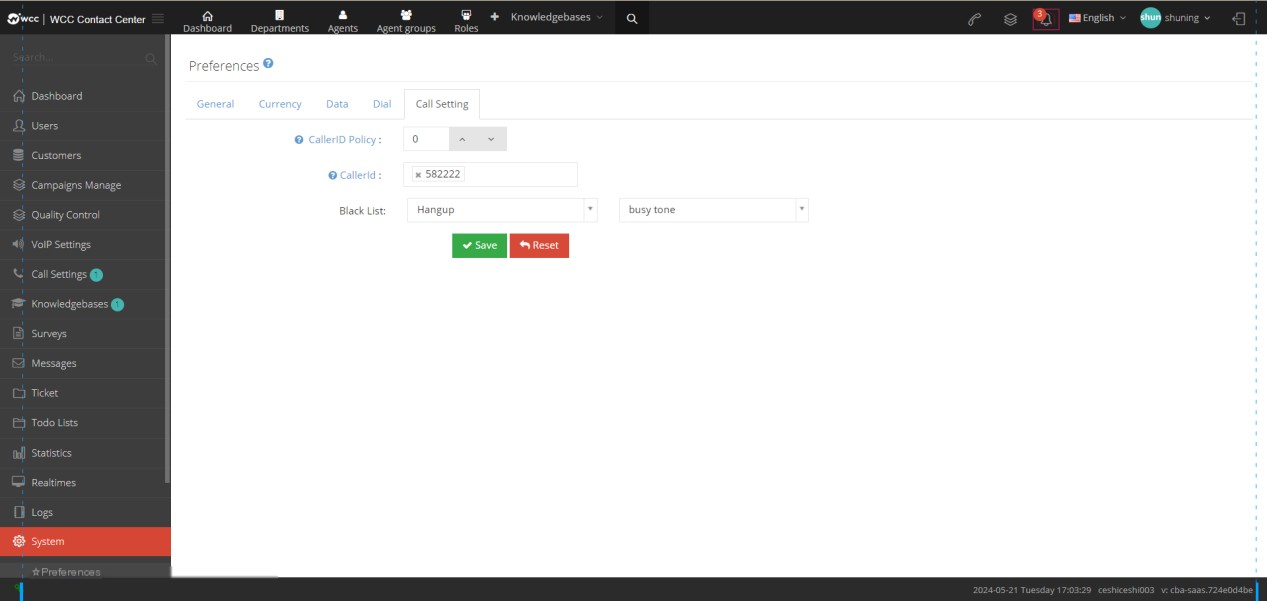
External number polling: The external number polling function can help you automatically change the external number. For example, 1 means changing a number every day, and 0 means using a new number for each call. This function is suitable for outbound call interface, agent outbound call or outbound call tasks.
External Number: Select the displayed calling number.
Blacklist: Select the turn of the blacklist call.
3.15.2 Sales funnel
1 Page Introduction
Used to record the client call status of the agent record.
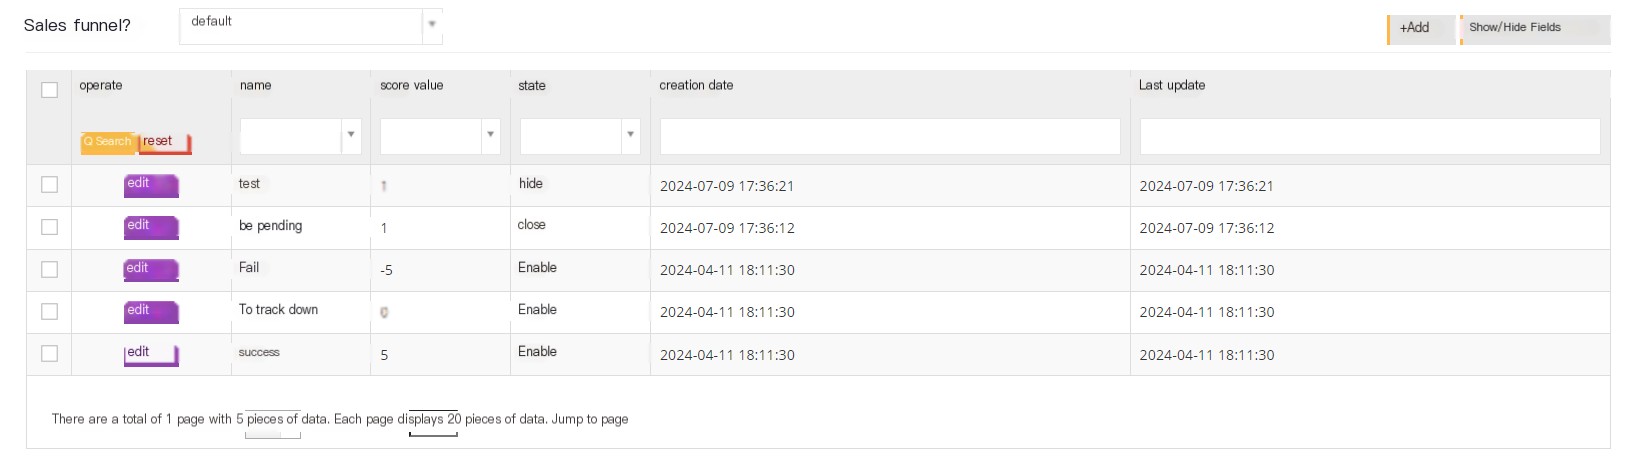
The above picture [Default] is an optional customer package.
[New] Added a new sales funnel.
【Show/Hide Field】Select the fields that this page needs to display or hide.
[Edit] Edit the established sales funnel.
2 Show/Hide fields
Name: The name of the sales funnel.
Score: The set score of this sales funnel.
Created Date: The creation time of the sales funnel.
Last Updated: The last update time of this sales funnel.
3 Add sales funnel
①点击【添加】按钮,进入销售漏斗添加/编辑常规界面:
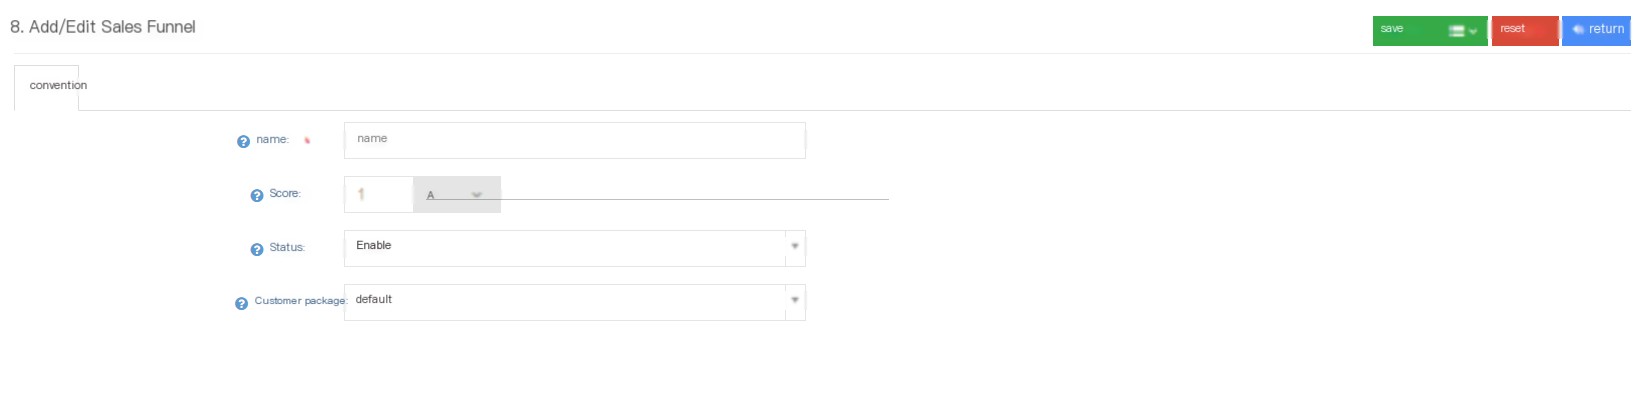
Name: Name this sales funnel.
Score: Set the score of this sales funnel, the score can reflect the working status of the seat.
Status: The status of the sales funnel.
Enable-normal display
Hide-The seat is not visible
Close-System is not visible
Customer Package: Select the customer package that will take effect in this sales funnel
3.15.3 Backstage Tasks
1 Page Introduction
Background tasks are allowed to perform program tasks in the system, usually time-consuming tasks, such as importing or exporting data.
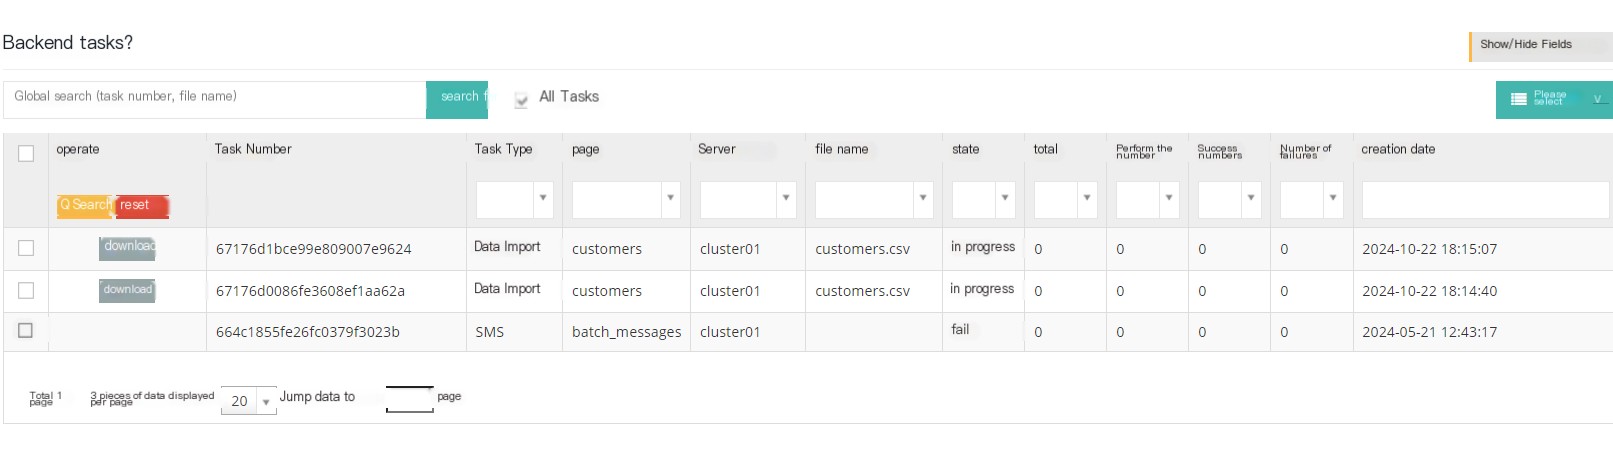
[Search] Supports searching with task number and file name as keywords in global search.
【Show/Hide Field】Select the fields that this page needs to display or hide.
【All tasks】In progress and past background tasks.
[Please select] Delete according to the selection criteria.
[Delete] Delete this task.
【Download】Download this task.
[Drop-down menu] Delete this background task.
2 Show/Hide fields
Task number: The number of the task.
Task Type: The call type of the task.
Page: The page that generates the task.
Server Name: The server that generated the task.
File name: The file name of the background task.
Status: The status of this background task.
Task options: The system’s program task type.
Total: The total number of this background task occurred.
Number of progresses: The number of in progress of this background task.
Number of successes: The number of successes for this task.
Number of failures: The number of failures for this task.
Creator: The initiator of this background task.
Created date: The creation date of this background task.
End Date: The end date of this background task.
Reasons for export failure: For example, exporting data will show the reason for export failure
3.15.4 Interface Configuration
1 api verification string
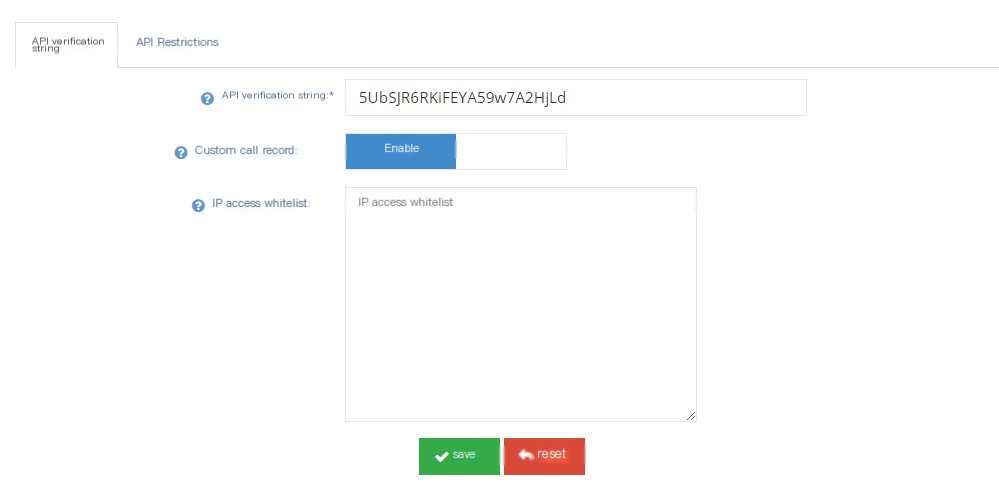
api verification string: Fill in the API verification string.
Custom call history: Whether to allow custom call history.
IP access whitelist: Accessible whitelist IP address.
2 API restrictions

SMS: Set the limit number of text messages.
Notification: Set the limit number of notifications.
Get data: Set the limit number of data to be retrieved.
Click to call: Set the limit number of click calls.
3.15.5 Company Information
Users can fill in their own company and financial information.